Building an Ocean Reef in Thread and Beads: My 3D Embroidery Module
How I’m turning an Under the Sea brief into a textured ocean reef using beads, thread, wire, clay and three-dimensional embroidery.
Thank you for reading these posts, leaving comments, and asking questions. It genuinely motivates me to keep writing. 🙏
So far, I have explained why I chose to study couture embroidery, how I chose Hand & Lock, and how the diploma is structured.
Now it is time to look at the modules themselves.
I’ll start with 3D Contemporary Hand Beading, partly because it is a fascinating subject and partly because I have already submitted my complete project for the first module.
A practical reason is still a reason. 🙂
What Is 3D Embroidery?
3D embroidery is about creating forms that rise above the fabric rather than remaining flat on its surface.
Threads, beads, wire, padding, fabric and other materials can be used to create:
- raised textures;
- sculptural details;
- free-standing elements;
- forms that project vertically from the base fabric.
In other words, the embroidery does not merely depict an object. It can begin to behave like the object.
A petal can curve away from the fabric. A fin can stand upright. A sea anemone can have real tentacles. A stone can look and feel uneven rather than appear as a flat patch of color.
That shift from image to object is what makes this module both so interesting and technically demanding.
One Brief, Many Completely Different Ideas
Each of the five diploma modules has its own design brief.
For the 3D embroidery module, the theme was Under the Sea. Within that theme, every student was free to choose her own subject and interpretation.
At the midpoint of the taught part of the module, we each presented an early version of our idea to the group.
The designs could hardly have been more different.
One student is embroidering a mermaid. Another is making an enormous clownfish that will eventually sit beneath a glass dome as an art object.
One woman is covering the surfaces of a sewing chest with a sequence of underwater scenes. Another is creating seahorses for a decorative screen.
An Irish student is basing her piece on traditional stories about selkie women - mythical figures connected with seals and the sea.
And I am making a wall-art picture.
It was interesting to see how often the chosen subject held personal meaning. We were all working from the same brief, yet nobody interpreted it the same way.
Apparently, “Under the Sea” is not a narrow subject once a group of embroiderers gets involved.
Why I Chose an Ocean Reef
For every module, I try to make myself create something I have not made before.
I already had some experience with dimensional embroidery, so I did not want to repeat the kind of small 3D elements I had previously used in jewellery and decorative pieces.
Instead, I decided to concentrate on two things:
relief and texture.
I developed two possible designs and spent a long time deciding between them. Eventually, the design with the greater variety of surfaces and the more complicated vertical forms won.
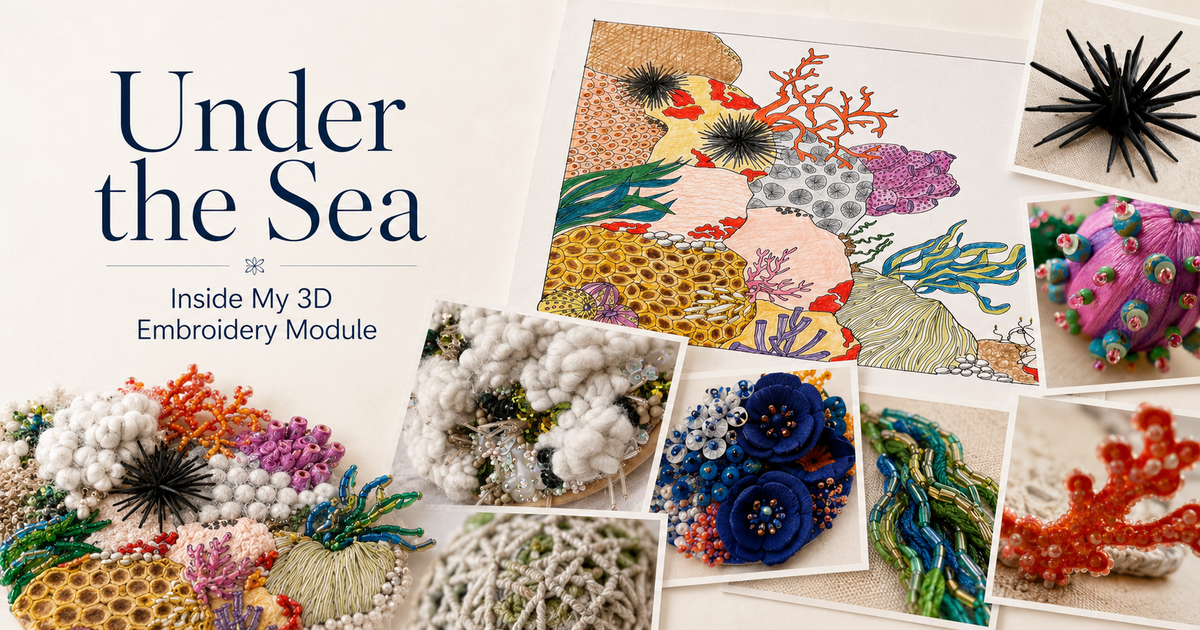
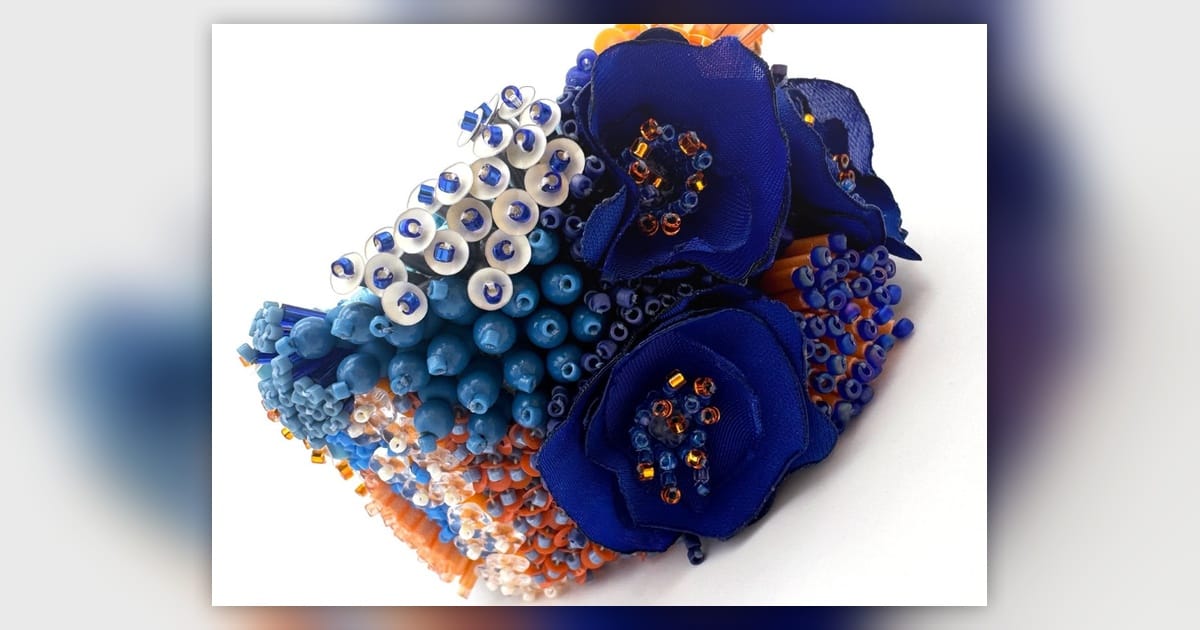
My final piece will be an embroidered picture measuring approximately 25 × 25 centimetres.
It will show a fragment of an ocean reef:
- raised rocks covered with several types of seaweed;
- anemones that glow in the dark;
- sea urchins;
- corals;
- and a collection of other marine forms growing between the rocks.
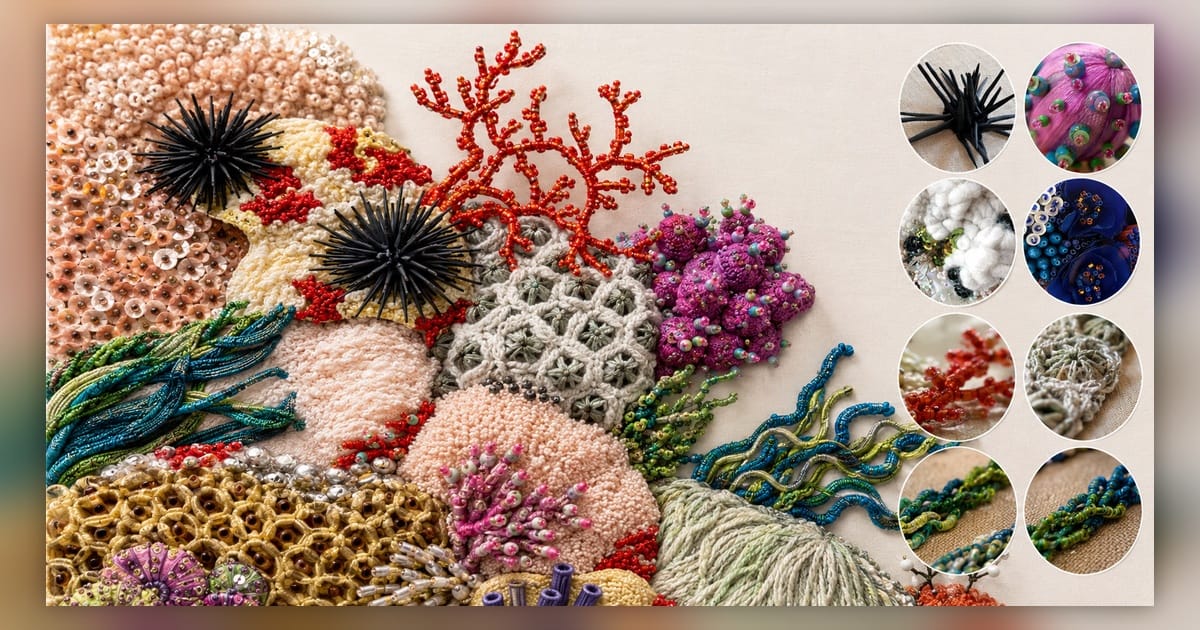
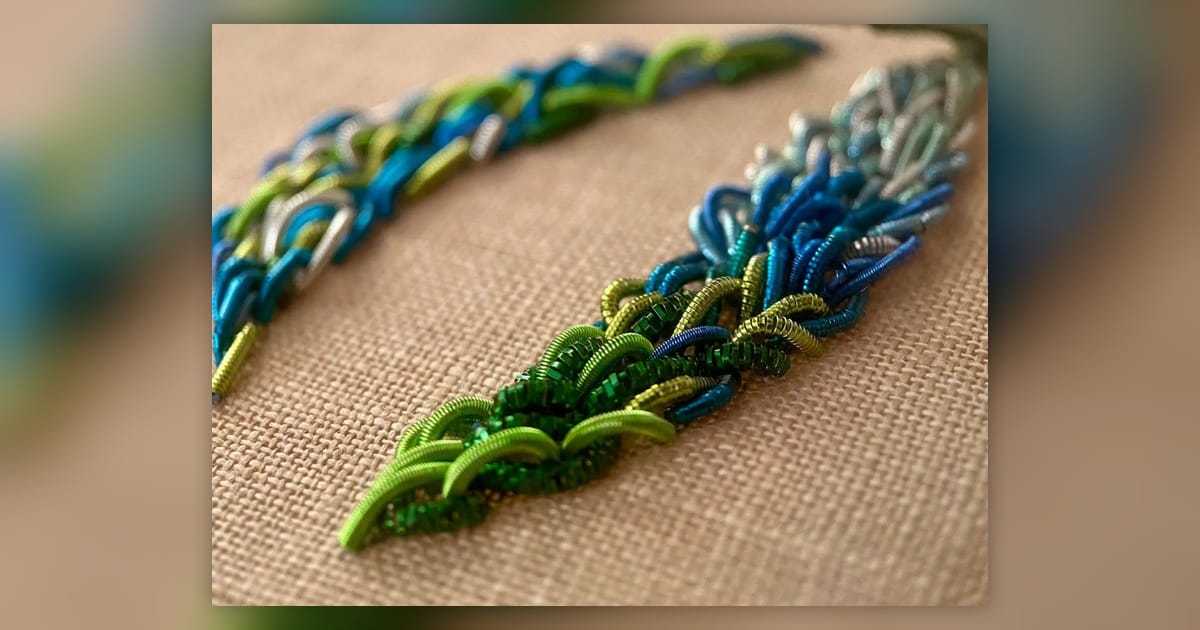
Each rock will have a different texture. Some surfaces will be rough, some soft, some layered, and some densely stitched.
The rocks will be raised from the background, while the marine organisms will be fully or partially three-dimensional.
This means the piece must work as both a composition and a physical structure. It is not enough for everything to look good in the drawing. The elements also have to stand, bend, hold their shape, and remain securely attached.
As it turns out, fabric has opinions about engineering.
From Design to Samples
I have already submitted the complete project document for this module.
It includes:
- my moodboard;
- the initial ideas;
- the black-and-white and colour designs;
- technical drawings;
- stitch plans;
- material choices;
- and photographs of the samples I made before settling on the final methods.
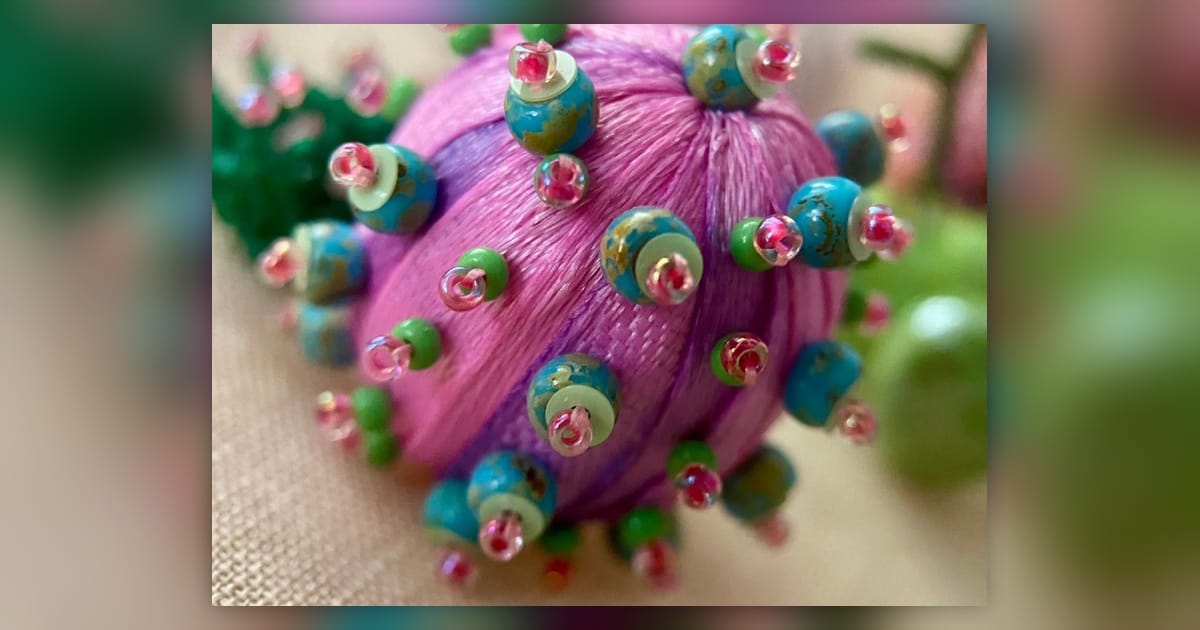
The photographs accompanying this post show several of those samples, along with the final design and one of my three stitch plans.
Sampling was essential because many techniques looked convincing in my head and rather less convincing once they existed in fabric.
A sample allows you to test:
- whether a form can support itself;
- how high it should sit above the base;
- whether the chosen material bends correctly;
- how light behaves on its surface;
- whether the colour works with the surrounding elements;
- and whether it can realistically be repeated in the final piece.
It is much better to discover a structural problem in a ten-centimetre sample than halfway through the final artwork.
Less dramatic, too.
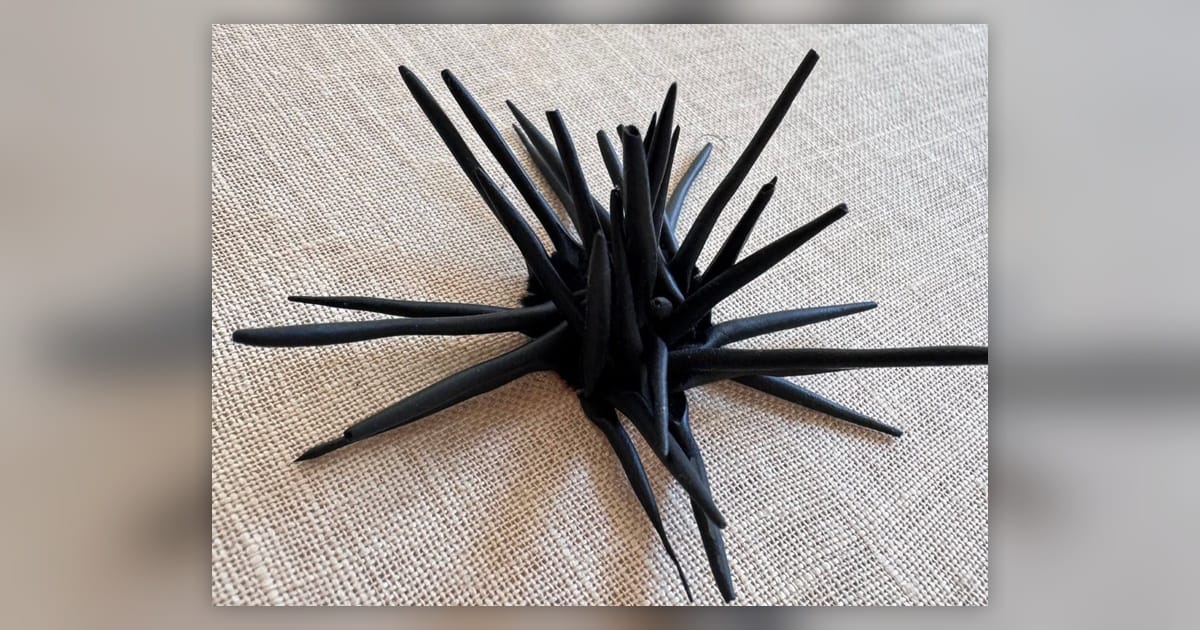
The Sea Urchin That Became a Separate Project
I have to mention the sea urchin separately because creating it turned into a small engineering project in its own right.
I made about 150 thin spines from black polymer clay.
The spines were all slightly different in length. One end of each spine was flattened before baking.
After the clay was baked, we drilled a tiny hole through every flattened end.
Yes, every one.
At this point, the phrase “small embroidered detail” had lost most of its meaning.
Next, I built a small dome on the fabric from several layers of felt. The dome was covered with a soft, furry chenille thread, which formed the body and helped conceal the construction beneath.
The polymer-clay spines could then be sewn individually onto the dome through the holes we had drilled.
The result is a properly dimensioned sea urchin with spines projecting in different directions.
The finished element is small.
The process was not.
Why This Module Suits Me
This module connects several things I already enjoy:
- bead embroidery;
- jewellery construction;
- unusual materials;
- surface design;
- and the challenge of making soft materials hold a clear form.
It also forces me to think differently.
In flat embroidery, the main questions concern color, stitch direction, and surface. With 3D work, you also have to consider weight, balance, attachment points, gravity, and how the piece will be viewed from different angles.
You are still embroidering, but part of the process begins to resemble miniature sculpture, while another part resembles construction.
Occasionally, it also resembles an argument with a piece of wire.
What Comes Next
In the next post, I’ll explain several of the more complex methods we learned for creating vertical and freestanding forms.
I’ll show how materials that normally lie flat can be persuaded to curve, rise, fold, and retain their shape.
“Persuaded” may be a generous description.
Sometimes they cooperate.
Sometimes they need firmer negotiations. 🙂
If you missed the earlier posts in this series, you can catch up here: