
How to Make a 3D Beaded Water Lily
Make a 3D beaded water lily with padded felt lily pads, chain-stitchoutlines, and bead couching in this step-by-step tutorial.
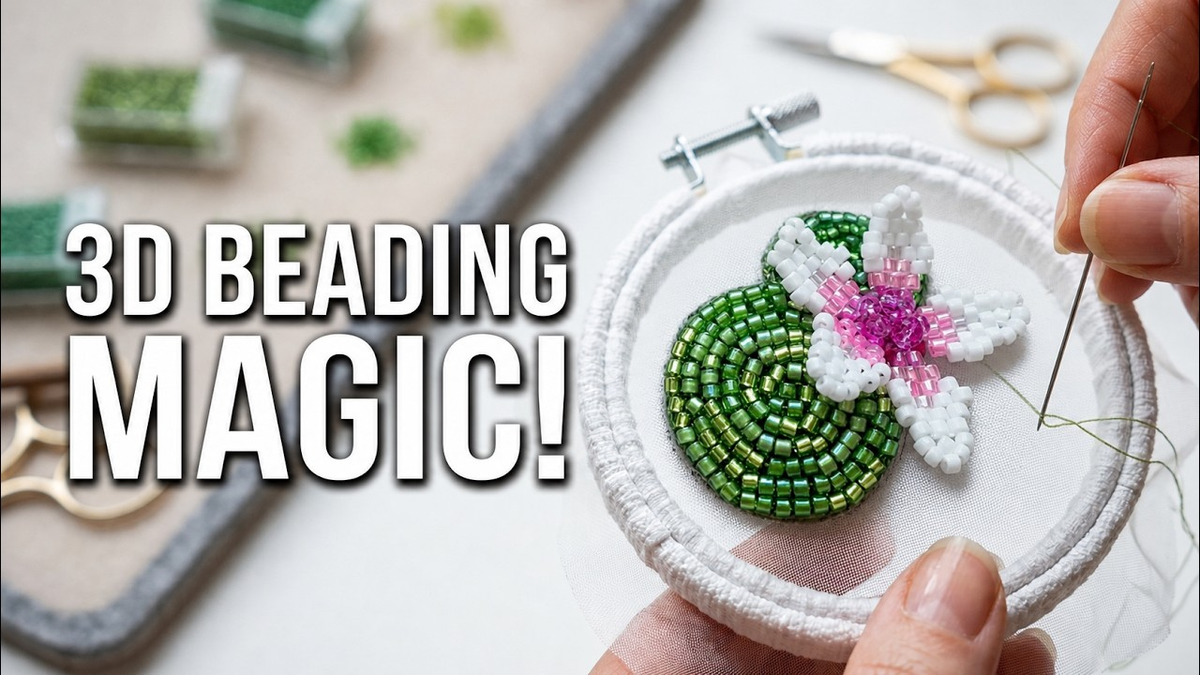
A flat piece of felt initially resembles little more than a lily pad. However, adding a second layer, a neat chain-stitch border, and rows of green seed beads transforms it into a small, textured form with genuine depth. Placing a beaded flower nearby completes the scene, making the entire arrangement resemble a miniature water garden.
This written guide follows Ornamentico's DIY beaded water lily embroidery tutorial. The project is best suited to an intermediate maker who is comfortable moving a needle through fabric and controlling the tension of small beads. If you prefer to learn visually, keep the video open and use the chapter times below to find each stage.
If sculptural beadwork is your favorite kind of tiny engineering, you may also enjoy our 3D-beaded floral ring tutorial or browse more projects in the beading tutorial archive.
What You'll Learn How layered felt creates the raised shape of the lily padsHow chain stitch gives each padded circle a clean outlineHow to couch short runs of beads and reduce the count near the centerHow to attach the finished beaded flower and center accents
Watch the beaded water lily tutorial
The video runs for about 17 minutes and uses these chapters:
| Time | Stage |
|---|---|
| 0:00 | Project preview |
| 0:31 | Materials and supplies |
| 1:12 | Transfer the pattern and prepare the felt |
| 2:04 | Stitch the felt padding |
| 5:24 | Chain-stitch the lily-pad outlines |
| 8:26 | Couch beads onto the large lily pad |
| 12:58 | Couch beads onto the small lily pad |
| 15:07 | Attach the flower and finish the center |
| 16:48 | View the finished motif and jewelry ideas |
Materials and supplies
Prepare the full work area before threading the needle. The tutorial uses:
- Organza fabric
- Green felt
- A heat-disappearing ink pen
- An embroidery hoop or stand
- DMC embroidery thread
- Miyuki beading thread
- Miyuki Delica 11/0 seed beads
- Toho 15/0 seed beads in several green shades
- 3 x 2 mm cubic zirconia faceted rondelle beads
- A finished beaded flower from the companion tutorial
- A beading needle and embroidery scissors
Make the flower before starting the lily pads. The video description links to Ornamentico's beaded flower companion tutorial, which creates the floral element attached near the end of this project.
Keep the organza taut in the hoop, but do not stretch it so aggressively that the fabric distorts. If you use a heat-disappearing pen, follow the pen manufacturer's removal instructions and test it on a scrap of the same fabric first.
Step 1: Transfer the lily-pad design
By the end of this step, you will have two touching circular outlines on the organza and enough space beside them for the flower.
At 1:12 in the video, the larger and smaller lily pads are drawn directly on the hooped fabric. Keep the shapes close enough to form a single composition, but leave their outlines visible as you position the felt.
- Secure the organza in the hoop or stand.
- Draw one large circle and one smaller circle beside it.
- Check the flower's position before cutting the felt. It will later sit across the lower edge of the pads.
- Cut the felt pieces slightly inside the drawn boundaries so the stitched outline remains visible.
The drawn lines are guides, not part of the finished design. The felt, thread, and beads will cover them as the motif develops.
Step 2: Build the padded felt shapes
The large lily pad features layered felt to add height, while the smaller pad is cut into its own circular outline.
Begin by placing the smaller inner layer of the large pad inside the large drawn circle. Secure it with small stitches around its edge to the organza. Cover it with the larger felt circle and stitch that down as well. This will form a gentle mound rather than a hard step.
Next, cut a separate felt circle to match the small lily pad. Stitch it inside the smaller drawn outline. At 4:45, the tutorial shows the completed large pad beside the felt piece prepared for the smaller one.
Check the work from the front before continuing. Both pads should lie securely against the organza, and the larger one should have noticeably more volume without a sharp or lumpy edge.
Tension check: The organza should remain flat around the felt. If the fabric gathers, loosen the last stitches and secure the padding again with gentler tension.
Step 3: Outline both pads with chain stitch
Chain stitch gives each felt circle a tidy green boundary and prepares a clear edge for the beadwork.
Use the DMC embroidery thread and work around the larger pad first. Bring the needle up on the outline. Take it down close to the same point while leaving a loop of thread on the surface. Bring the needle up again at the edge of that loop, then pull until the loop lies neatly against the felt.
Repeat the same motion around the circle. The video summarizes the rhythm at 6:10: leave the loop, then bring the needle up at the point of the loop. Keep the links similar in size so the border stays smooth.
Outline the small lily pad in the same way. When both circles have a continuous chain-stitch edge, secure the embroidery thread on the back of the work.
Step 4: Couch beads onto the large lily pad
Bead couching fills the raised circle without forcing the working needle through every bead and every layer of felt at once.
Switch to Miyuki beading thread. Starting near the outer edge, pick up six beads and lay them along the curve. Take the needle down at the end of the short run. Add a couple of small couching stitches over the thread between the beads so the row follows the circle instead of lifting away from the felt.
Bring the needle back out through the final bead in the row. Pick up the next six beads and repeat. The tutorial shows this sequence clearly at 9:31: six beads, needle down, a couple of couching stitches, then the needle returns through the last bead.
Continue inward in close circular rows, changing among the green shades to create depth. Keep checking that the rows sit next to one another without crushing the beads together.
As the circle tightens near the center, shorten the runs. At 12:01, the tutorial switches to two beads at a time. This smaller count follows the curve more cleanly and helps close the center without a gap.
Bead couching is a surface-embroidery method in which short bead strands are laid on the fabric and secured with small stitches. In this project, the change from six-bead runs to two-bead runs is more than a counting detail. It lets the line bend into a tighter radius, which helps the center stay smooth instead of crowded.
Step 5: Fill the smaller lily pad
The smaller pad follows the same couching method, but the curve tightens sooner.
Begin at the chain-stitch outline and build inward. Pick up six beads where the curve allows, take the needle down, add the couching stitches, and return through the last bead in the row. Reduce the bead count as you approach the center rather than forcing a six-bead segment into a space that is too small.
The finished small pad should echo the large one without becoming an exact copy. A slightly different balance of green shades makes the pair feel natural while the shared stitching method holds the composition together.
Step 6: Attach the flower and finish the center
The beaded flower turns the two green circles into a recognizable water lily composition.
Position the finished flower where the lily pads meet. Stitch it securely through its center and base, checking the angle from the front before tightening the final attachment stitches.
Add the 3 x 2 mm faceted rondelle beads to the flower center. At 16:01, the beads are pulled into the middle of the flower and the needle returns through the fabric at the center. Secure the thread on the back without pulling so tightly that the petals collapse.
The tutorial ends with the motif still in the hoop. It suggests turning the finished water lily into earrings, a ring, a brooch, or a pendant, but it does not demonstrate backing, cutting, or mounting hardware. Choose the finishing method that fits your jewelry base and keeps the organza and stitches protected.
For another project that combines organza and bead embroidery, see our floral earrings tutorial.
Common mistakes to avoid
Starting before the flower is ready. The flower is a separate element and appears only near the end. Complete it first so you can test the full arrangement before securing the lily pads.
Leaving the organza loose. The padding and bead rows need a stable surface. Recheck the hoop whenever the fabric starts to ripple.
Making long, unsecured bead runs. Short runs and couching stitches help the beads follow the rounded shape. Do not rely on one long strand to hold the curve.
Keeping six beads all the way to the center. The video reduces the count to two beads as the space narrows. Shorter runs prevent crowding and make the center easier to close.
Pulling the flower center too tightly. The accent beads should sit securely without flattening the petals or puckering the organza.
Questions about the project
Is this beaded water lily suitable for beginners?
The video labels the project as intermediate. A patient beginner can still study the method, but it helps to know basic hand stitching and to practice chain stitch and bead couching on scrap fabric first.
Why use both embroidery thread and beading thread?
The DMC embroidery thread forms the visible chain-stitch outlines. Miyuki beading thread secures the seed beads and fits more easily through their small holes during repeated couching.
Can I use different green beads?
Yes. The tutorial combines Miyuki Delica 11/0 and Toho 15/0 beads in green shades. You can change the palette, but consistent bead sizes will make the circular rows easier to control.
Does the tutorial show how to mount the motif as jewelry?
No. It shows the embroidered motif and suggests earrings, a ring, a brooch, or a pendant as possible uses. The backing and hardware stages need a separate finishing plan.
A small water garden in beads
The structure of this design is simple to remember: pad the shapes, outline them, couch the beads inward, and attach the flower. The care is in the curves. Short bead runs, steady couching stitches, and lighter tension near the center keep the miniature lily pads smooth.