How to make 3D-beaded ring
Detailed step-by-step tutorial on creating a handmade ring crafted in 3D-beading technology from Toho and Miyuki Delica beads and sequins.
Recently, a subscriber of our YouTube channel asked us to create a tutorial for crafting a 3D-beaded floral ring. Creating such a ring includes a lot of variations of stitches, colors, and materials used, so we decided that a better way to share such a tutorial is by writing it. Hence, here we go.
This ring is made in so-called 3D-beading technology. It is also sometimes called sculptural beading or volume beading. In this technology, you create a 3D composition using a combination of beads, bugle beads, sequins, or stone beads. You can see examples of applying 3D-beading technology to jewelry in our online shop.
Now, that you know what is 3D-beading and how it might look within a jewelry piece, we are ready to start.
This ring can be created in different colors, using various materials. You can bead it with only Toho and Miyuki Delica beads. You can add small stone beads, pearls, sequins, or even handmade beads from glass or polymer clay. The list of materials below represents materials that were used to create exactly the ring, that you see in the photos.
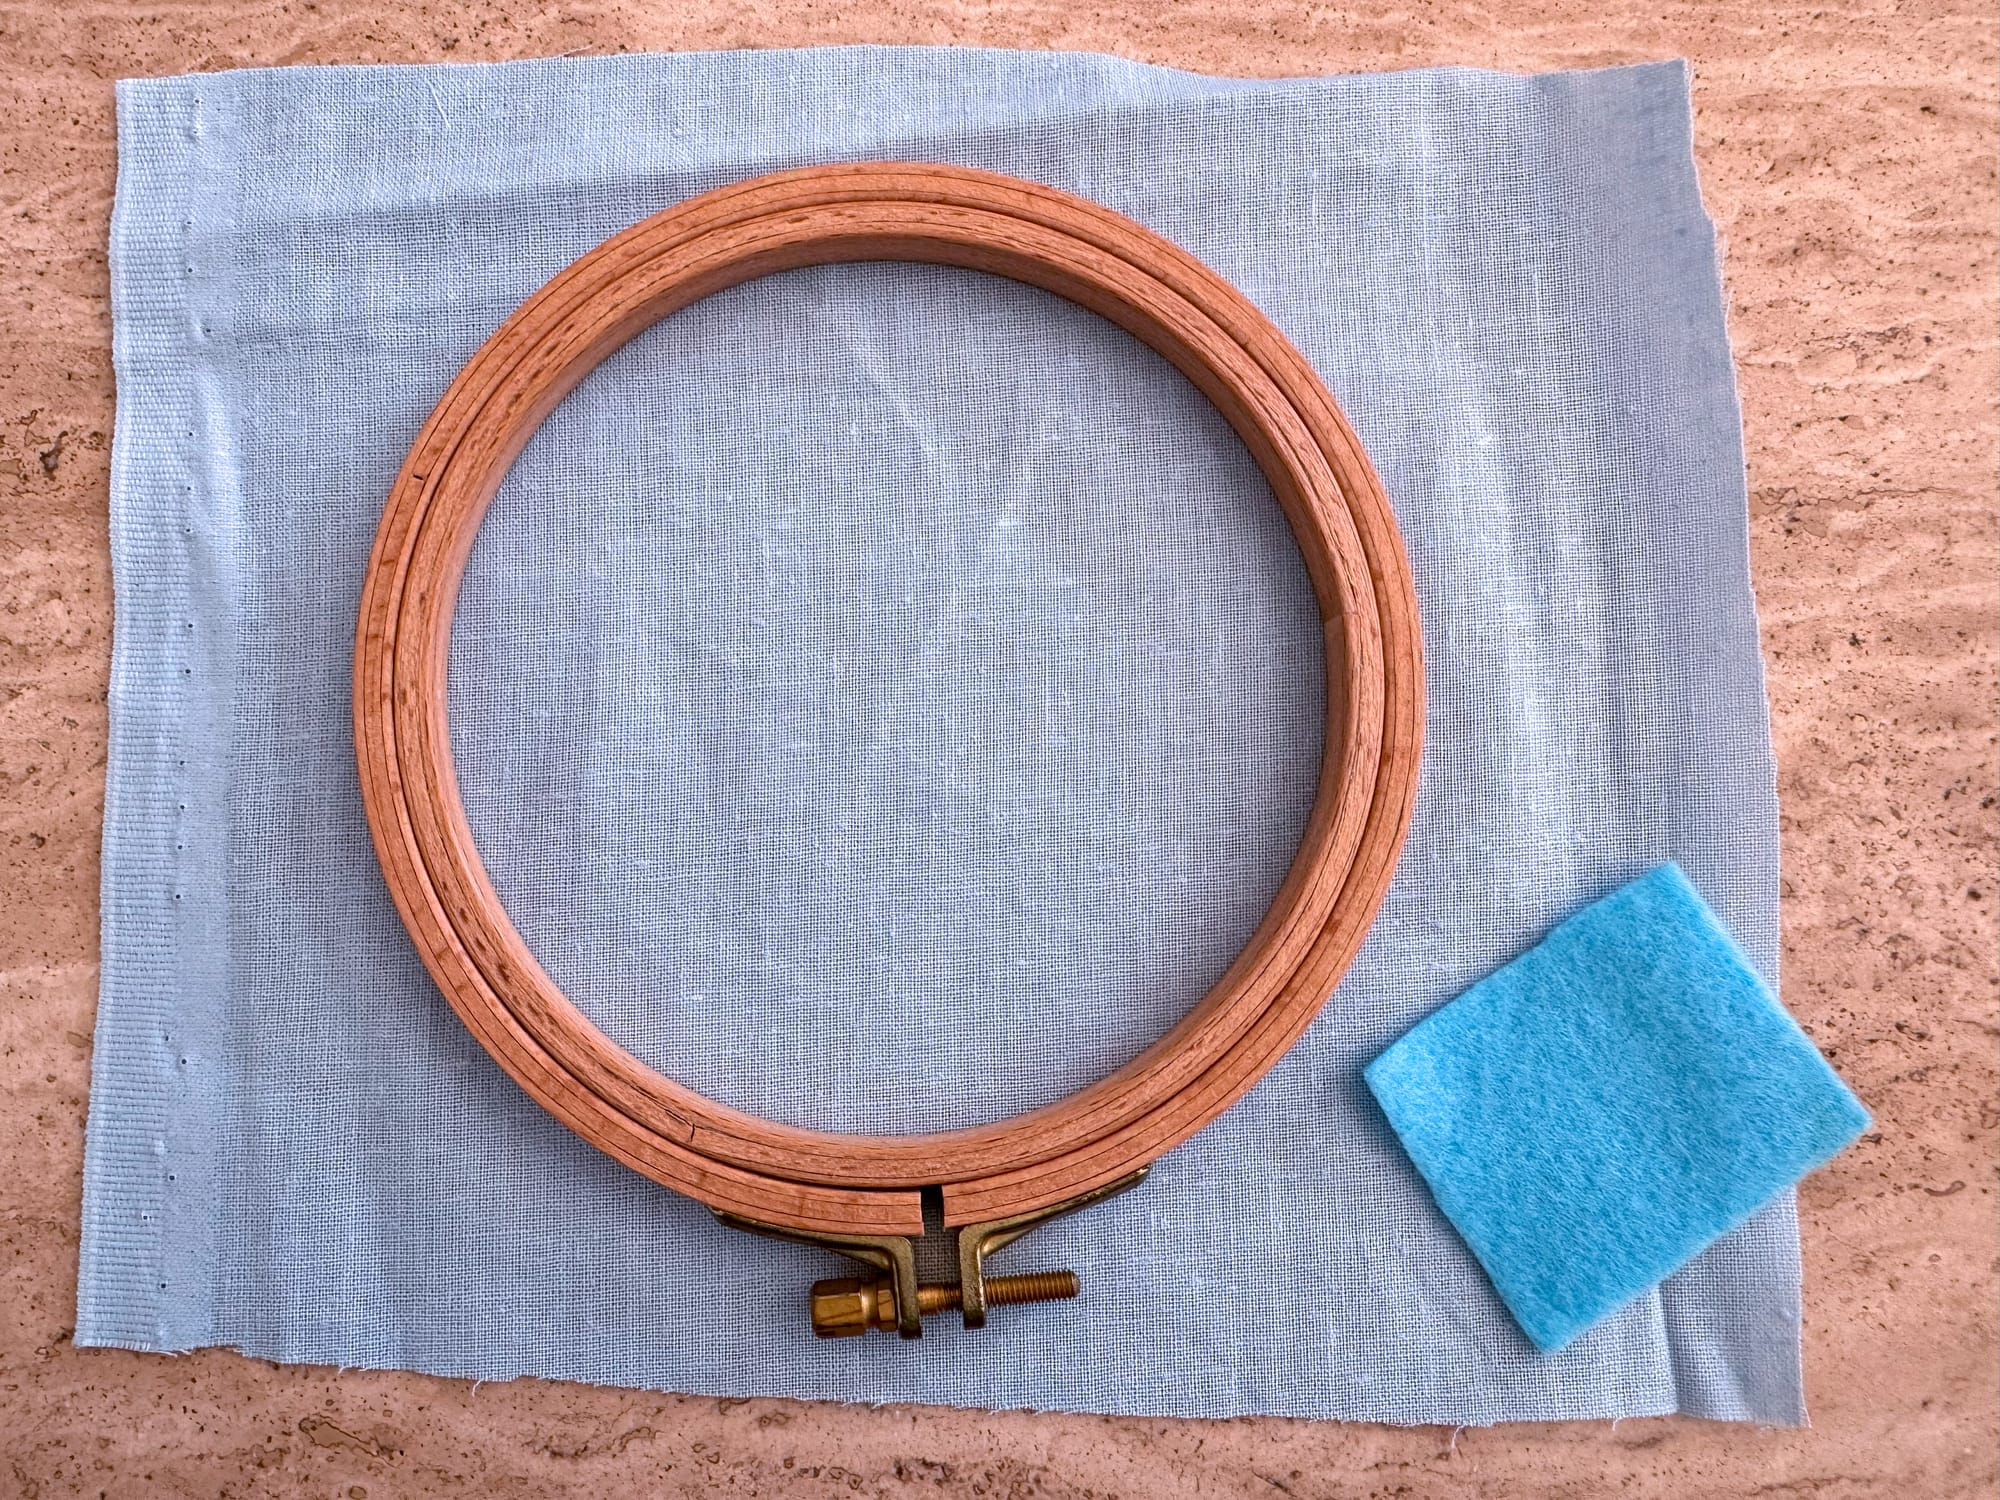
Let's talk about the materials we will need. We will need embroidery hoops, a piece of fabric (base to connect a piece of felt, so you can use any leftovers), and a piece of felt (color matching your design).
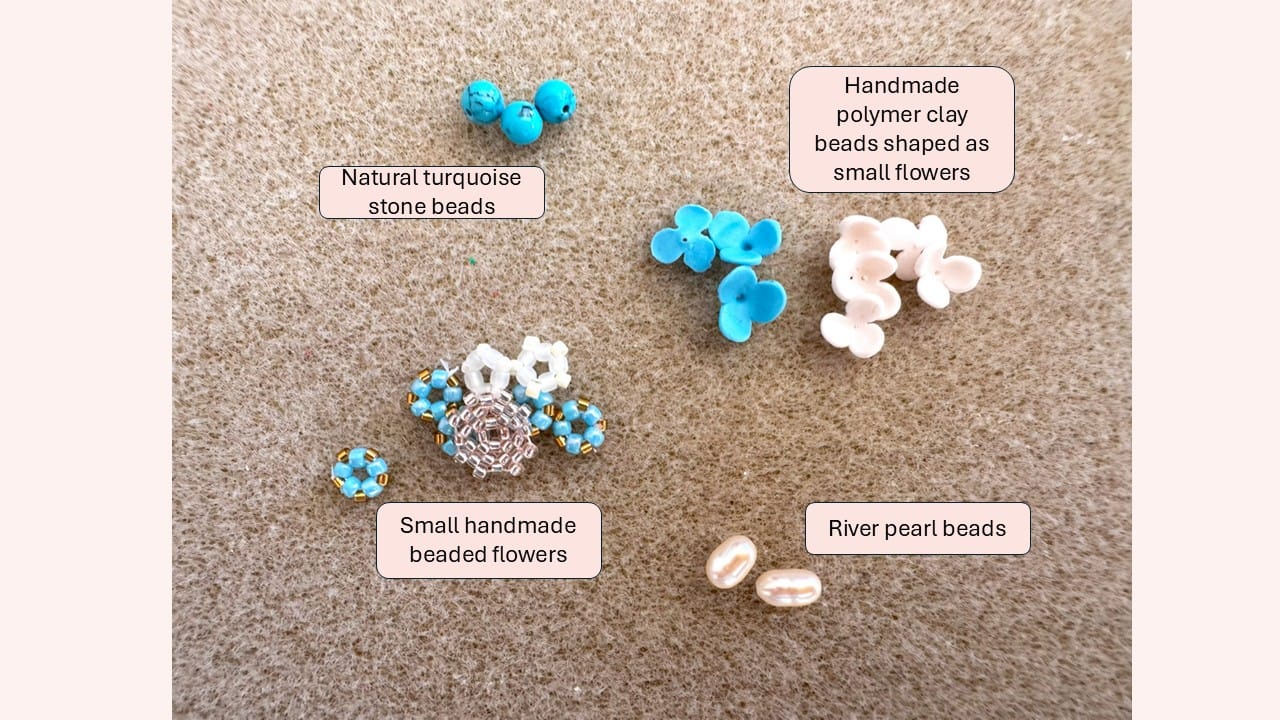
To make accents, I am using unusual beads, such as small natural stone beads, pearls, small floral handmade beads, and small floral beads from polymer clay.
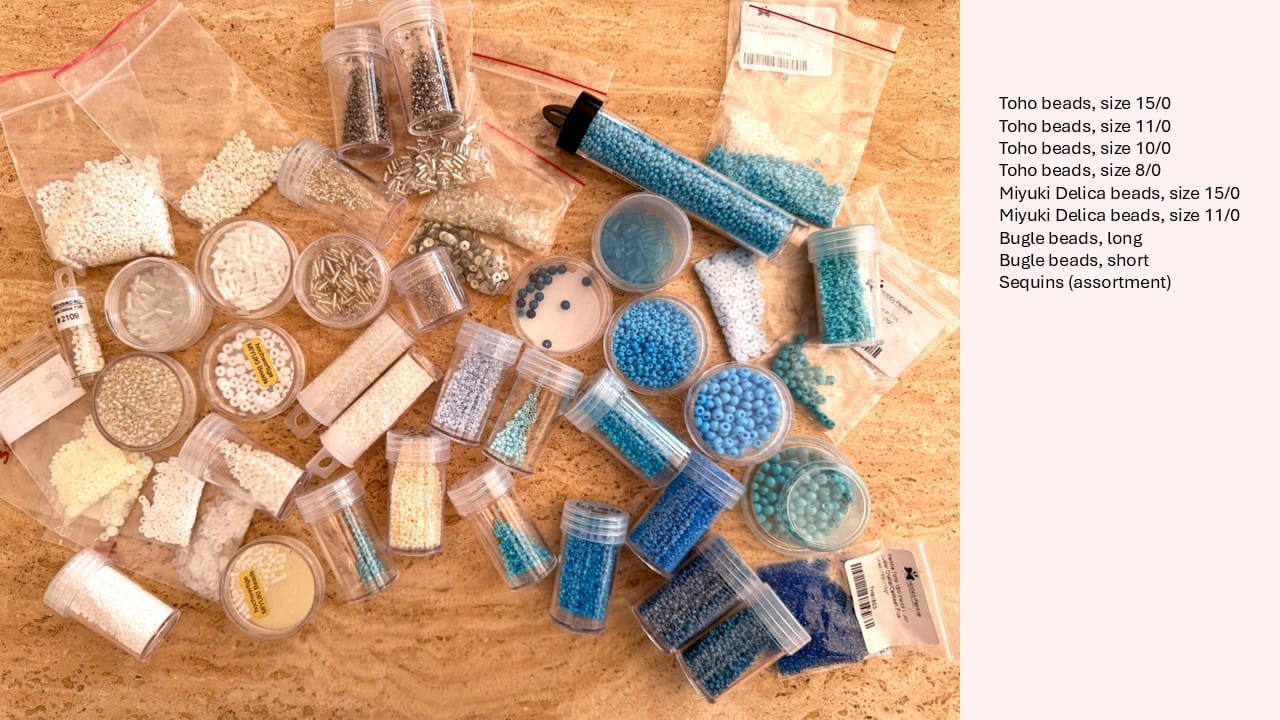
The biggest part of the materials will be various beads. The way I am creating many of my 3D-beading designs is by picking all the matching hues of all the beads I have in my storage. I prefer to have all materials around me on the table so that I can pick them up as I create my piece. Below is an example of materials I picked at the beginning of my work. You can see there is a variety of Toho beads (sizes 9/0, 10/0, 11/0, and 15/0), Miyuki Delica beads (sizes 11/0 and 15/0), sequins, and bugle beads. My way of sorting materials is by color which for me is the most important thing when creating a composition for a piece of jewelry.
Finally, we will need a beading needle (size 11), beading thread (Miyuki), a pair of scissors, a ring setting, and jewelry glue. If you (like me) do a lot of beadwork, your working needle might be curved. For this project, I recommend taking a new straight bead. We will be moving the needle from the wrong side to the front side and back vertically. To make sure you put the needle through all beads on the thread, it is easier to use a straight needle.
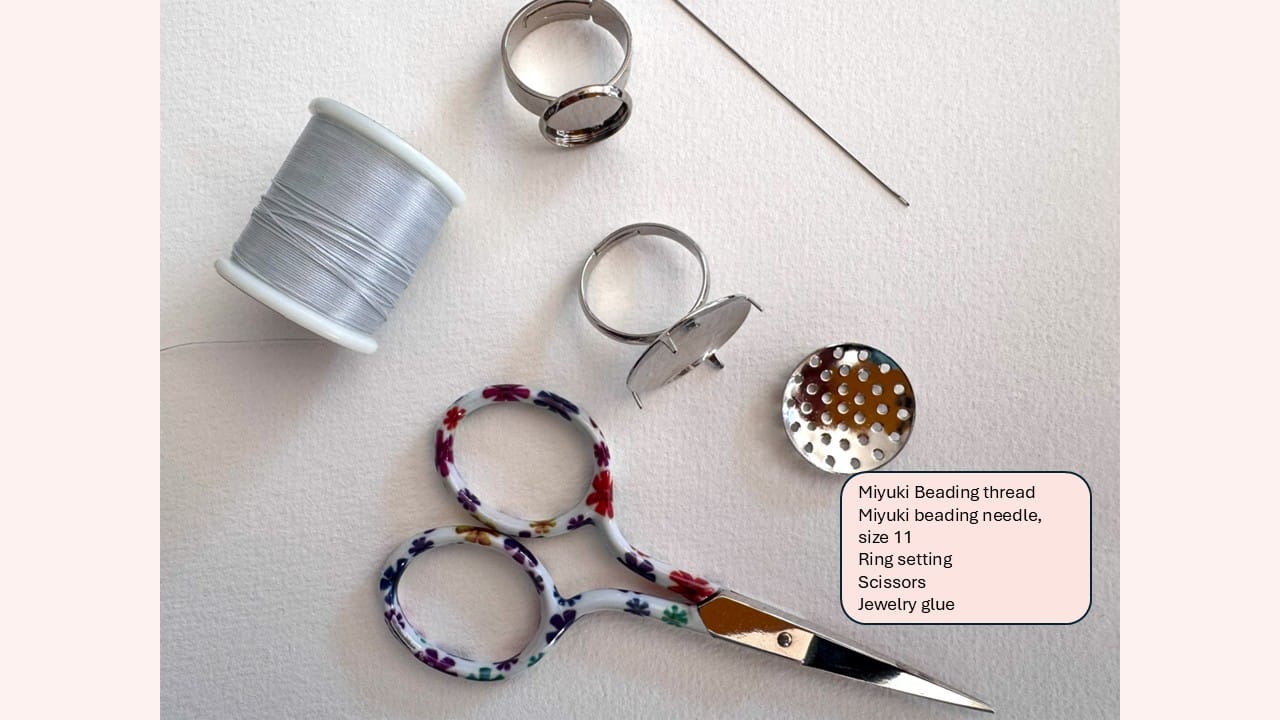
In the photo, you can see two types of ring settings: one consisting of two parts (the ring and a round shape with holes) and another one which is a solid ring setting with a round shape on top. Both settings will work to create our ring. For this tutorial, we will use the second setting which is a whole ring with a round shape on top. If you use the option with a disconnected circle with holes, you simply stitch your piece of felt with beadwork to it.
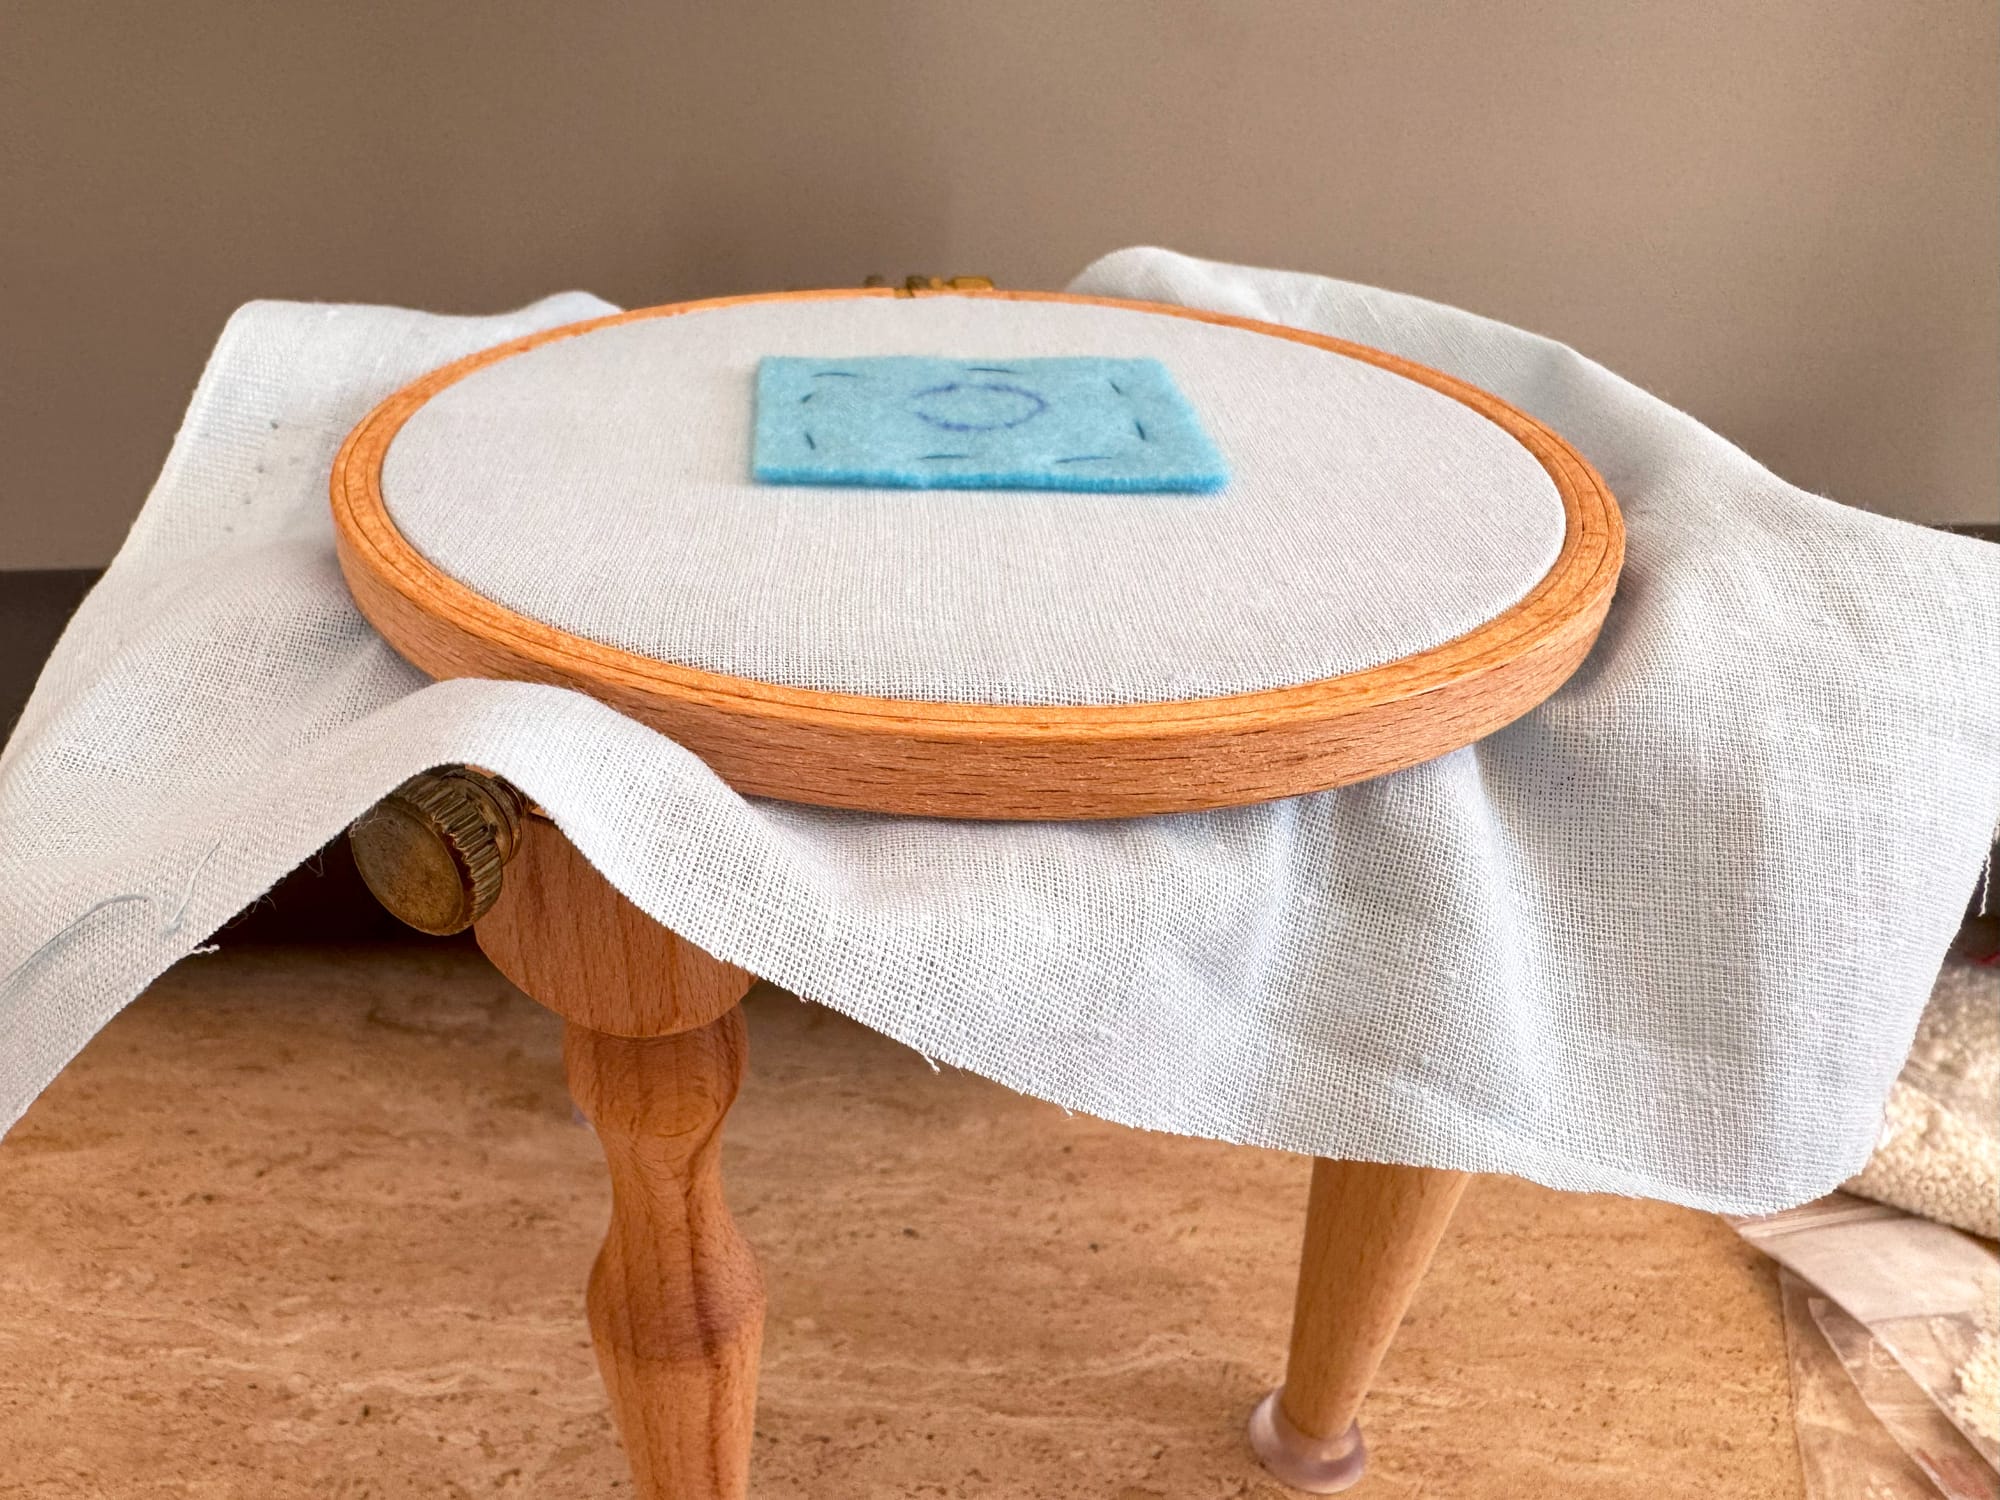
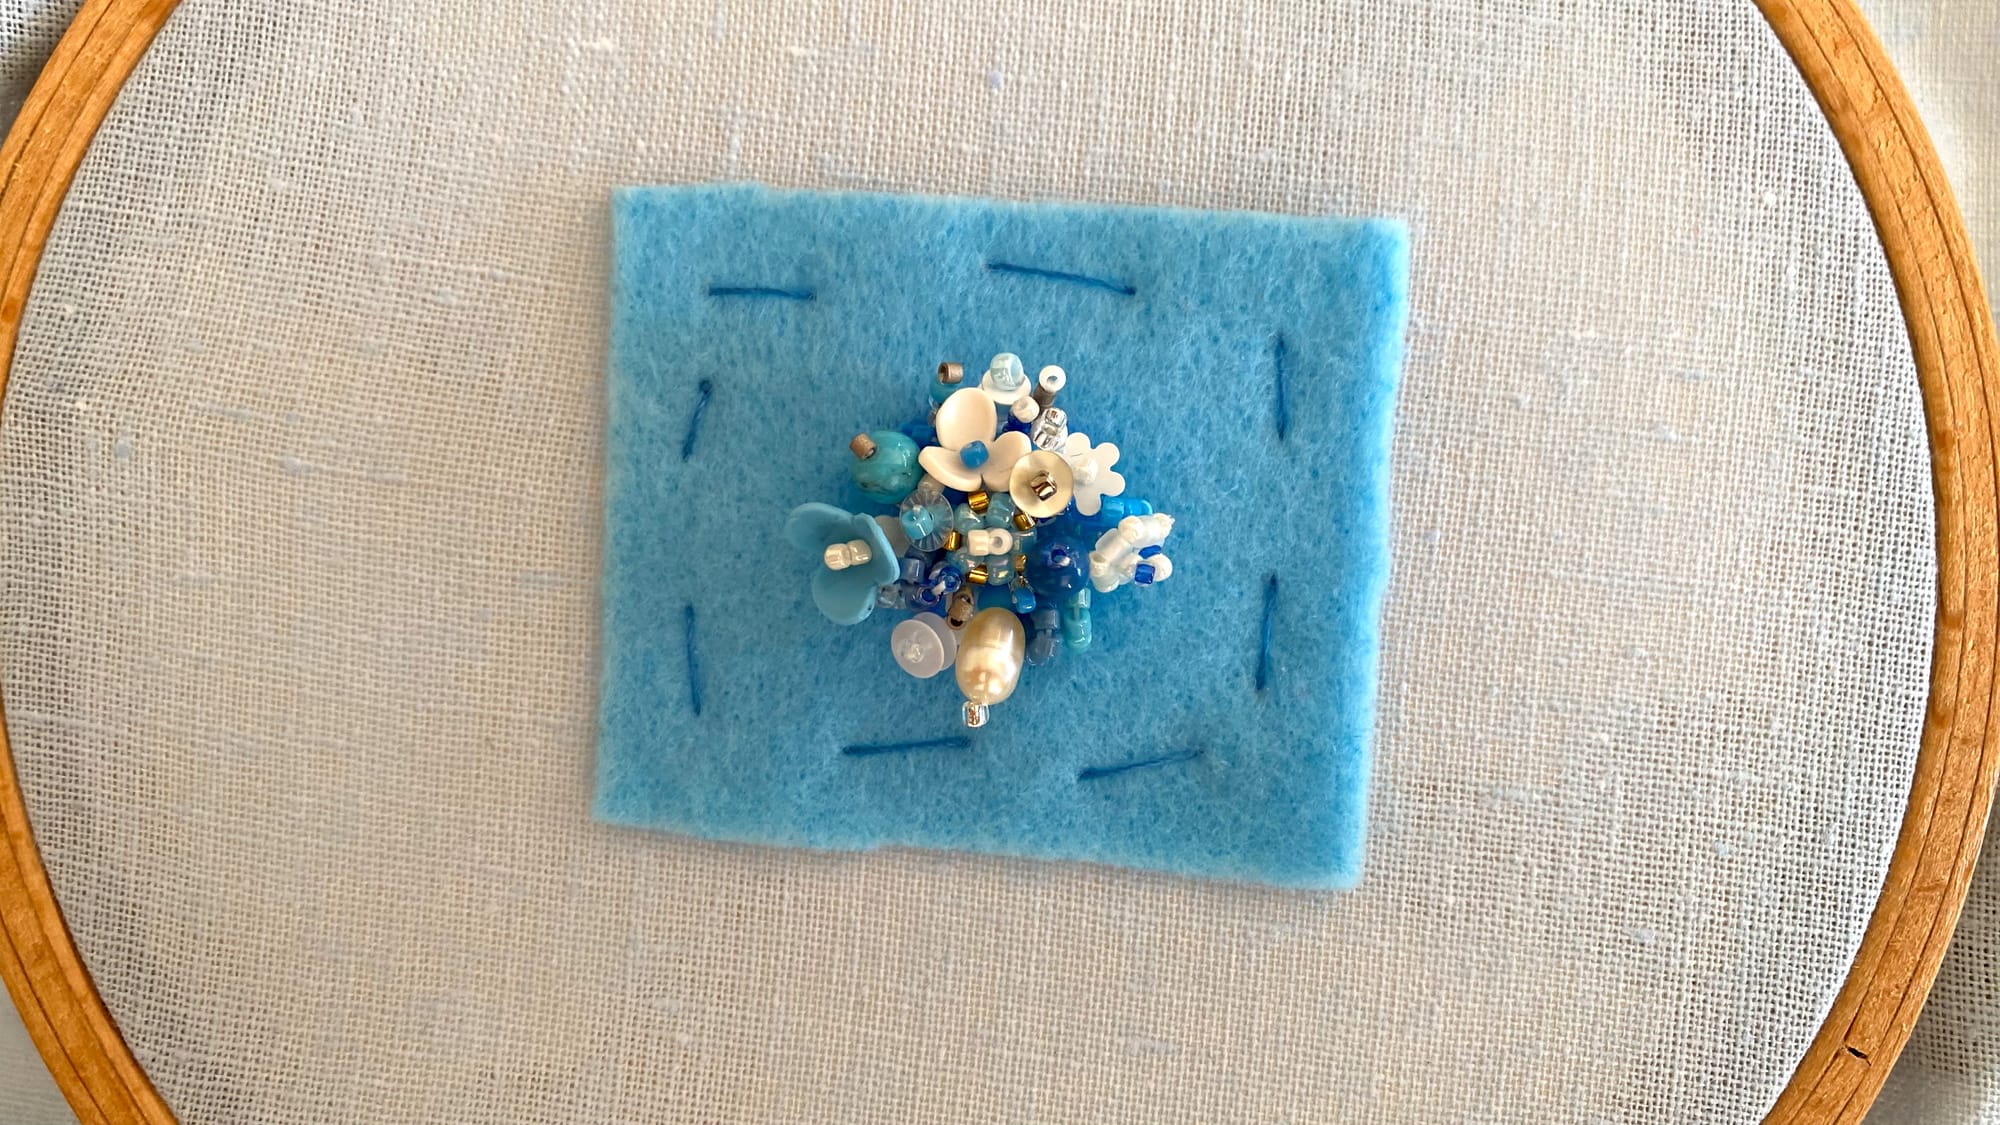
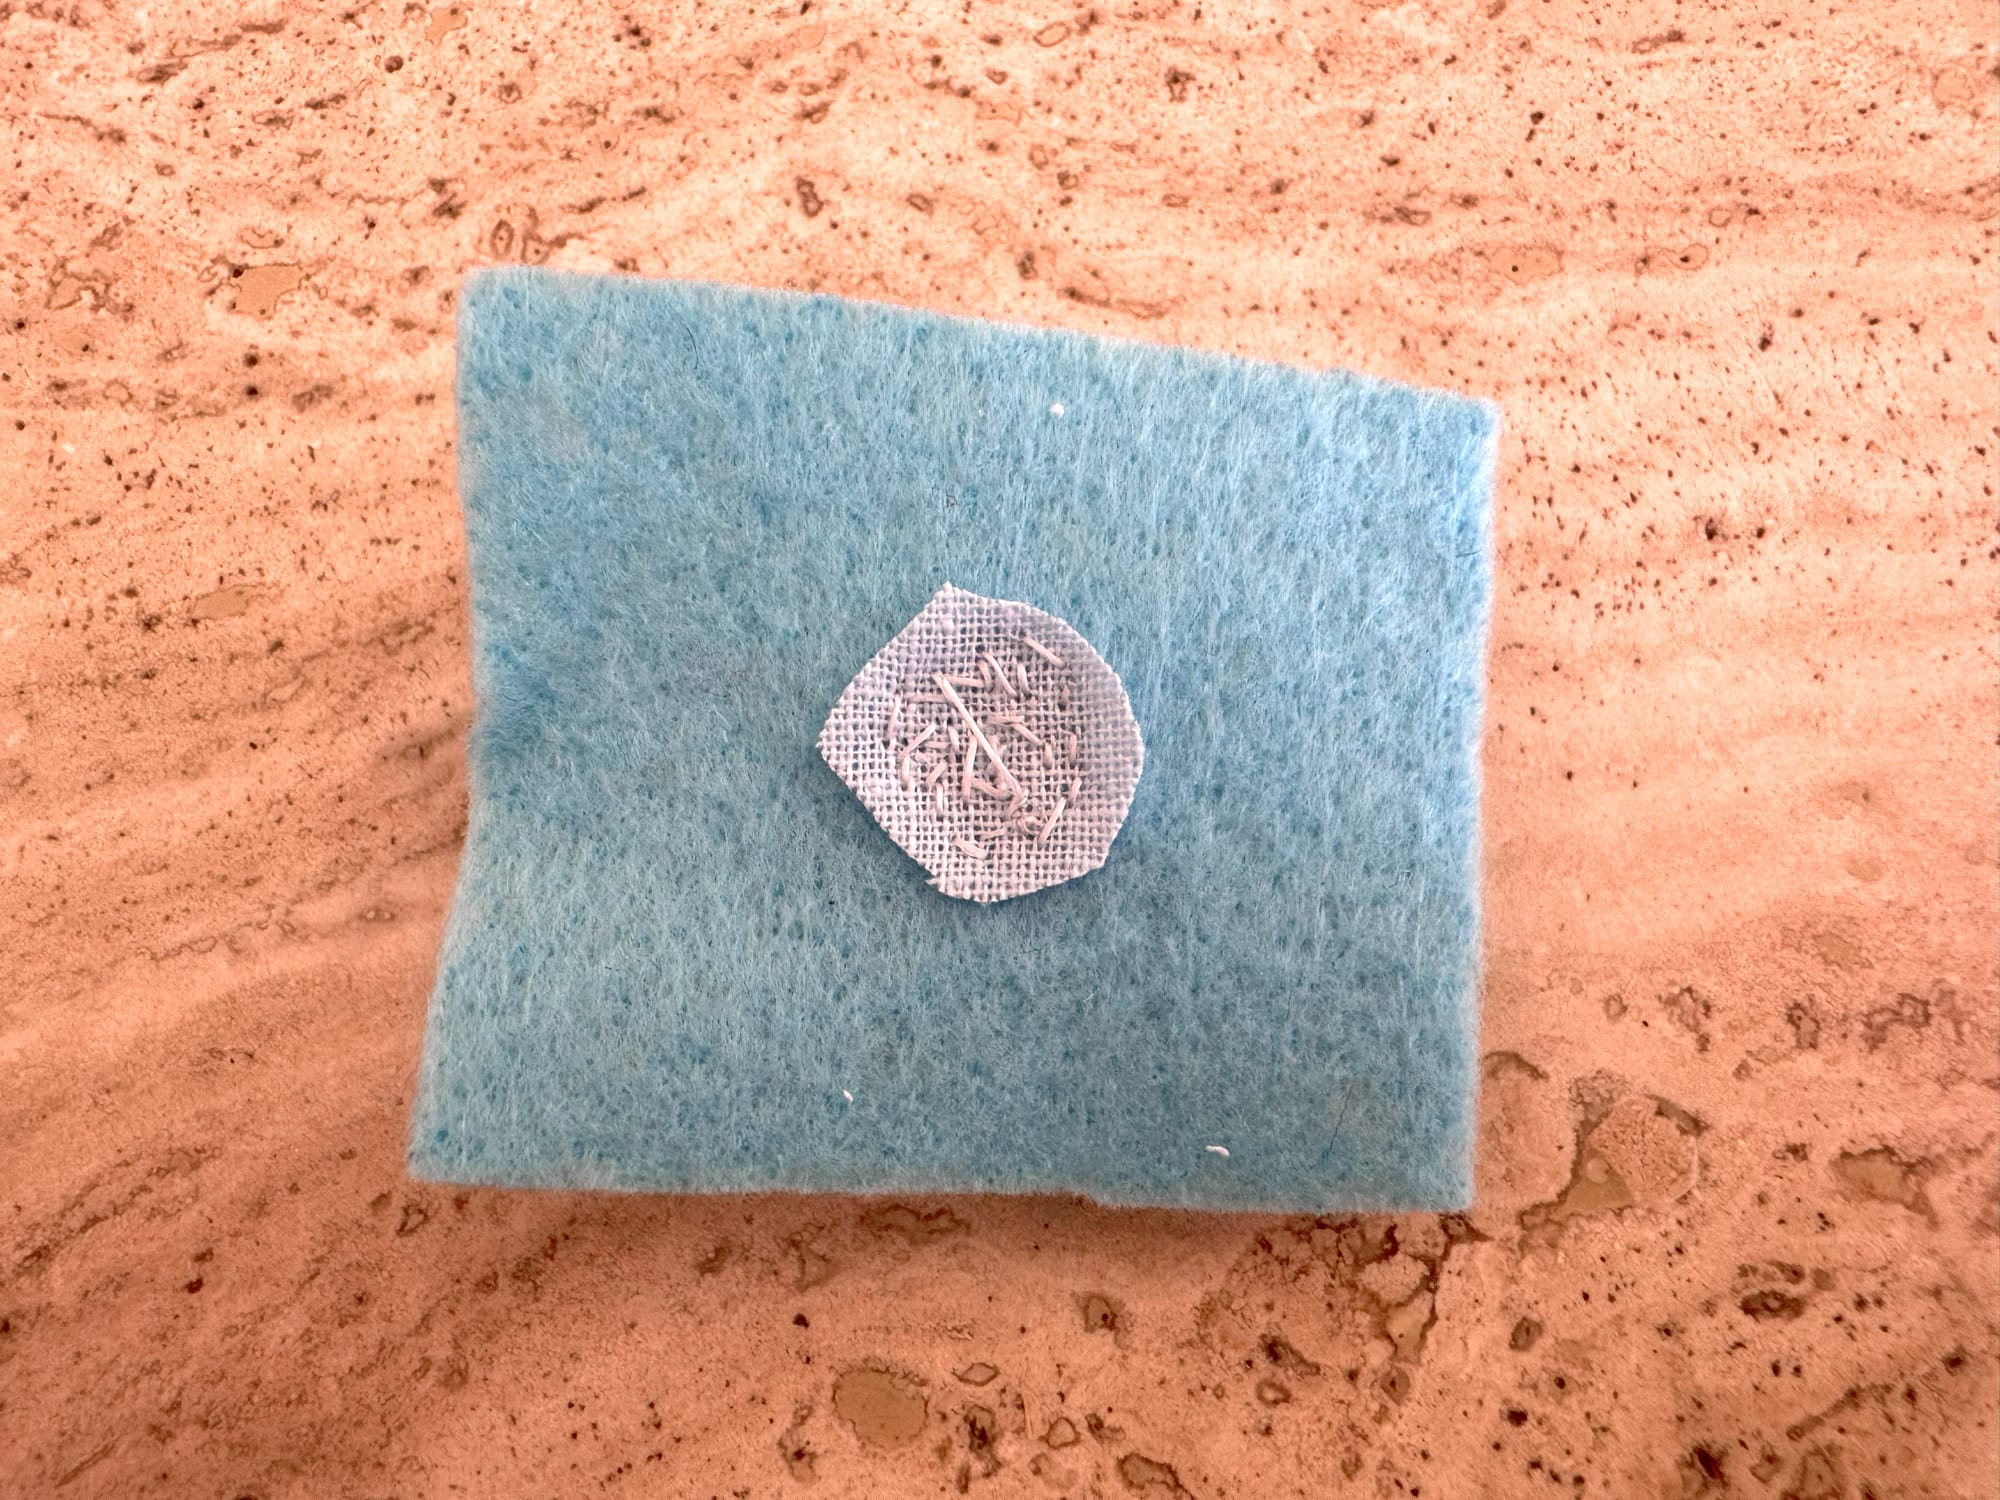
We start by taking our ring base and marking the circle on a piece of felt. We need it to make sure our stitches do not go beyond the borders of the ring setting. We then stitch a piece of felt to the fabric base and position the fabric base within the embroidery hoops. Make sure your fabric is stretched and tightened well (not as strongly as you need it for regular embroidery, by strongly enough to keep the pressure of your beadwork).

I have additional four wooden legs, which I can attach to the earring hoops. These legs give my embroidery space additional stability as well as allow easier access to work and flexible movement of hands. As this piece of craft is small, I am using small earring hoops (10cm in diameter), but it does not matter. As soon as your fabric is tightened well, you can use any hoops you have.
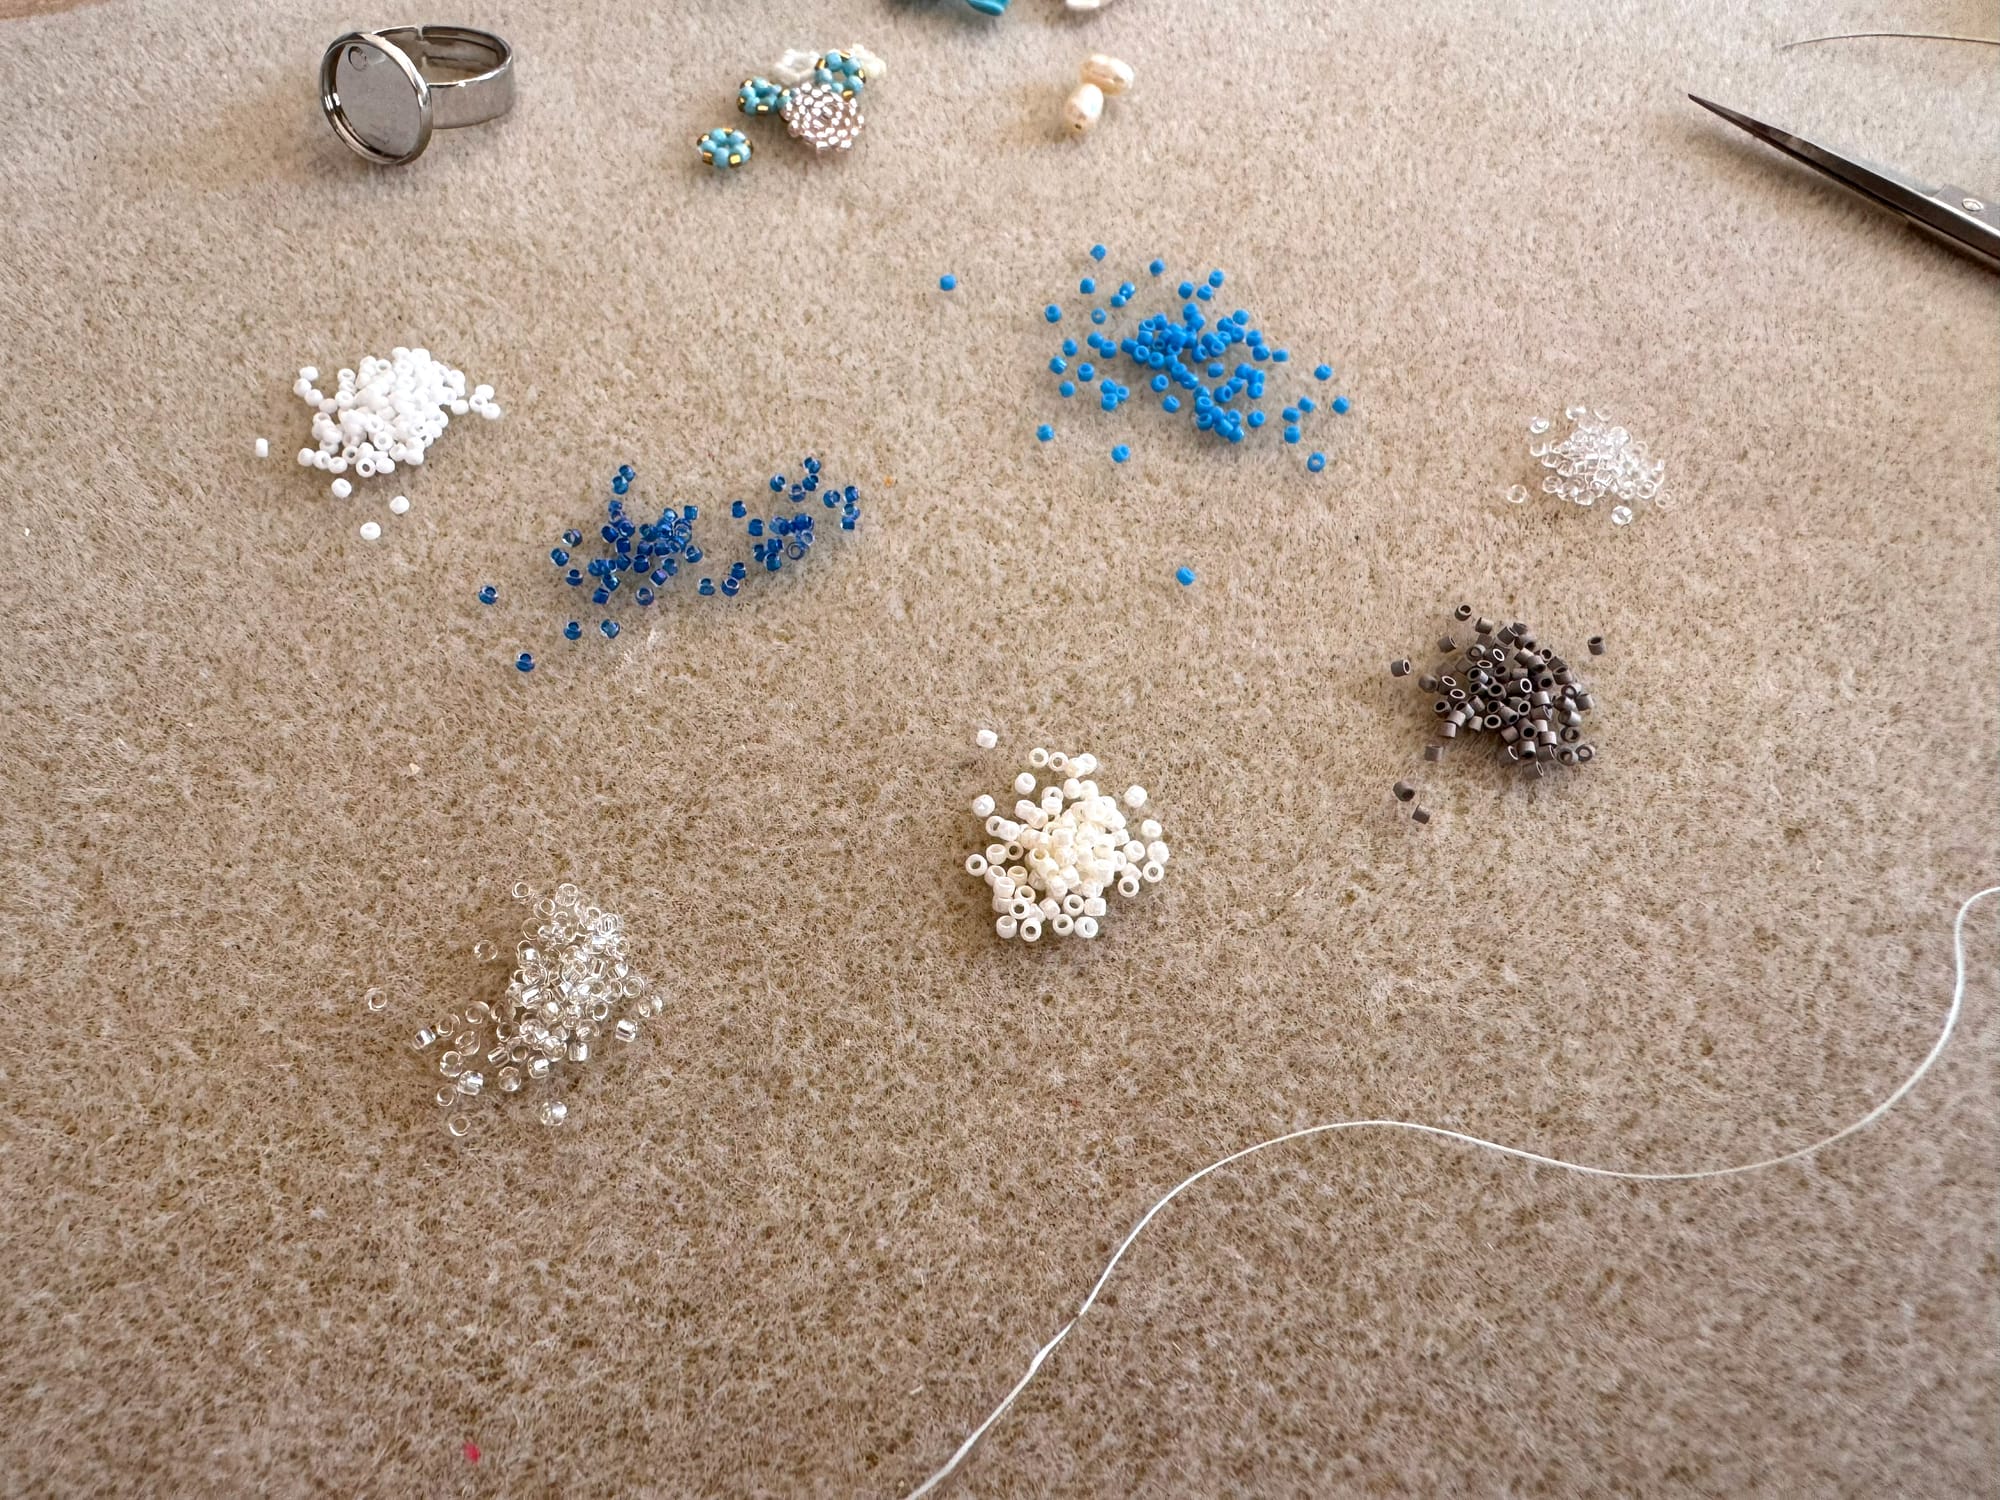
I do not open all of the materials I picked up (it would be madness to have them all at my working surface), but for all my 3D-beading projects I put on the working surface all the selected beads of size 15/0. Those beads will finish the majority of our stitches and I prefer to have all of them at hand.
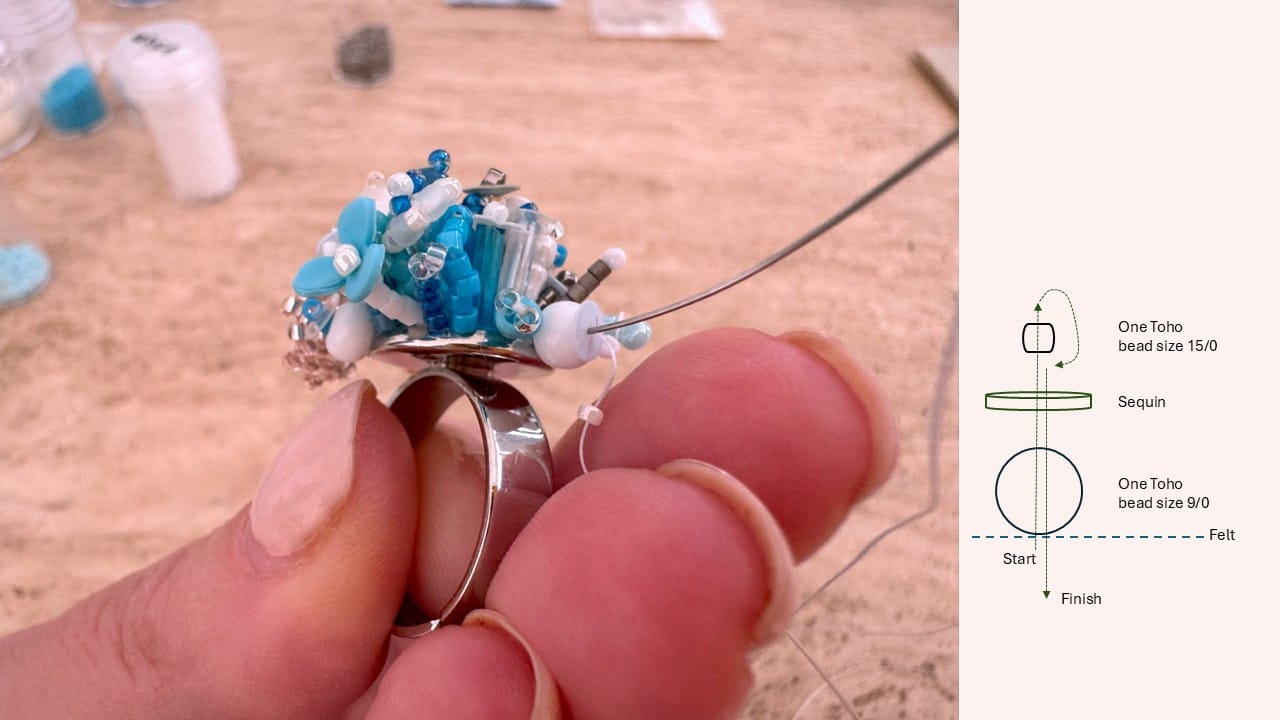
We now start creating our vertically standing composition. For your convenience, I have added a scheme to each stitch I've made while creating this ring. That's exactly why I believe writing this tutorial and accompanying it with a schematic drawing is a better way than making a video. On the drawing, I can show you every composition in much clearer details, than I would be able to do while shooting a video.
Take about 1 meter of the beading thread, and make a security knot at the end of your thread. Move your needle from the wrong side to the front side exiting at the center of our circle. And you are now ready to start your first floral sculptural stitch.
I hope the schematic drawing is self-explanatory, but let me put the process in words anyway. I picked up and put on the needle: one white bugle bead, one floral bead I made myself, and three Toho beads size 15/0. I pulled all the beads onto the thread until they reached the felt. Then I skipped three last taken Toho beads size 15/0 and moved my needle through the floral bead and bugle bead, existing on the wrong side of my work.

I then returned to the front side, putting my needle as close to the first element as I could.
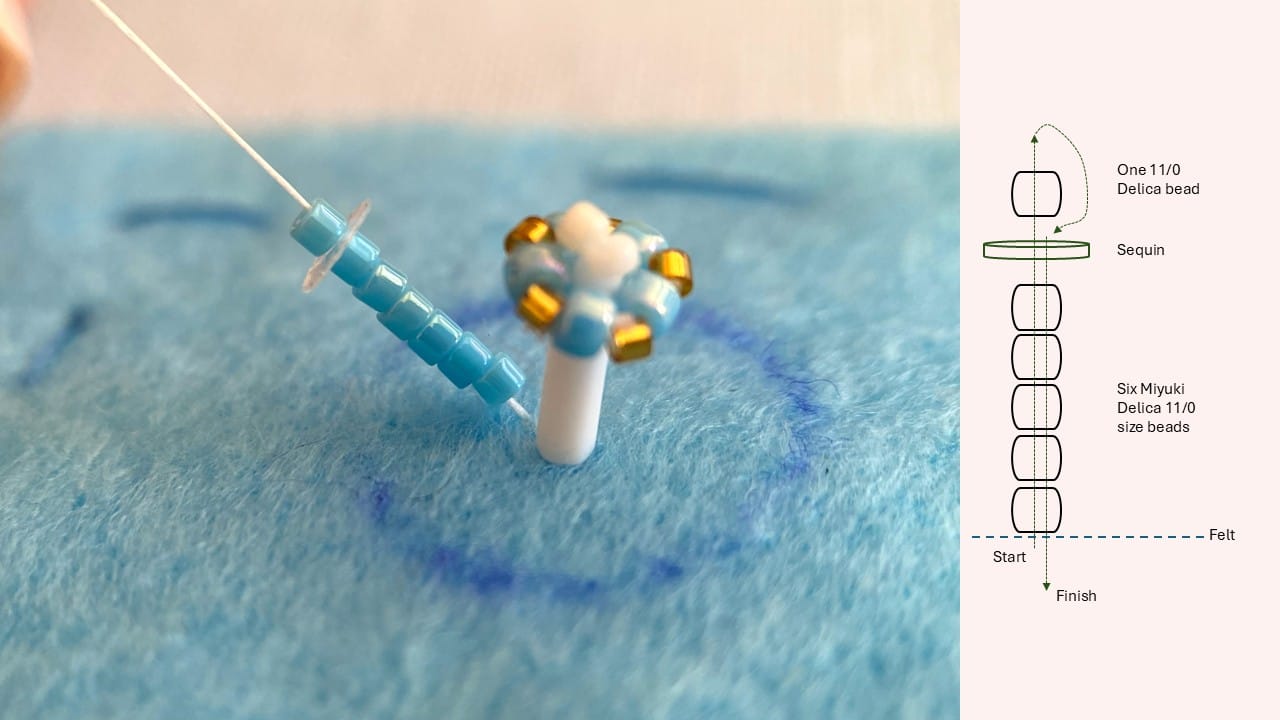
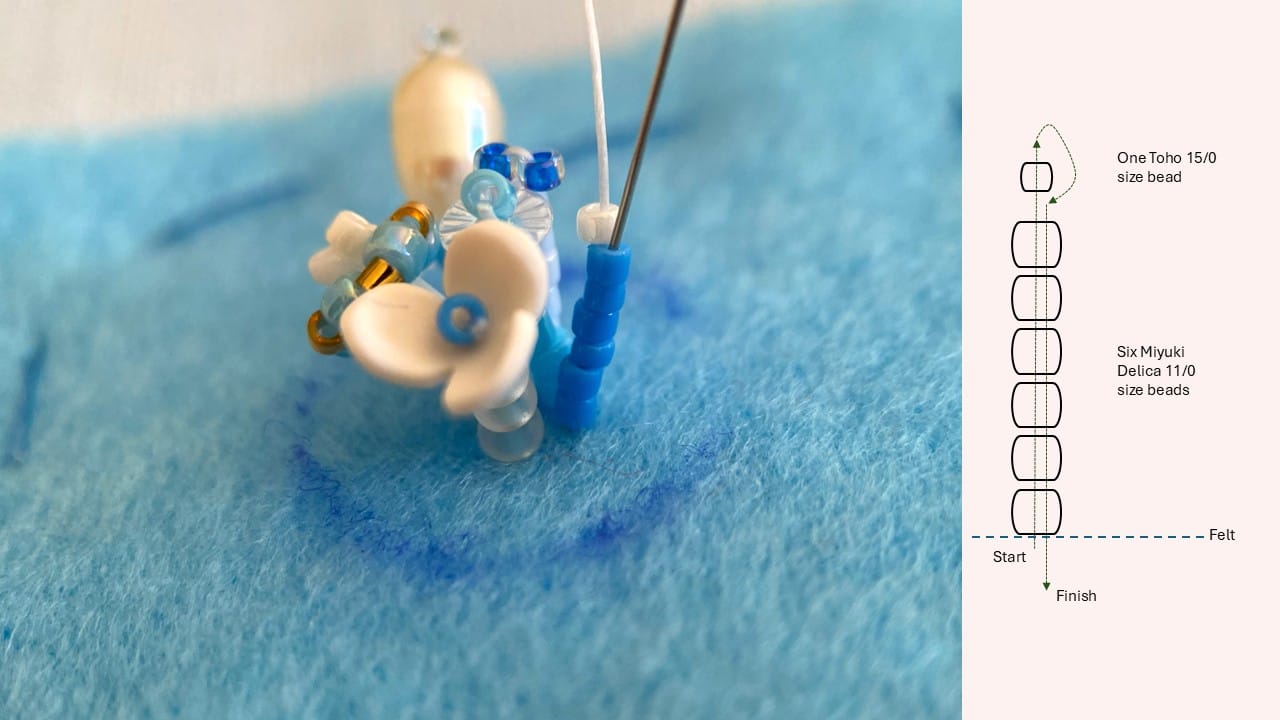
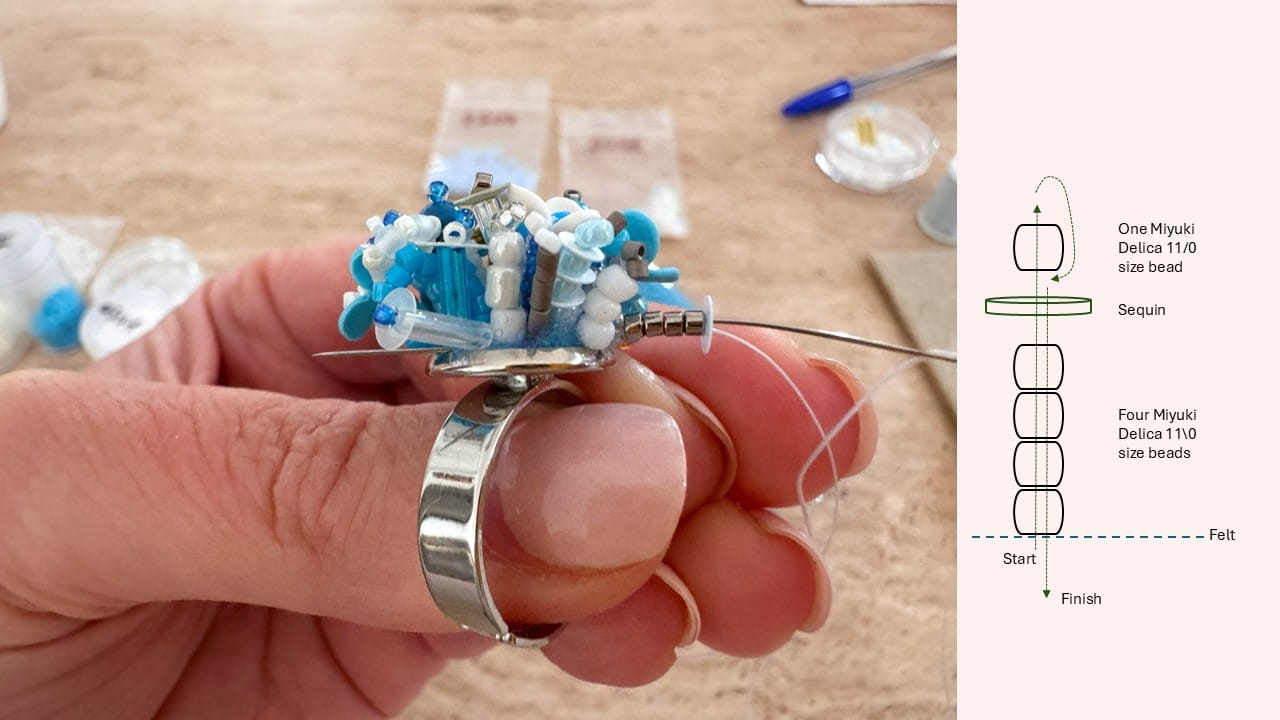
Now I make the second element. I put on the needle six Miyuki Delica 11/0 beads, one sequin, and one more Miyuki Delica bead size 11/0. I skipped the last taken bead and moved my needle through the sequin and six Miyuki Delicas returning to the wrong side.
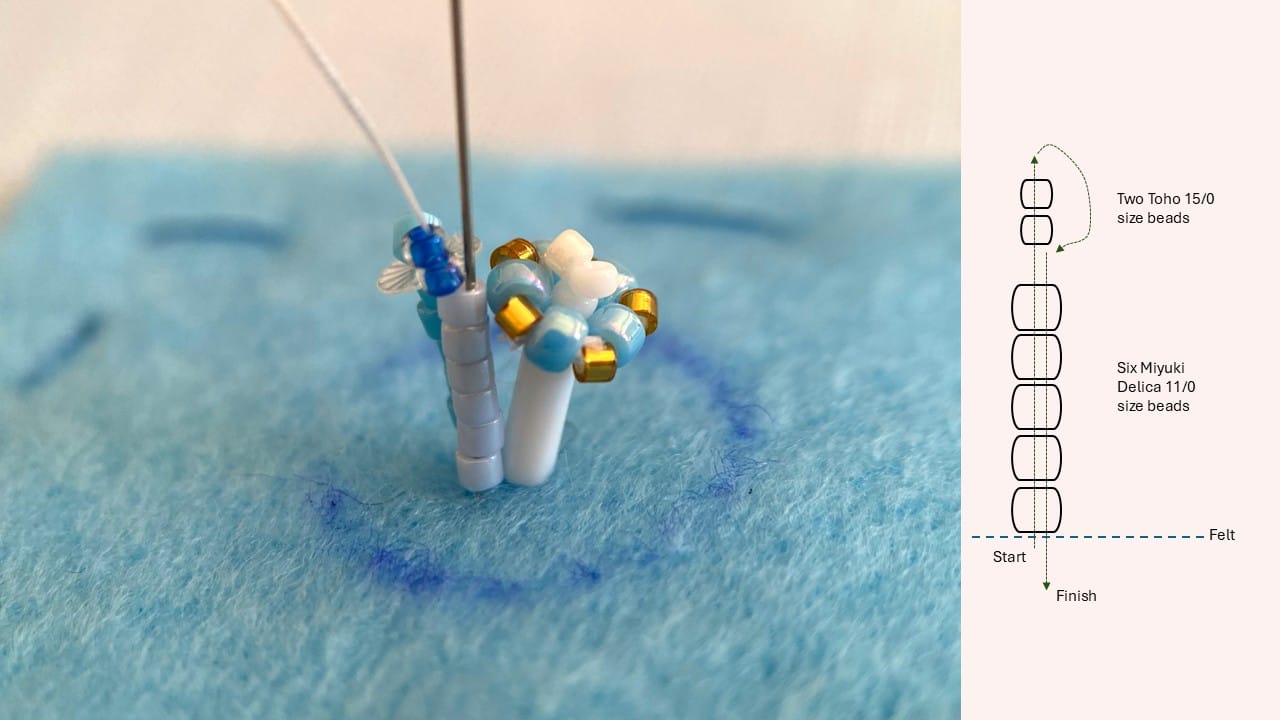
Next element: six Miyuki Delica beads size 11/0, and two Toho beads size 15/0. Put them all on the needle, and pull them to the felt. Now skip two last taken Toho beads size 15/0 and move your needle through six Miyuki Delicas.
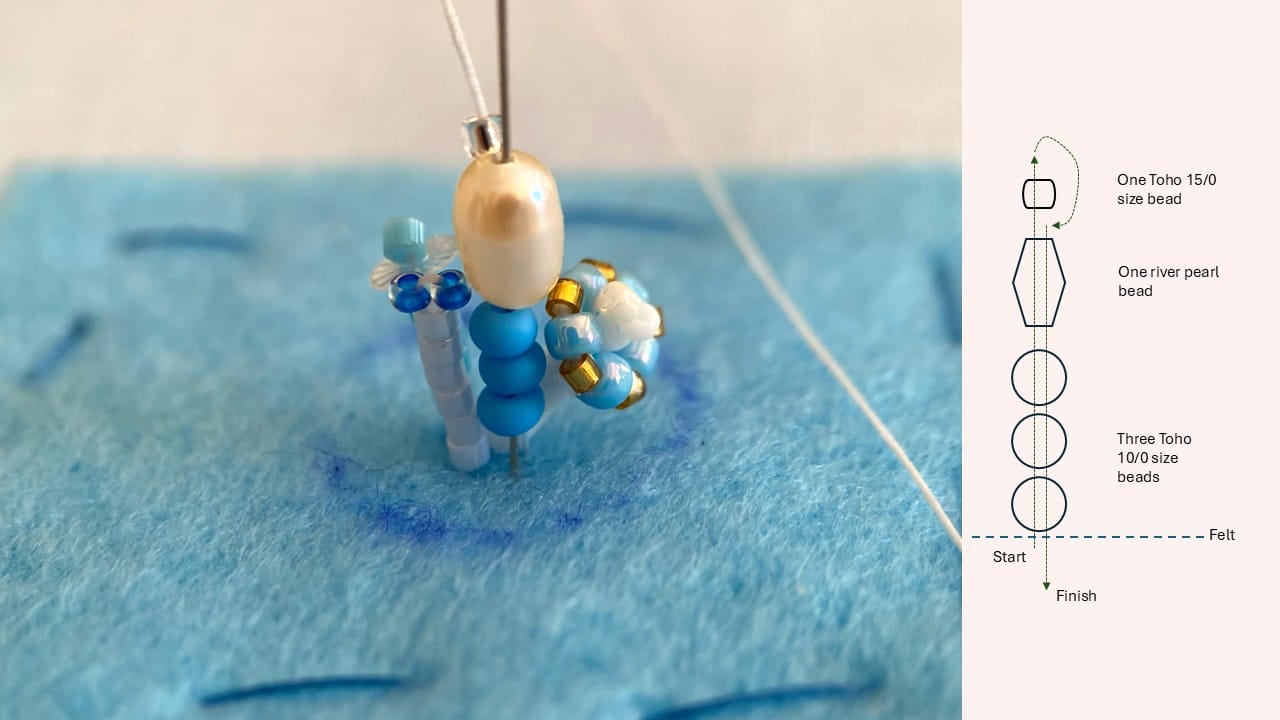
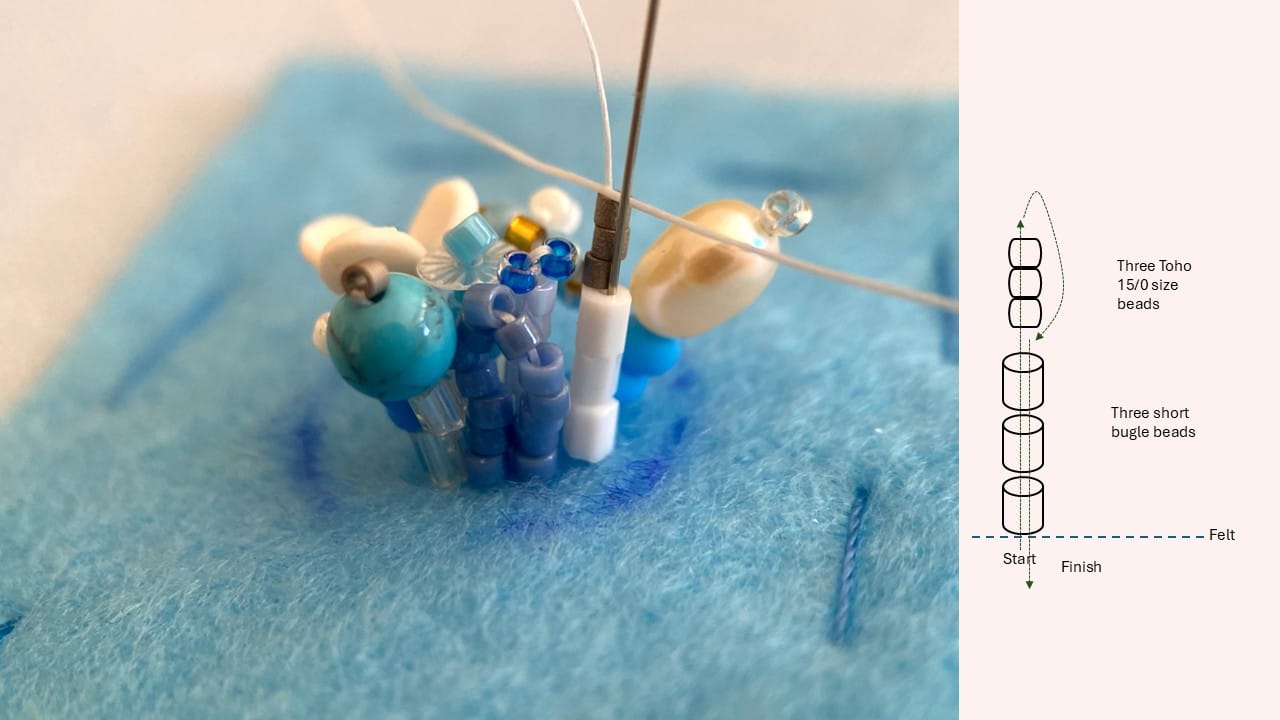
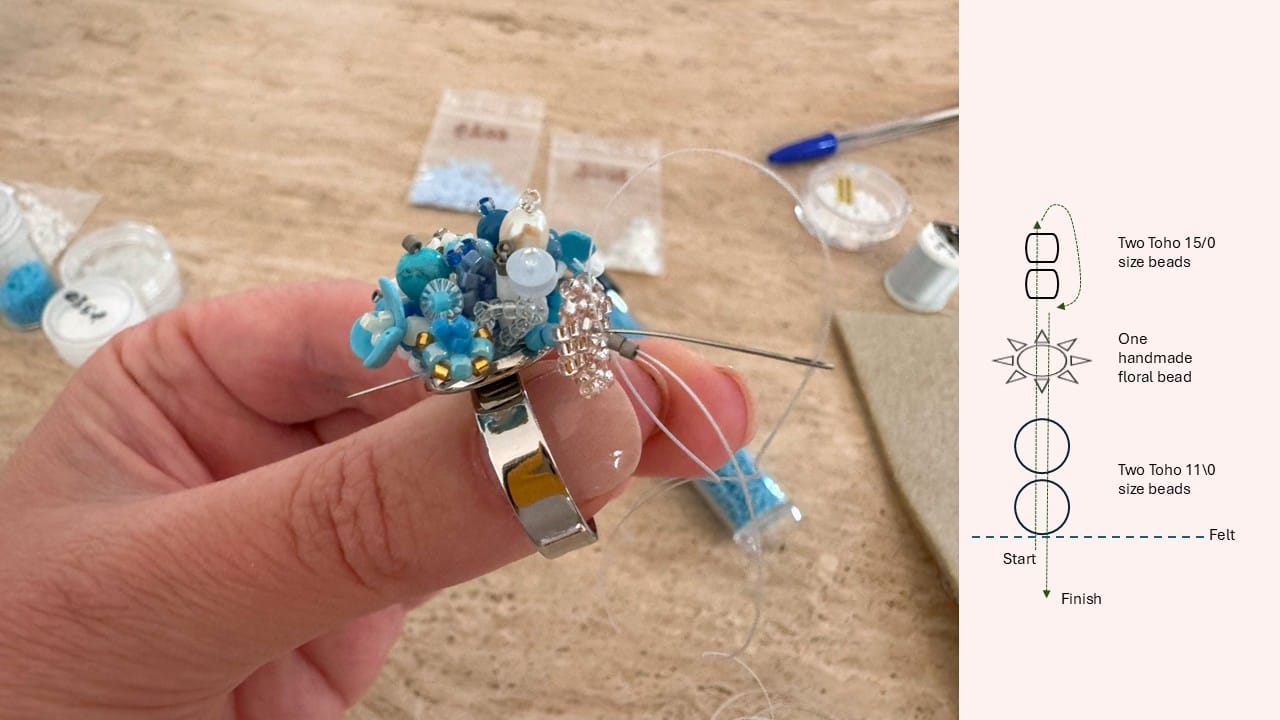
Now I decided to add a pearl. Depending on the size of your pearl (or natural stone) you can put it on a stem created from different beads. As you can see in the photo, my pearl is quite big, so for the stem I picked up three Toho beads size 9/0, then a pearl, and then a Toho bead size 15/0. Now I skip the last taken Toho bead size 15/0 and move the needle through the pearl and three Toho beads size 9/0.
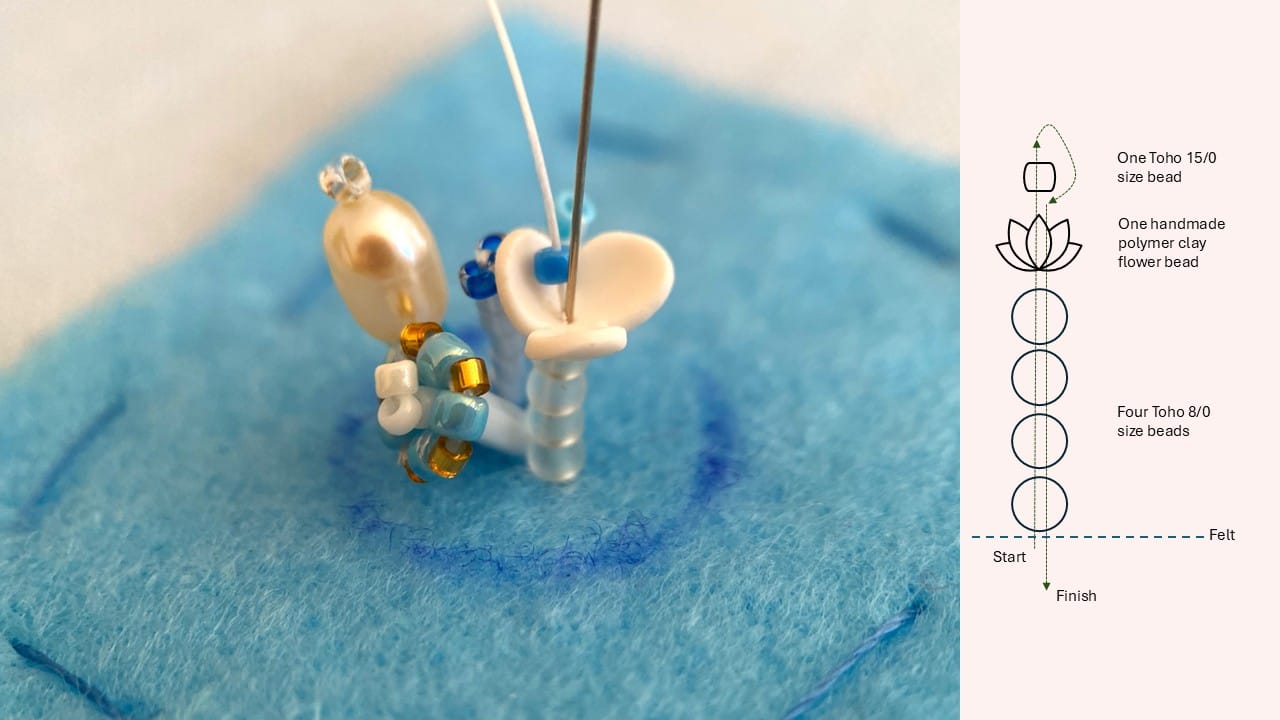
For the next element, I picked up four Toho beads size 9/0, one handmade floral bead made from polymer clay, and one Toho bead size 15/0. Same principle: put them all onto the thread, pull them close to the felt, skip the last taken 15/0 Toho bead, and move your needle through the floral bead and four Toho beads size 9/0.
For such a small ring we won't be able to put a lot of big beads (like pearls, turquoise stones, or polymer clay beads). But we still need to fill the volume of the ring. For that, there is a simple element, which I use often to create the volume without taking too much space. I take six Miyuki Delica size 11/0 and one Toho bead size 15/0. You can make a similar element with beads of size 15/0 to create a very thin vertical element.
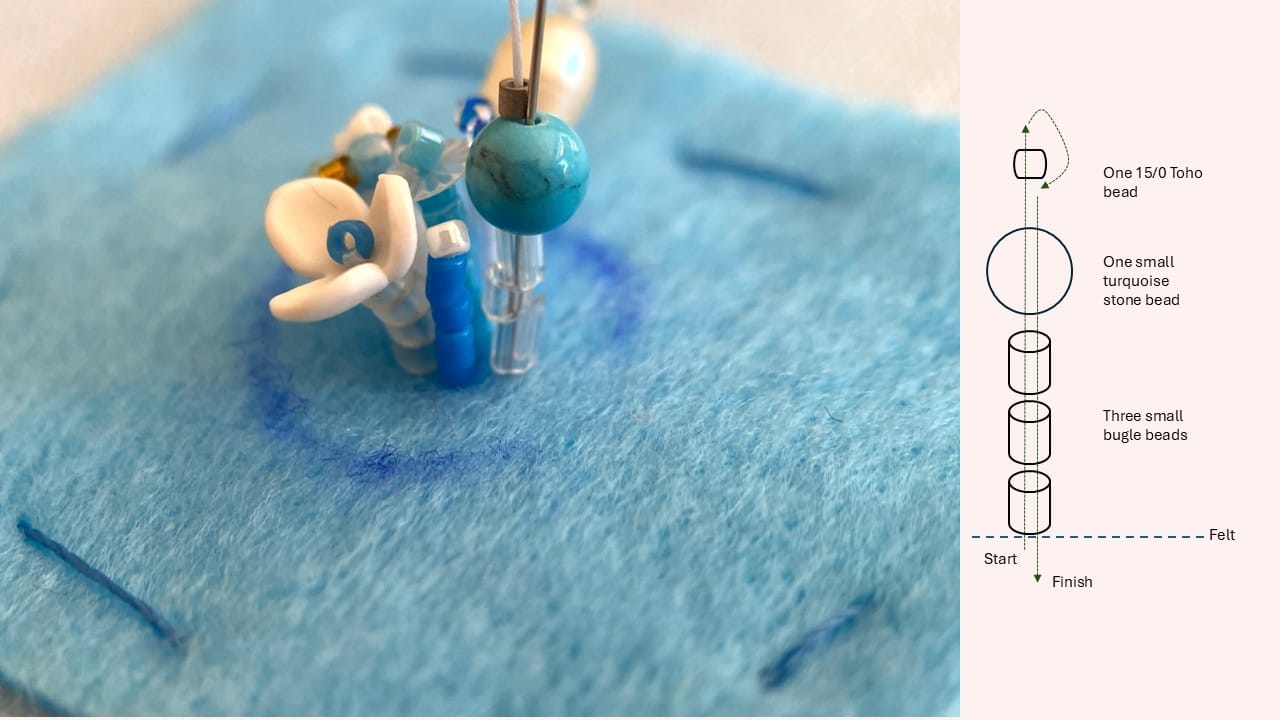
Same as for the pearl, if you decide to add a small natural stone bead, keep in mind such a bead is usually heavier than Toho or Delica. That's why I always make a stem from bigger or more stable beads. In this case, I am using three small bugle beads as a stem, then adding a turquoise stone bead and finish element with a small Miyuki Delica size 15/0. If your element falls, try to tighten your thread a little bit. And do not worry: when you surround these heavy elements with neighboring combinations, they will keep their position and will remain vertical.
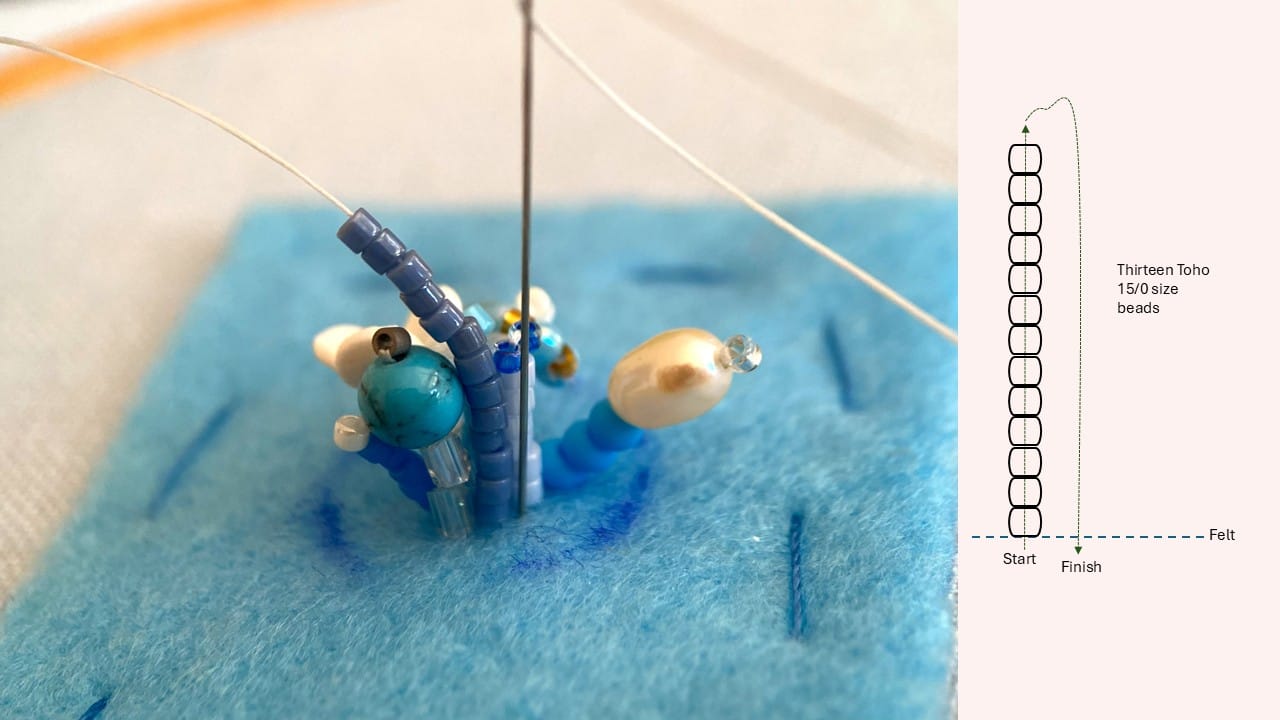
To add variety, I will next create a loop with beads to shape something like a leaf. For that, I go to the front side near the previously beaded element and put 13 Miyuki Delicas (or 13 Toho beads) size 11/0 on the thread. Now I step 2-3 mm away from the starting point and return my needle to the wrong side to shape a loop.
Next element: three hexagon Toho beads 8/0 size and three Toho beads 15/0 size. Skip three 15/0 beads and return through three hexagon beads.
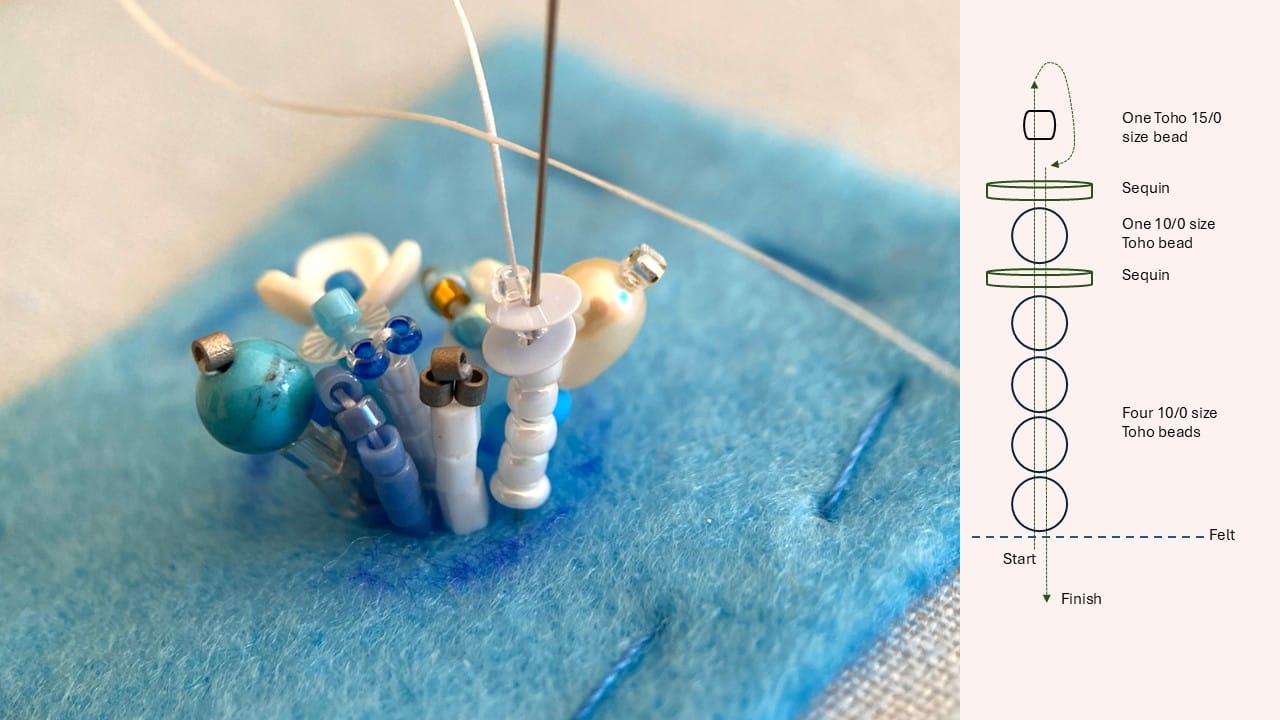
Next element: five Toho beads size 10/0, one sequin, one Toho bead size 10/0, one sequin, one Toho bead size 15/0. Skip the last taken Toho bead 15 size and move your needle to the wrong side through all the beads and sequins you put onto the thread.
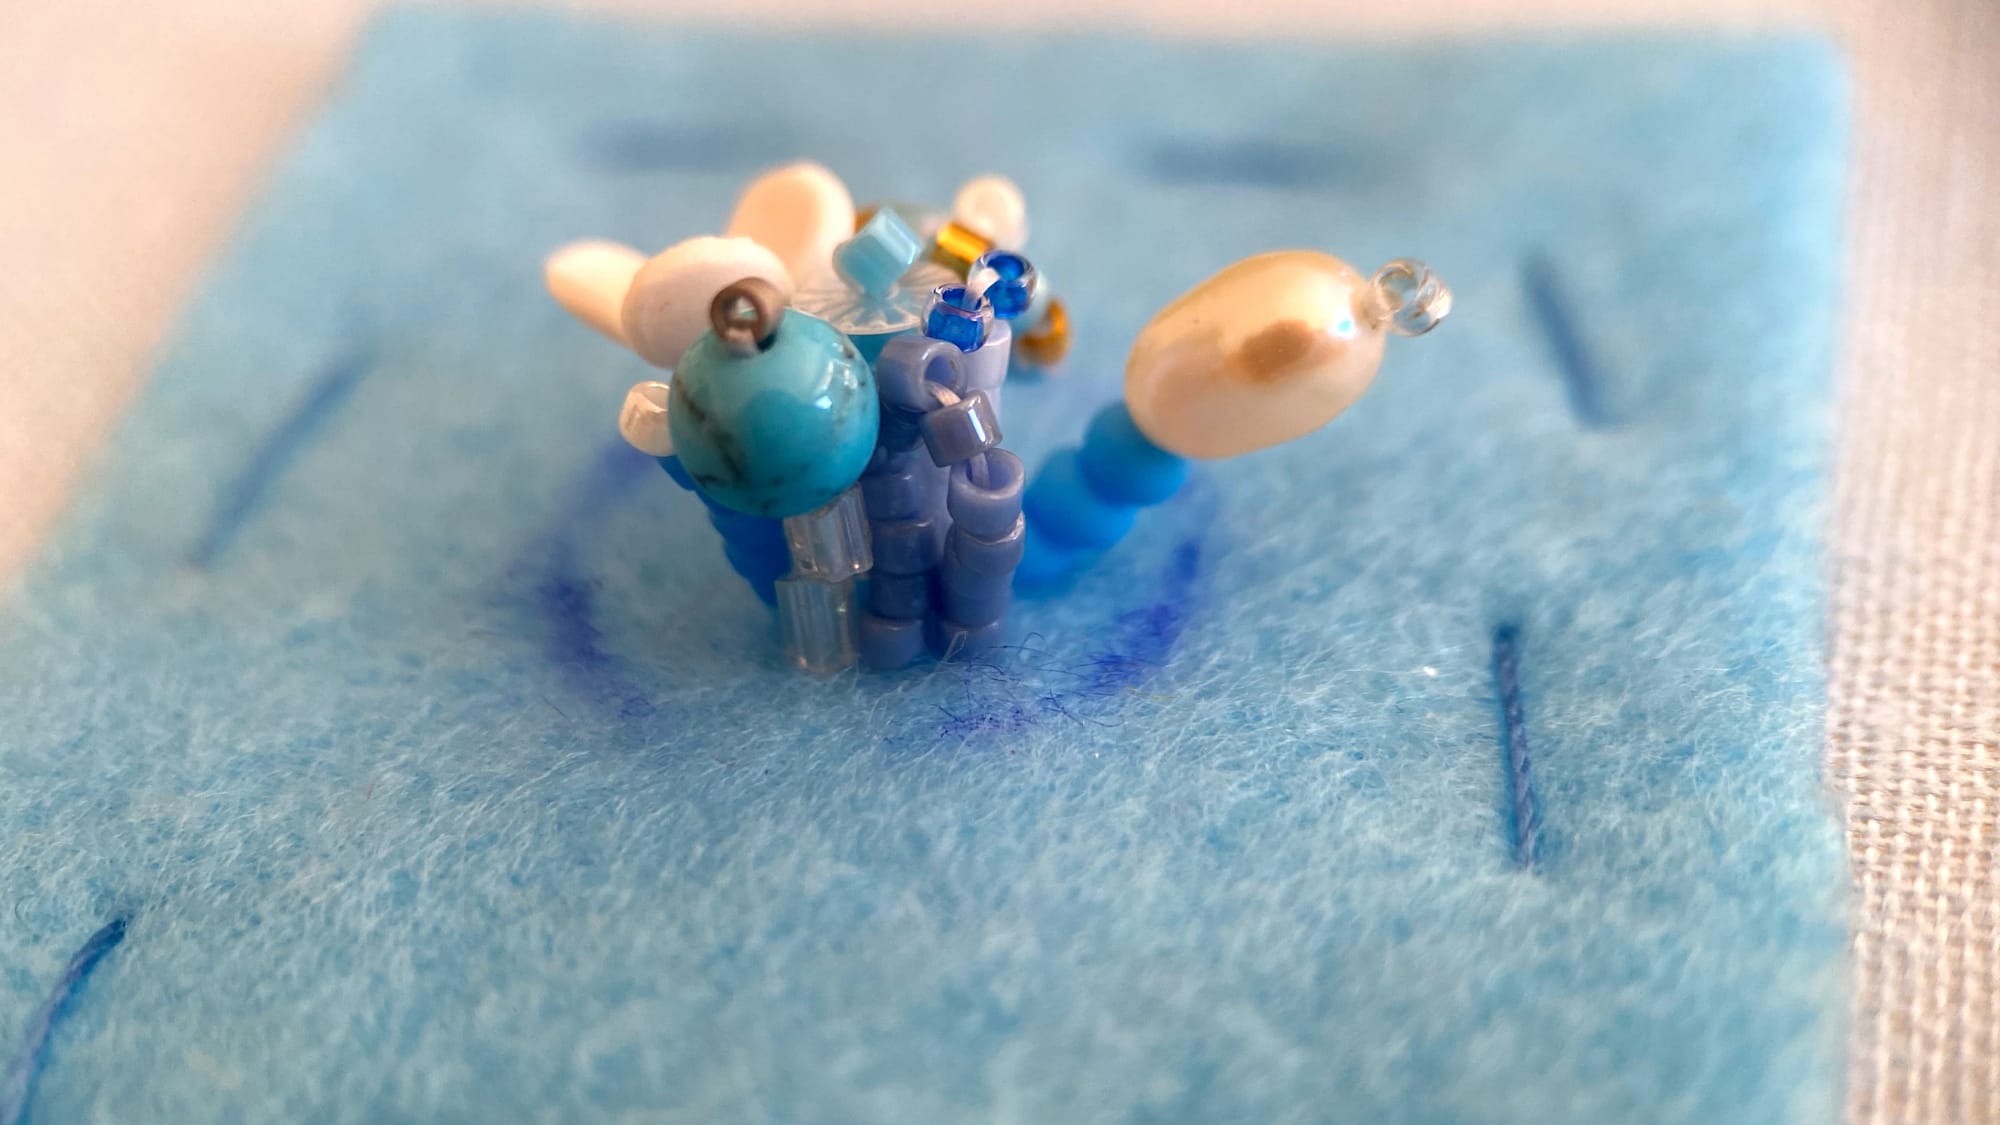
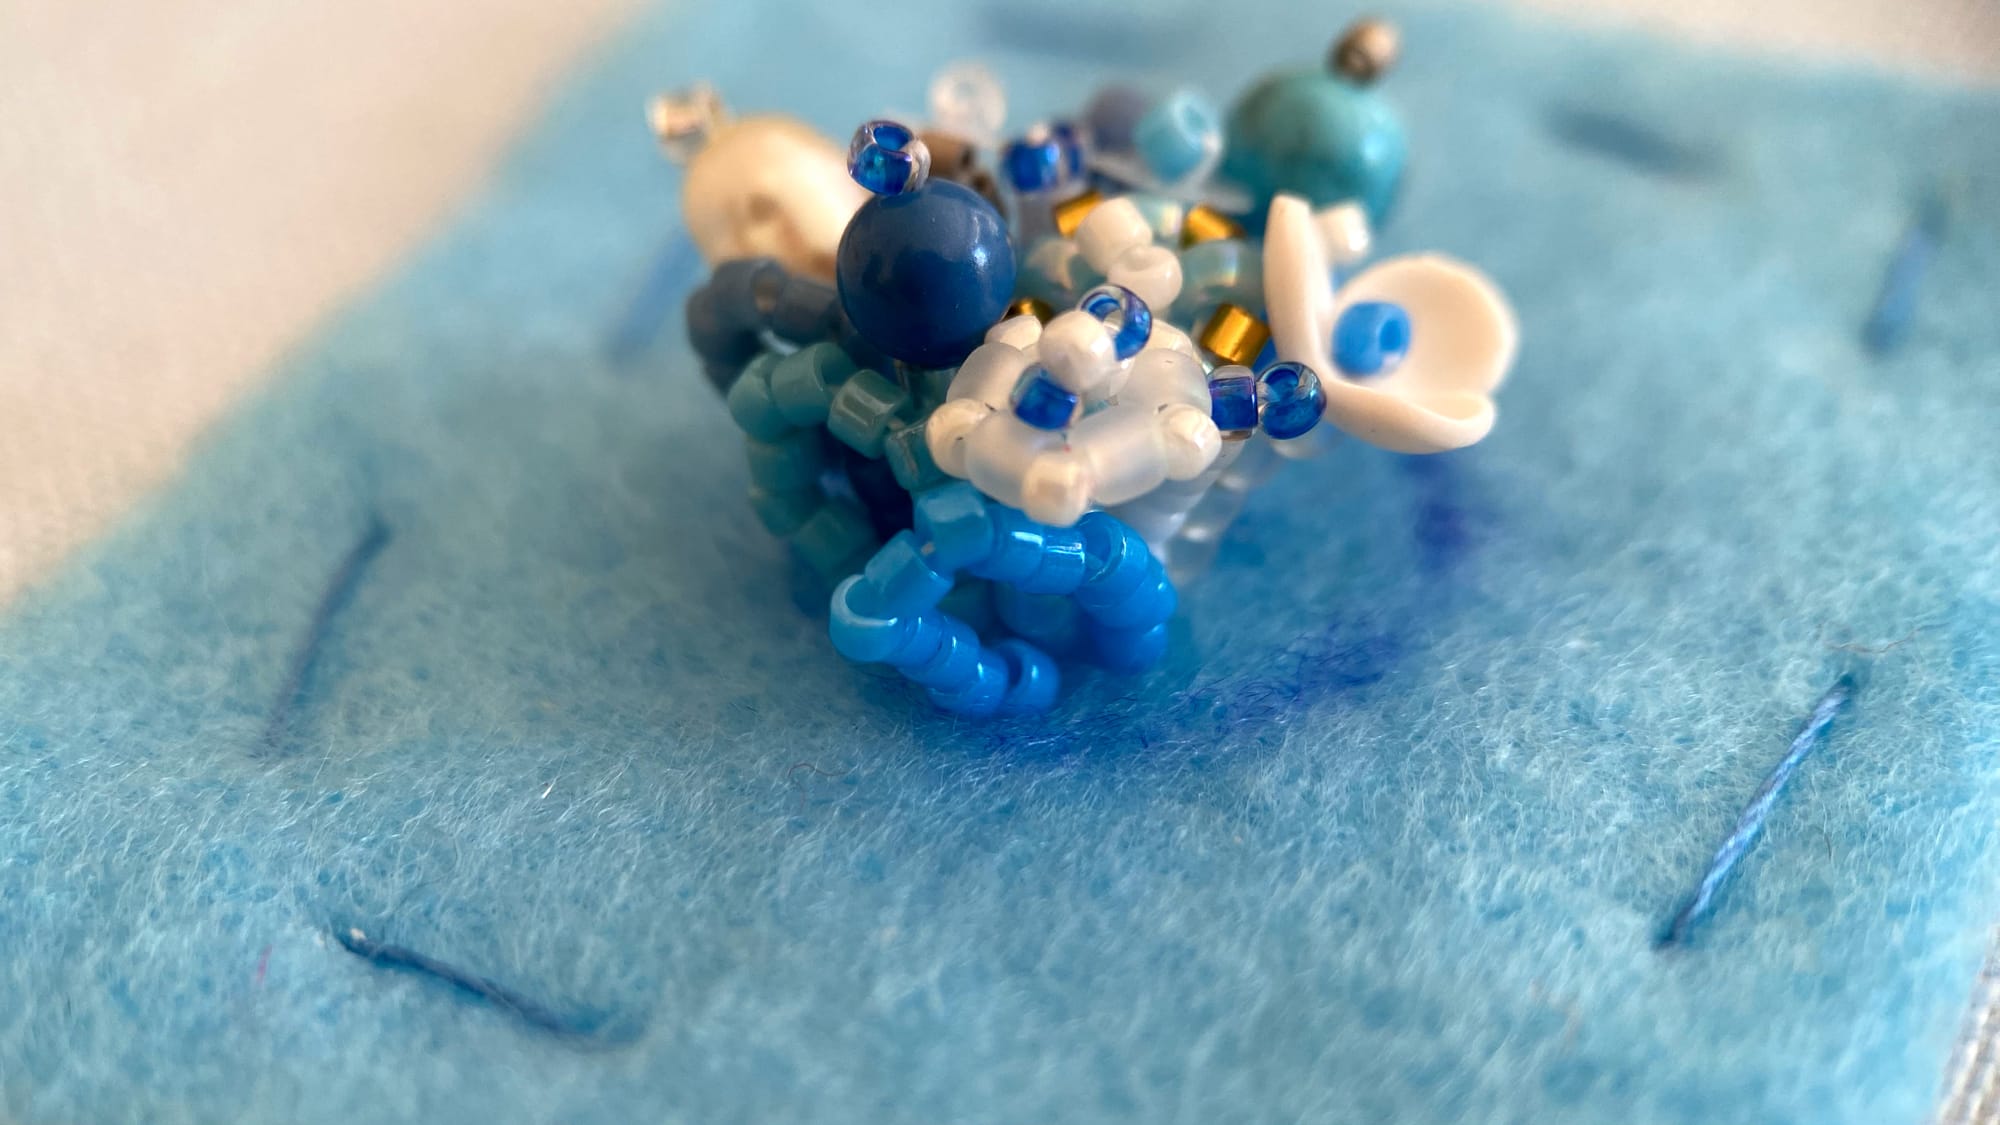
I have added a few more elements using the designs we already explored earlier. You can see on the photo that I now have three loops (aka 'leaf') made of Miyuki Delica beads. One more element with a floral bead. And one more element with a round dark blue stone bead. You can now start combining beads the way you like to fill in the marked circle of your ring.
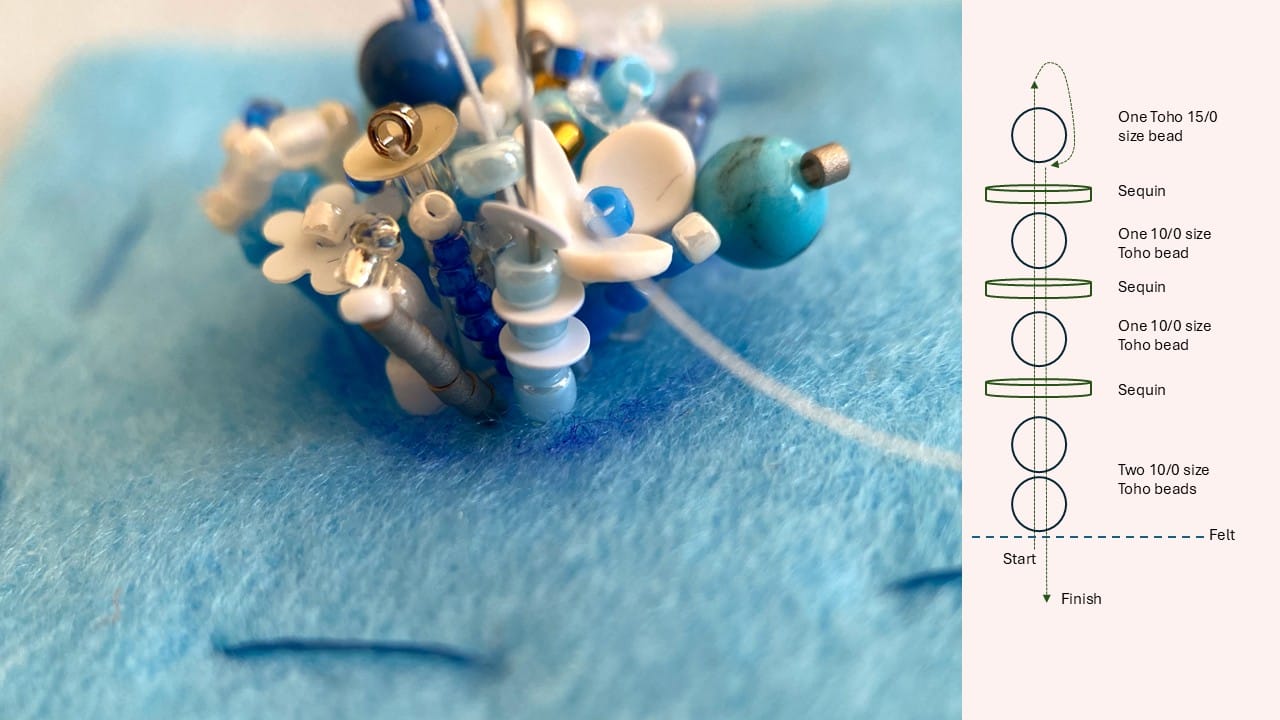
One of my favorite elements is a combination of a few sequins and beads. In this case, I took two Toho beas size 10/0, a sequin, a Toho bead, a sequin, a Toho bead, and yet another sequin, and finished all with a Toho bead.
Keep adding elements to your liking until you fill the circle marked by pen. When your circle is filled with elements, we can move to the next part of our project.
We now take the fabric base off the embroidery hoops and disconnect the felt from the fabric base, cutting the base where needed.
I usually apply a little bit of jewelry glue (you can also apply regular wood glue) to the wrong side of my work to ensure all the stitches are secured before I cut out the needed shape. I hope you can see in the photo below that the wrong side of my work became a bit yellowish - that's because the glue was applied to the stitches.
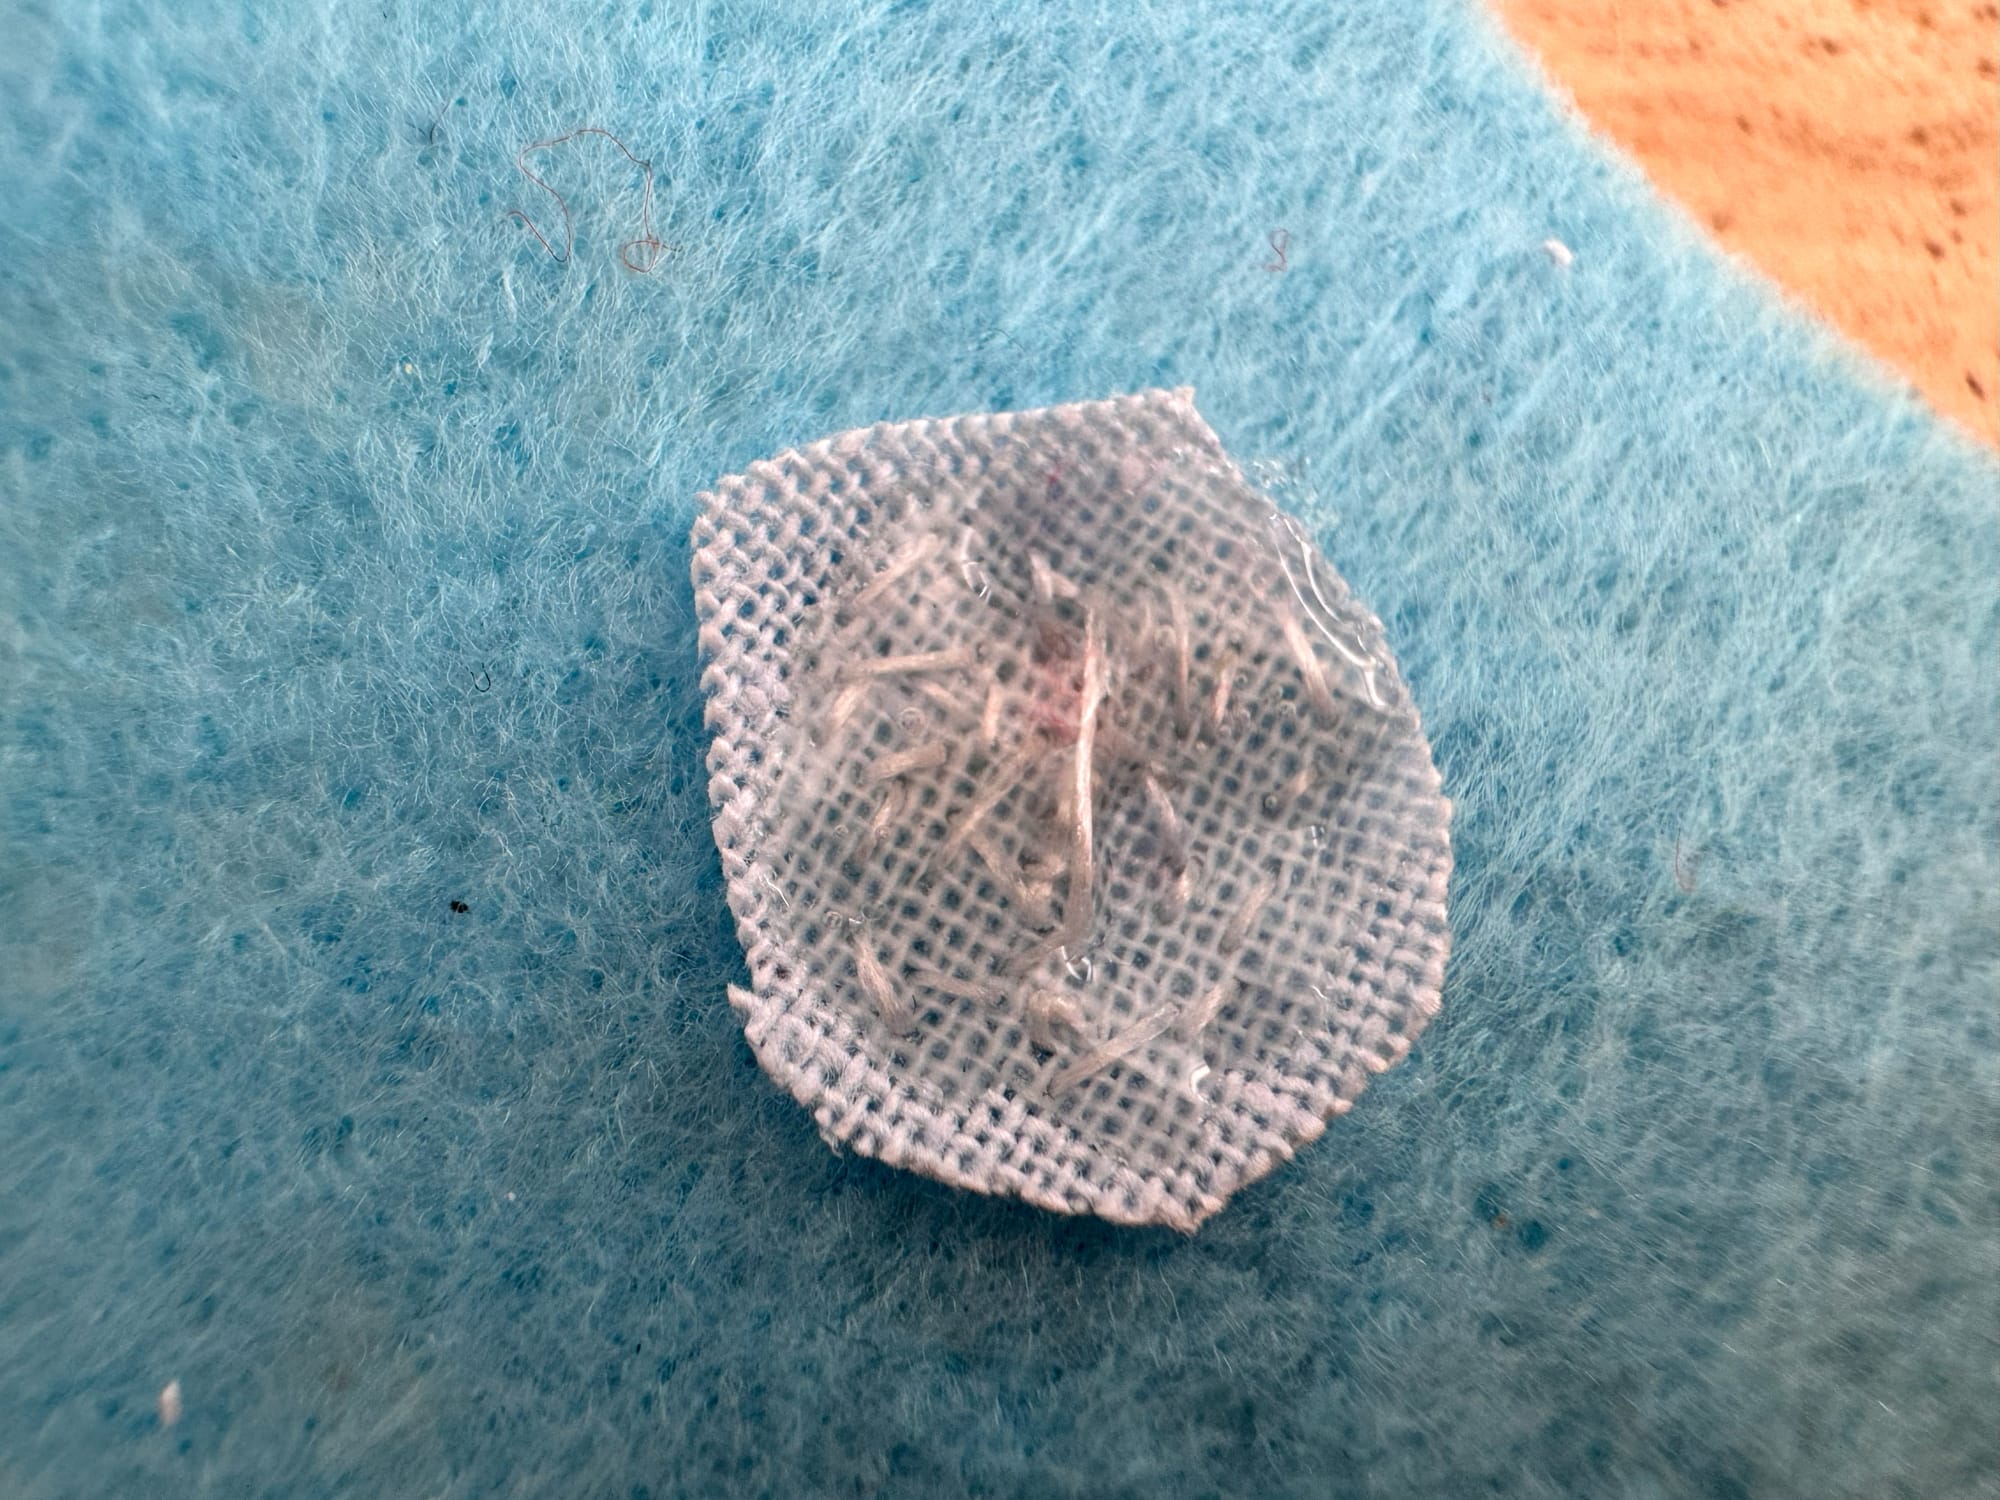
After the glue dries out, I carefully cut out the circle trying to cut as close to the stitches as possible without damaging them.
We now take the ring base and put some jewelry glue into the central part of the setting.
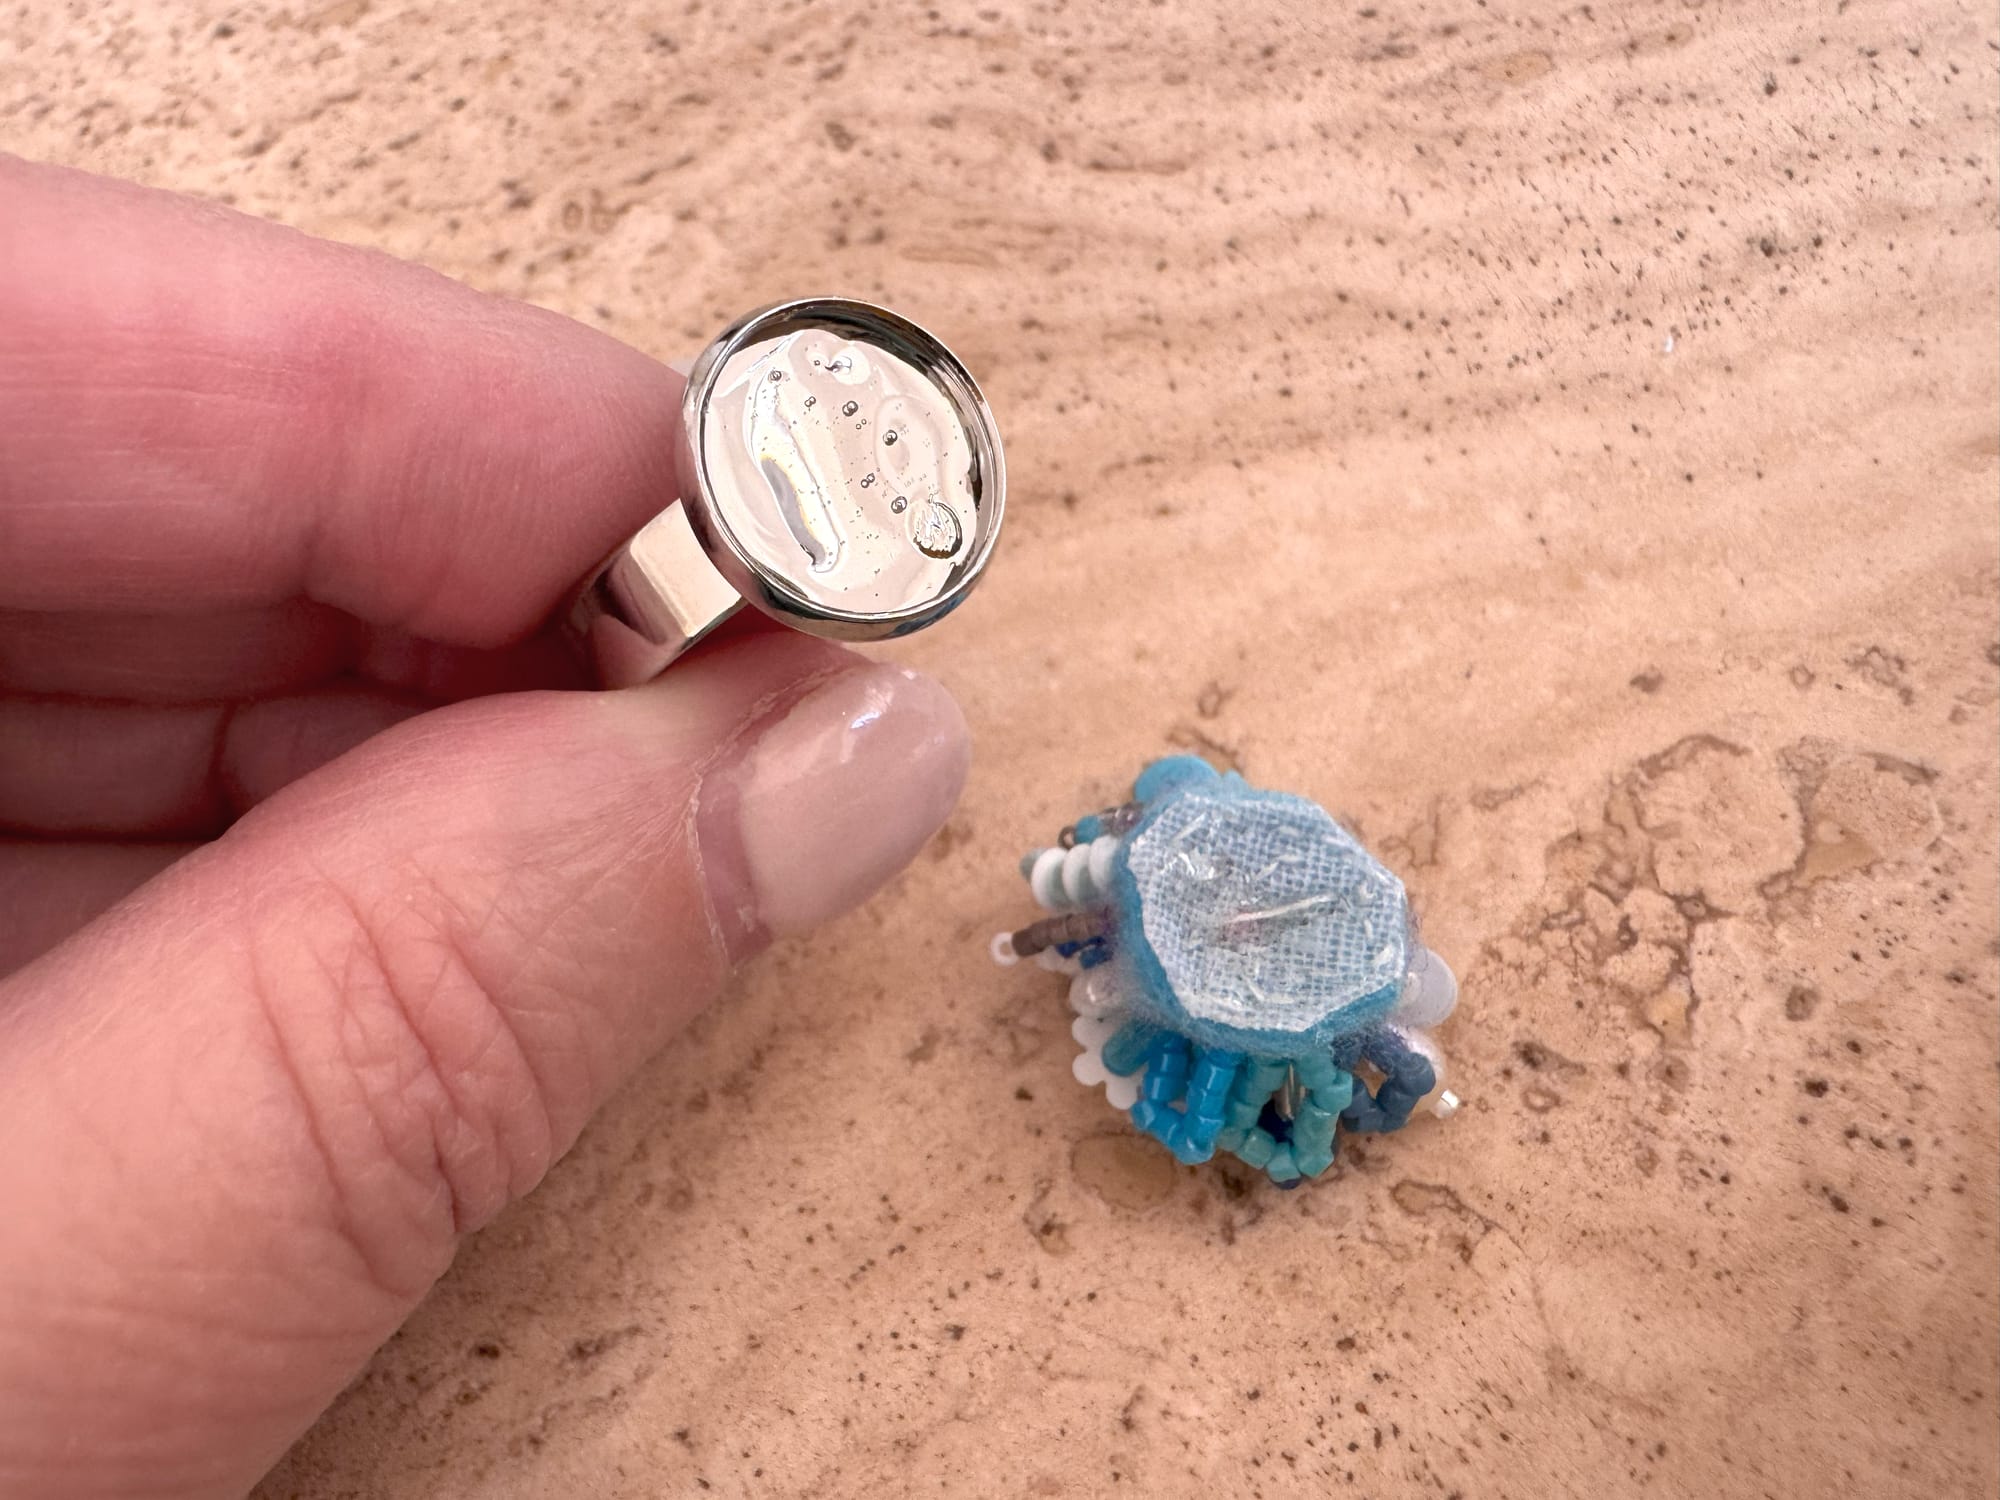
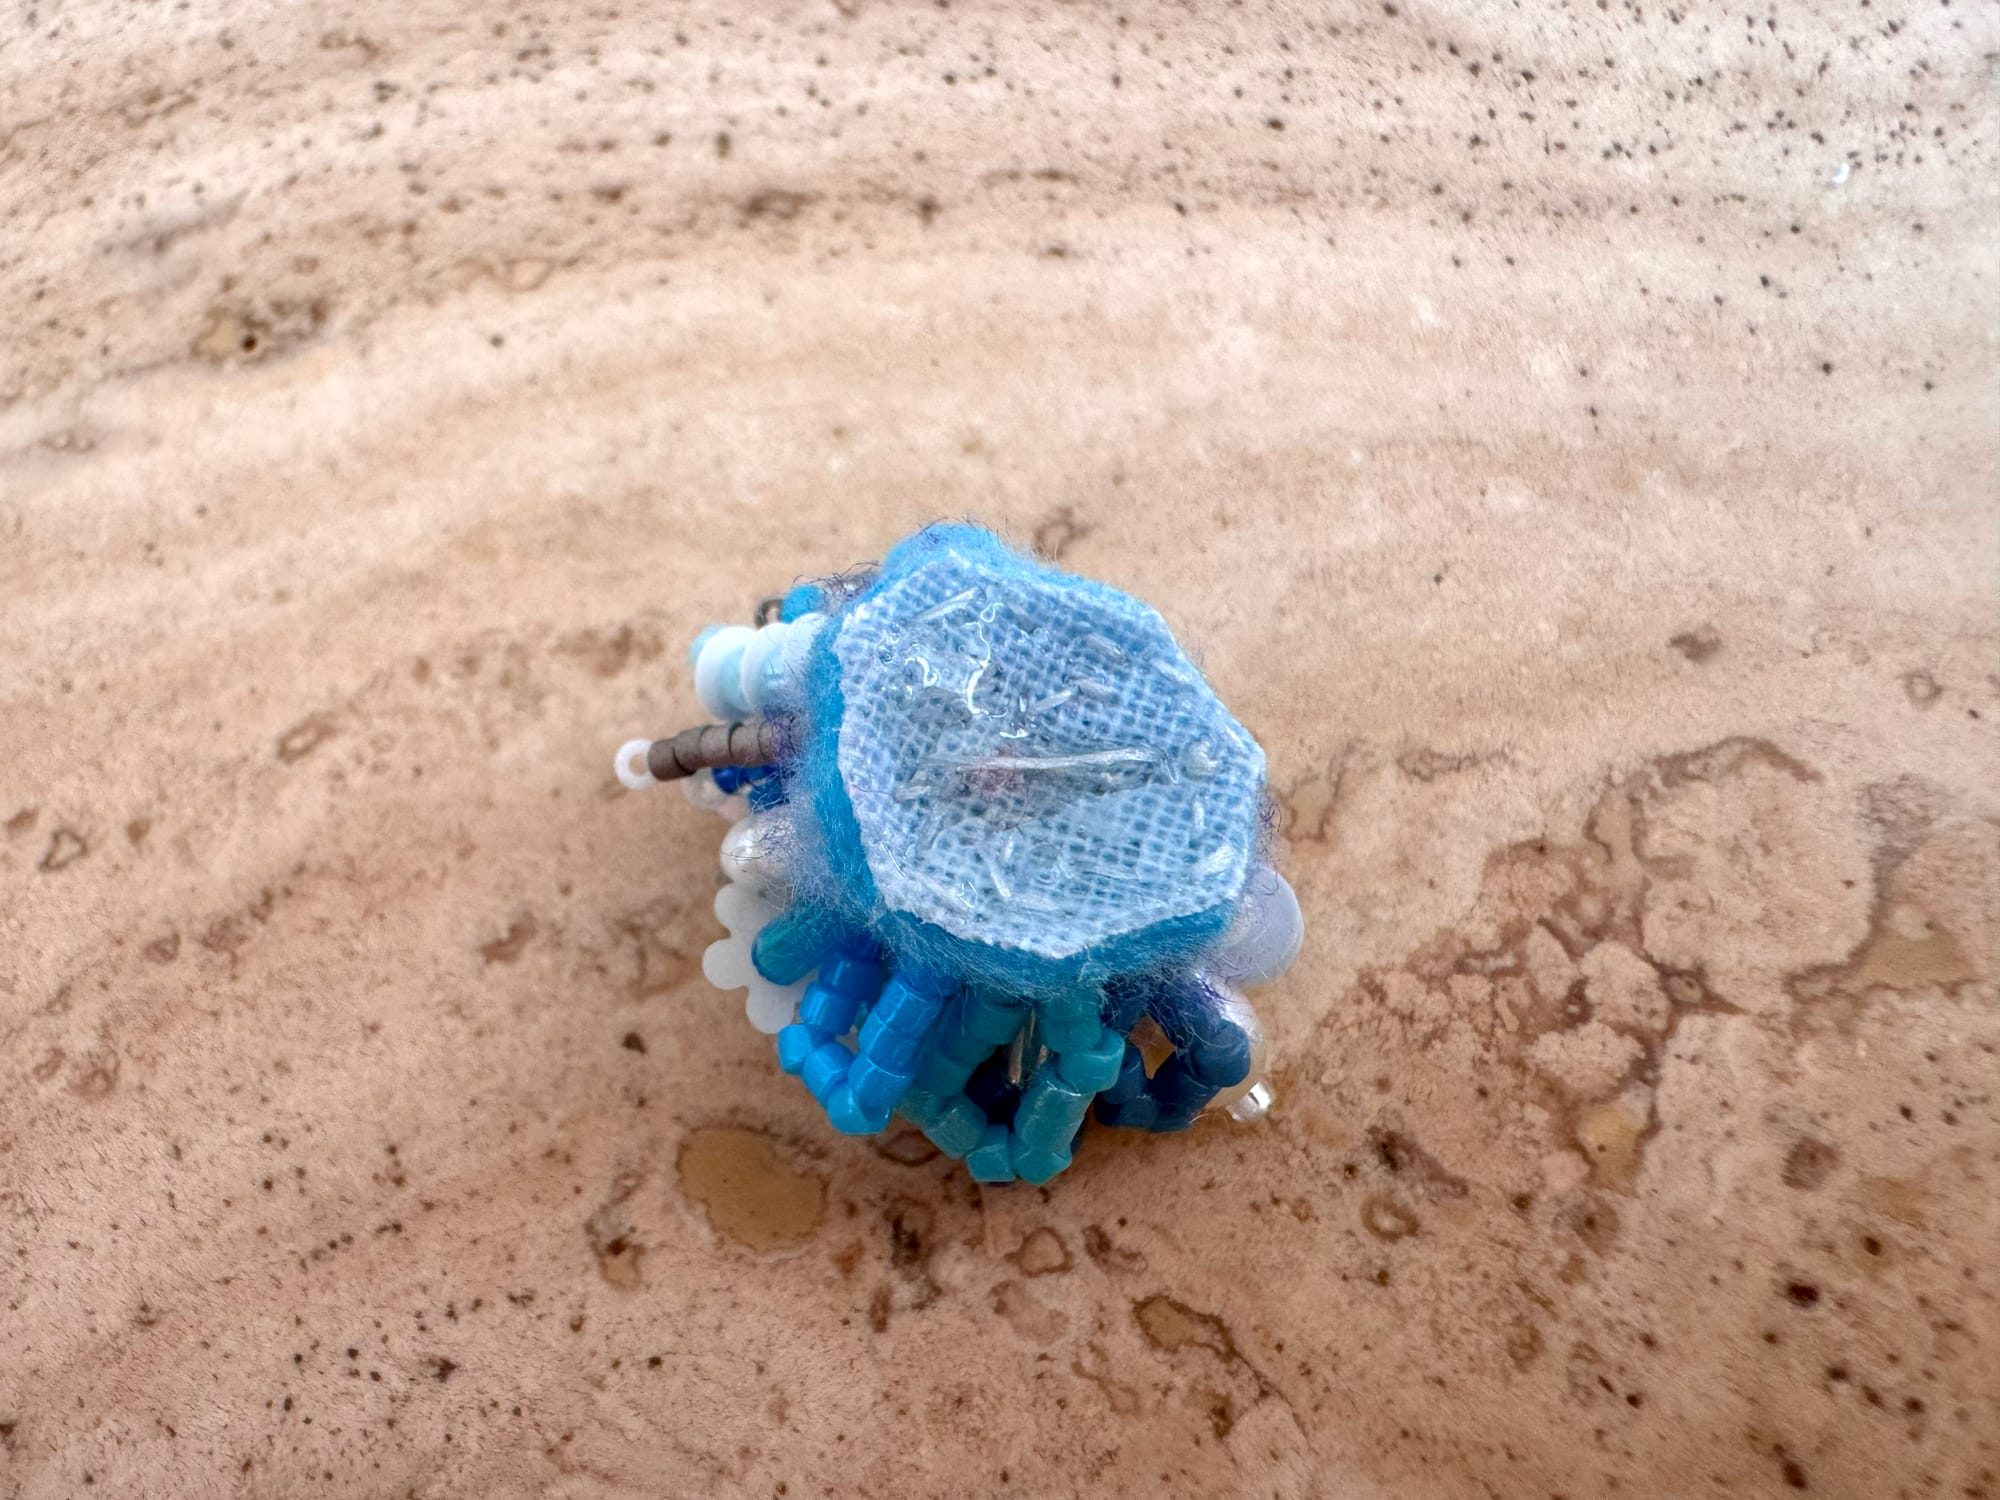
Now I carefully position the beadwork into the ring setting. Jewelry glue dries quickly, but you can still correct the position of your beaded part with the help of an awl or a toothstick. Press carefully at the center of your beadwork and then at the edges inserting the felt into the ring setting.
Now we need to leave the ring to dry completely. Please follow the instructions for your jewelry glue. I usually keep the ring to dry overnight, as I prefer to do my beadwork during daylight. By the time I finish above explained part, a day usually comes to the middle, so I simply leave it until the next morning to finish crafting.
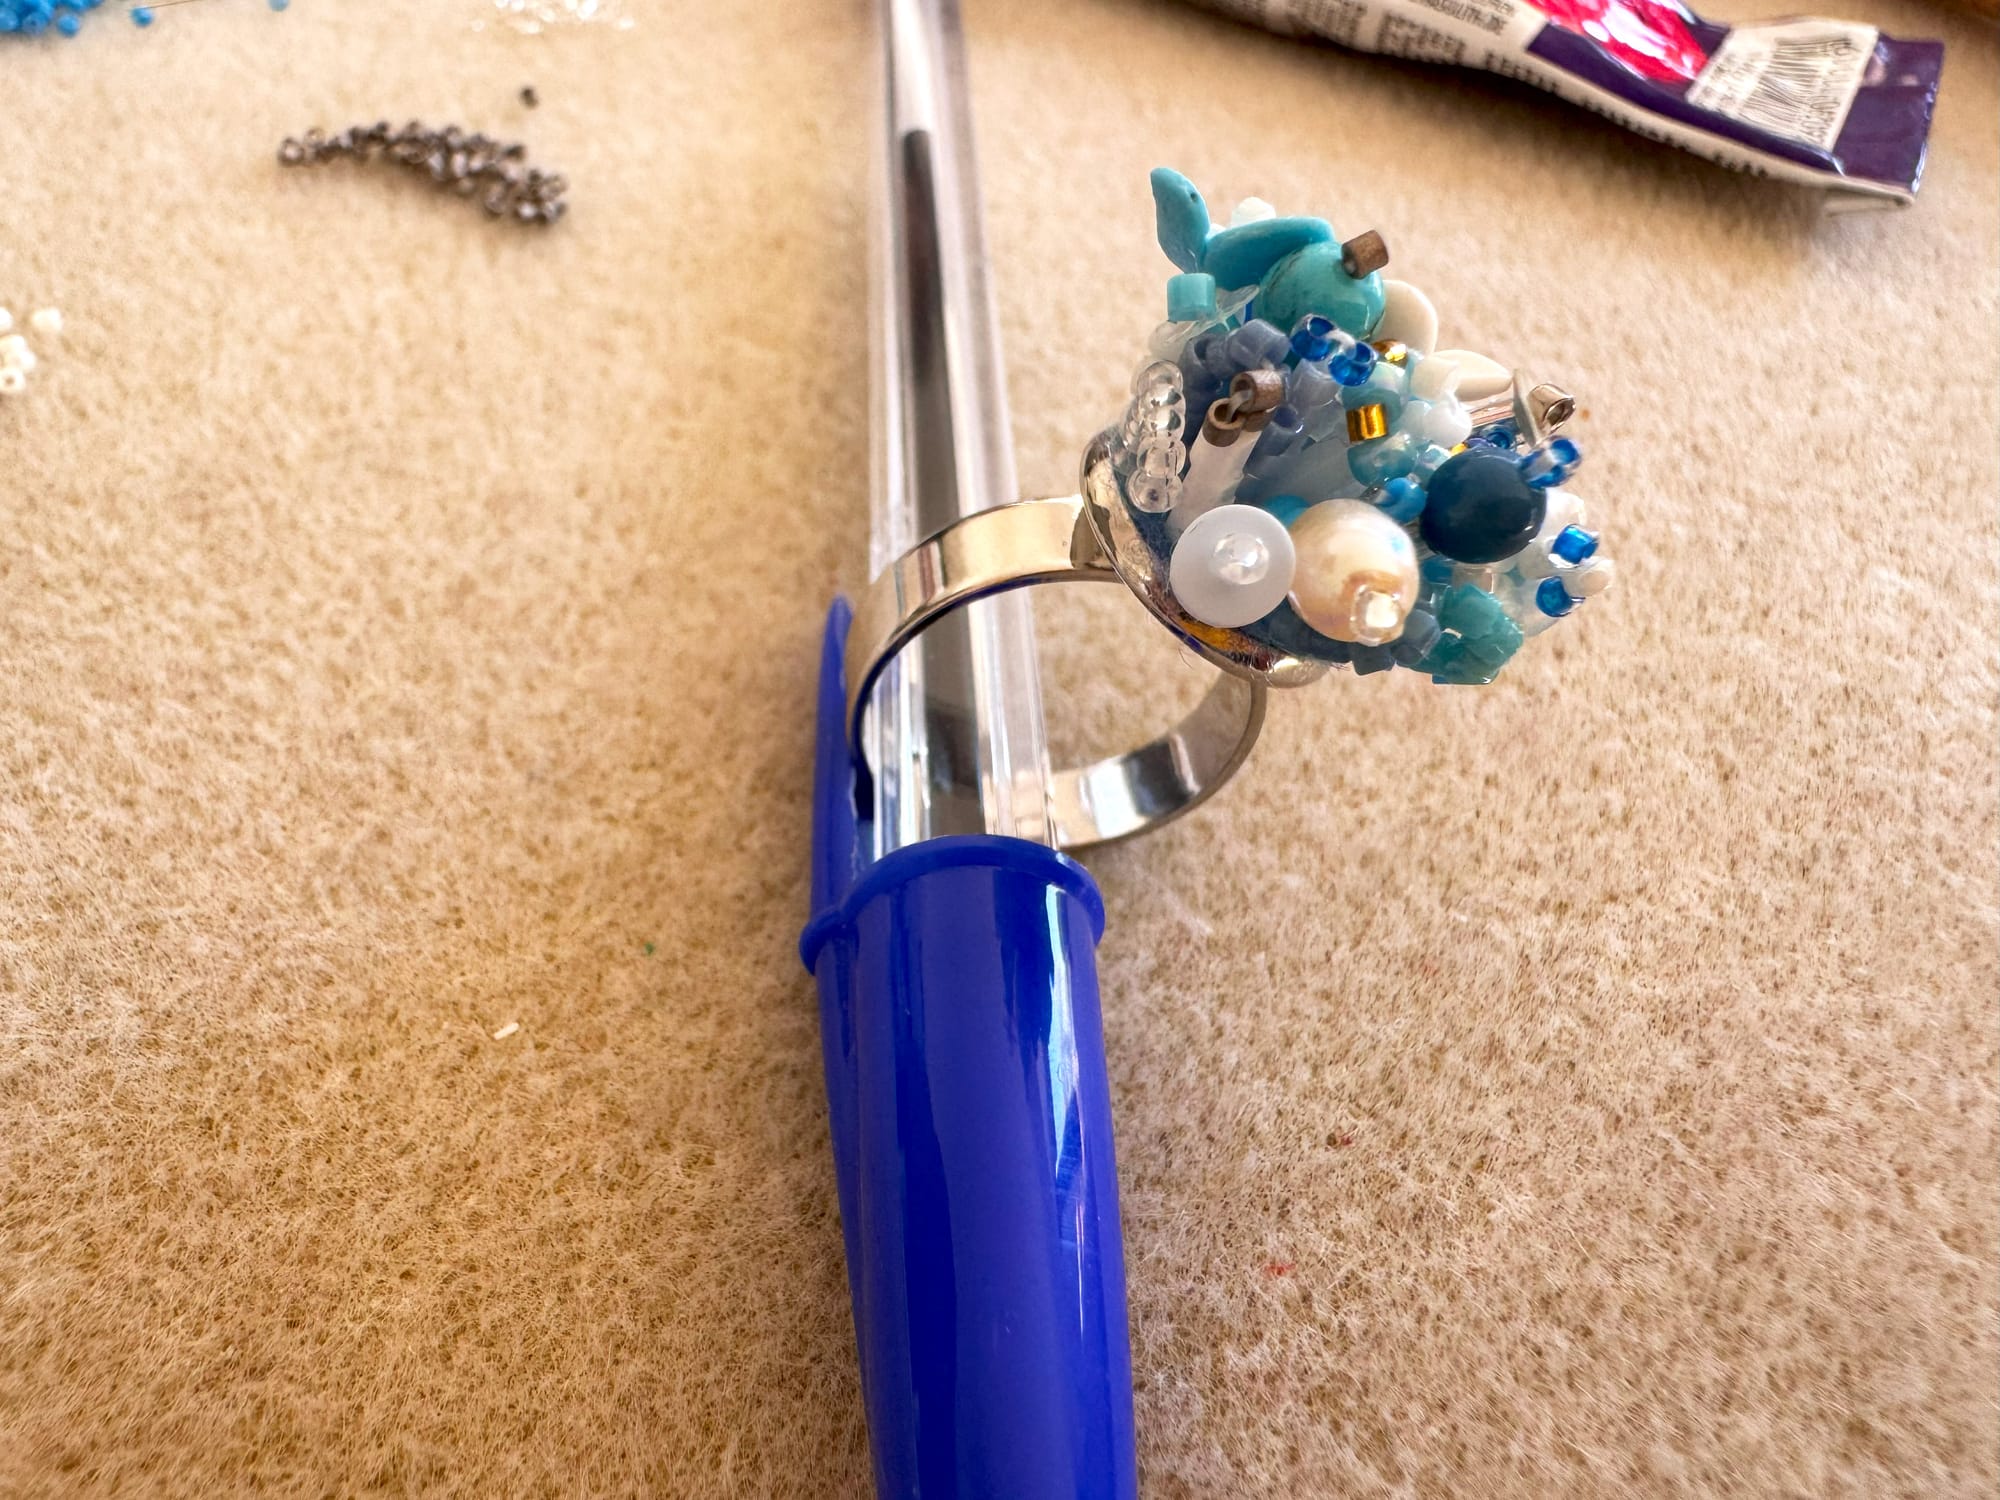
Hint: to place your ring to dry in the correct vertical position you can use a regular pen. Simply slide your ring under the pen's cup and leave it.
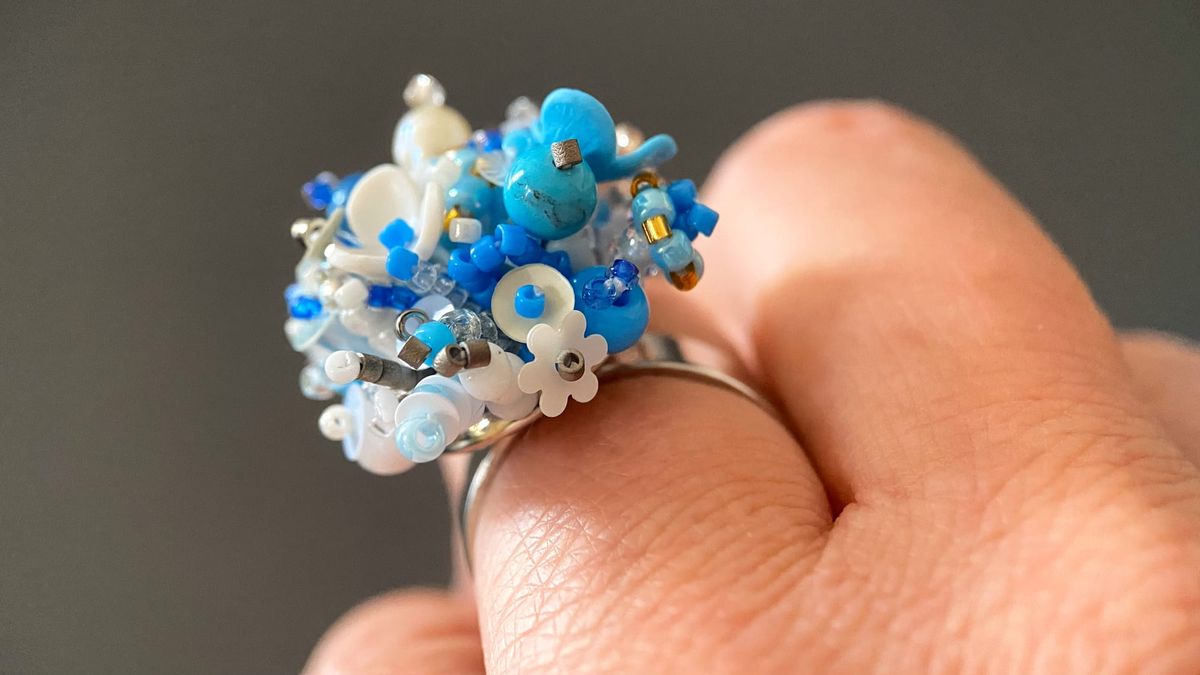
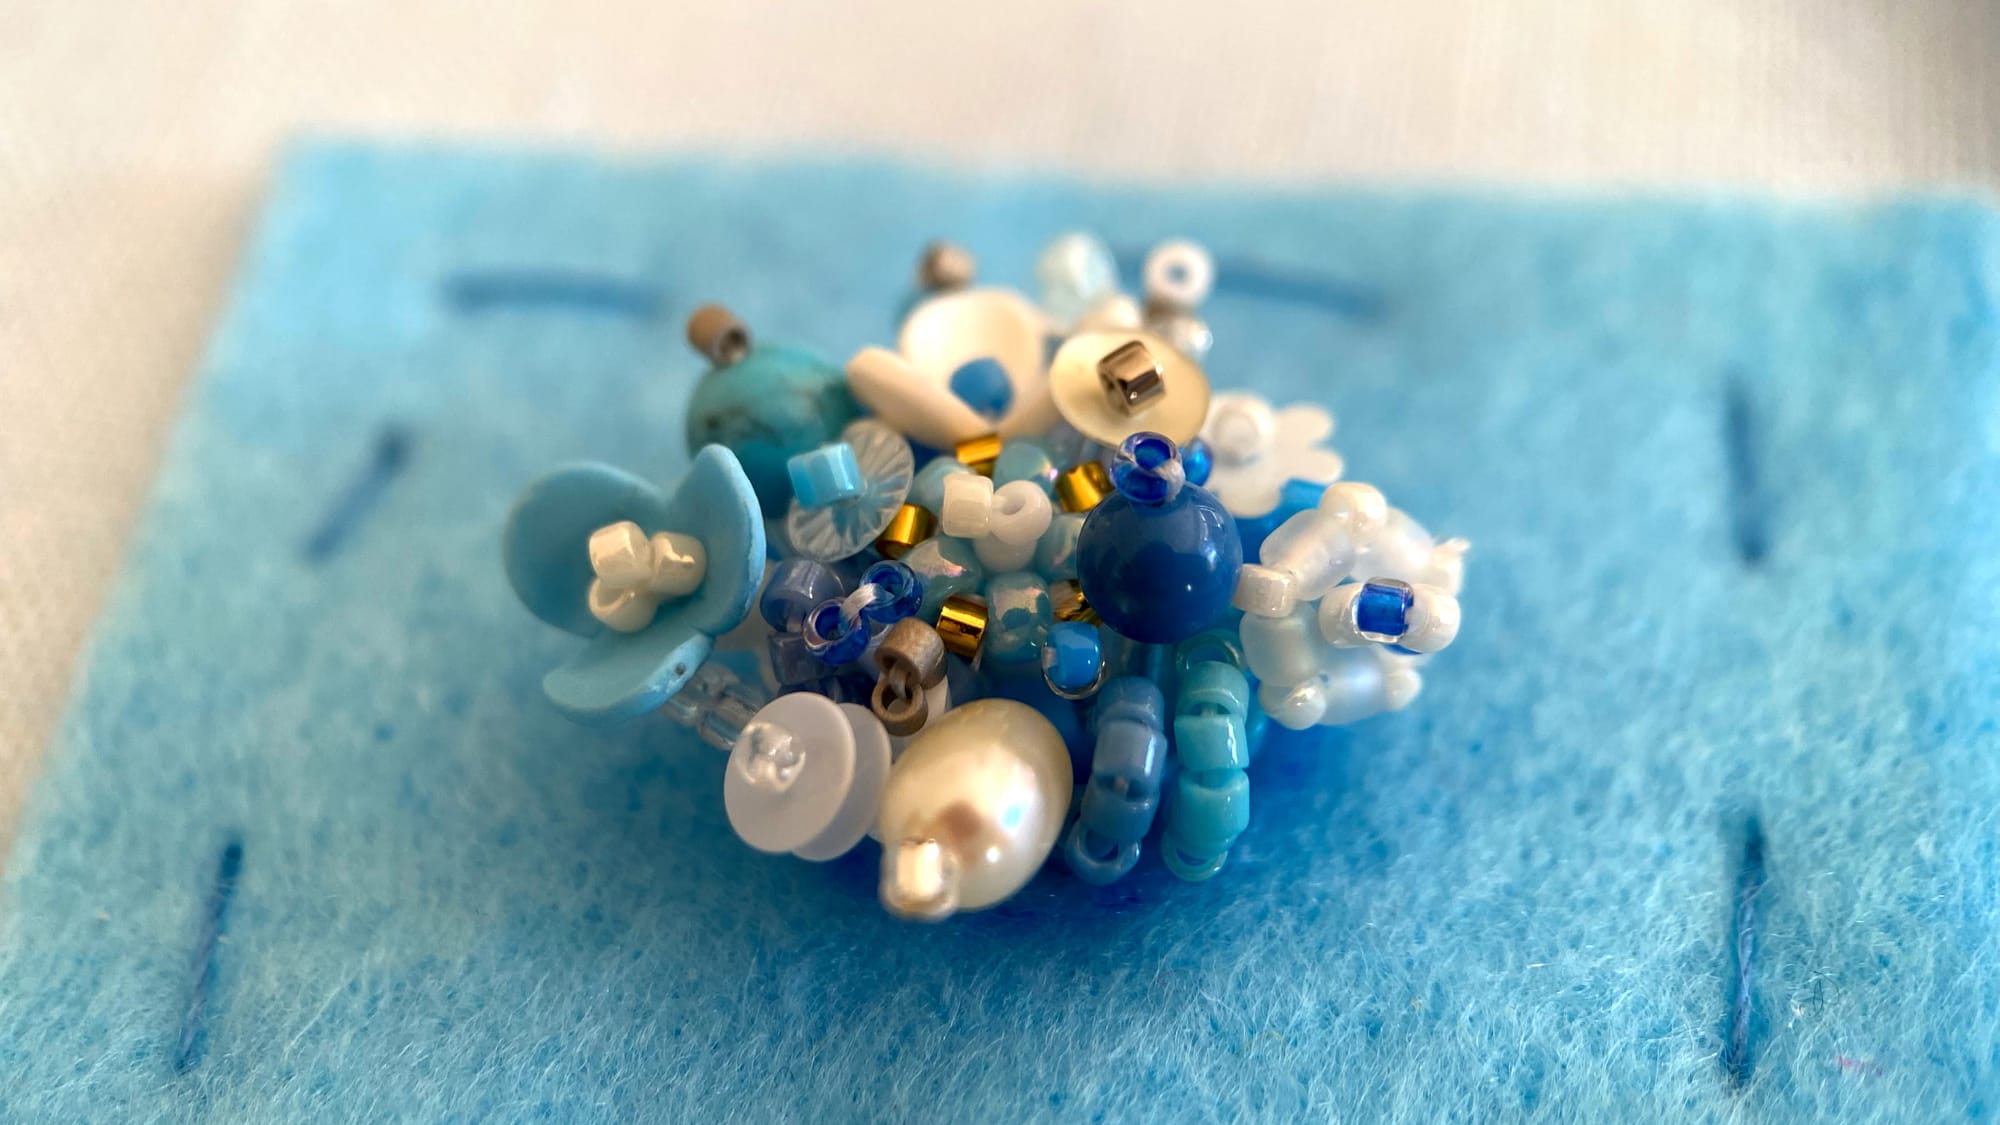
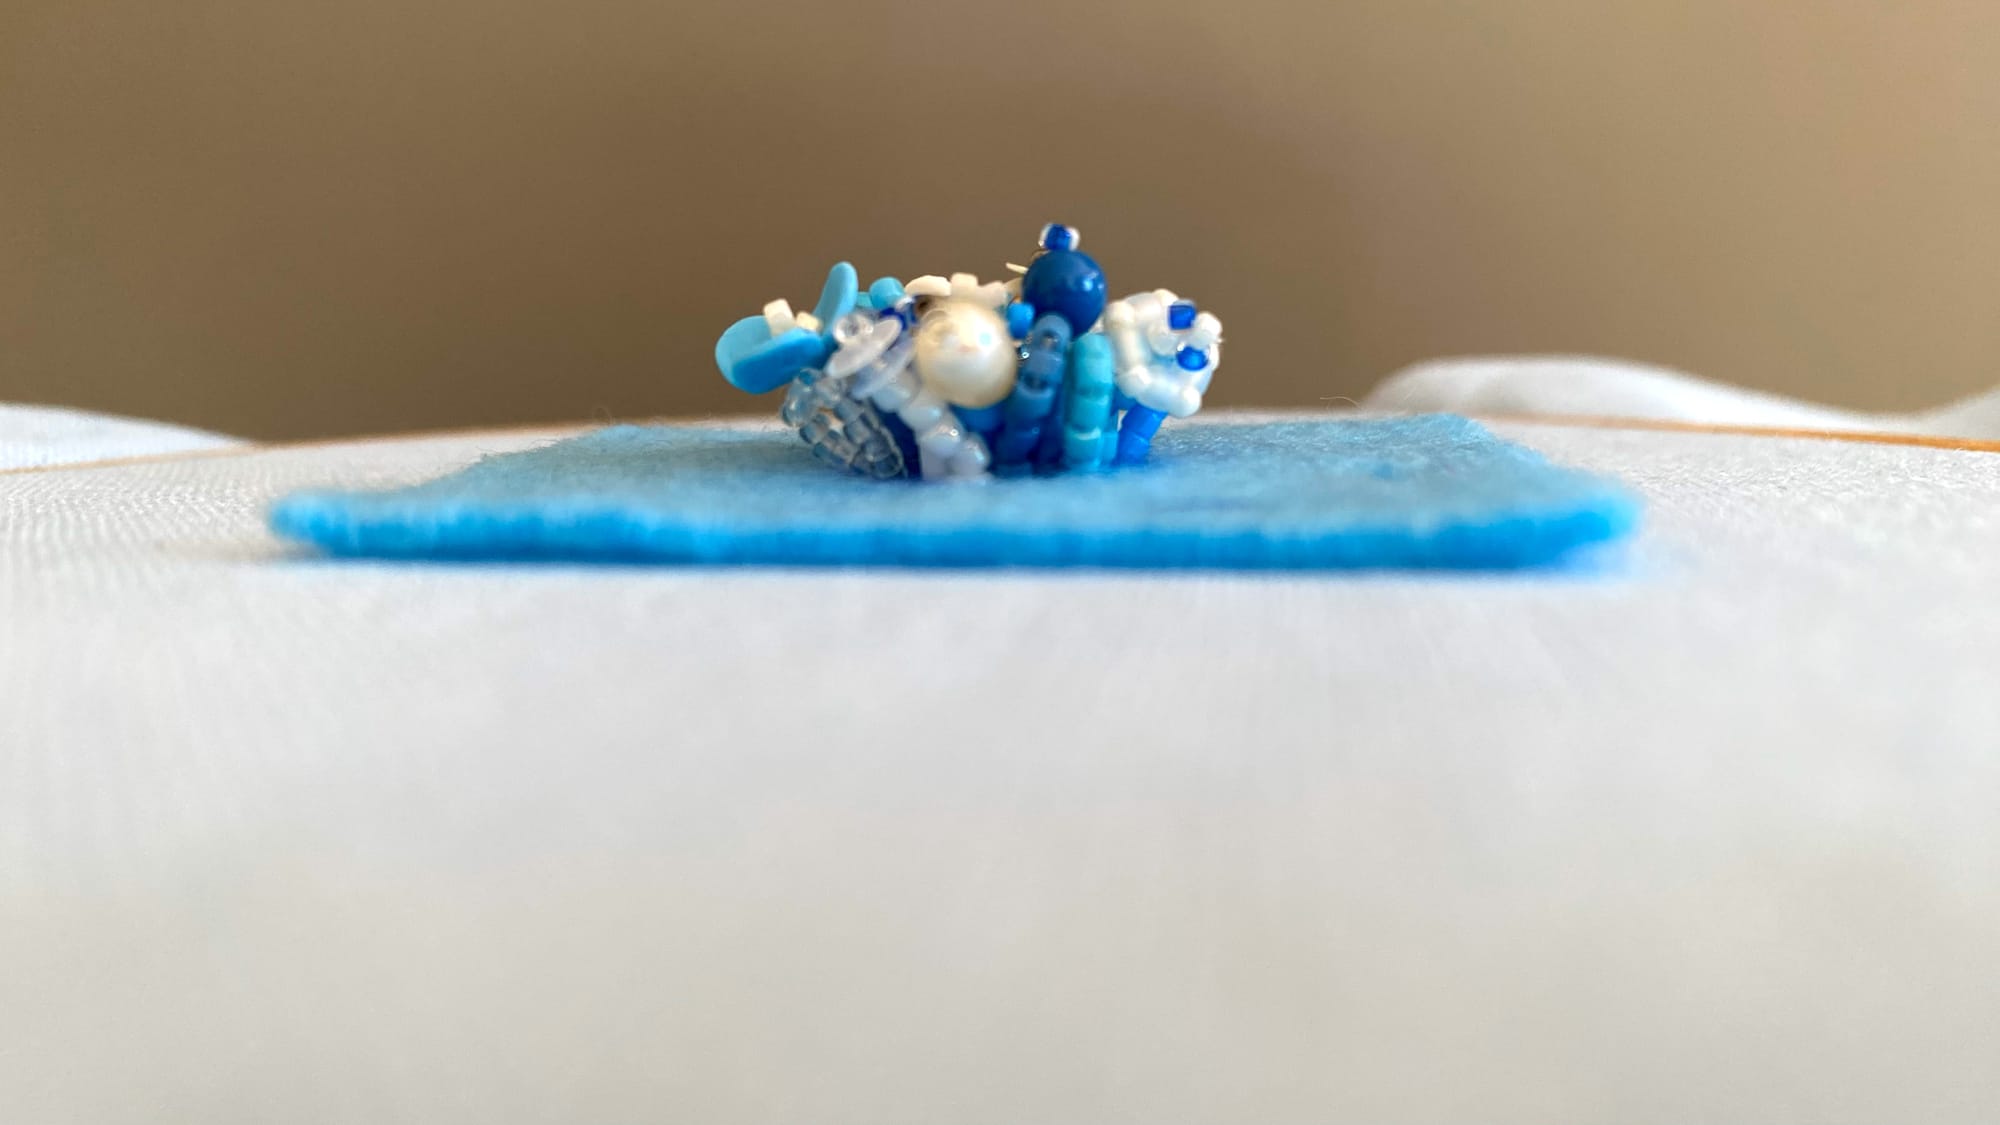
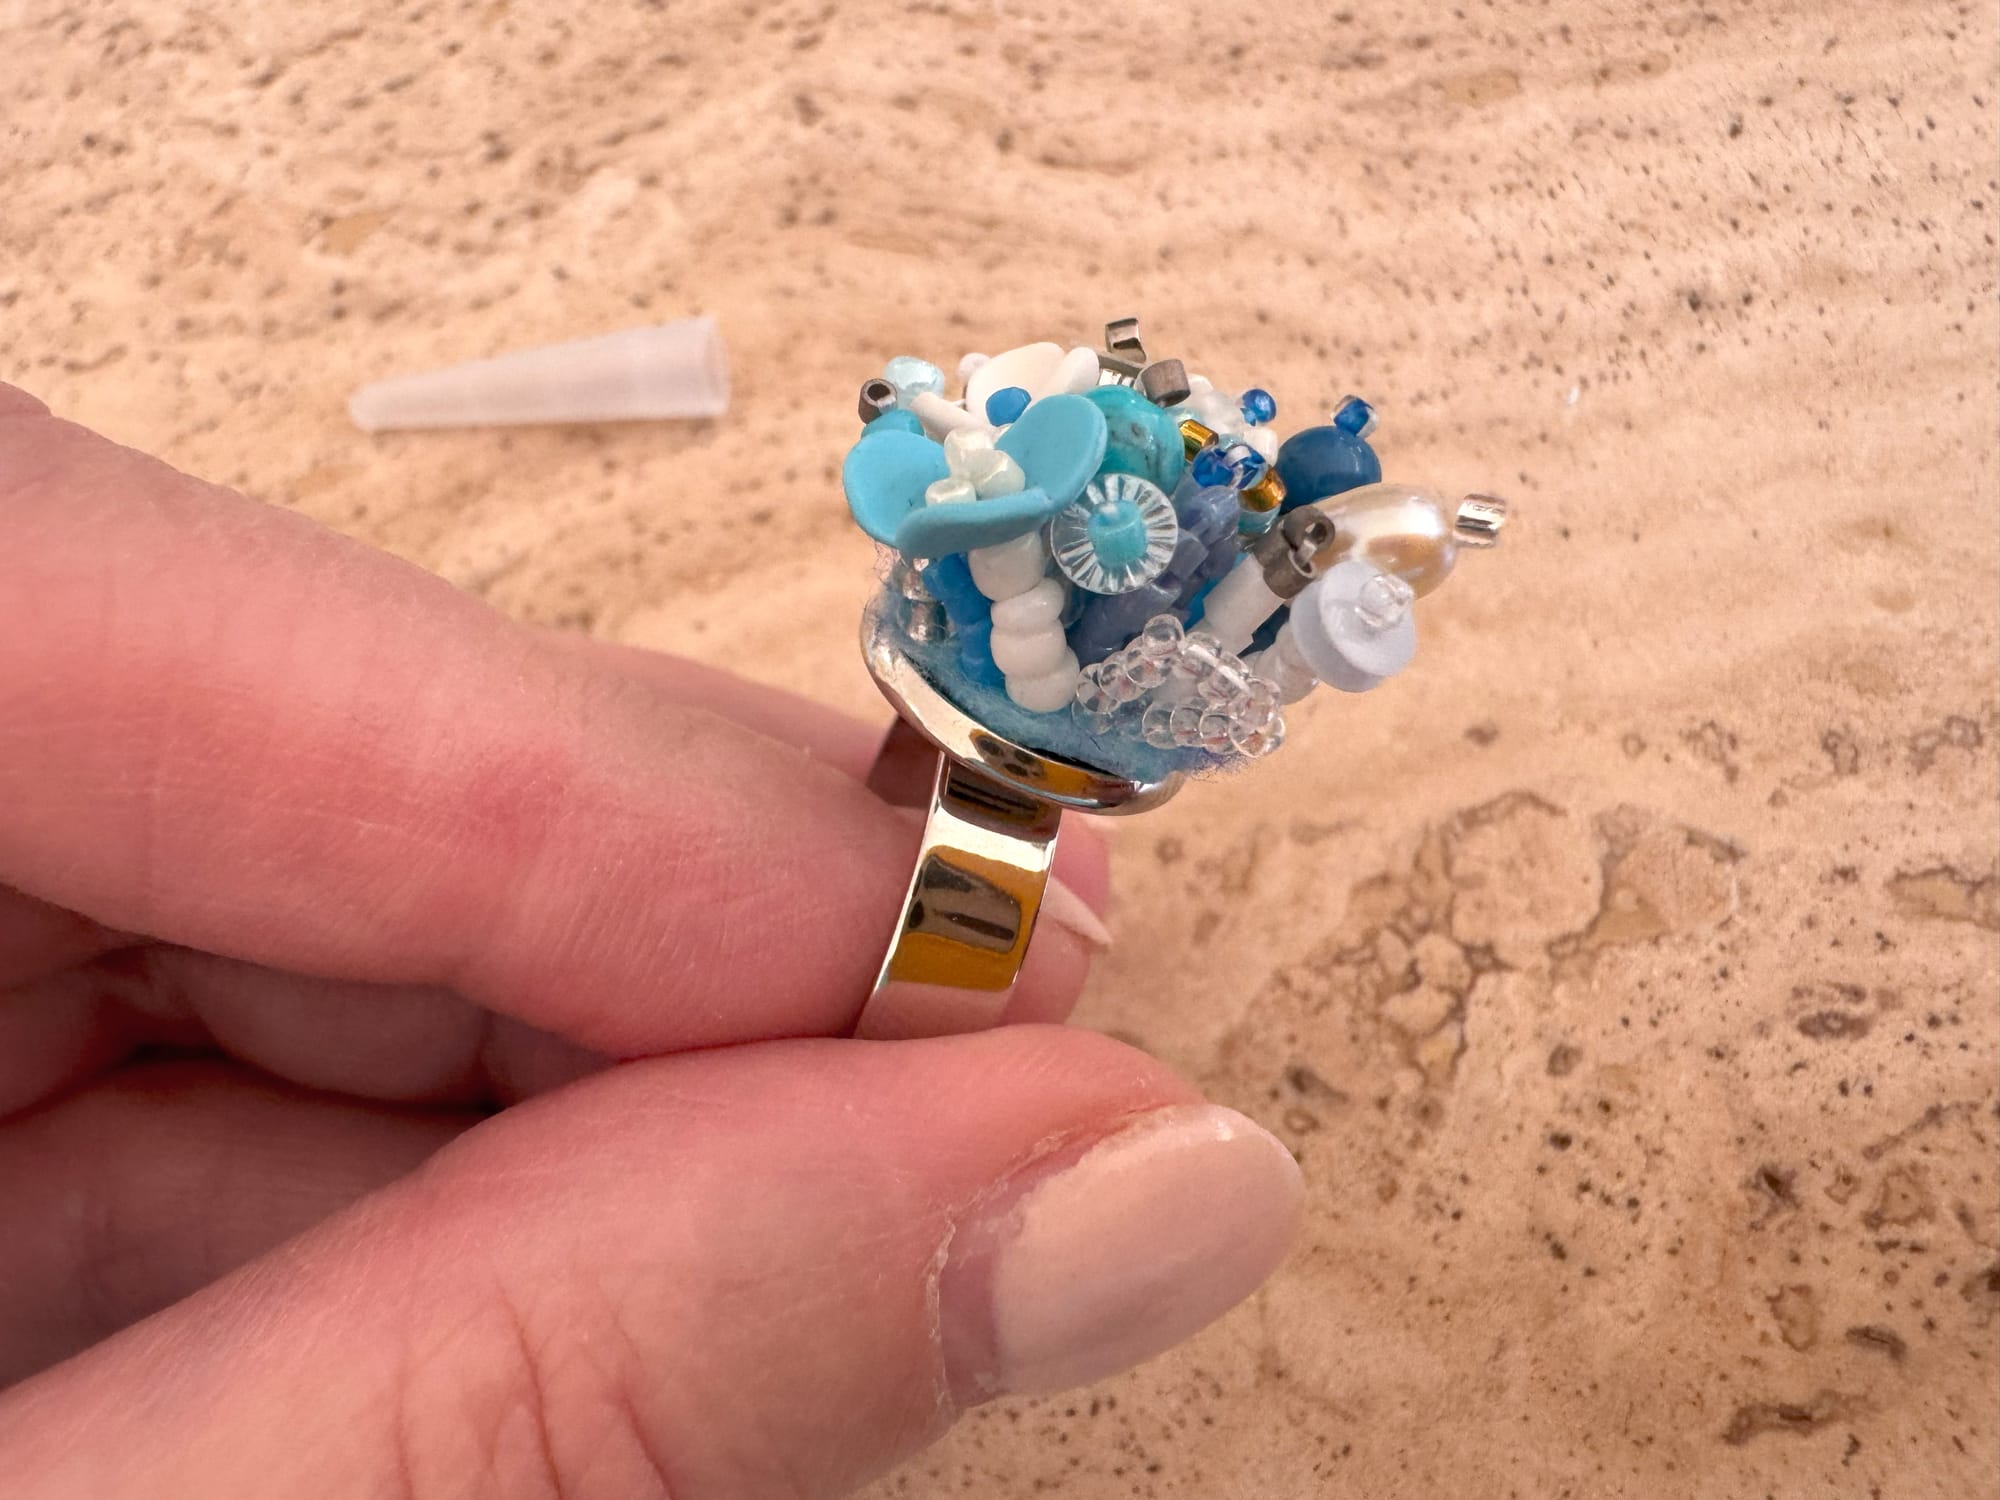
When your glue is completely dry, we can move to the next stage of our crafting. As you can see in the photo below, to look beautiful and rich the ring must have enough volume. On the left is the ring we are crafting right now and on the right is the ring which I made some time ago. You can explore this ring by watching the product video on our YouTube channel.
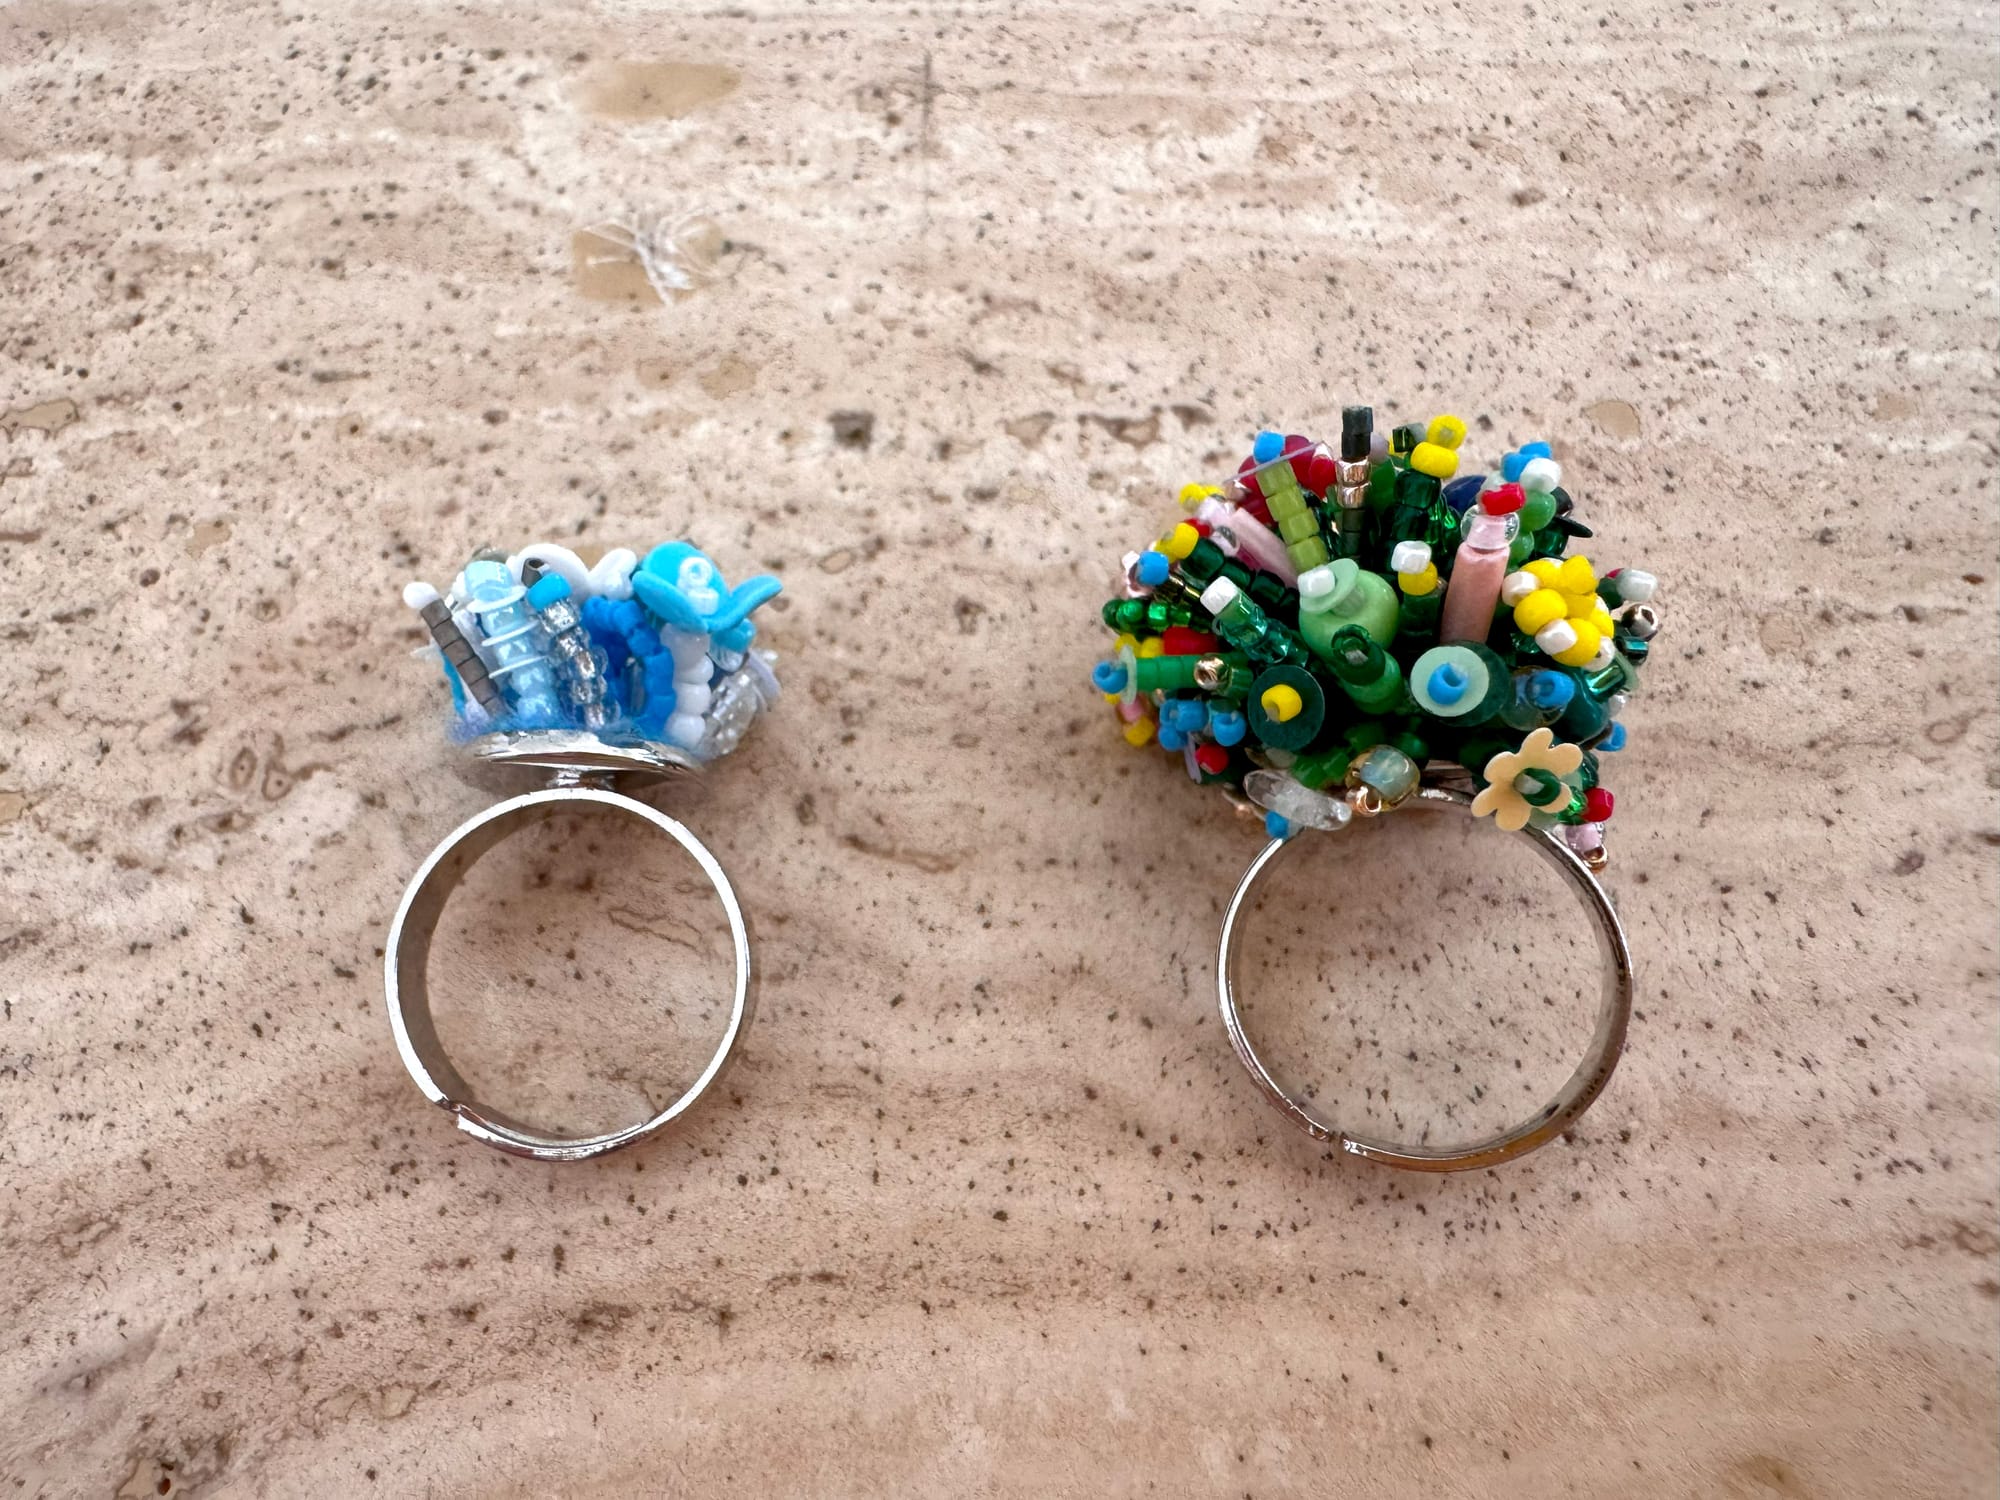
It is obvious that our current ring is missing volume, so let's add it!
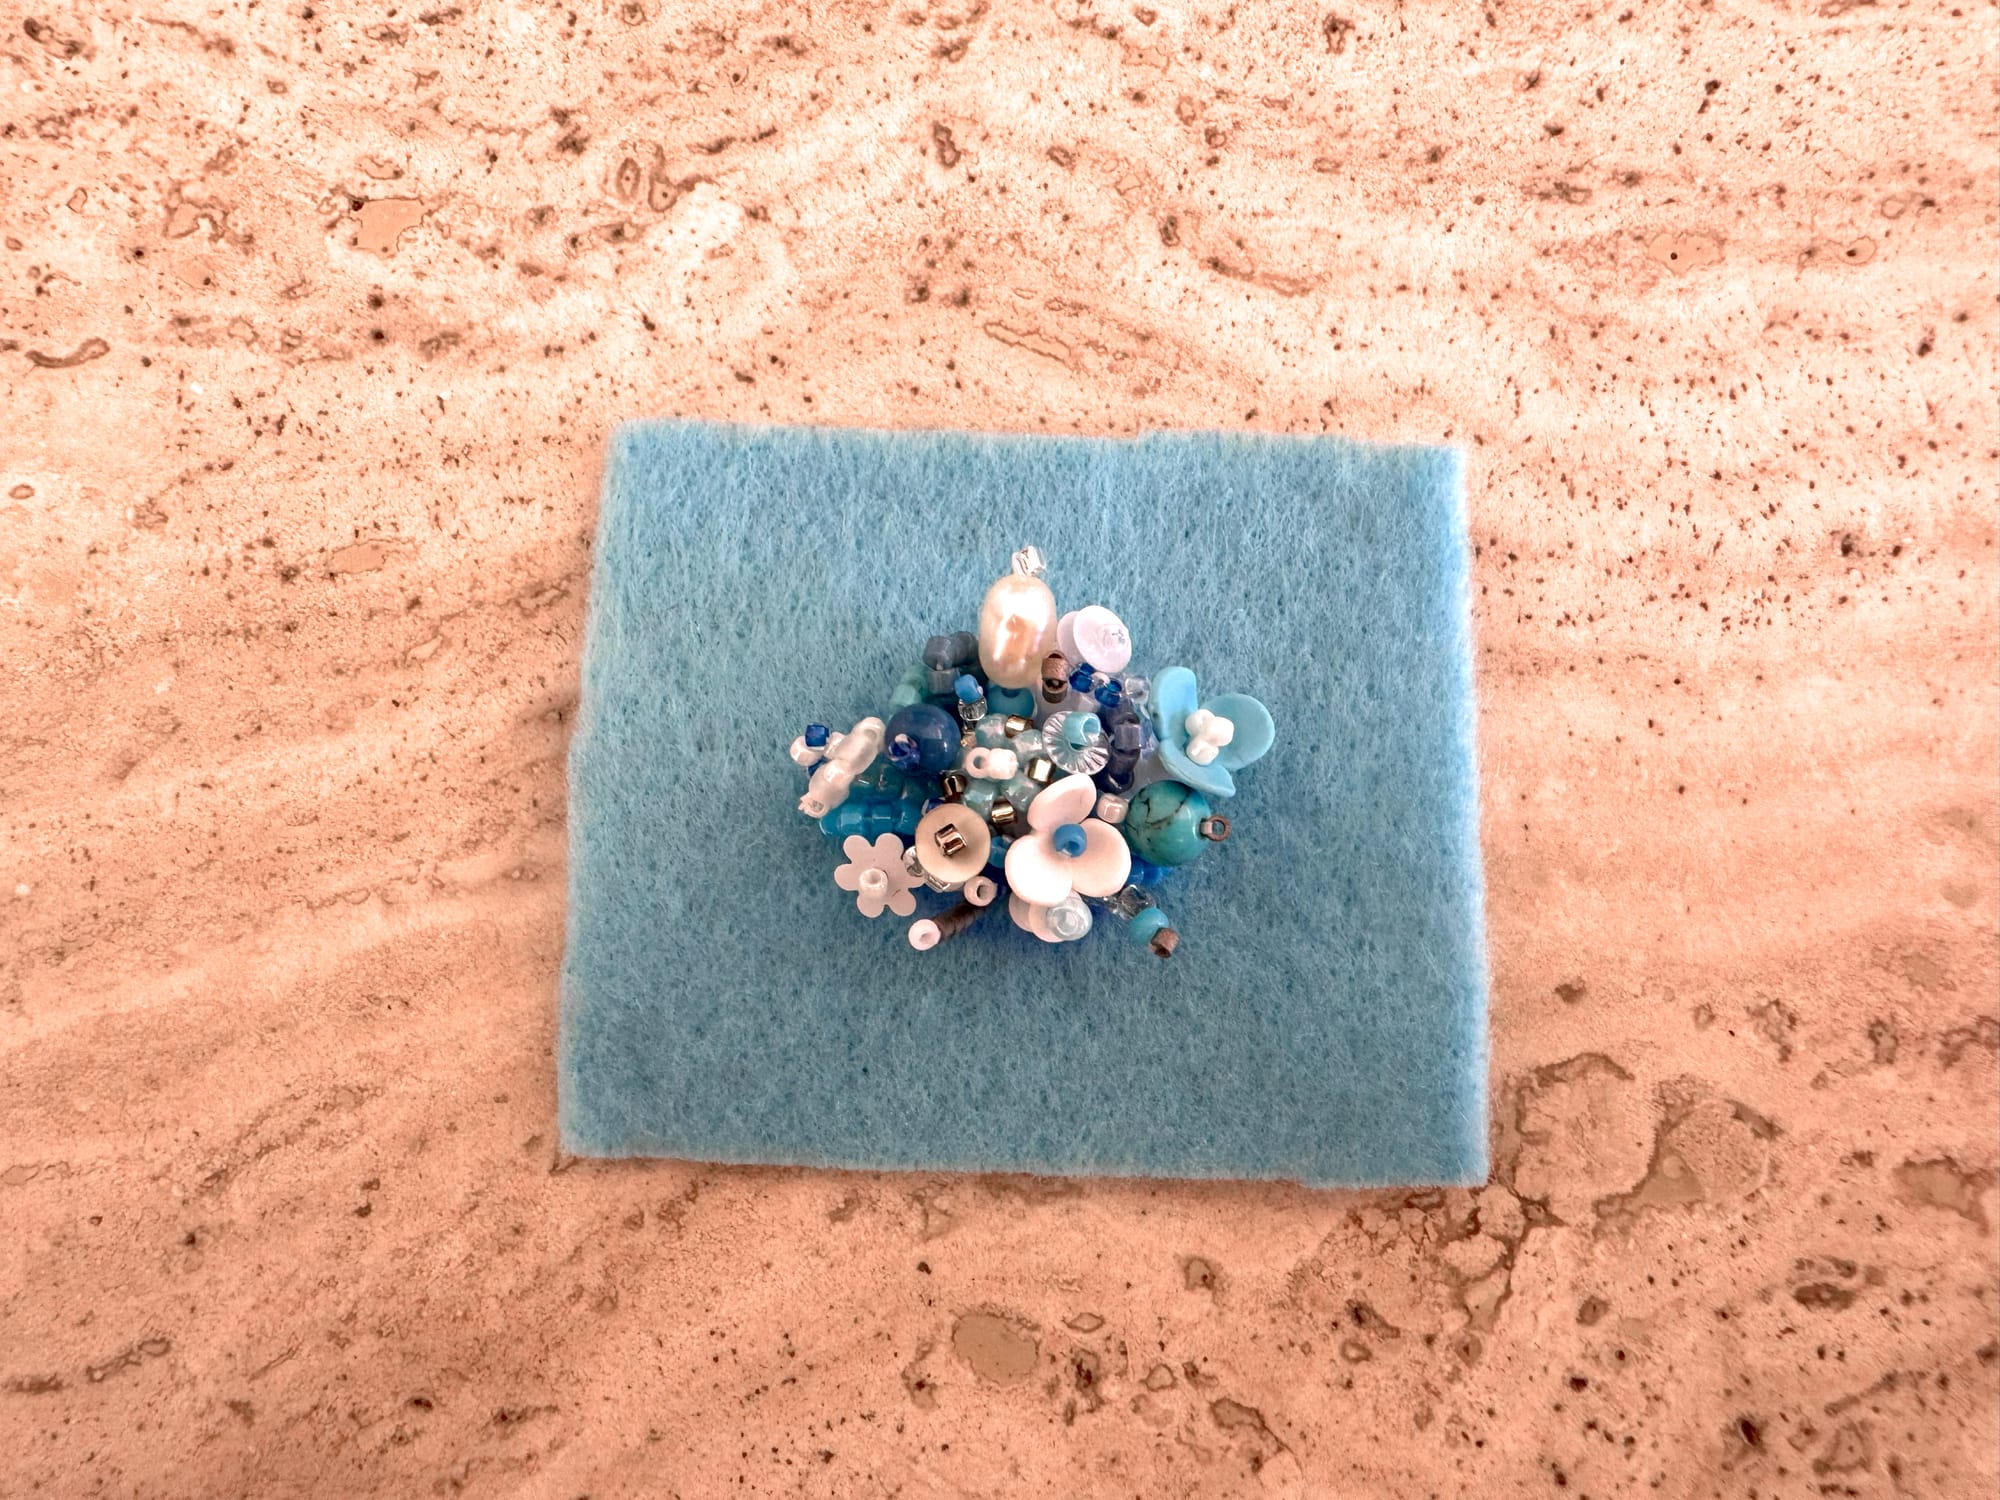
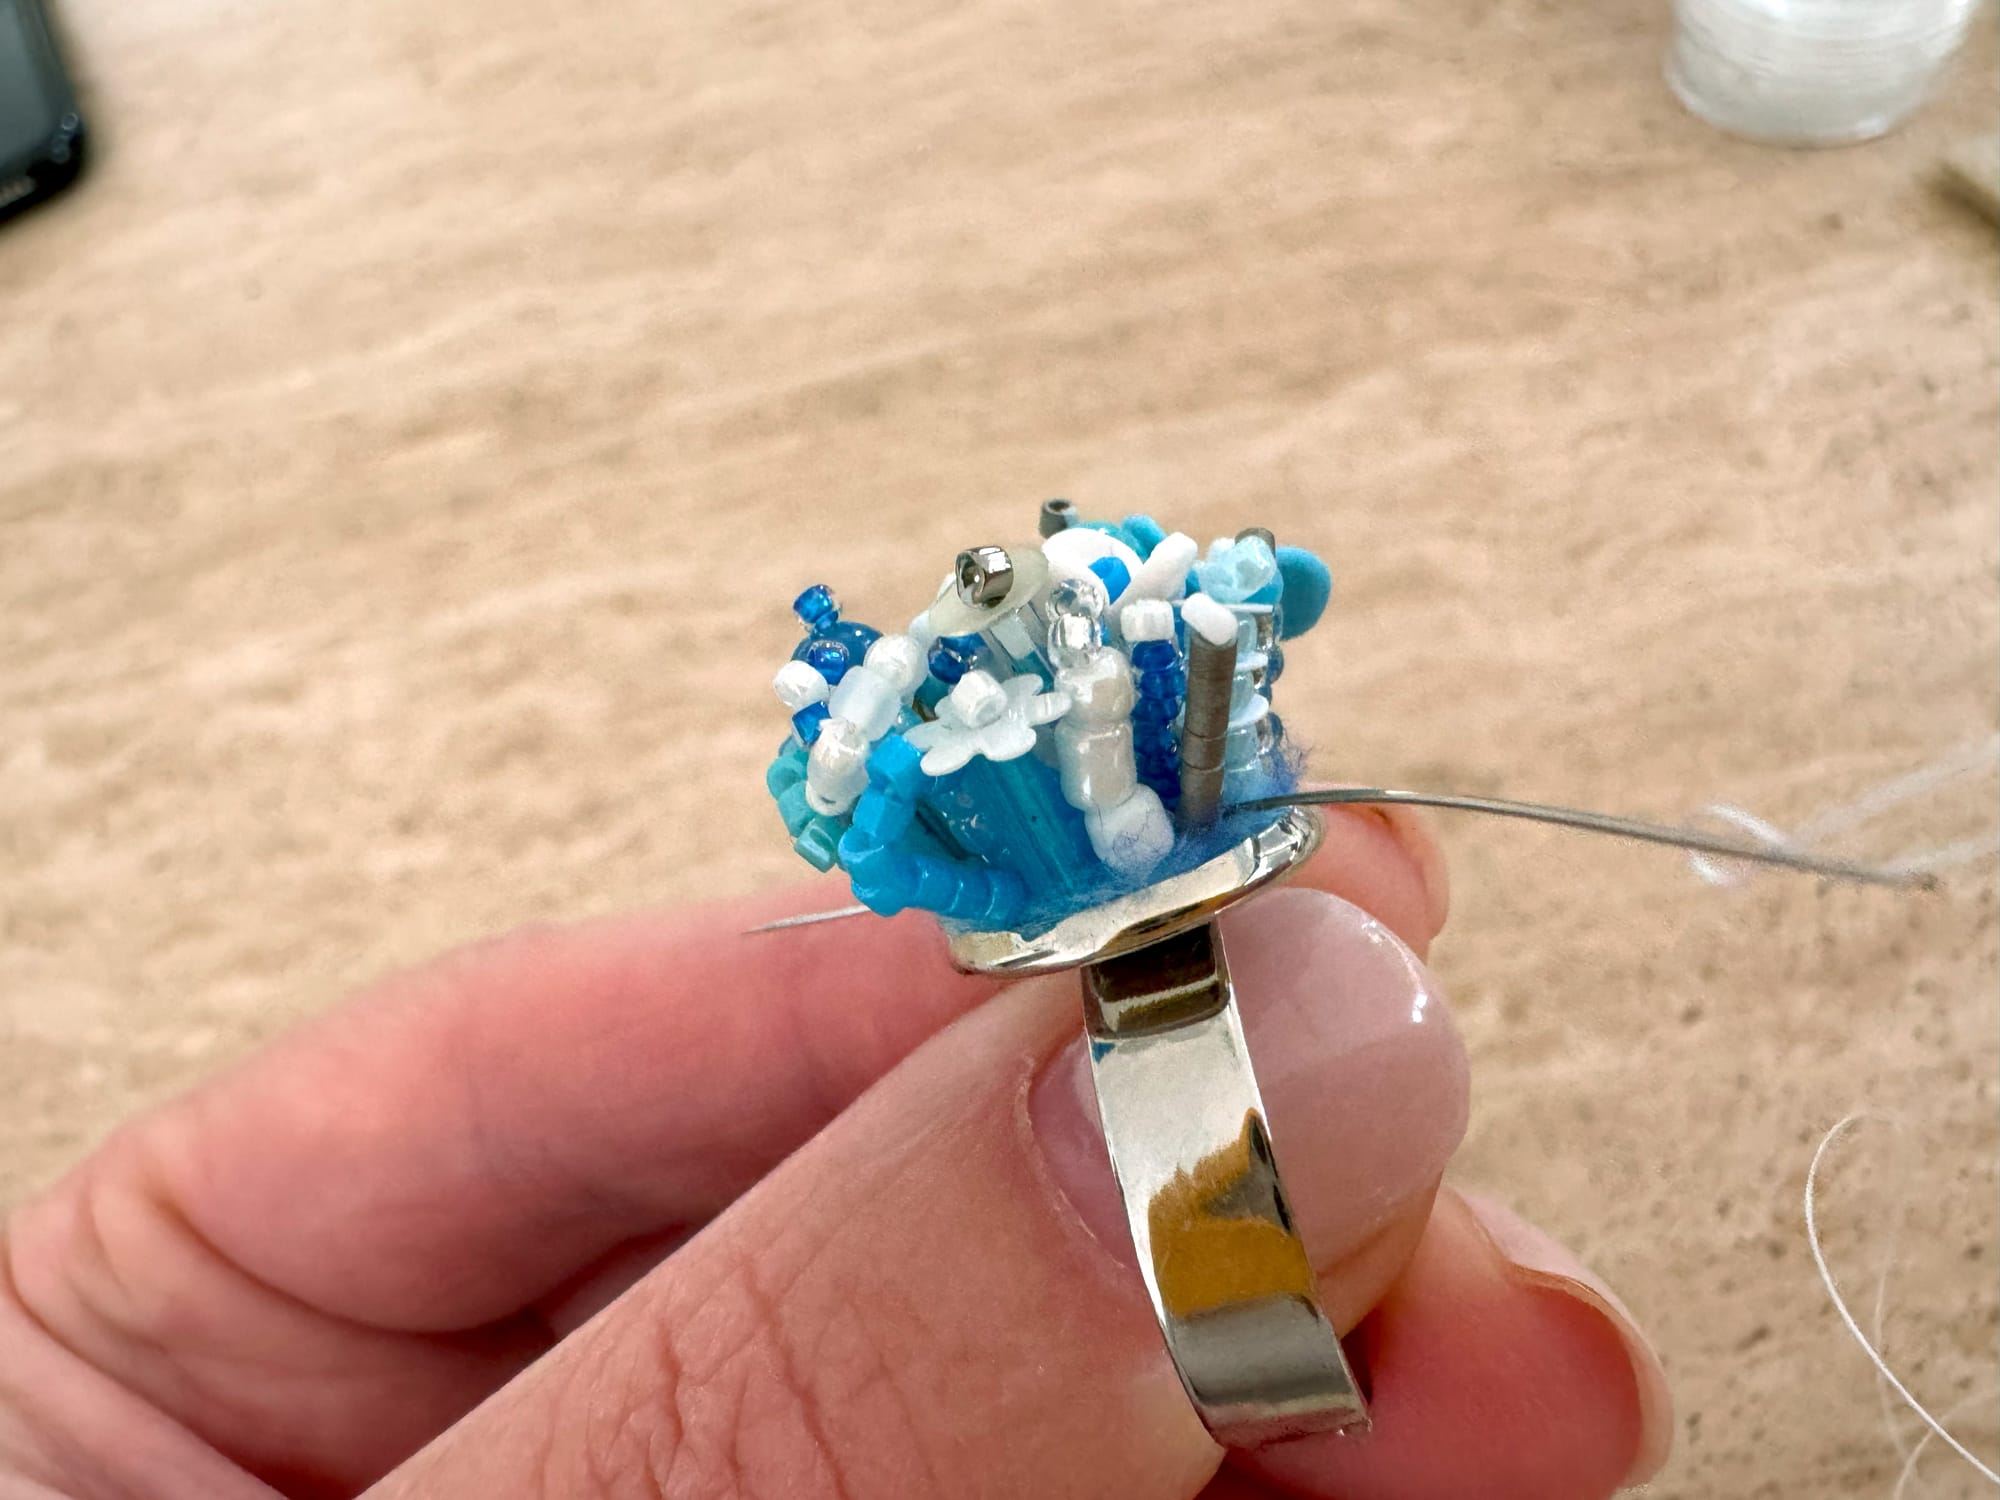
As you can see in the photo below, we have a lot of empty space around the ring setting base. We can also see felt. To finish the ring we need to fill in all the space close to the ring base and hide as much felt as possible under more beaded elements.

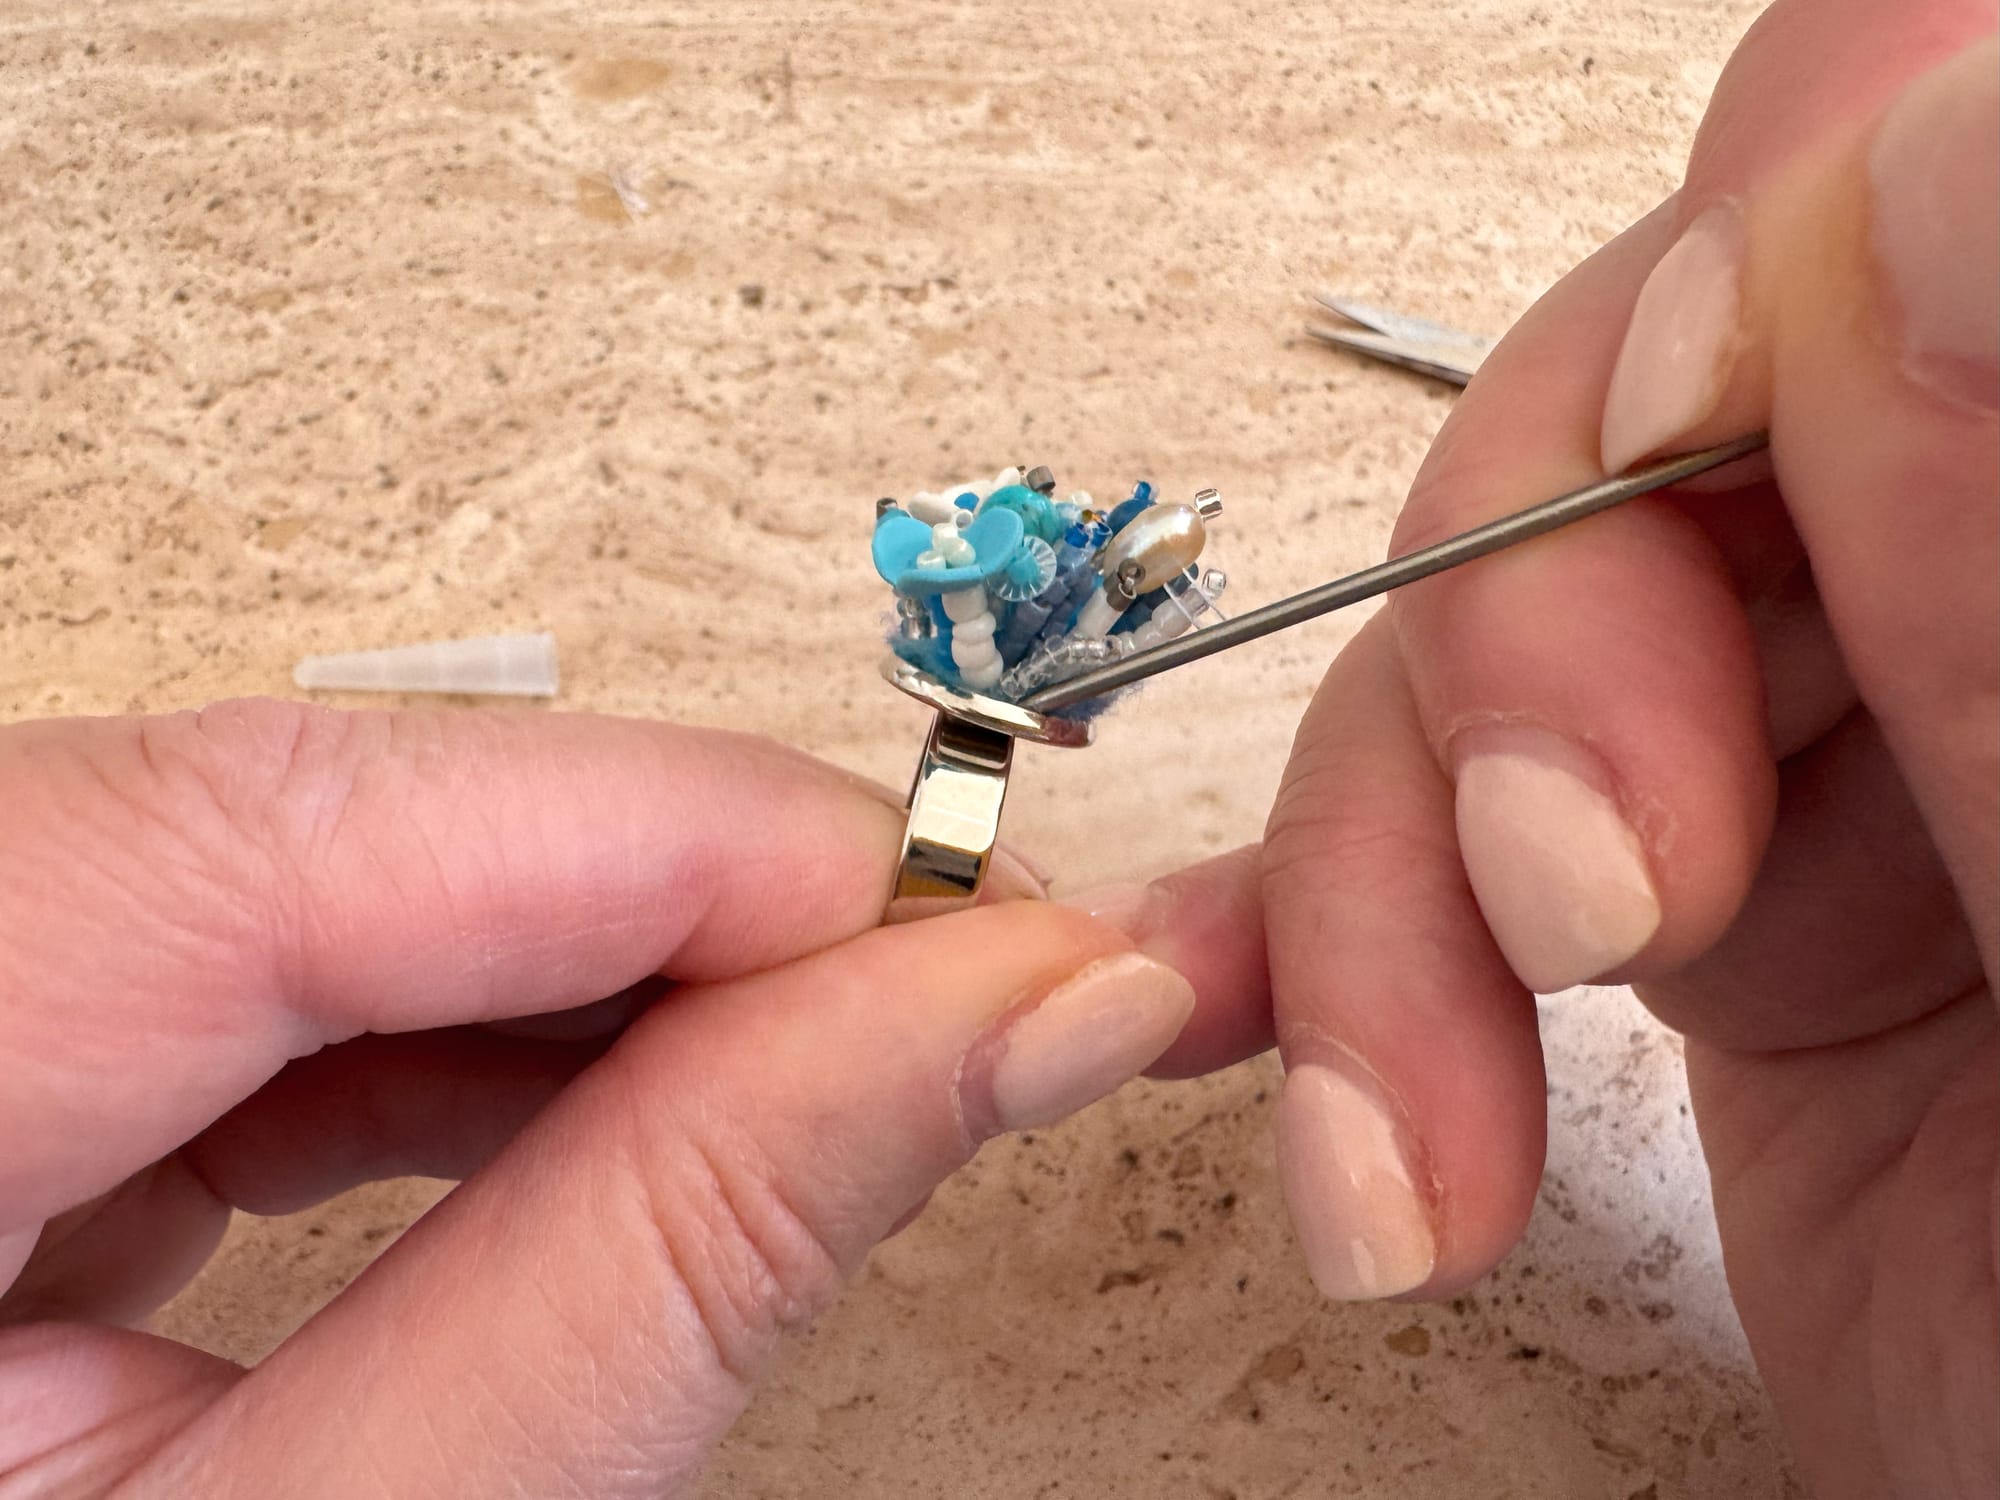
Take another 1 meter of the beading thread, make a security knot at the end,nd and move your needle through the center of your ring, existing as close to the edge and as close to the ring setting as you can. By the way, since now you are holding a ring with your fingers and you move the needle through many elements, you can use your normal working curved needle to save your straight needle for the next project.
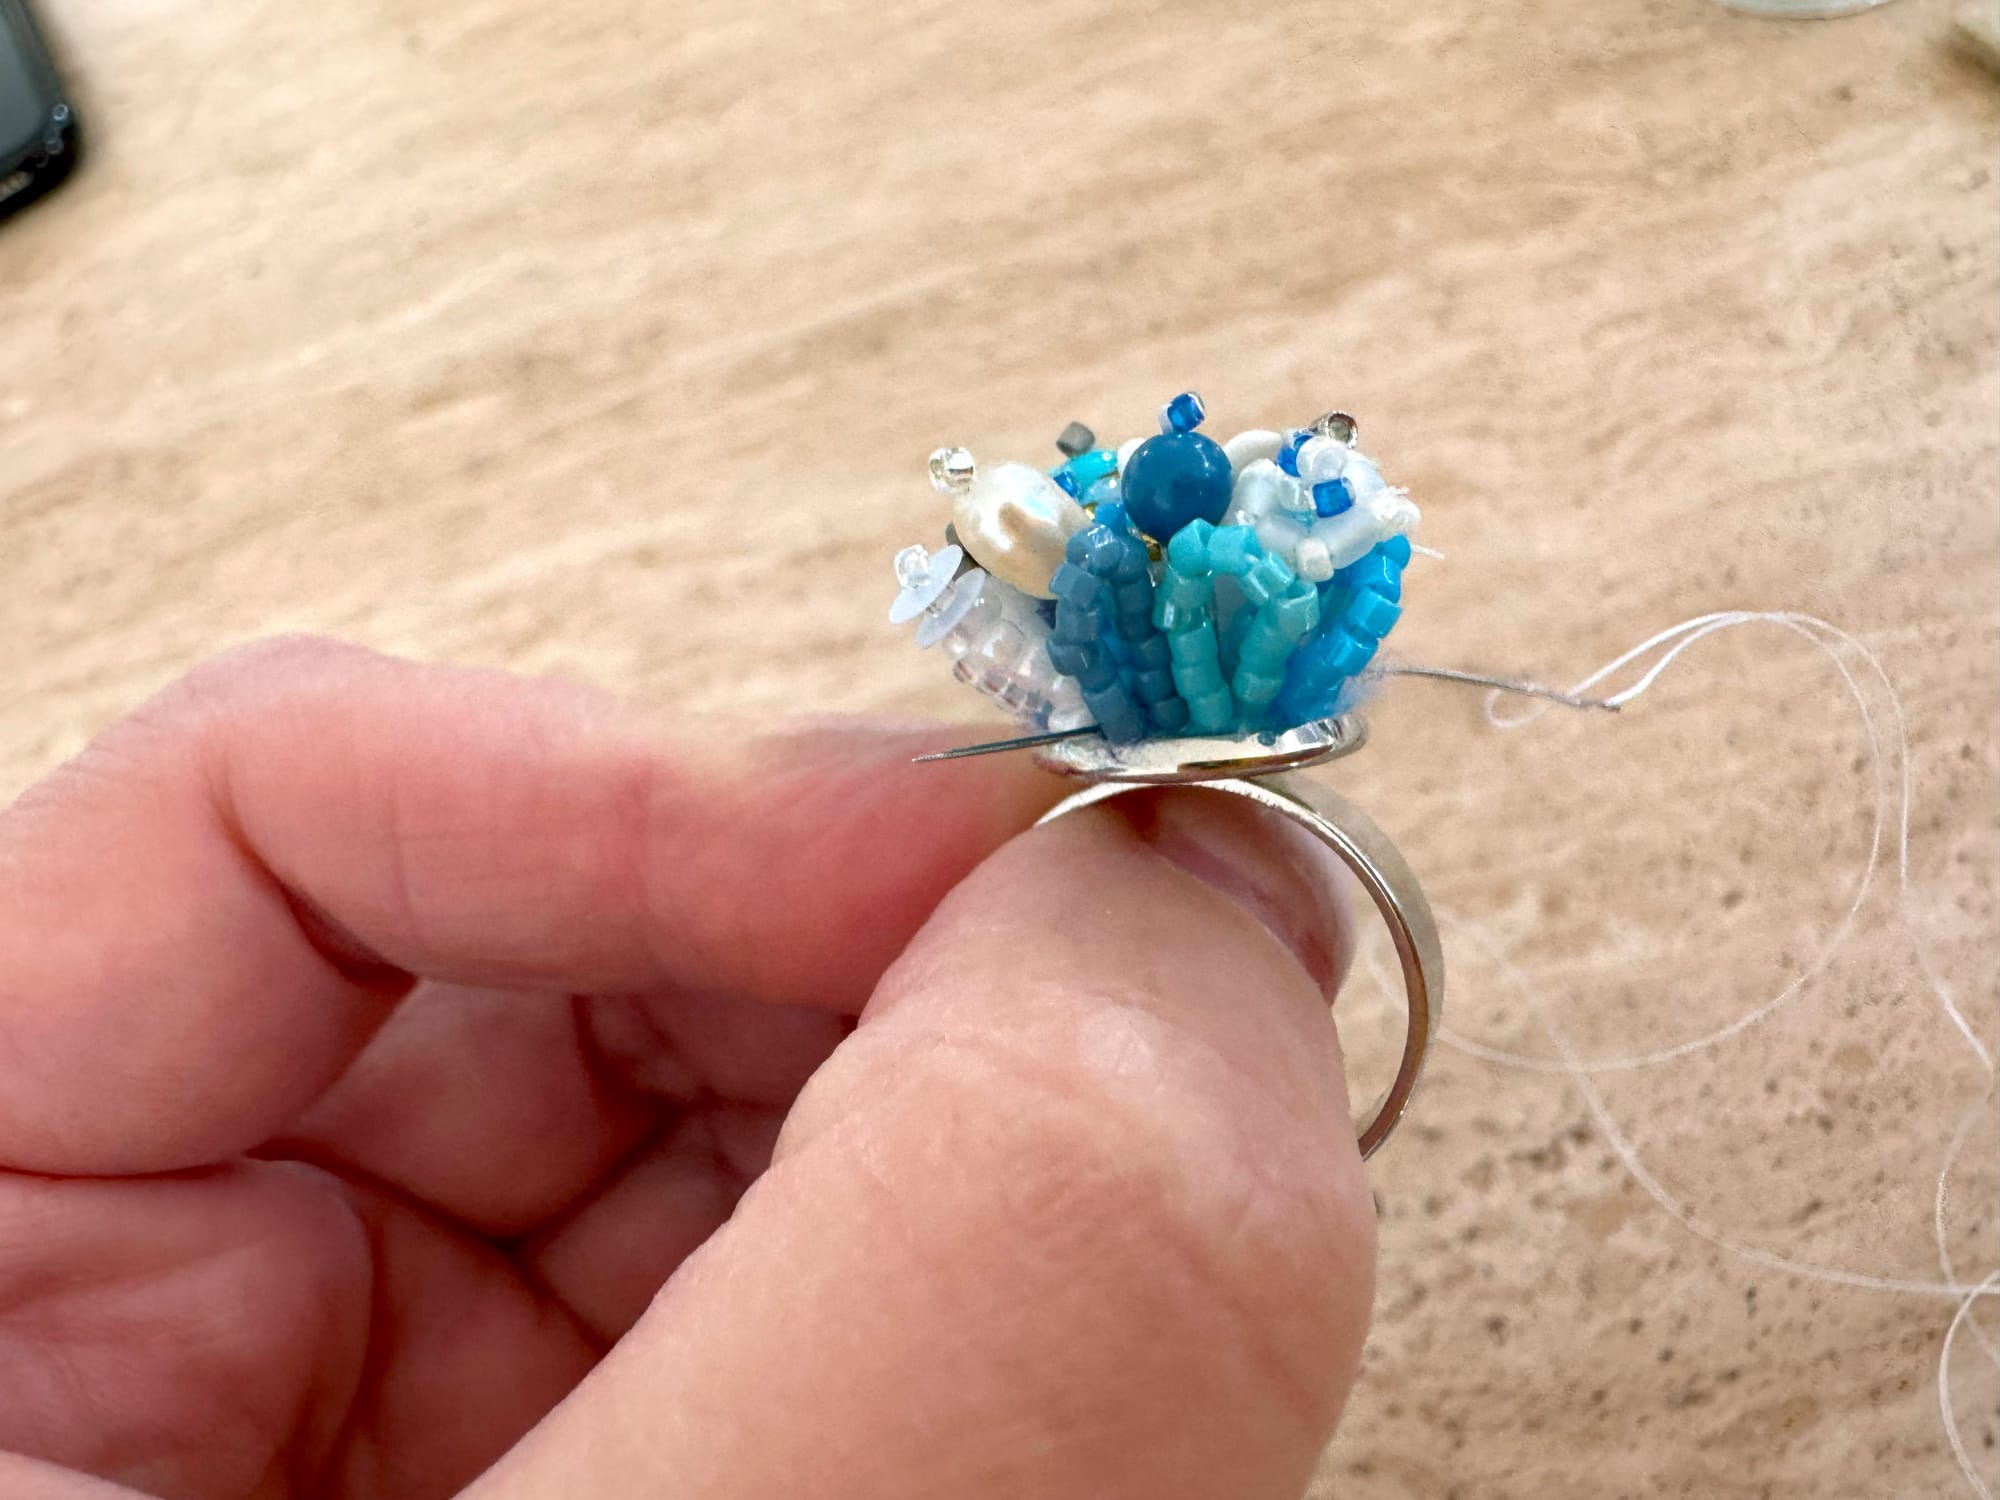
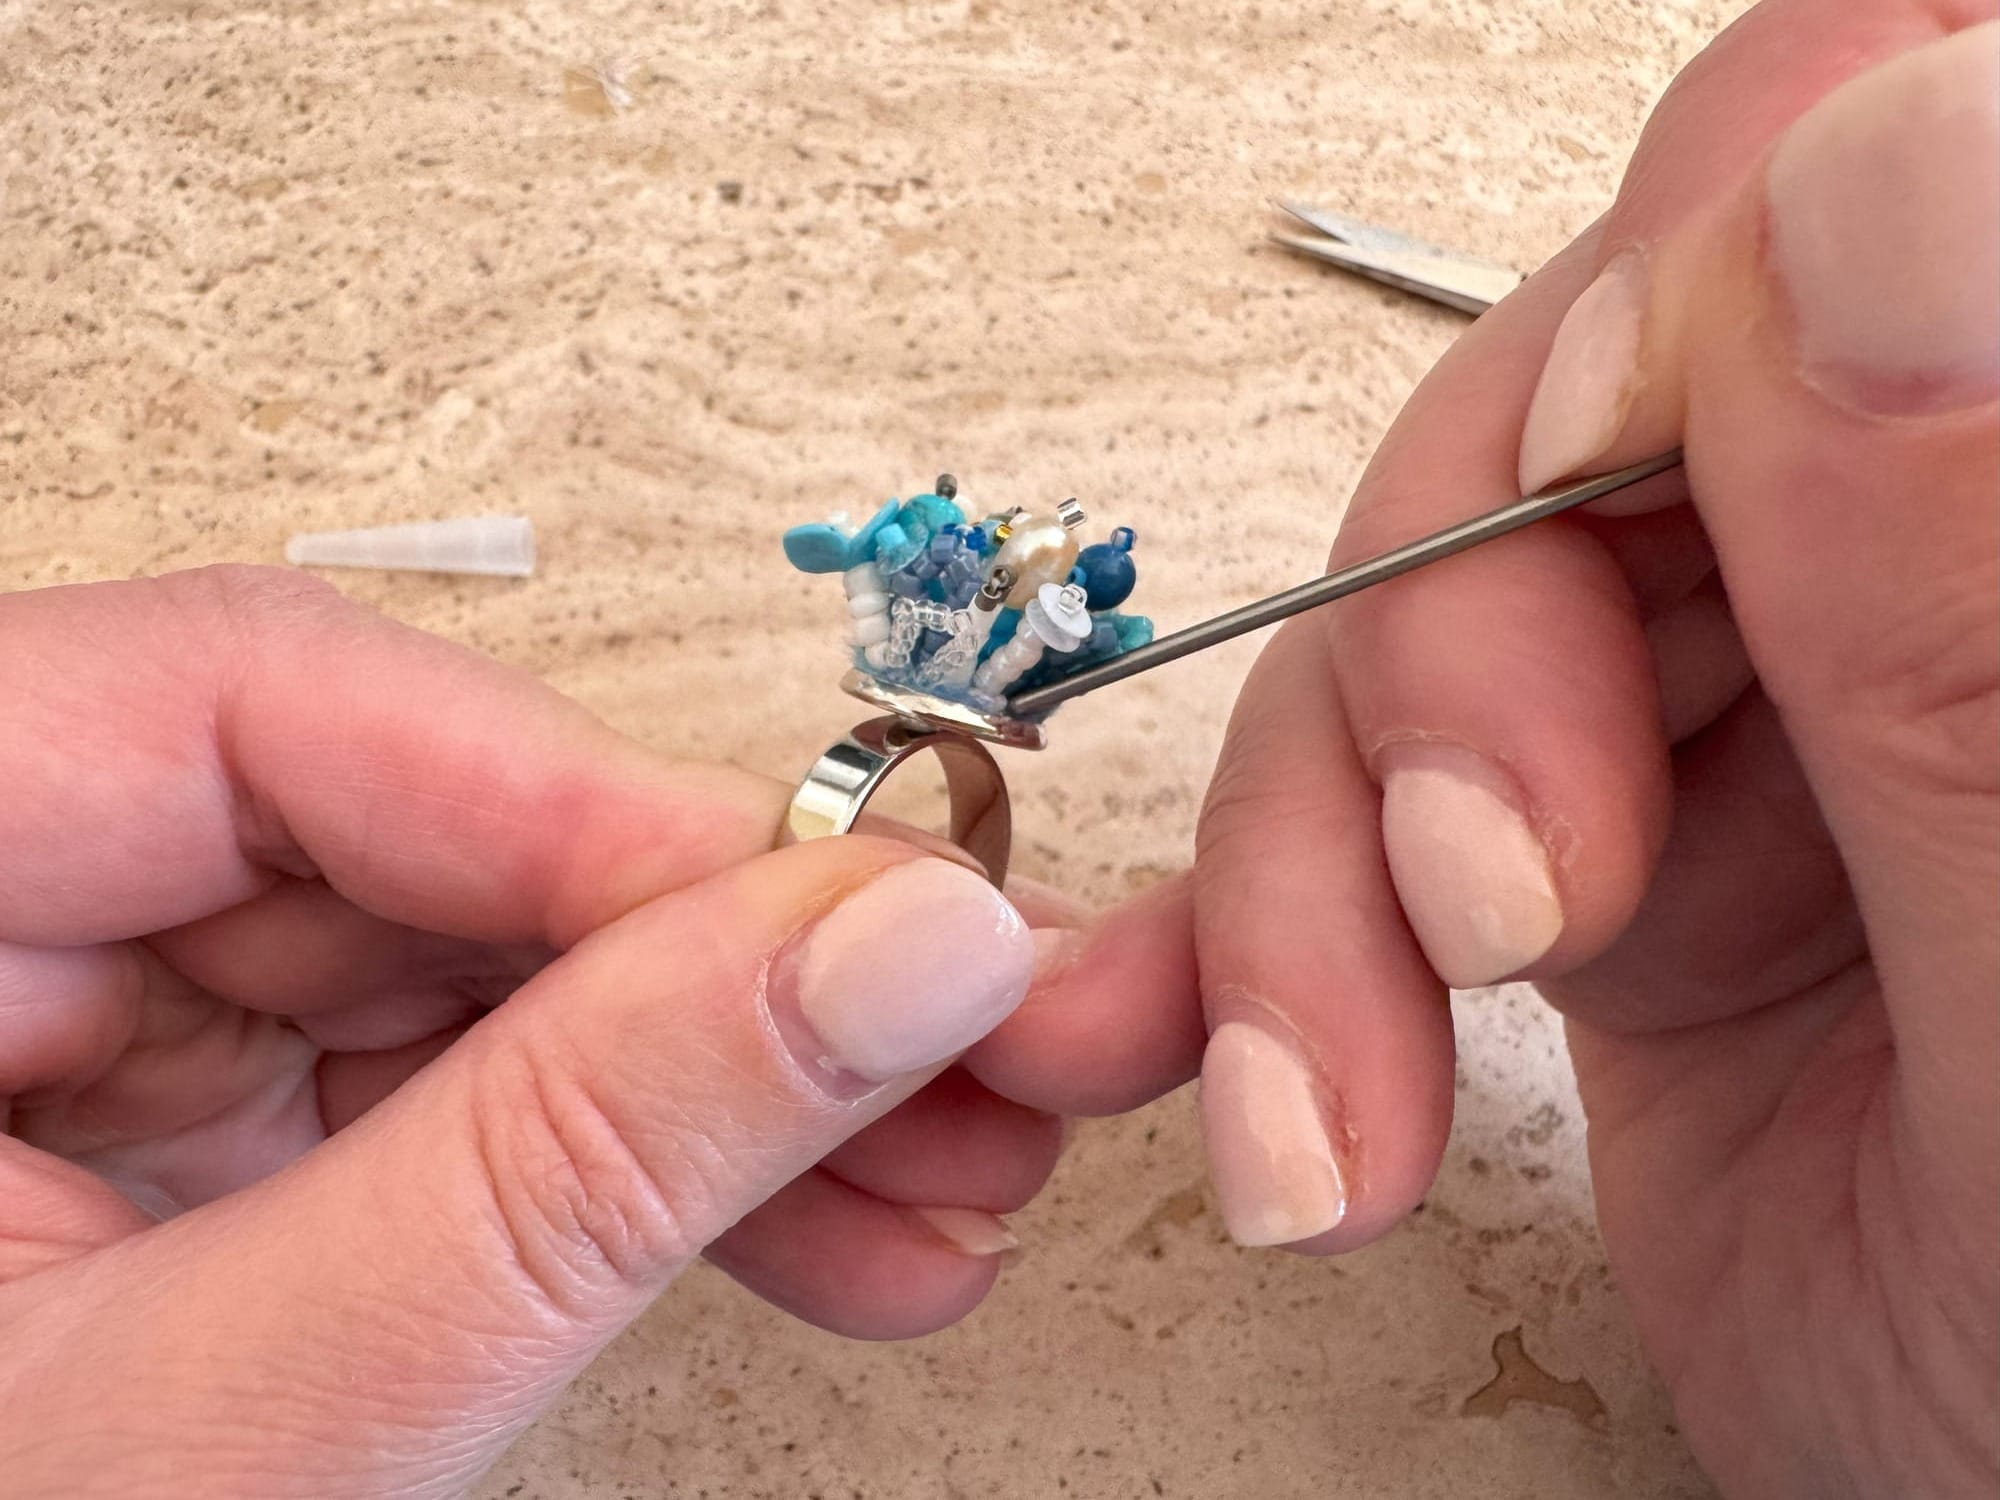
Now we keep on adding beaded elements all around the ring base. The closer is your beaded element to the ring setting, the shorter it should become. For example, if during our work on the embroidery hoop, we usually took 5-6 beads size 11/0 to shape the stem, we now decrease the number of beads to 3-4 or even 2. That will shape the volume correctly and the ring will look neat when finished.
The next element is four Toho beads size 10/0, one sequin, and one Toho bead size 15/0. As before, I skipped the last taken Toho bead size 15/0, moved the needle through the sequin and four Toho beads, and exist at the opposite edge of the ring. Again, I try to exist as close to the ring base as I can.

For the next element, I took three Toho beads size 10/0 and two Miyuki Delica beads size 15/0. I skipped both Delicas, moved my needle through three Toho beads, and existed on the opposite side of the ring, as close to the ring setting as possible.

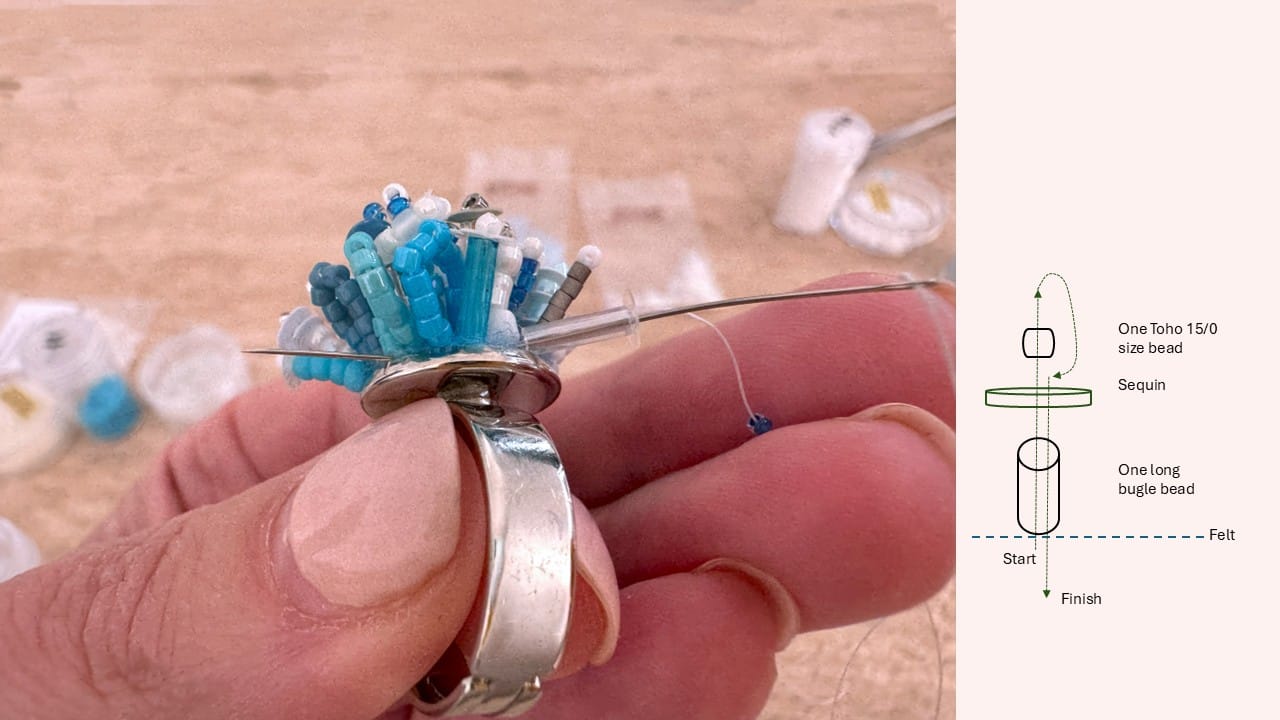
By now you can already add any element to your liking. I am still keeping photos with schematic drawings so that you can use these elements in your future crafts. For example, below is a simple element, which we have not yet used: a combination of a bugle bead, sequin, and Toho bead 15/0 size.
I decided to add one more handmade floral bead to add both volume and a silver hue to my work. As the ring setting is made from steel and has a silver color, it is better to use some beads to match the ring base, so that the work looks complete.
As I wrote above, close to the ring setting I make elements smaller. In this example, there are only four Miyuki Delicas, one sequin, and one more Delica.
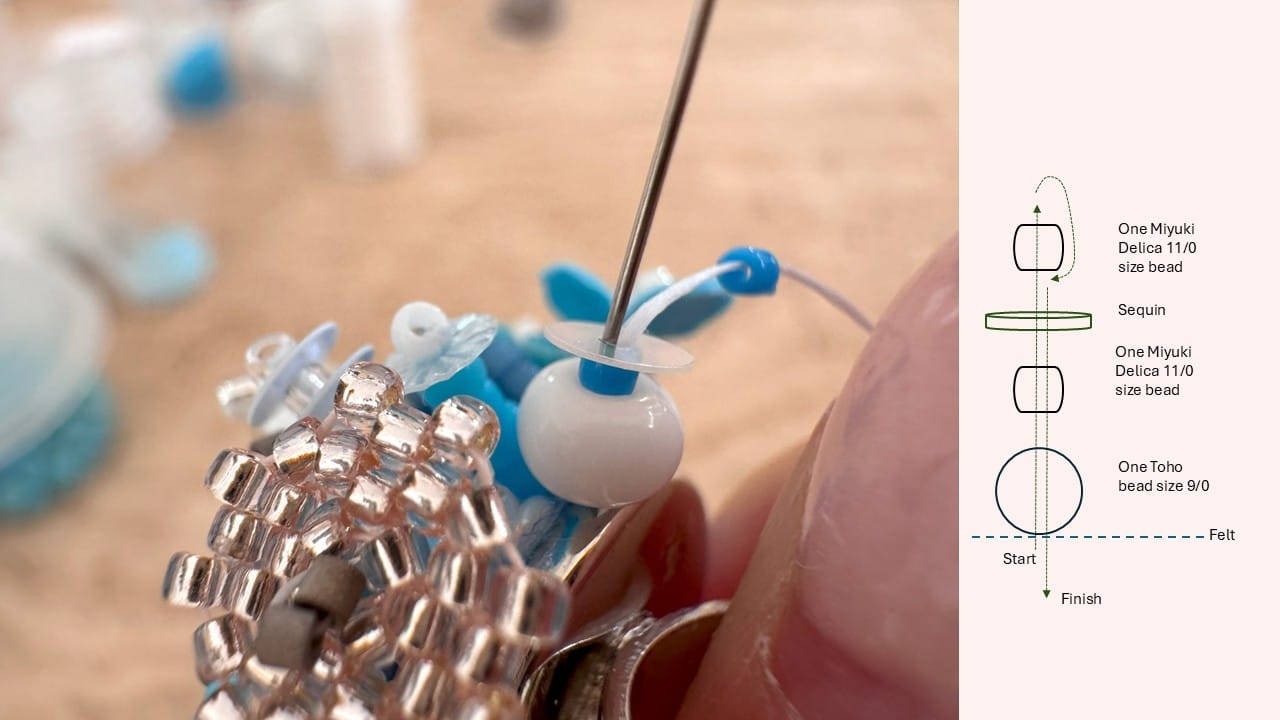
As we are getting closer and closer to the end of our work, elements are becoming smaller. Below is one of my most loved elements consisting of one big Toho bead size 9/0, one Miyuki Delica, a sequin and another Miyuki Delica.
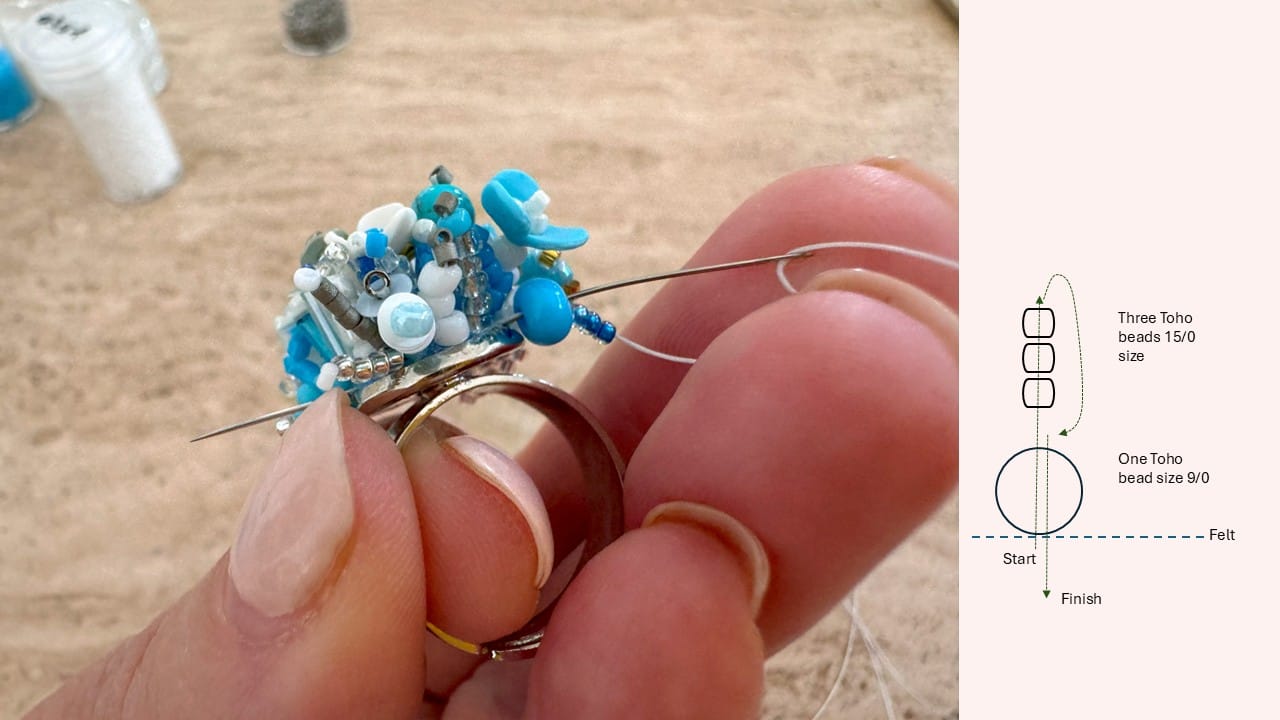
A variation of the element above is one Toho bead size 9/0 and three Toho beads size 15/0. You skip all three 15/0 Toho beads and move the needle through the first big Toho bead.
And yet another variation is one big Toho bead size 9/0, one sequin, and one Toho bead size 15/0.
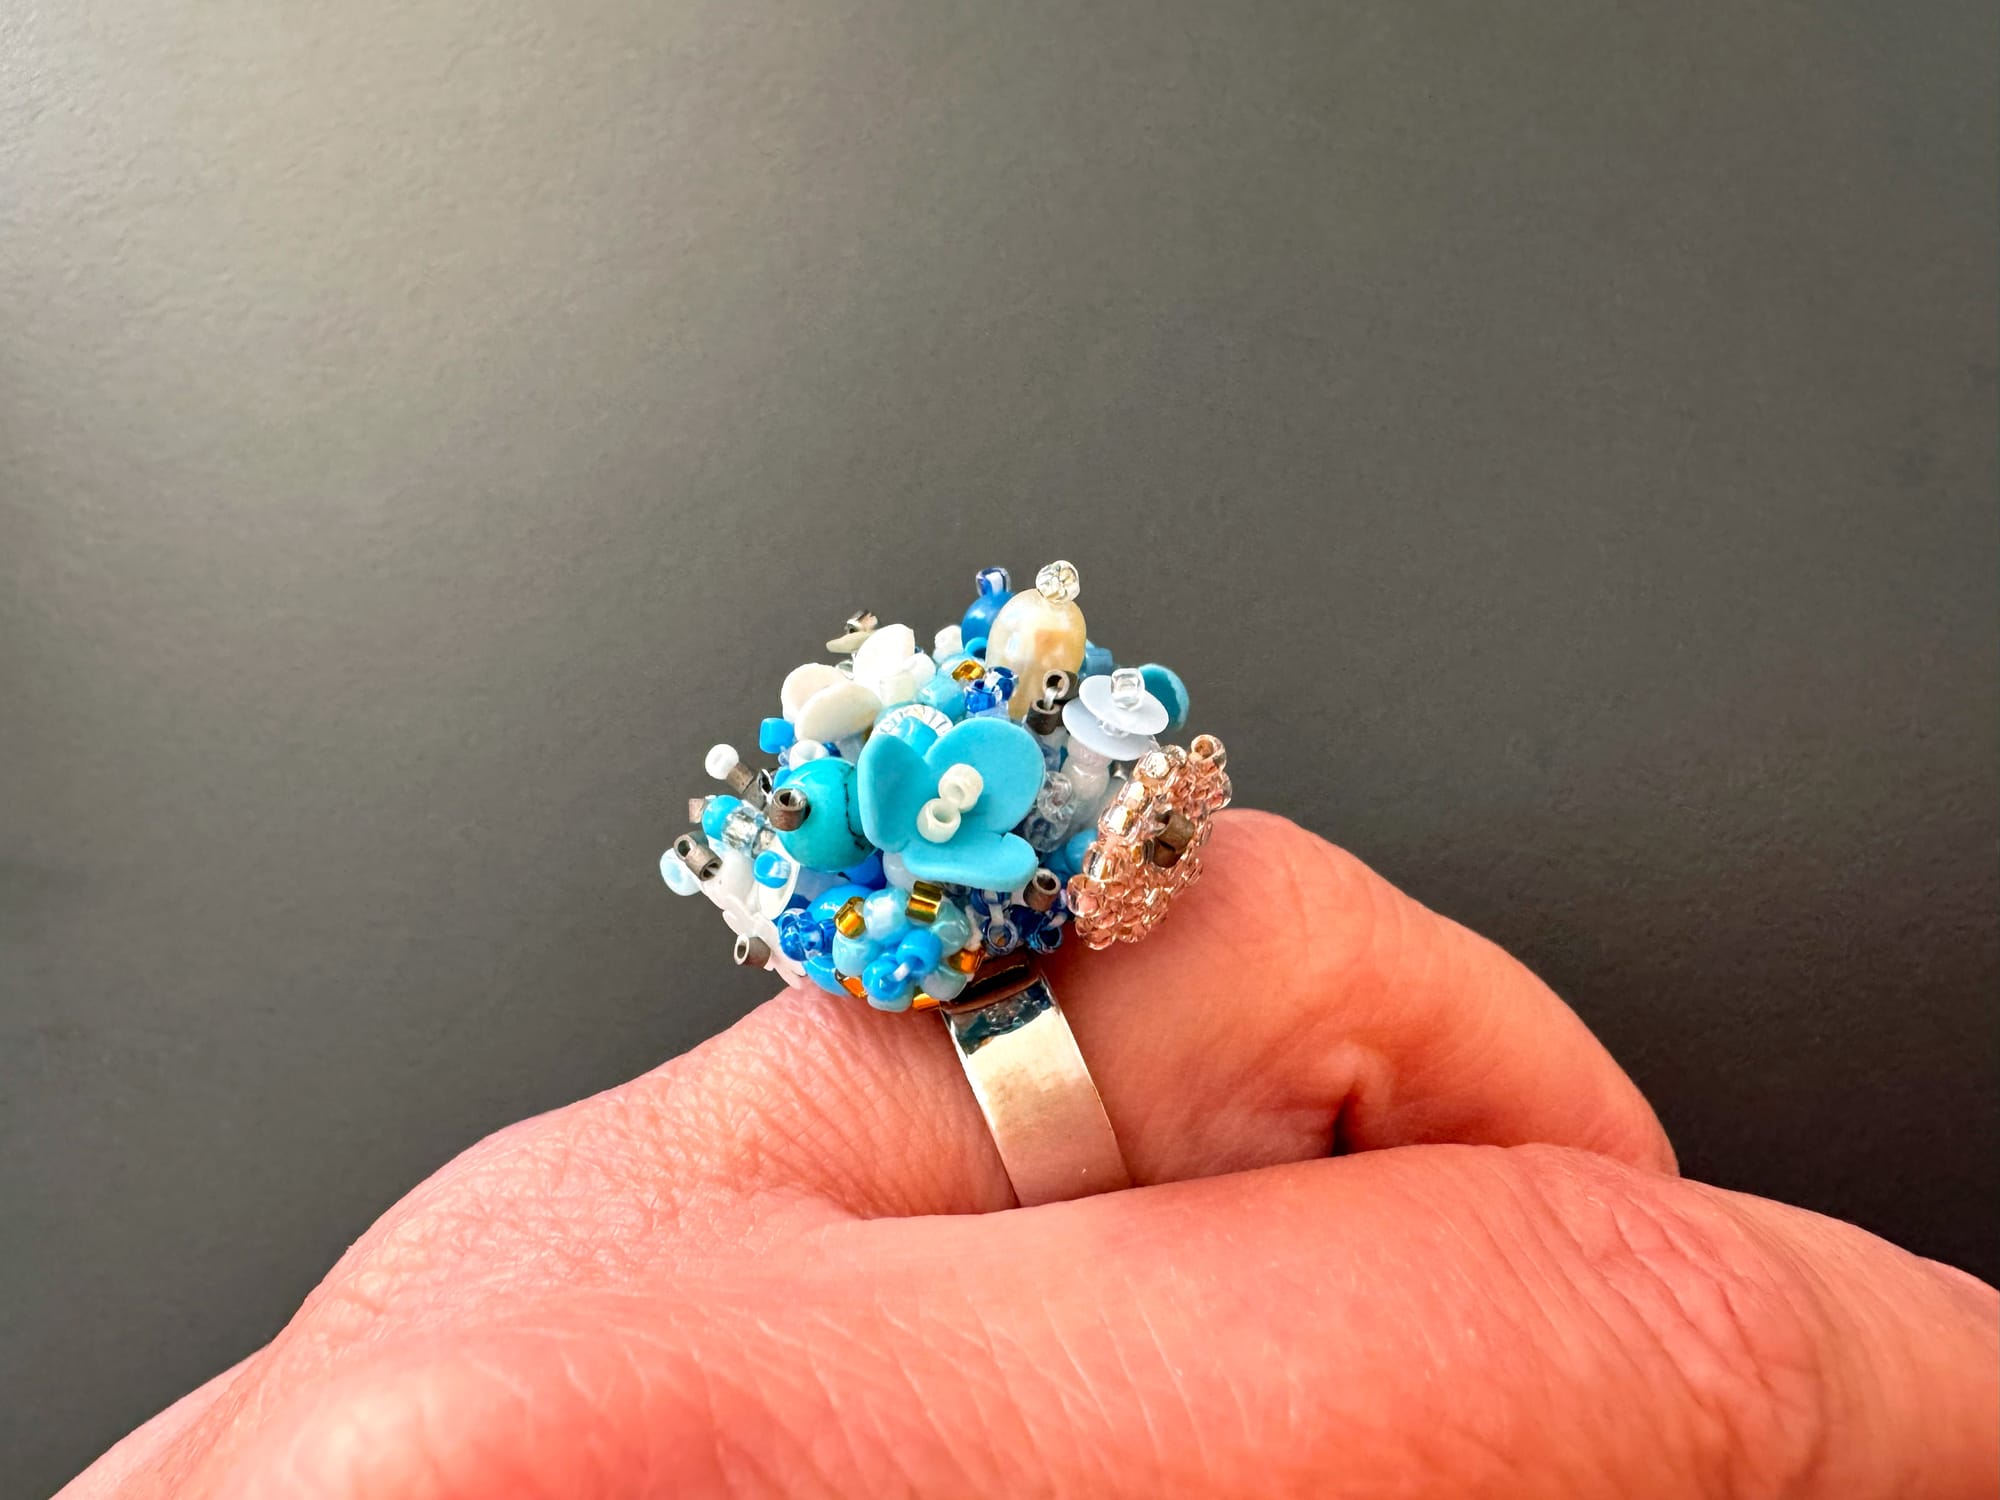
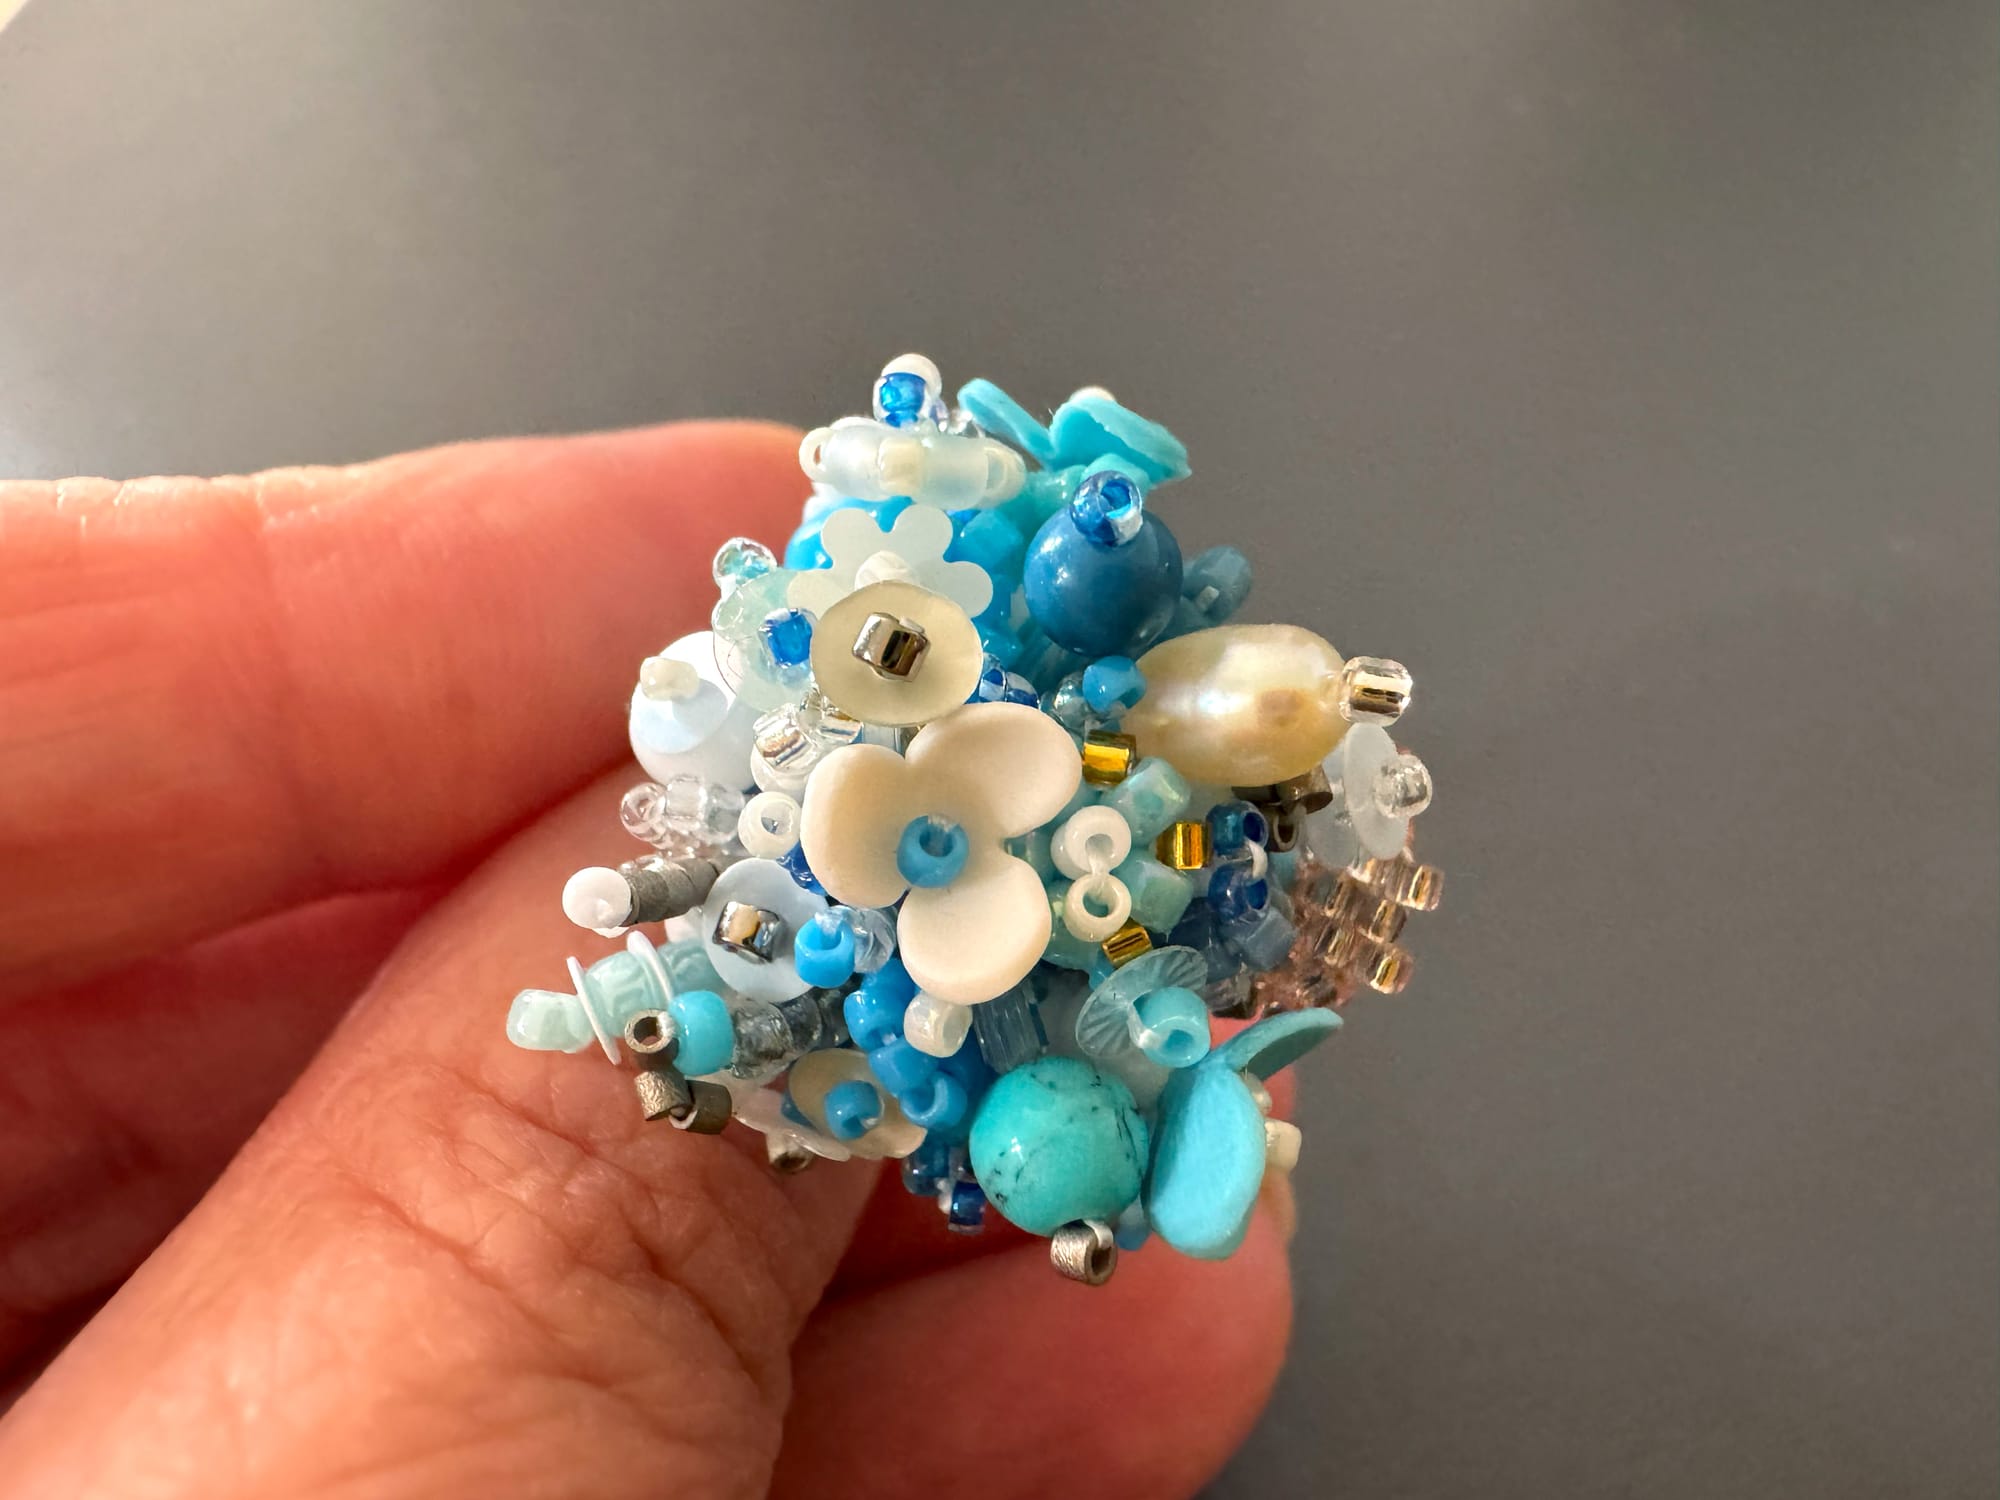
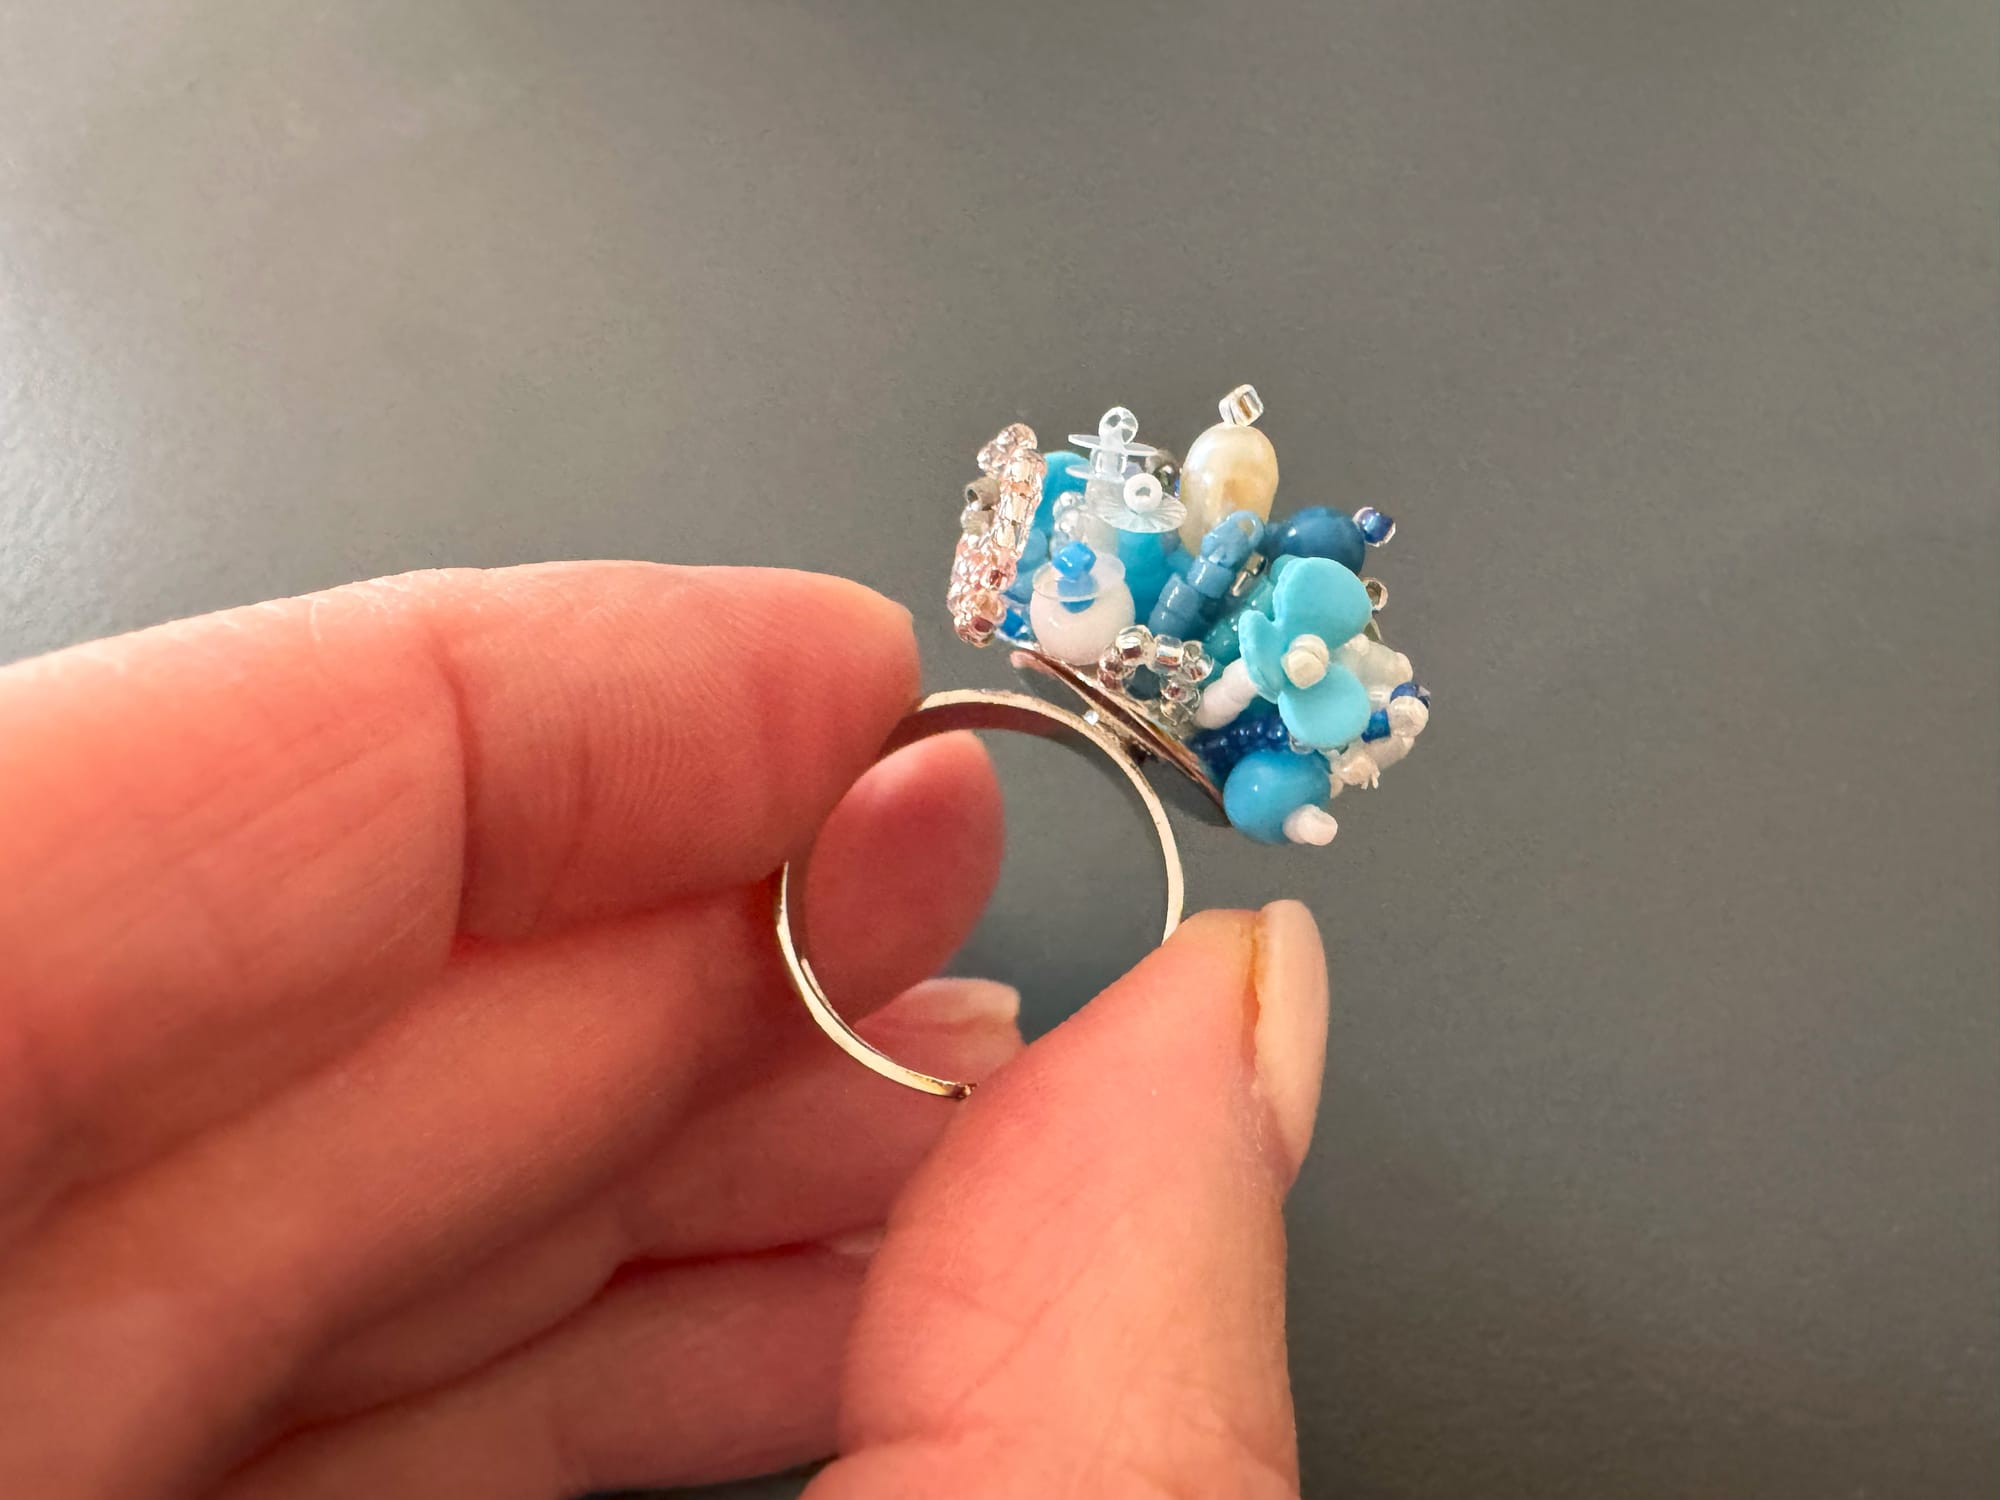
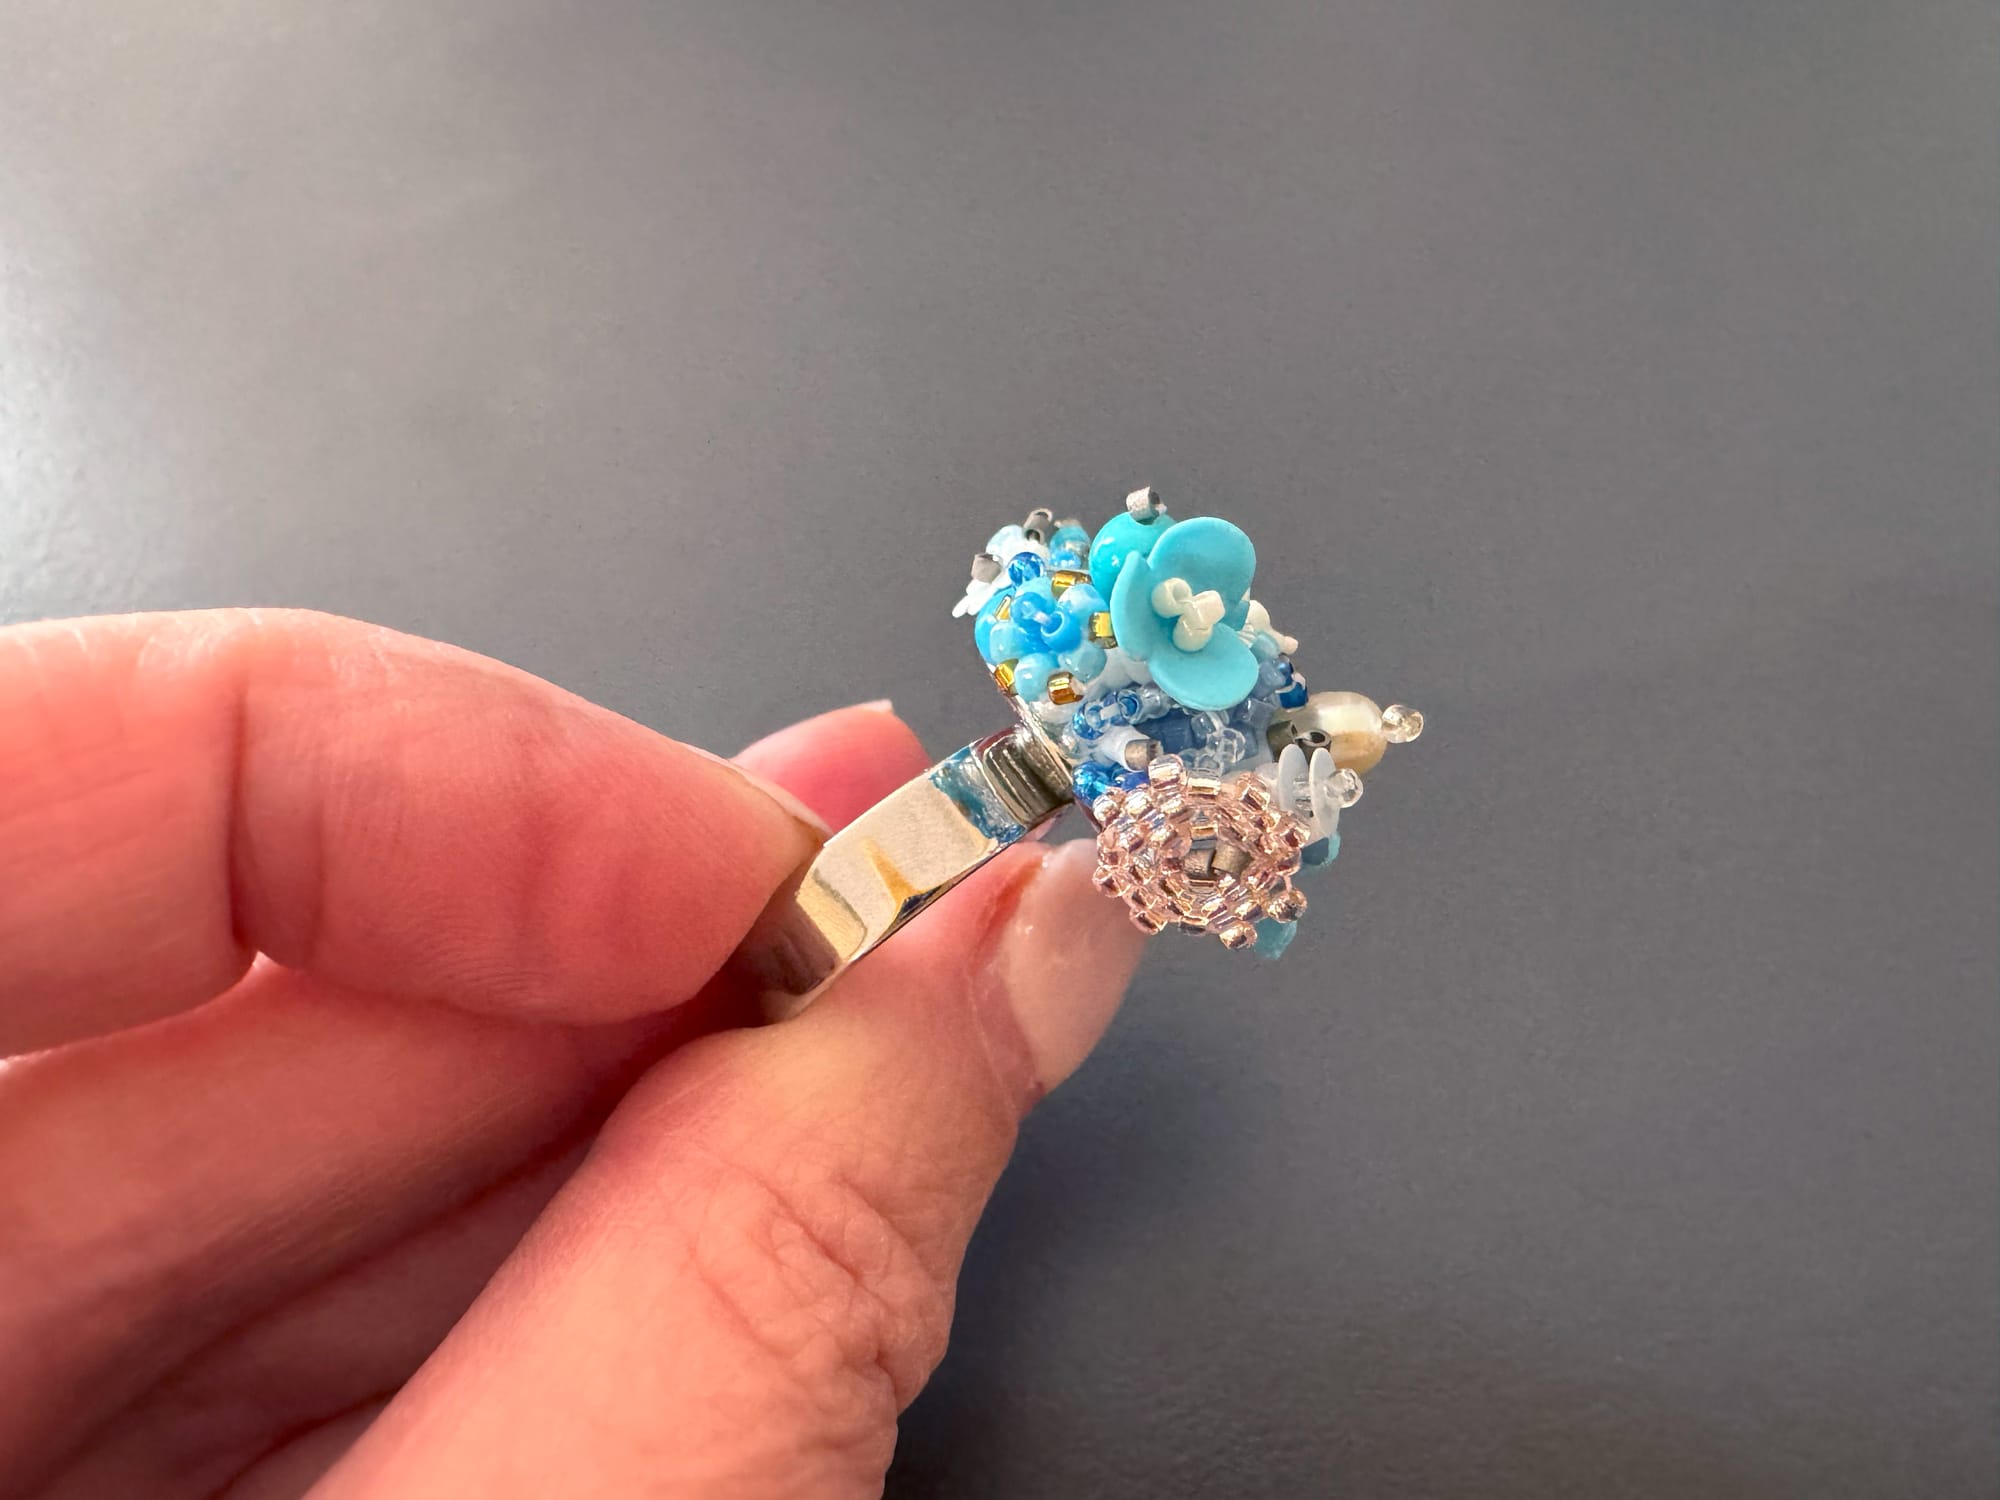
Keep adding elements all around your ring base until you run out of space. When you feel that all the space is filled with 3D-beaded elements, your ring is ready!
Here is the result.
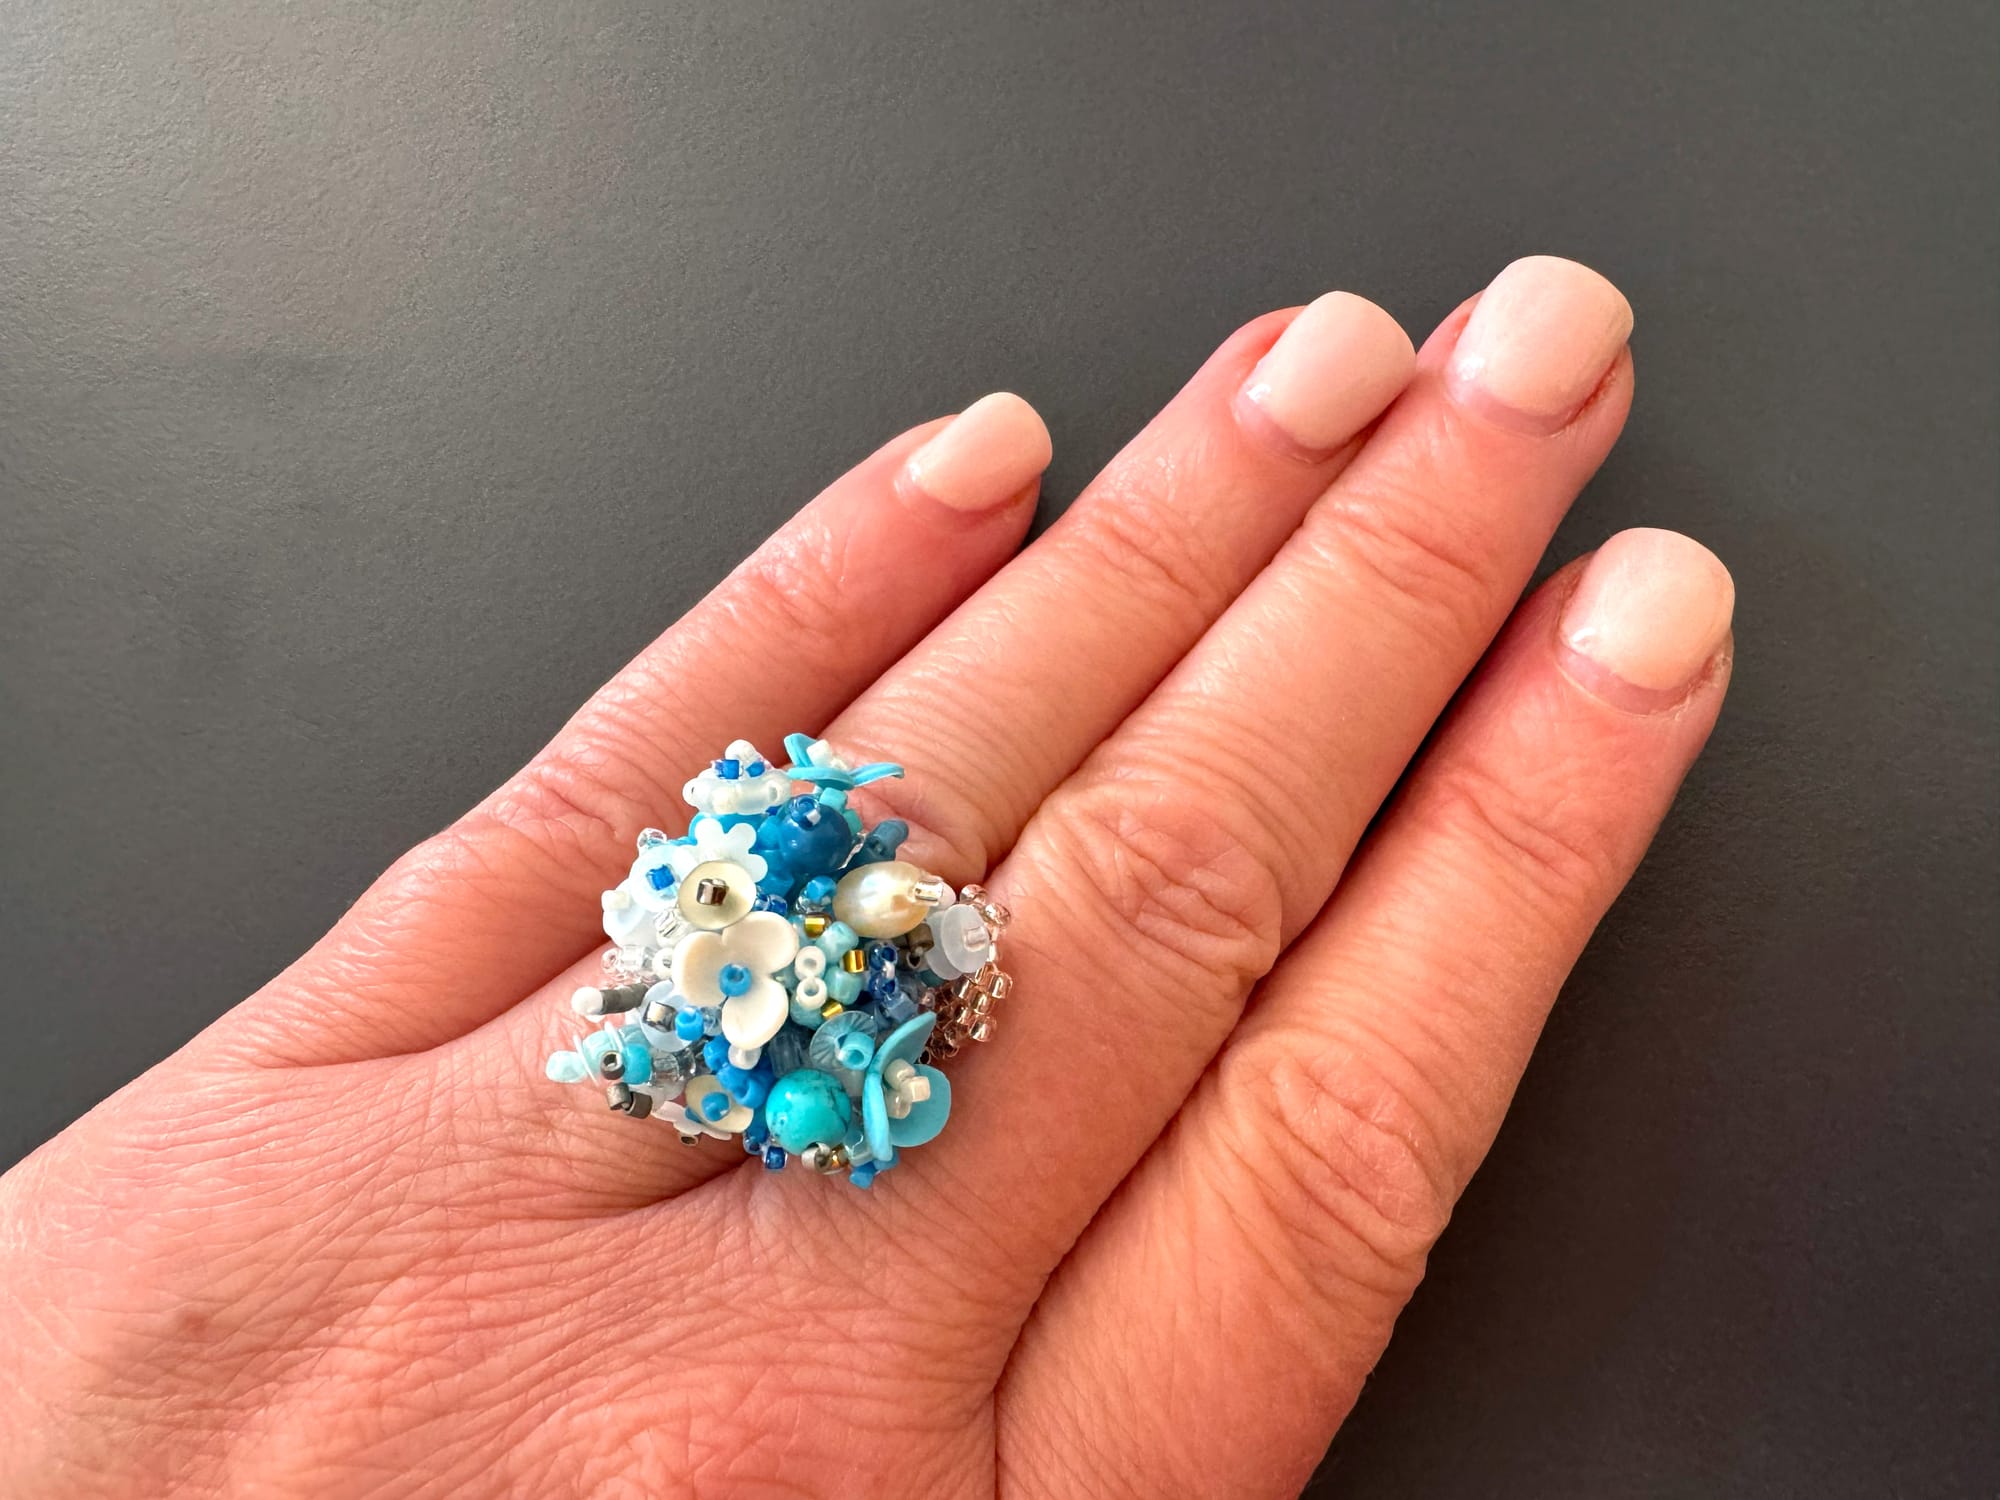
We hope you like this tutorial. The creation of such a ring allows for a lot of creative freedom. You can use different colors and color combinations, add any beads you have at your disposal, create your own beads from polymer clay or glass, and also use leftovers from your previous pieces. This ring is very 'touchy,' as is all the sculptural beadwork.
We hope you like this tutorial and, as always, we look forward to reading your comments or answering your questions.
Happy Crafting!