How You Can Beautify Regular Summer Blouse with Embroidery
Explore our journey of customizing a regular blouse with couture embroidery, beads, sequins, and fabric flowers.
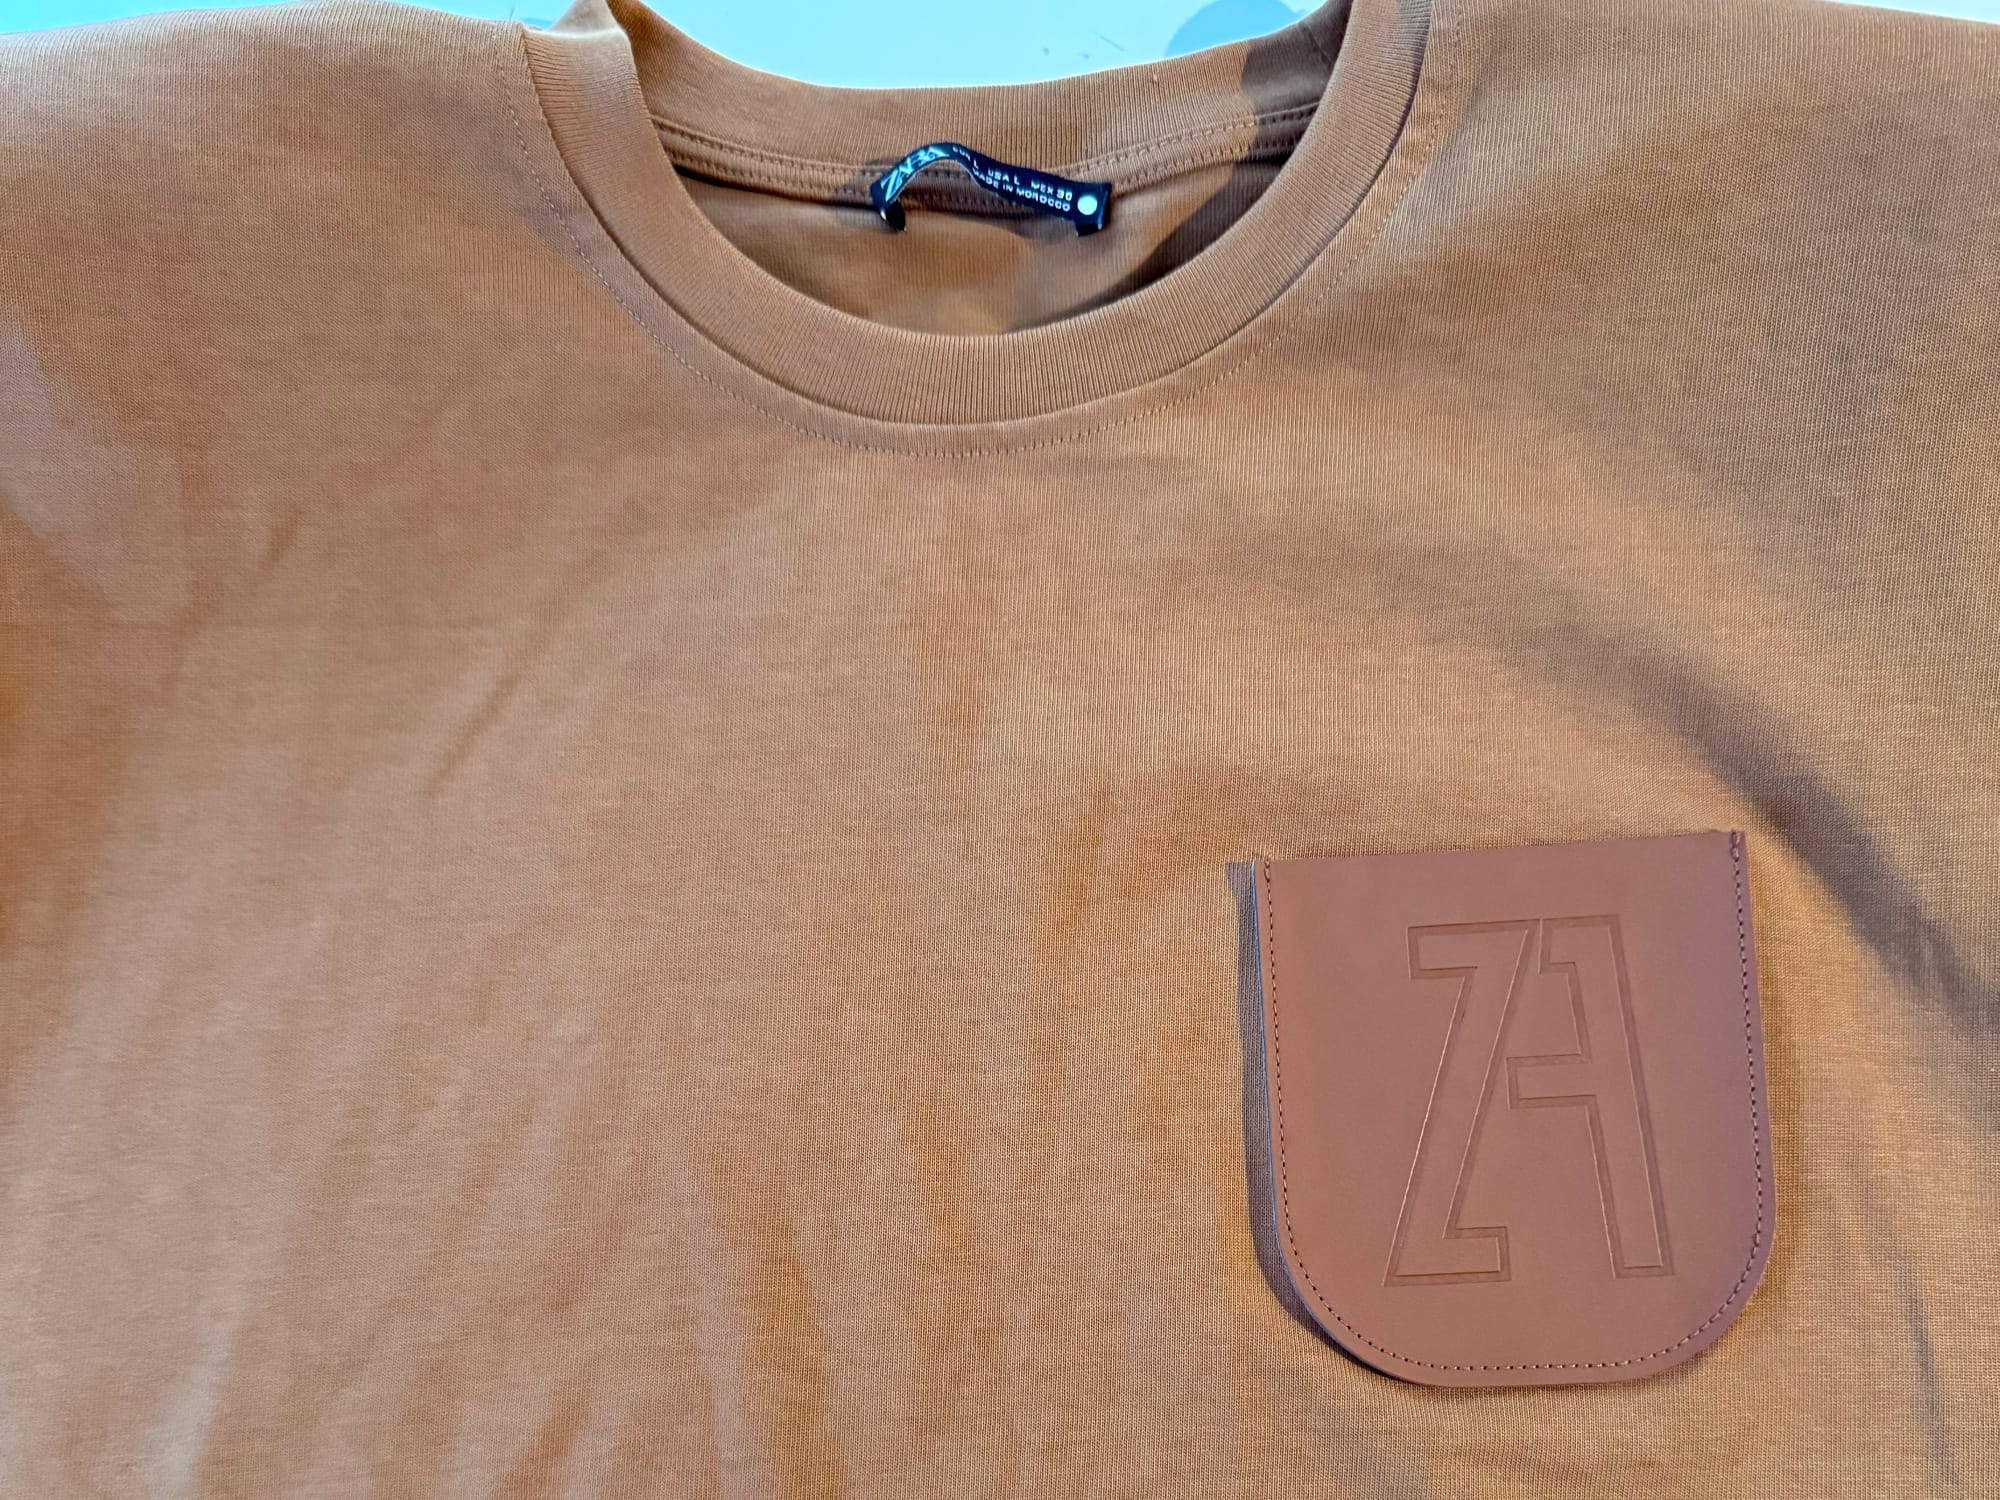
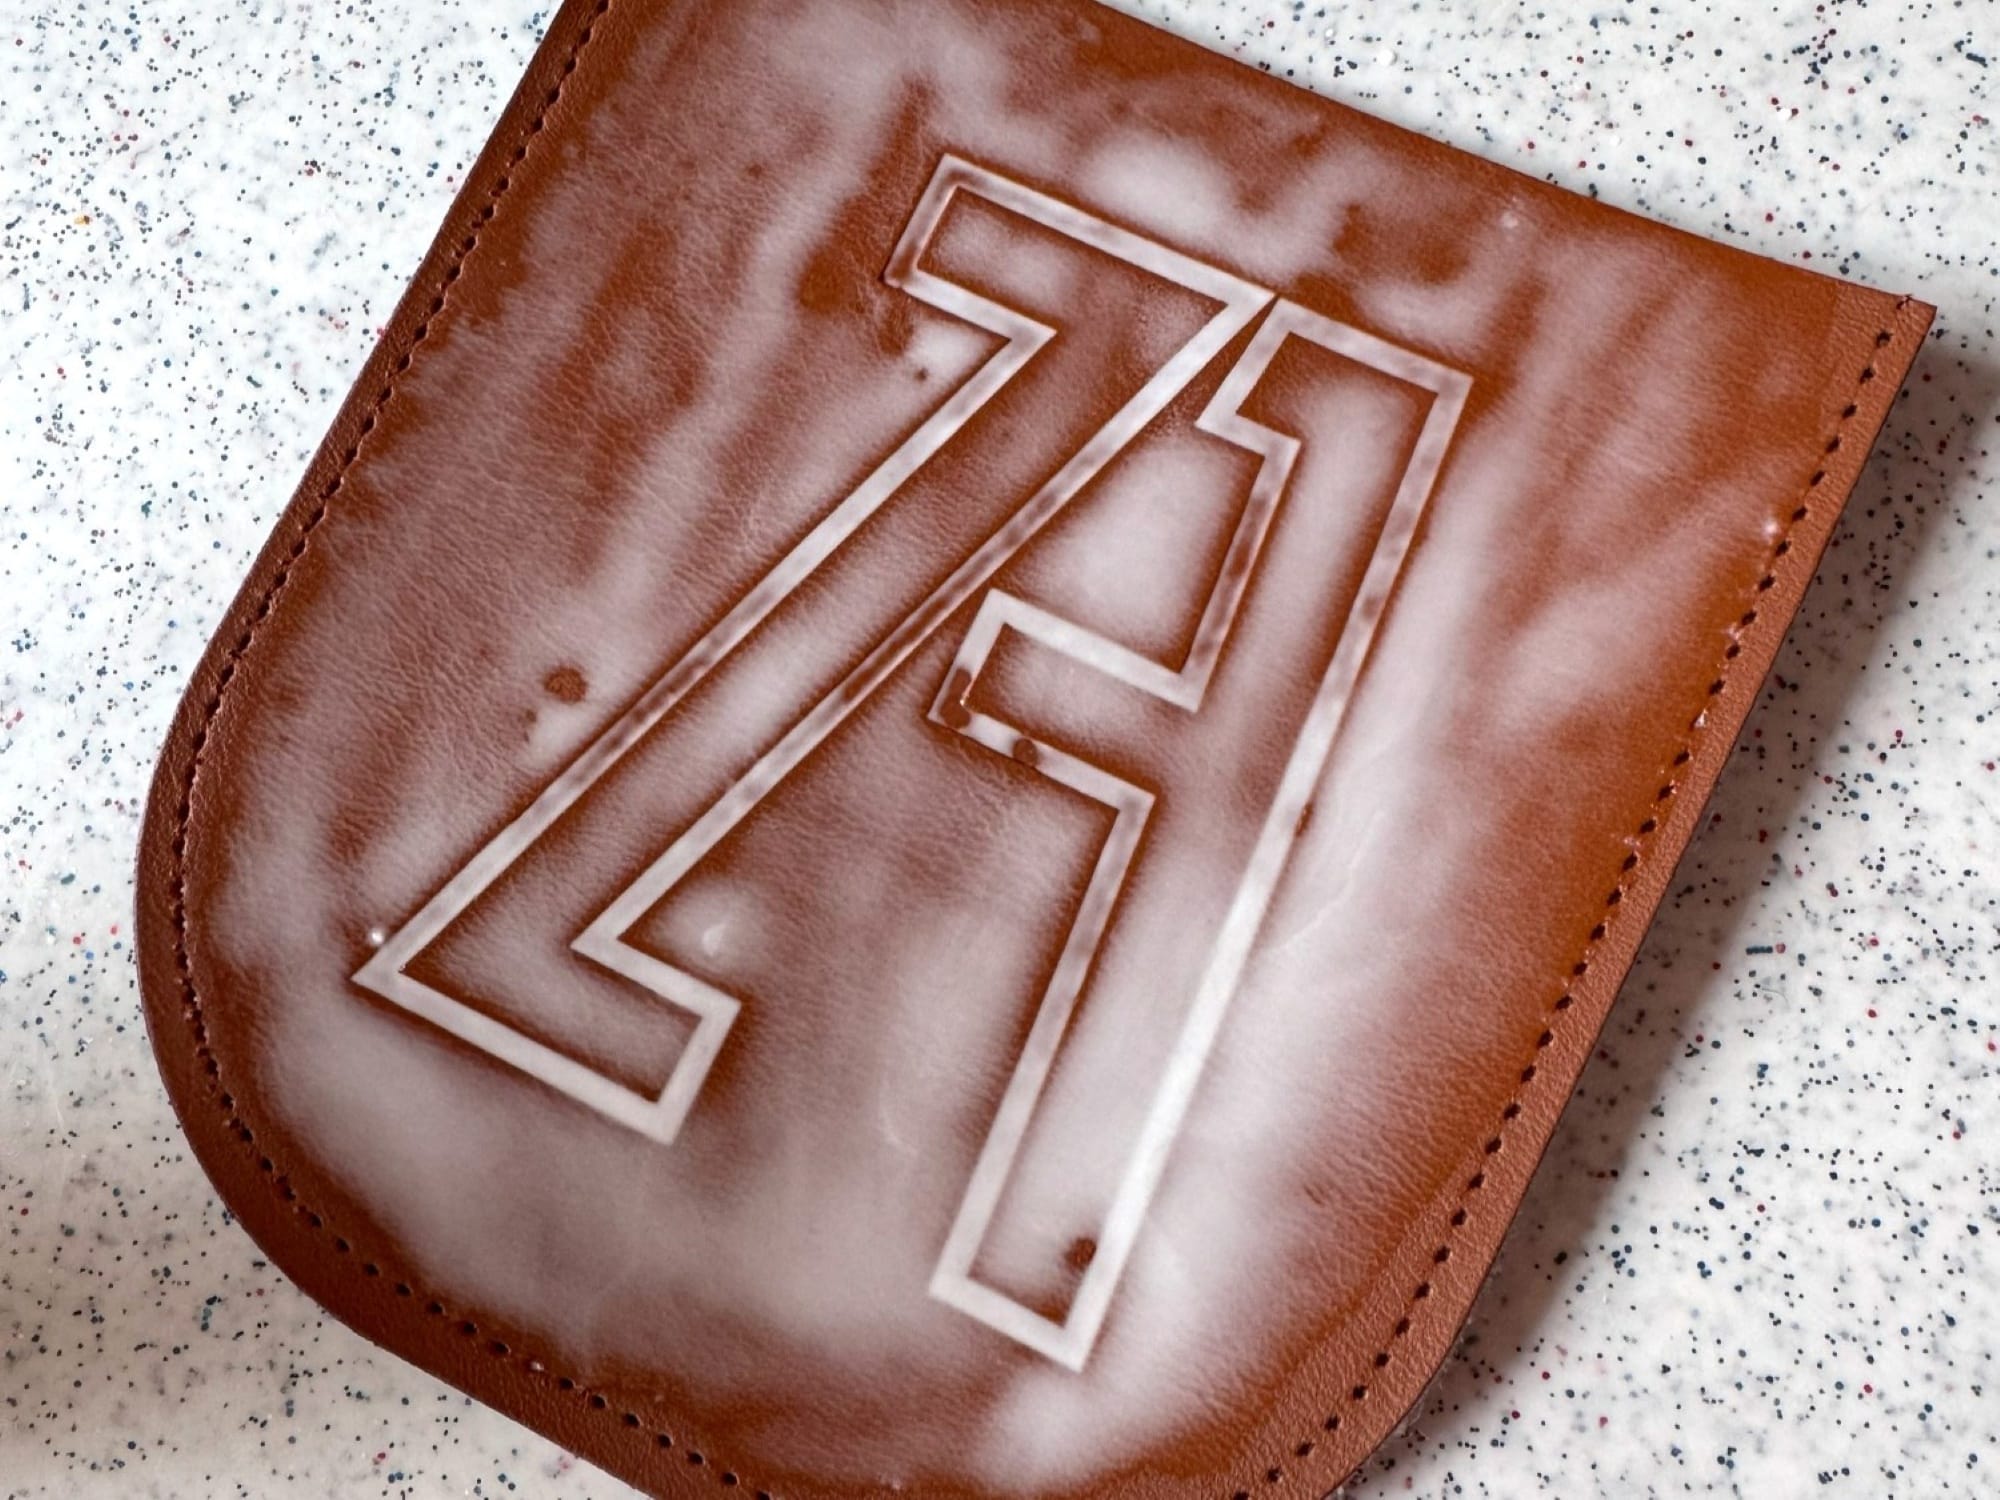
It was last summer. We lived in Cyprus, and the weather was really hot. After coming to Cyprus from Slovenia, I did not have a stockpile of summer clothes. So I decided to shop lightly and spotted a stylish sleeveless blouse at Zara. Color suited me well, so I purchased it. The blouse fit was nice, but I noticed I am not wearing it often. When I thought about the reason, I understood that I did not like the faux leather pocket on the front. It was too rough and somehow affected the elegance of the look. Guess what? Of course, I decided to customize it.
In this post, I am going to share with you the process of customization. It is not going to be a detailed tutorial, since all real tutorials are located on our YouTube channel. But I still want to share with you some details of how I approached this project, some photos of the process, as well as the final result.
In the photo below, you can see the original blouse of rust brown color with a dark brown faux leather pocket.
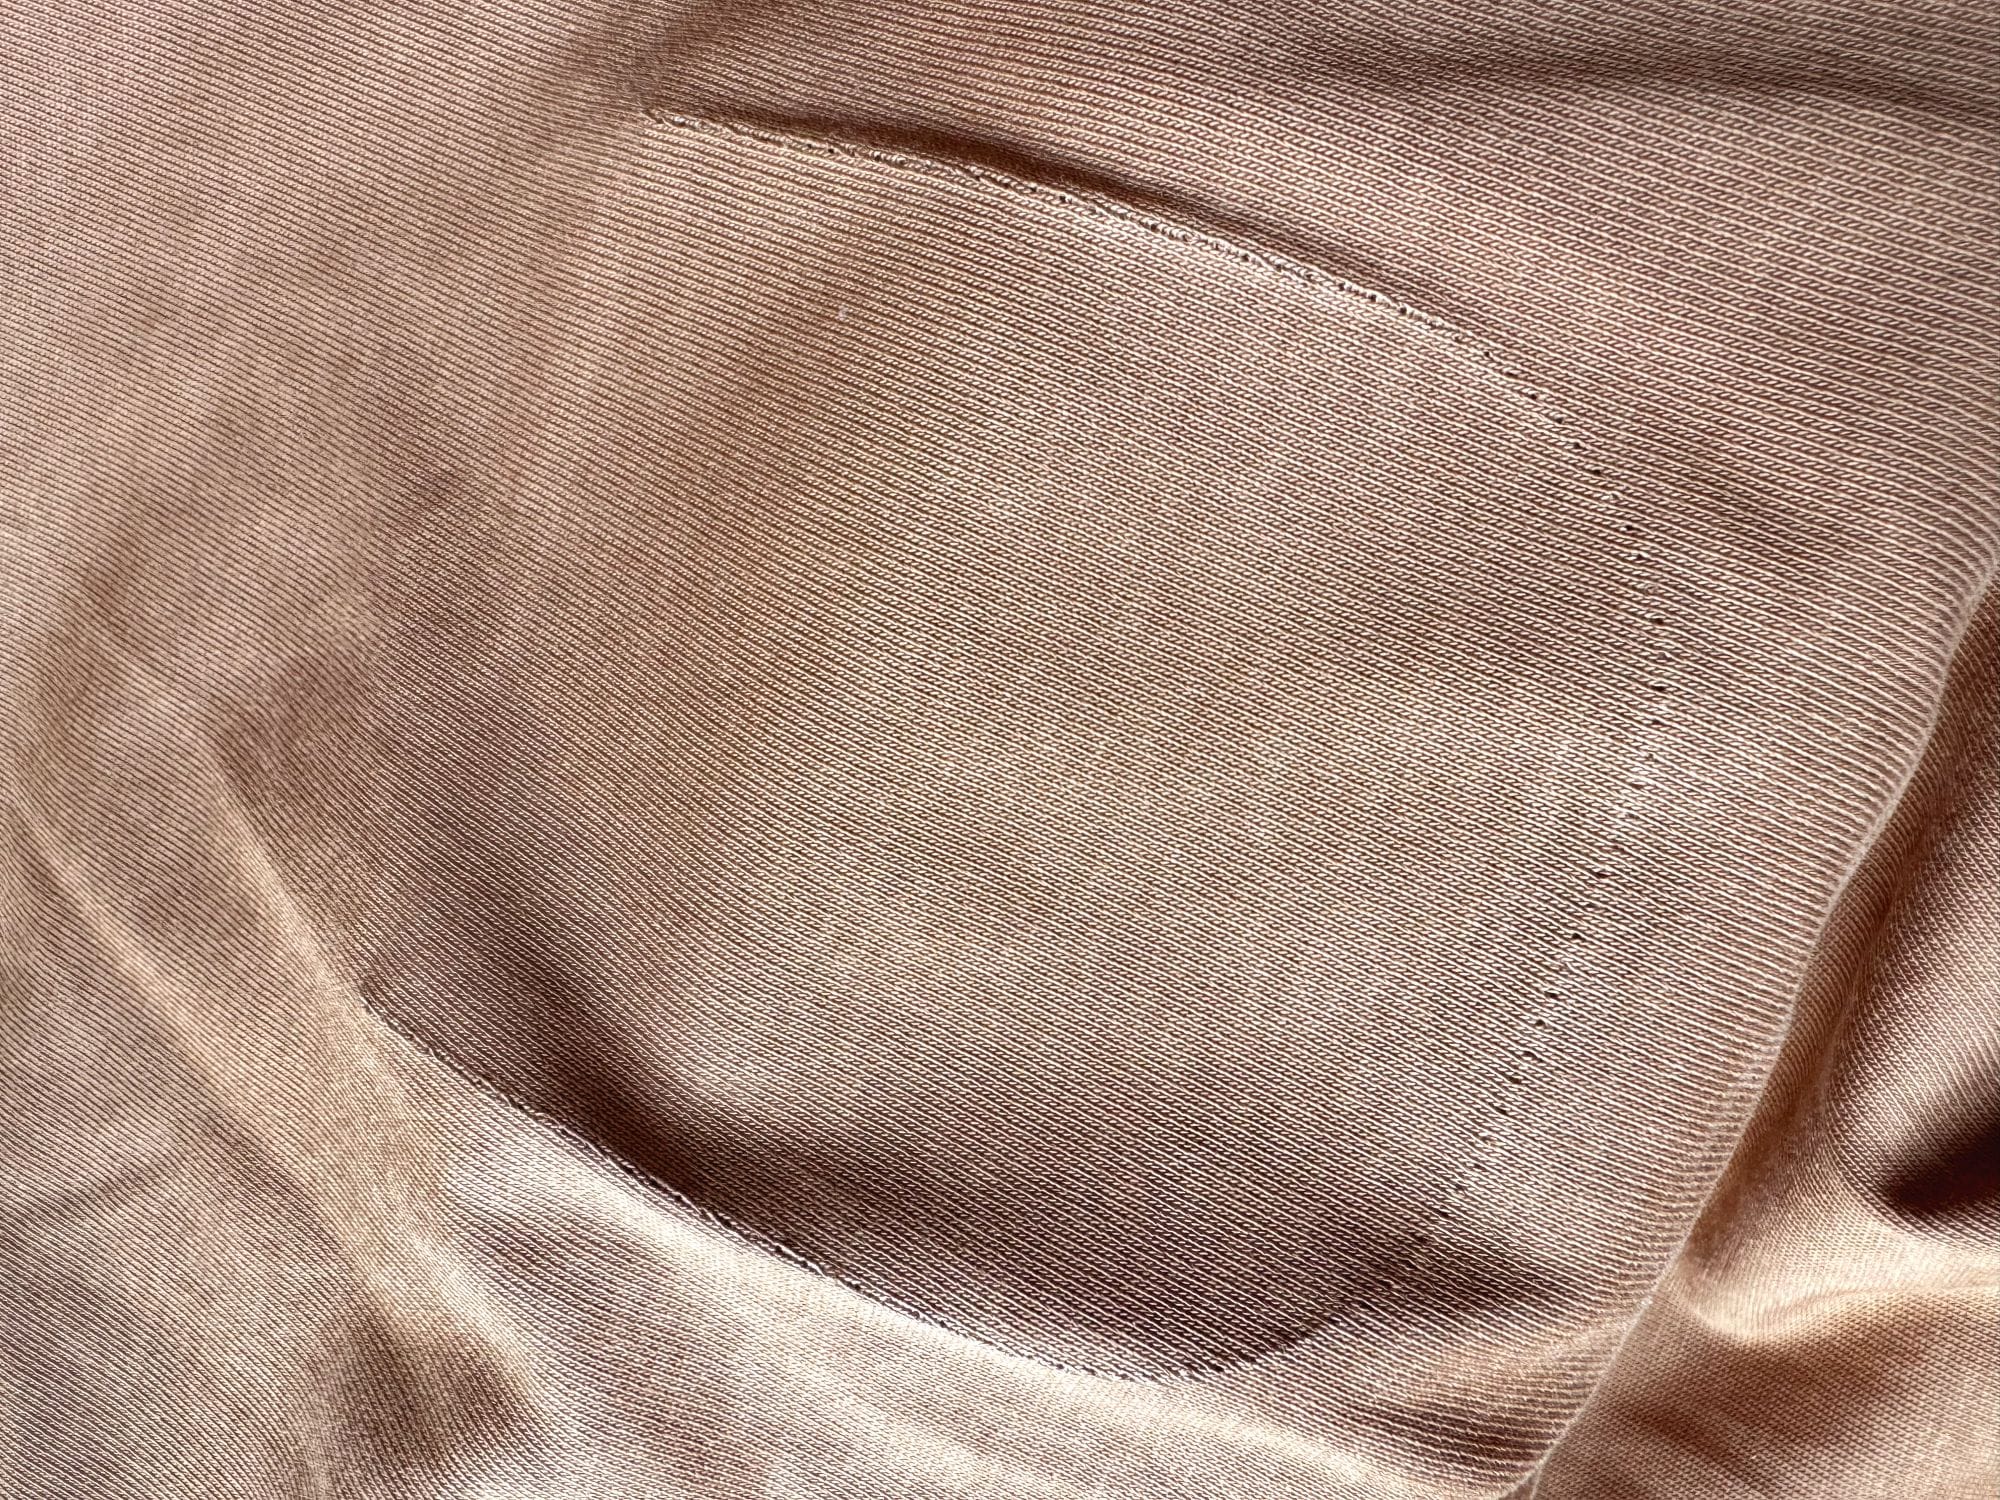
First, I unstitched the pocket from the blouse. The trace of the original stitch stayed visible, and it came out useful at later steps. I did not throw away the original pocket and used it later as well.
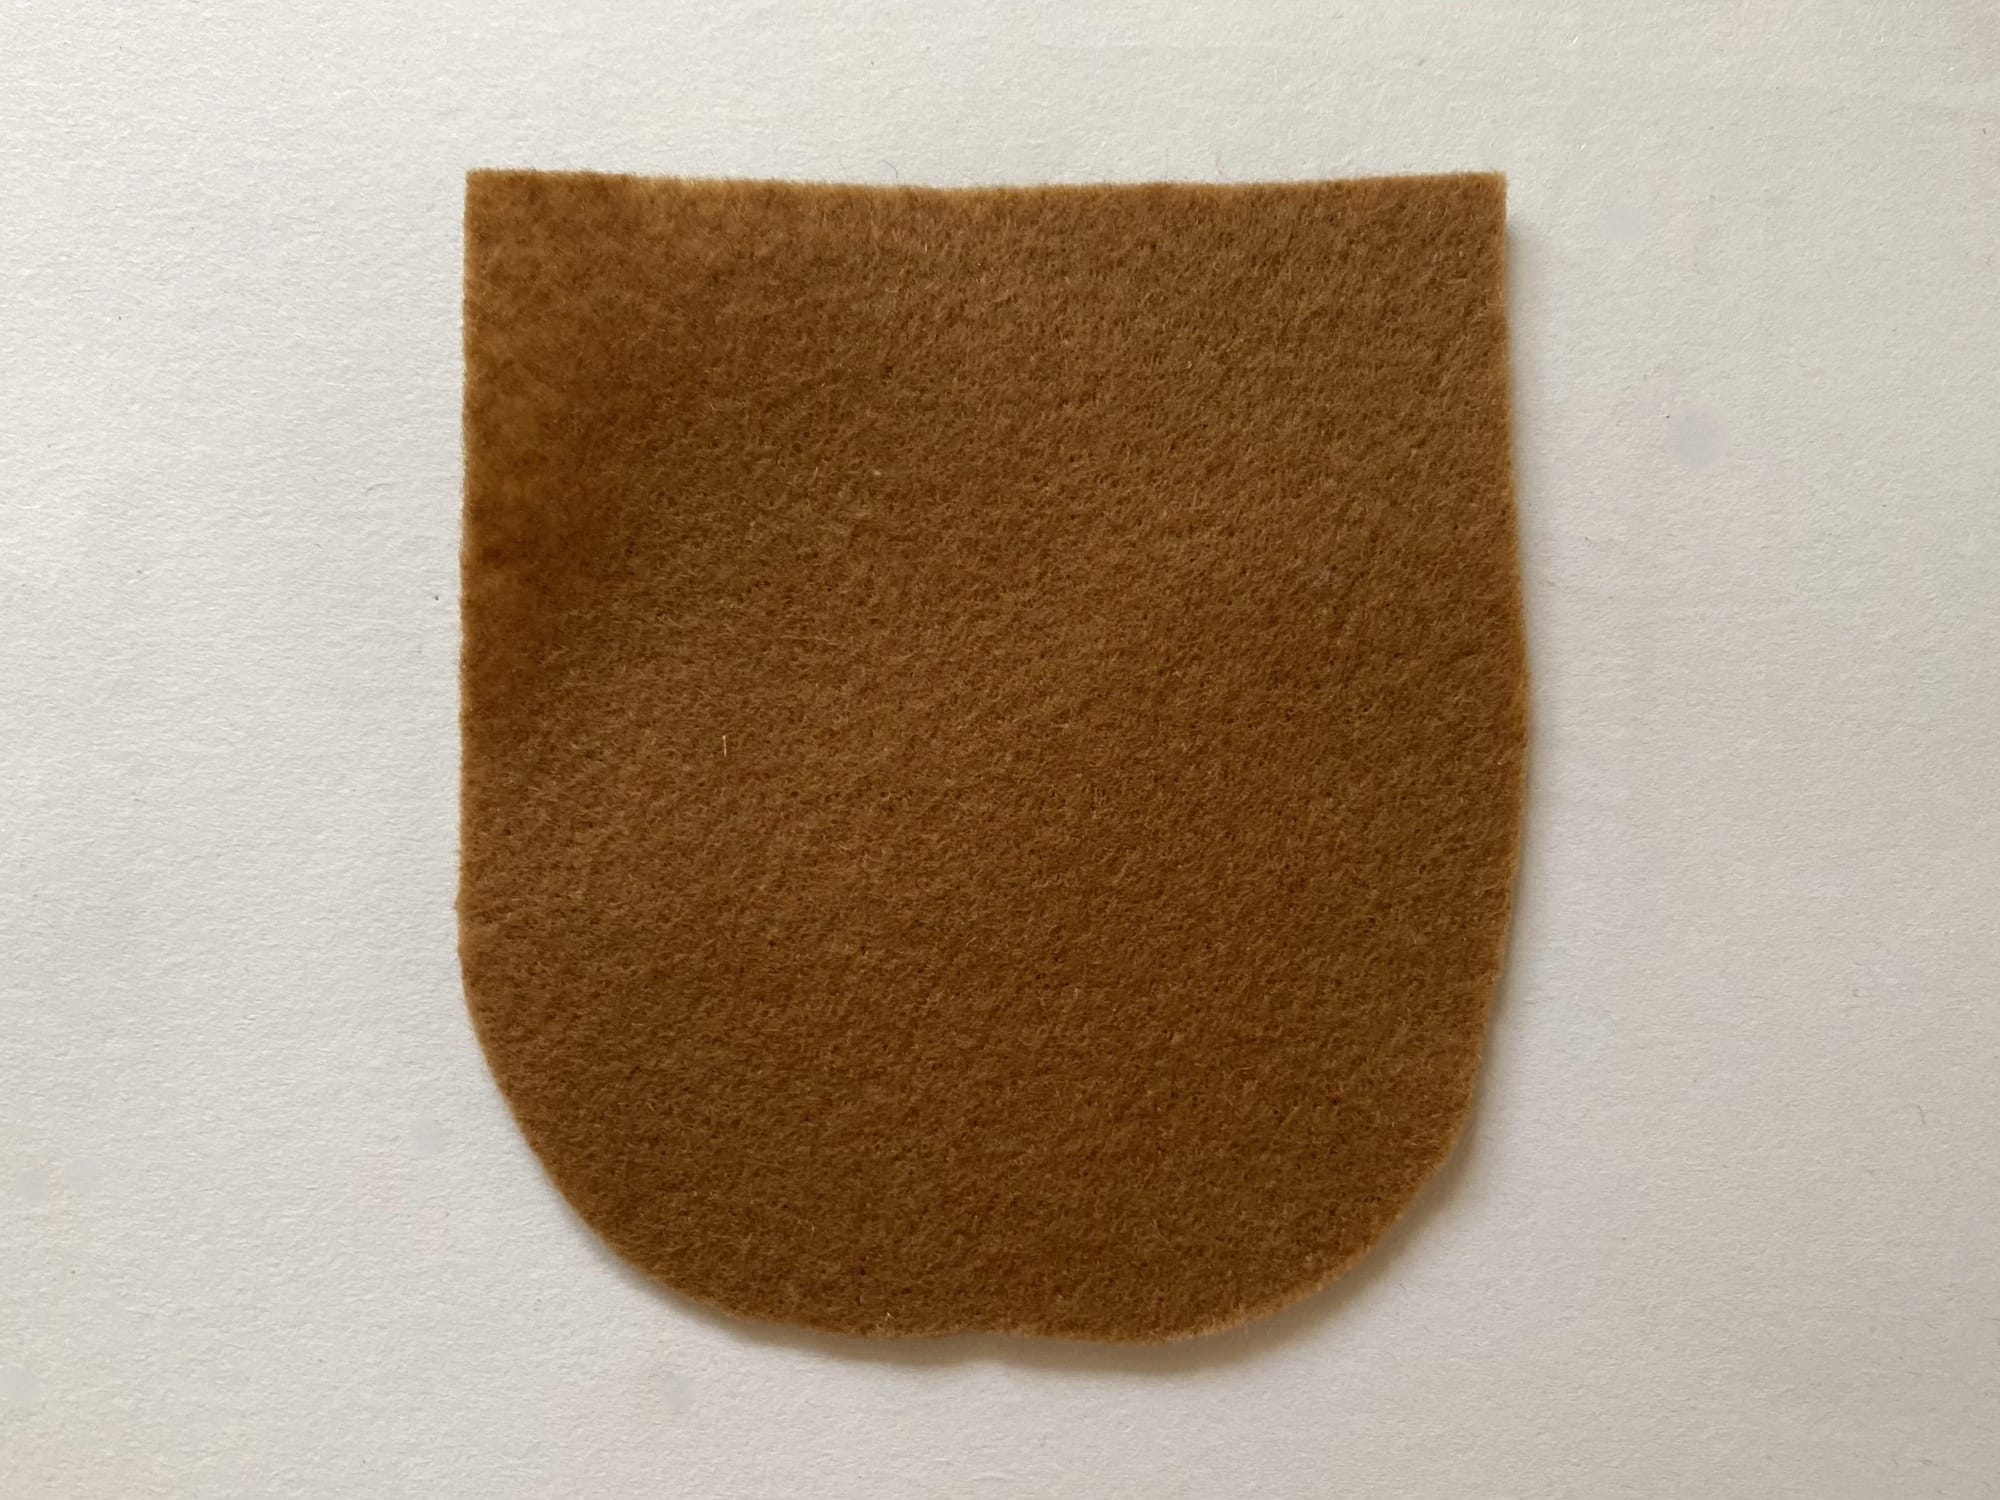
I then took a piece of felt of the matching rust brown color. I marked needed shape, using the original faux leather pocket, and cut the same shape from the felt.
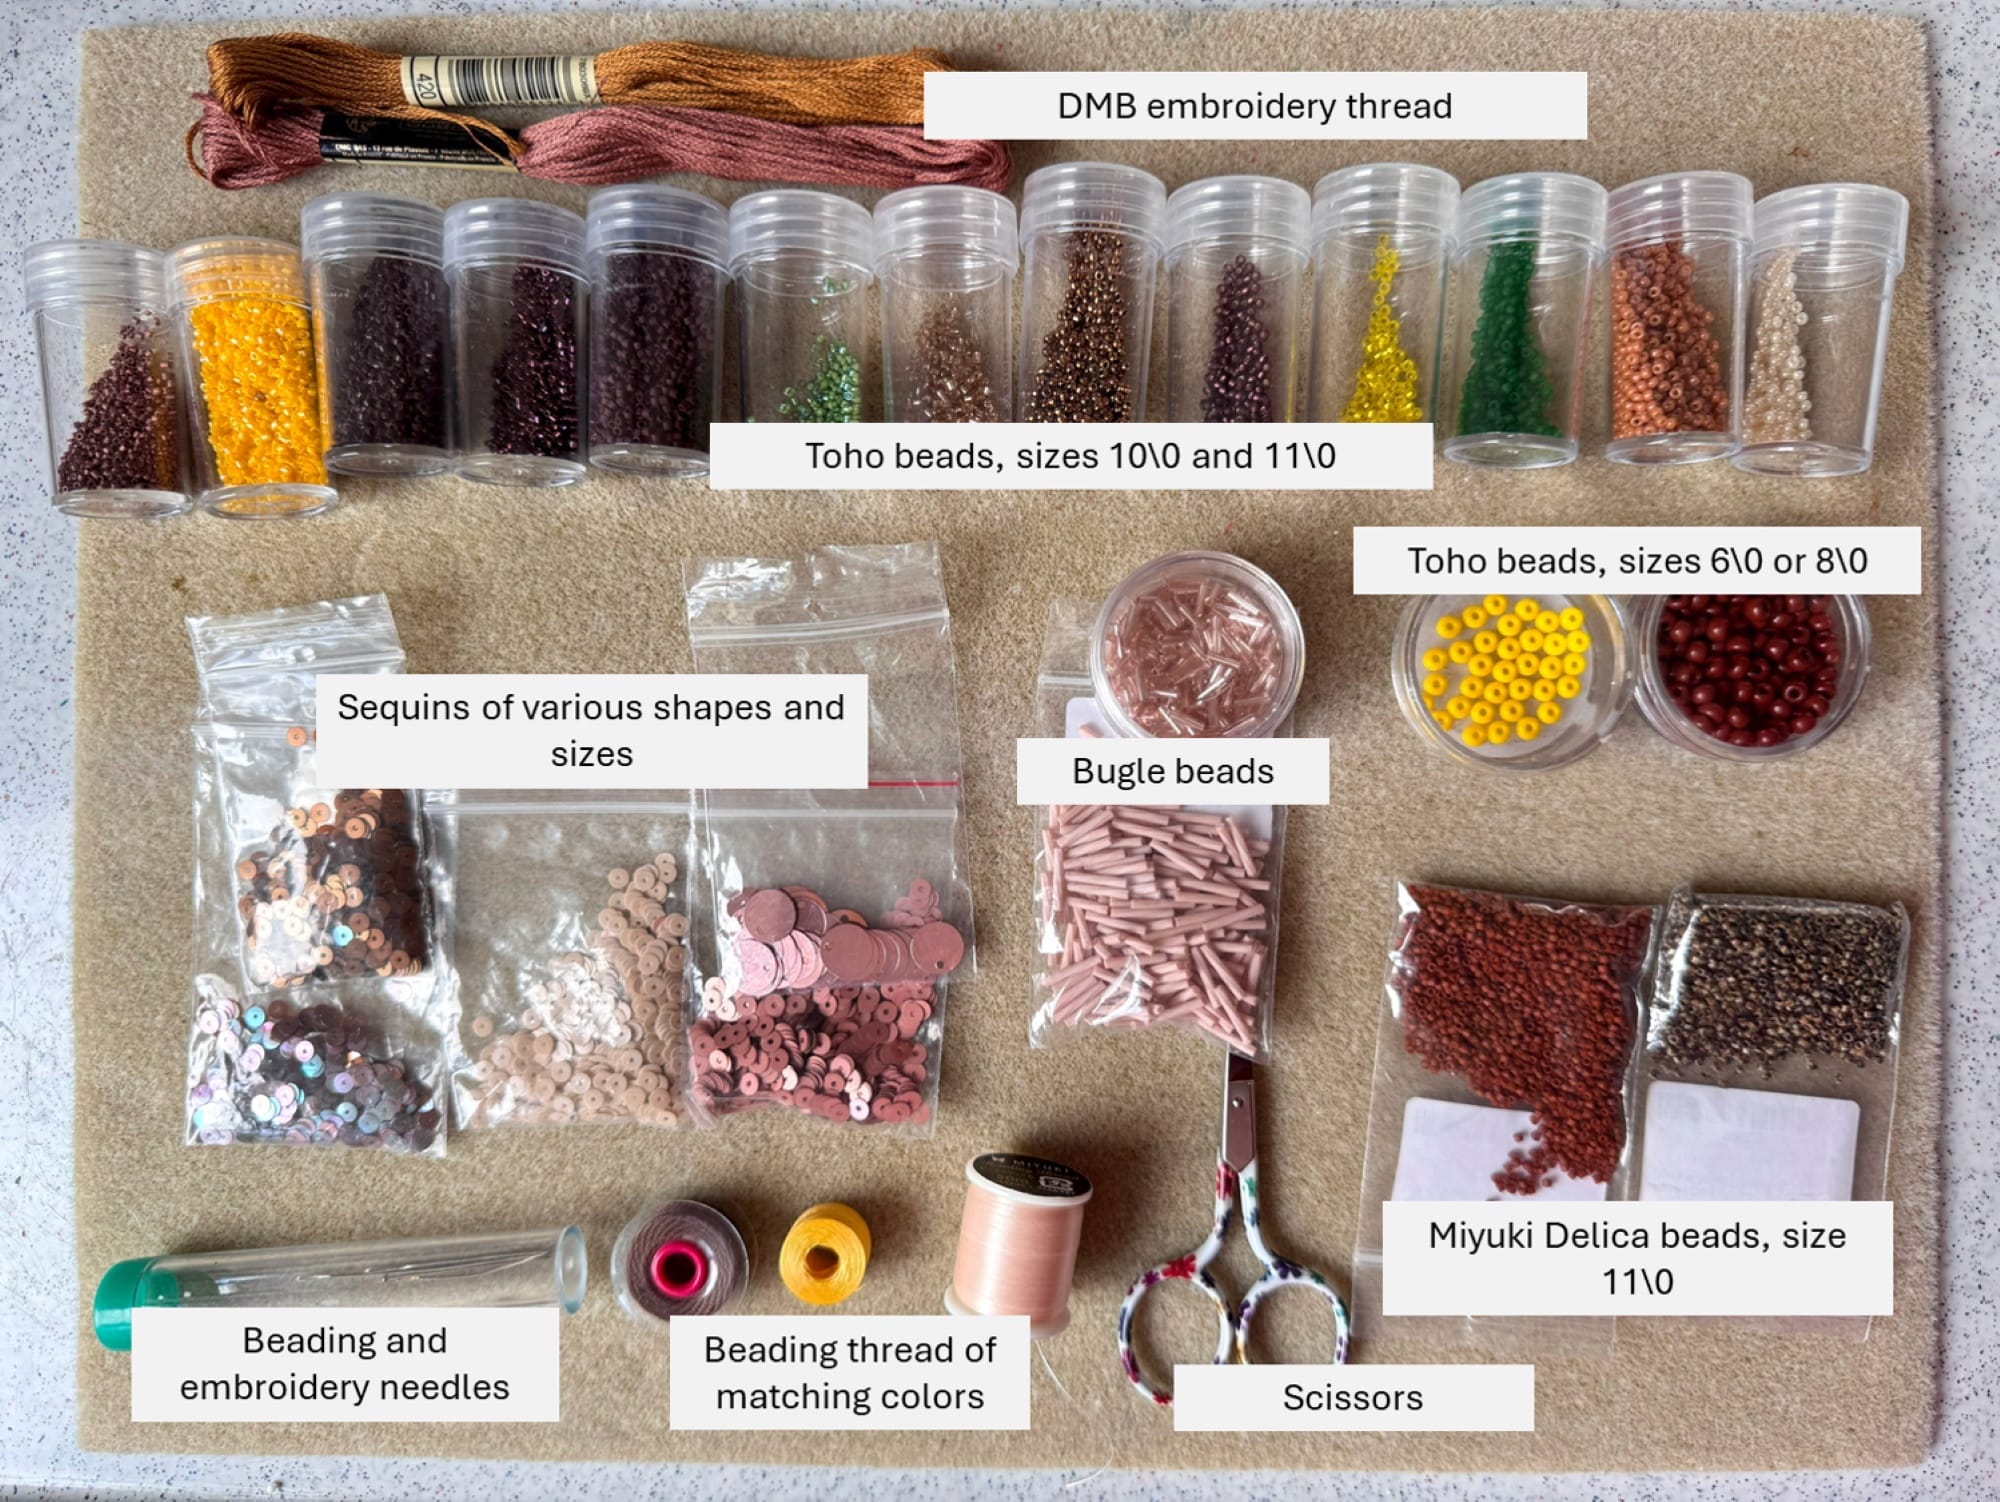
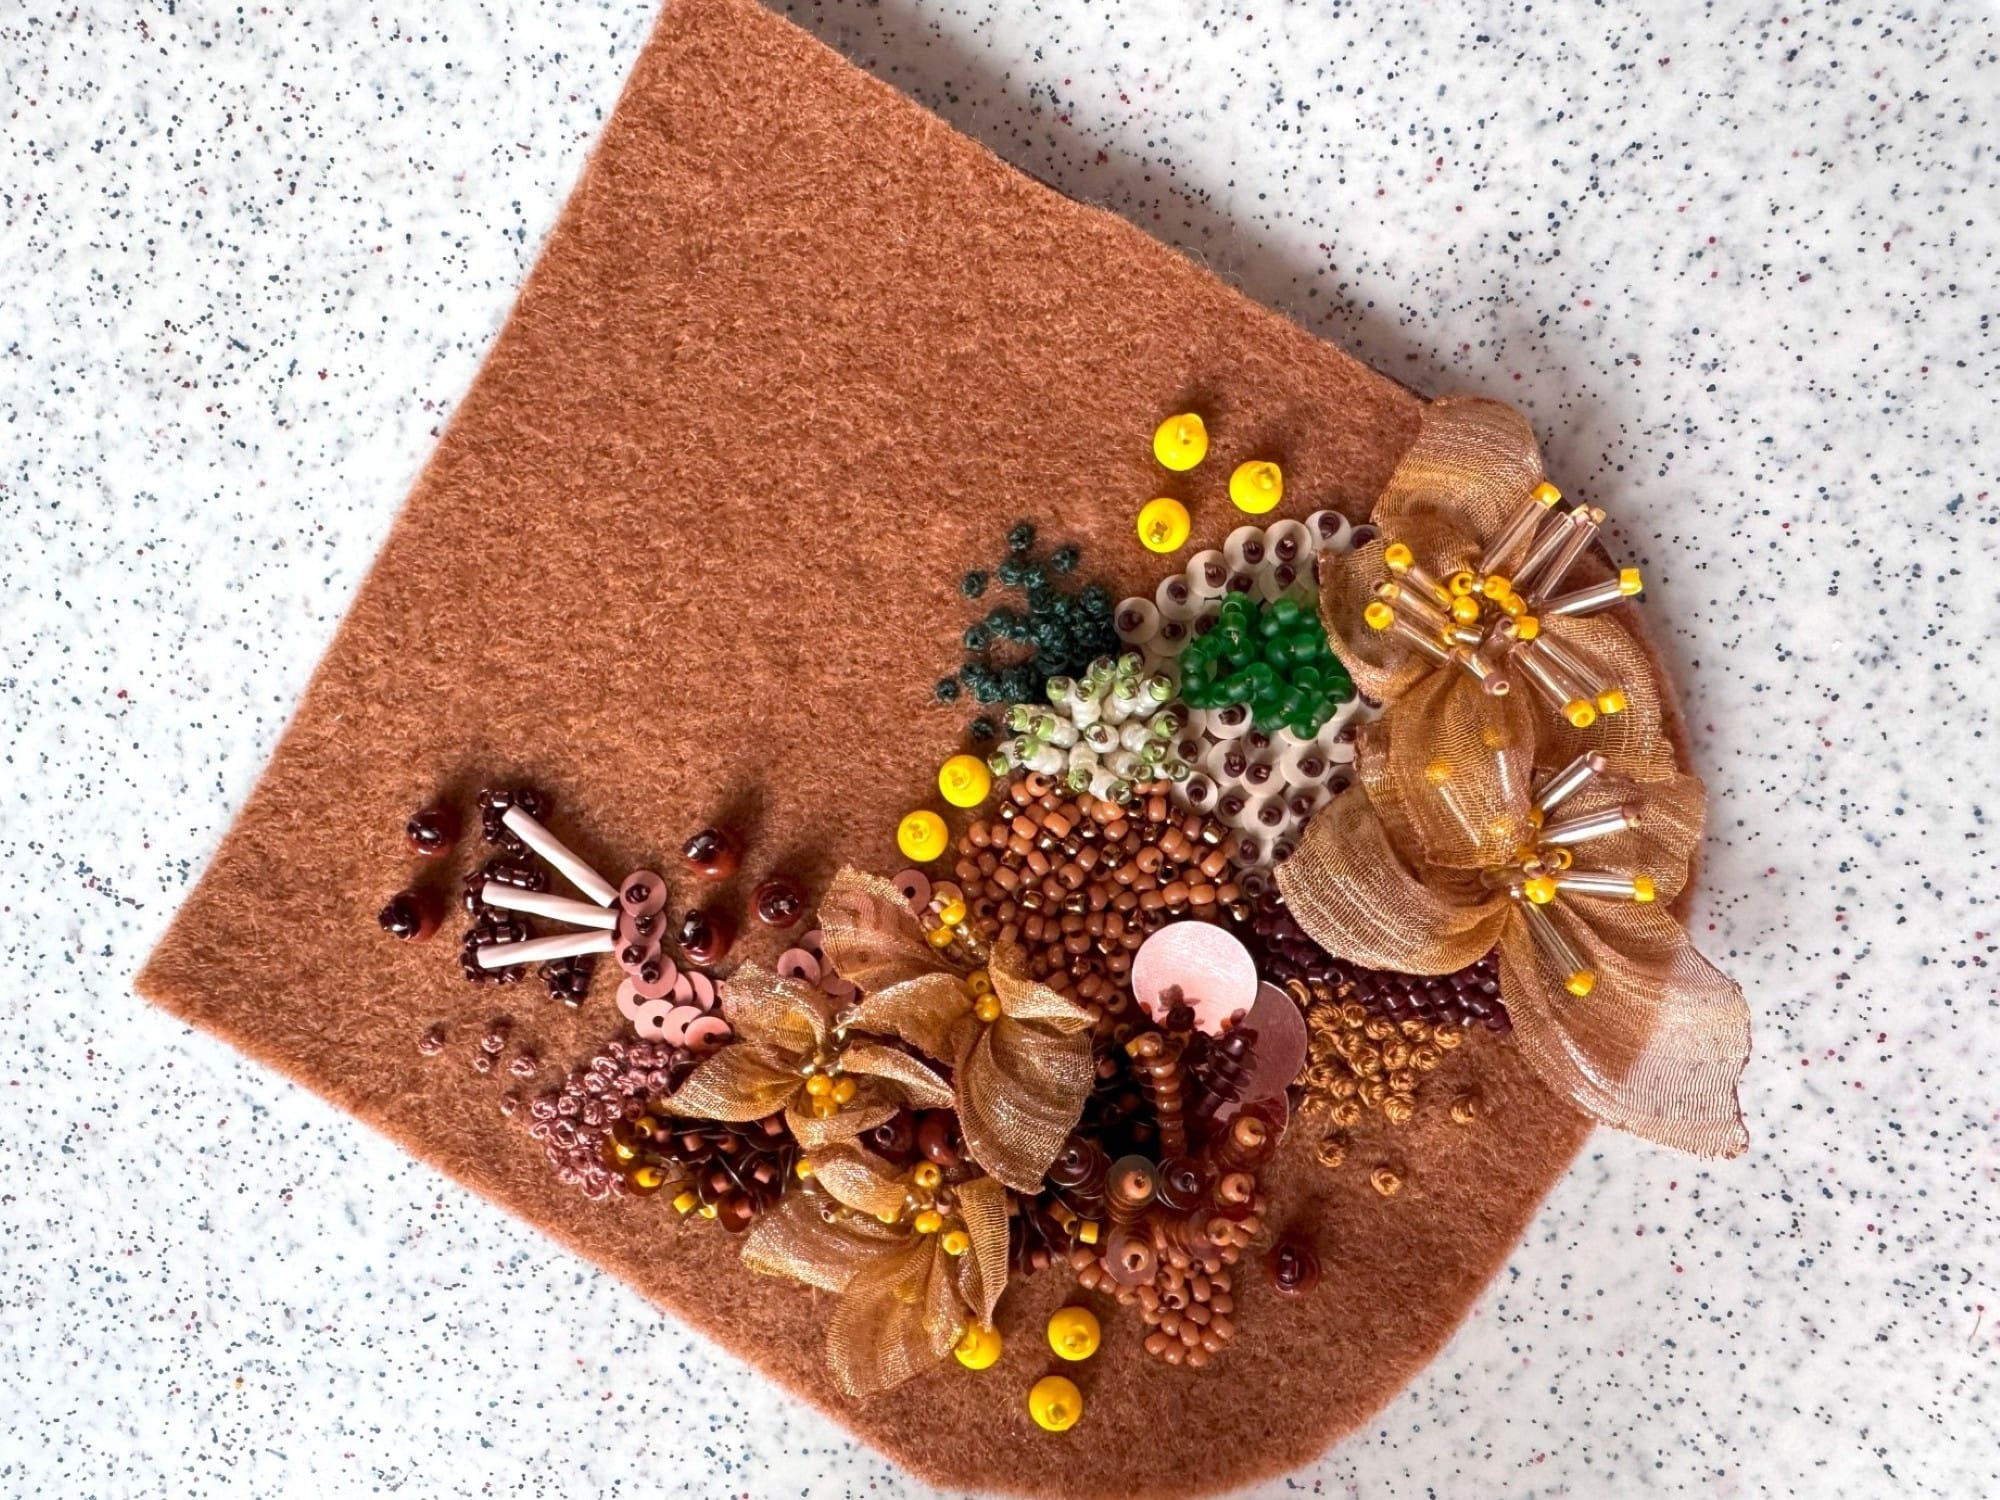
The next step was to review my storage of beads, sequins, bugle beads, DMC threads, and to pick up all materials, which fit my design idea. I wanted the embellishment to match the original color, but also to stand out with brighter accents. I have therefore picked up a bit of green, bright yellow, and some chocolate hues. These are the materials I have used for the project:
Also, as I am currently learning how to create various shapes of fabric flowers, I took a piece of pale yellow organza and made several flowers from it. Leave us a comment if you want me to write about different fabric flowers I currently know how to make, including those used for this project.
After that, I started putting elements one by one, creating shapes and designs as I was crafting. I took a few photos as I was embroidering, and I will give you some additional hints on which stitches or combinations of beads I've used.
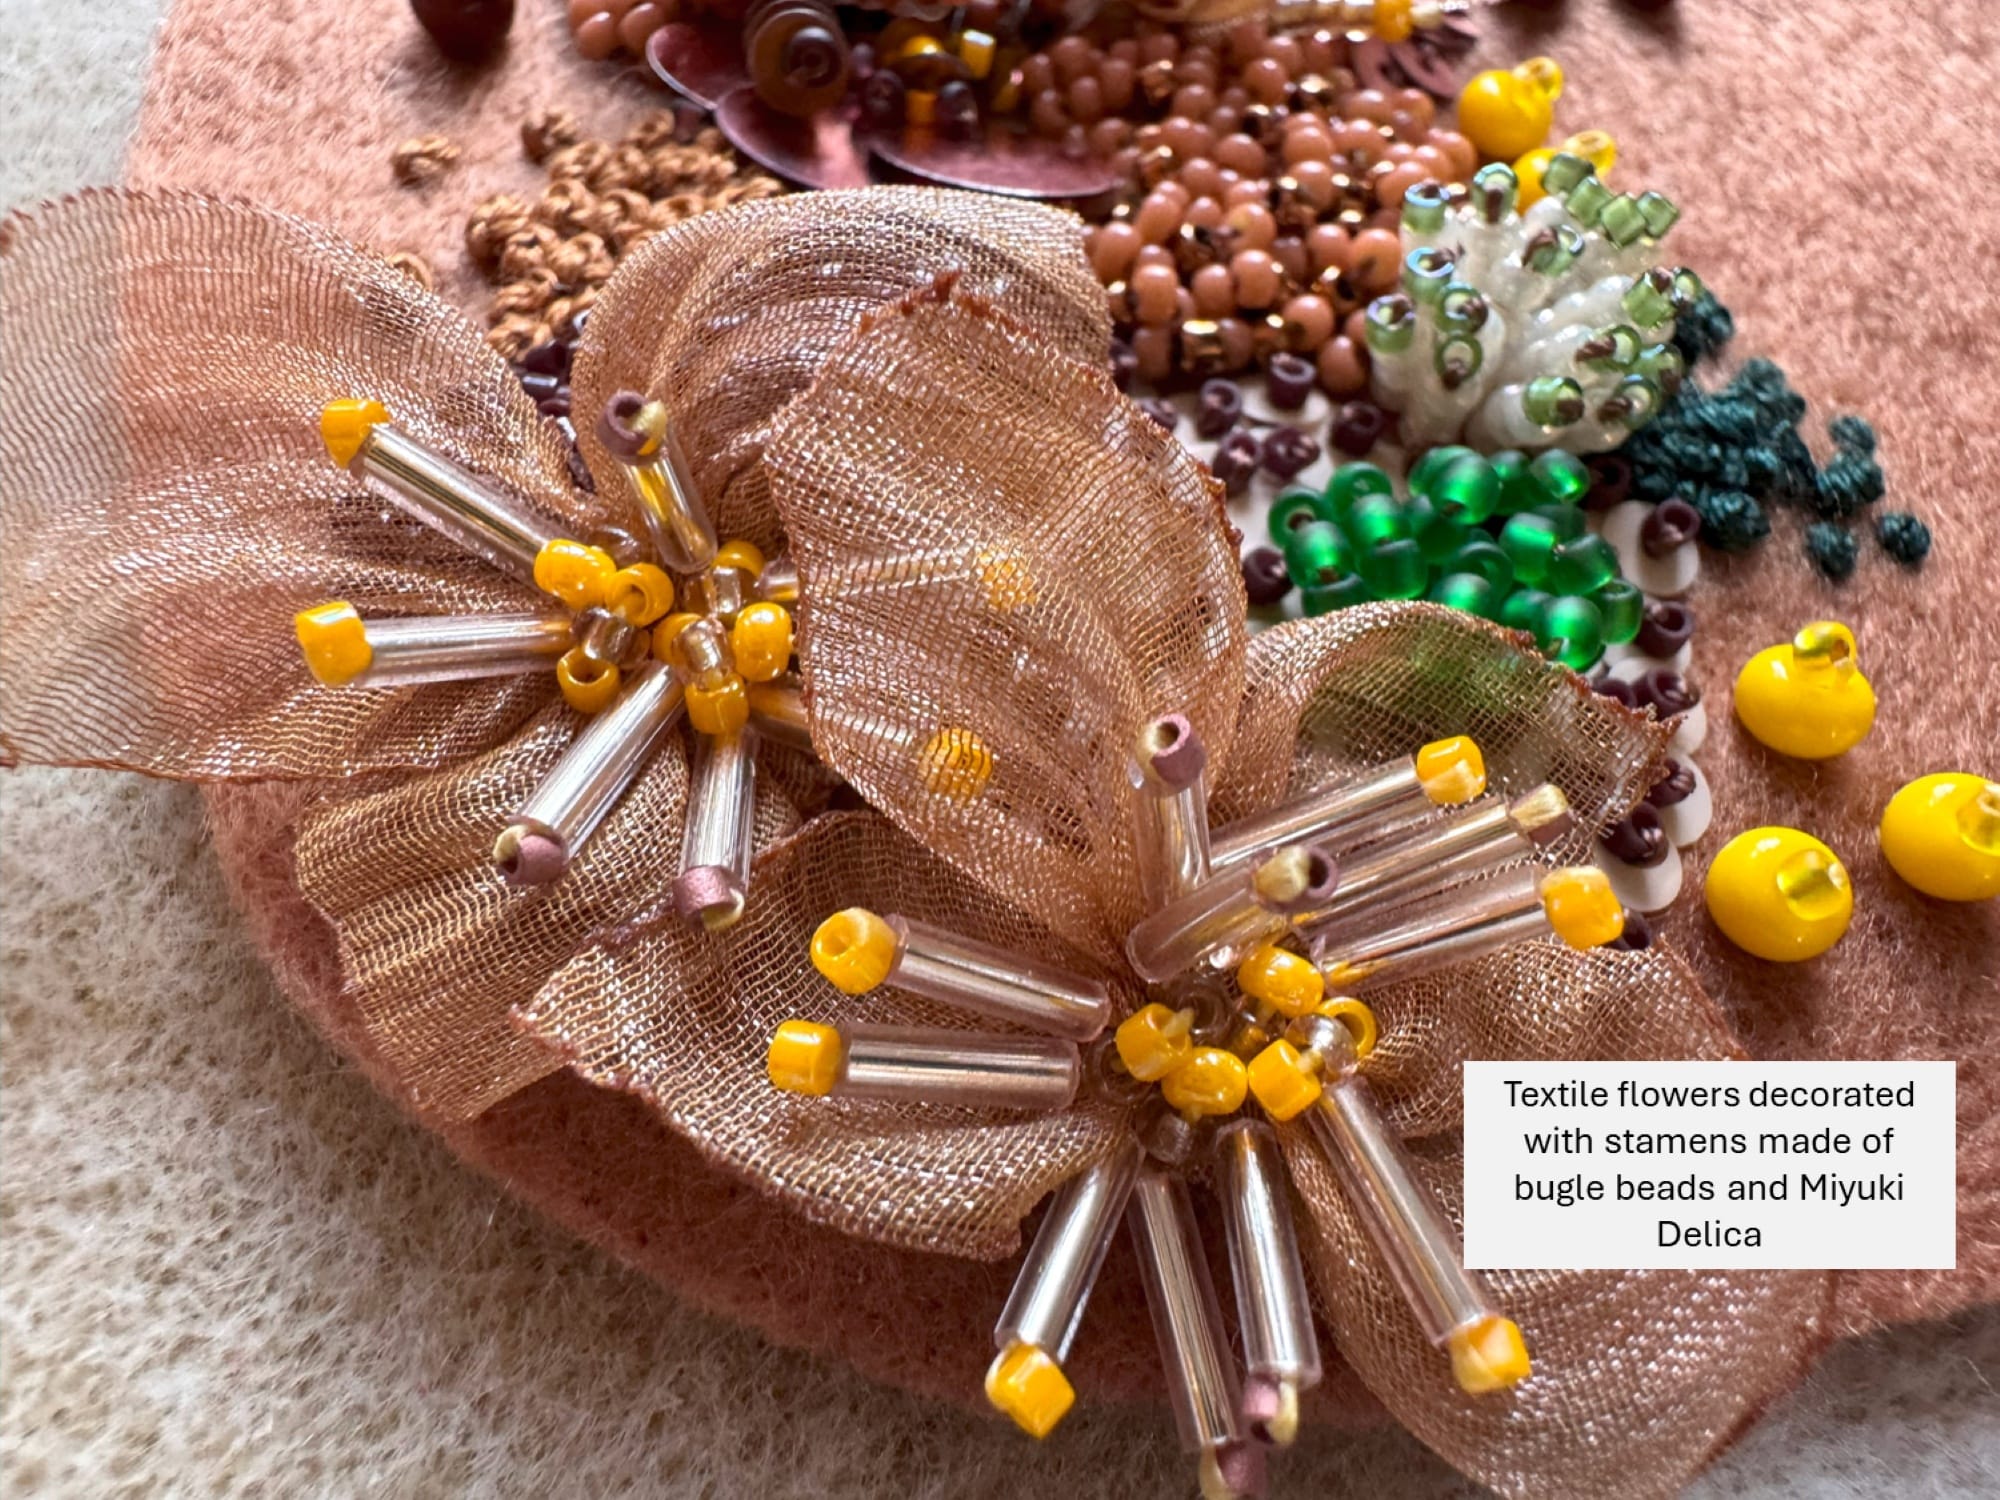
I usually start with the anchor elements of the design. In this case, these were fabric flowers. I decorated them with stamens made from one bugle and one Miyuki Delica bead, and then I filled in the center of the flower with yellow and gold beads. Attaching stamens and filling the flower's center also allowed me to fix the flower on the felt.
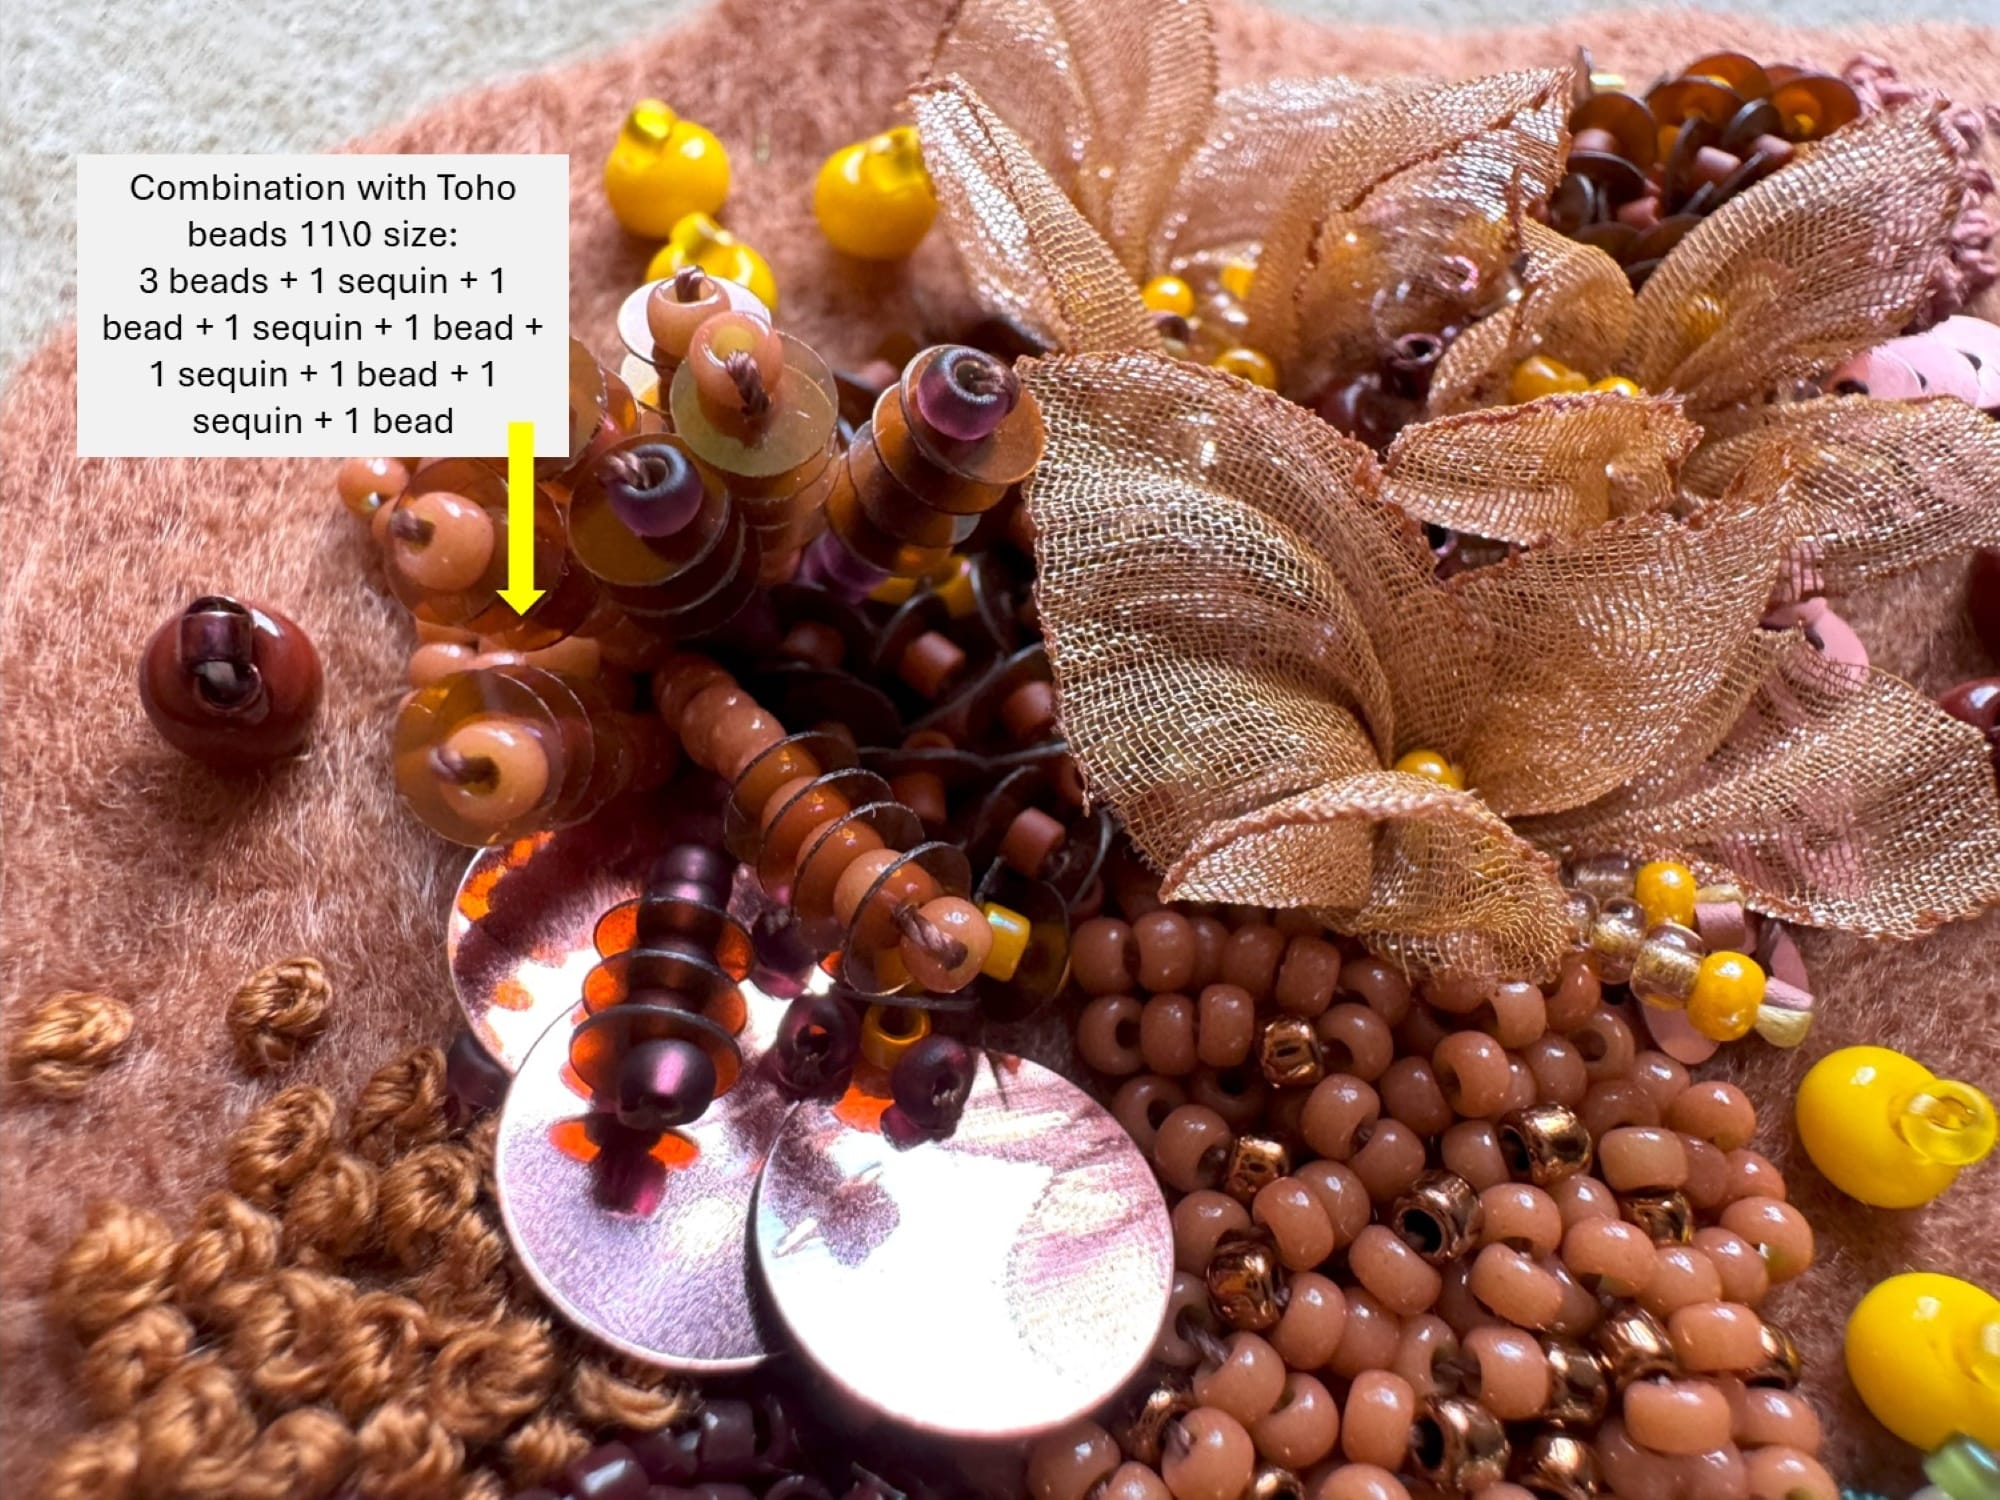
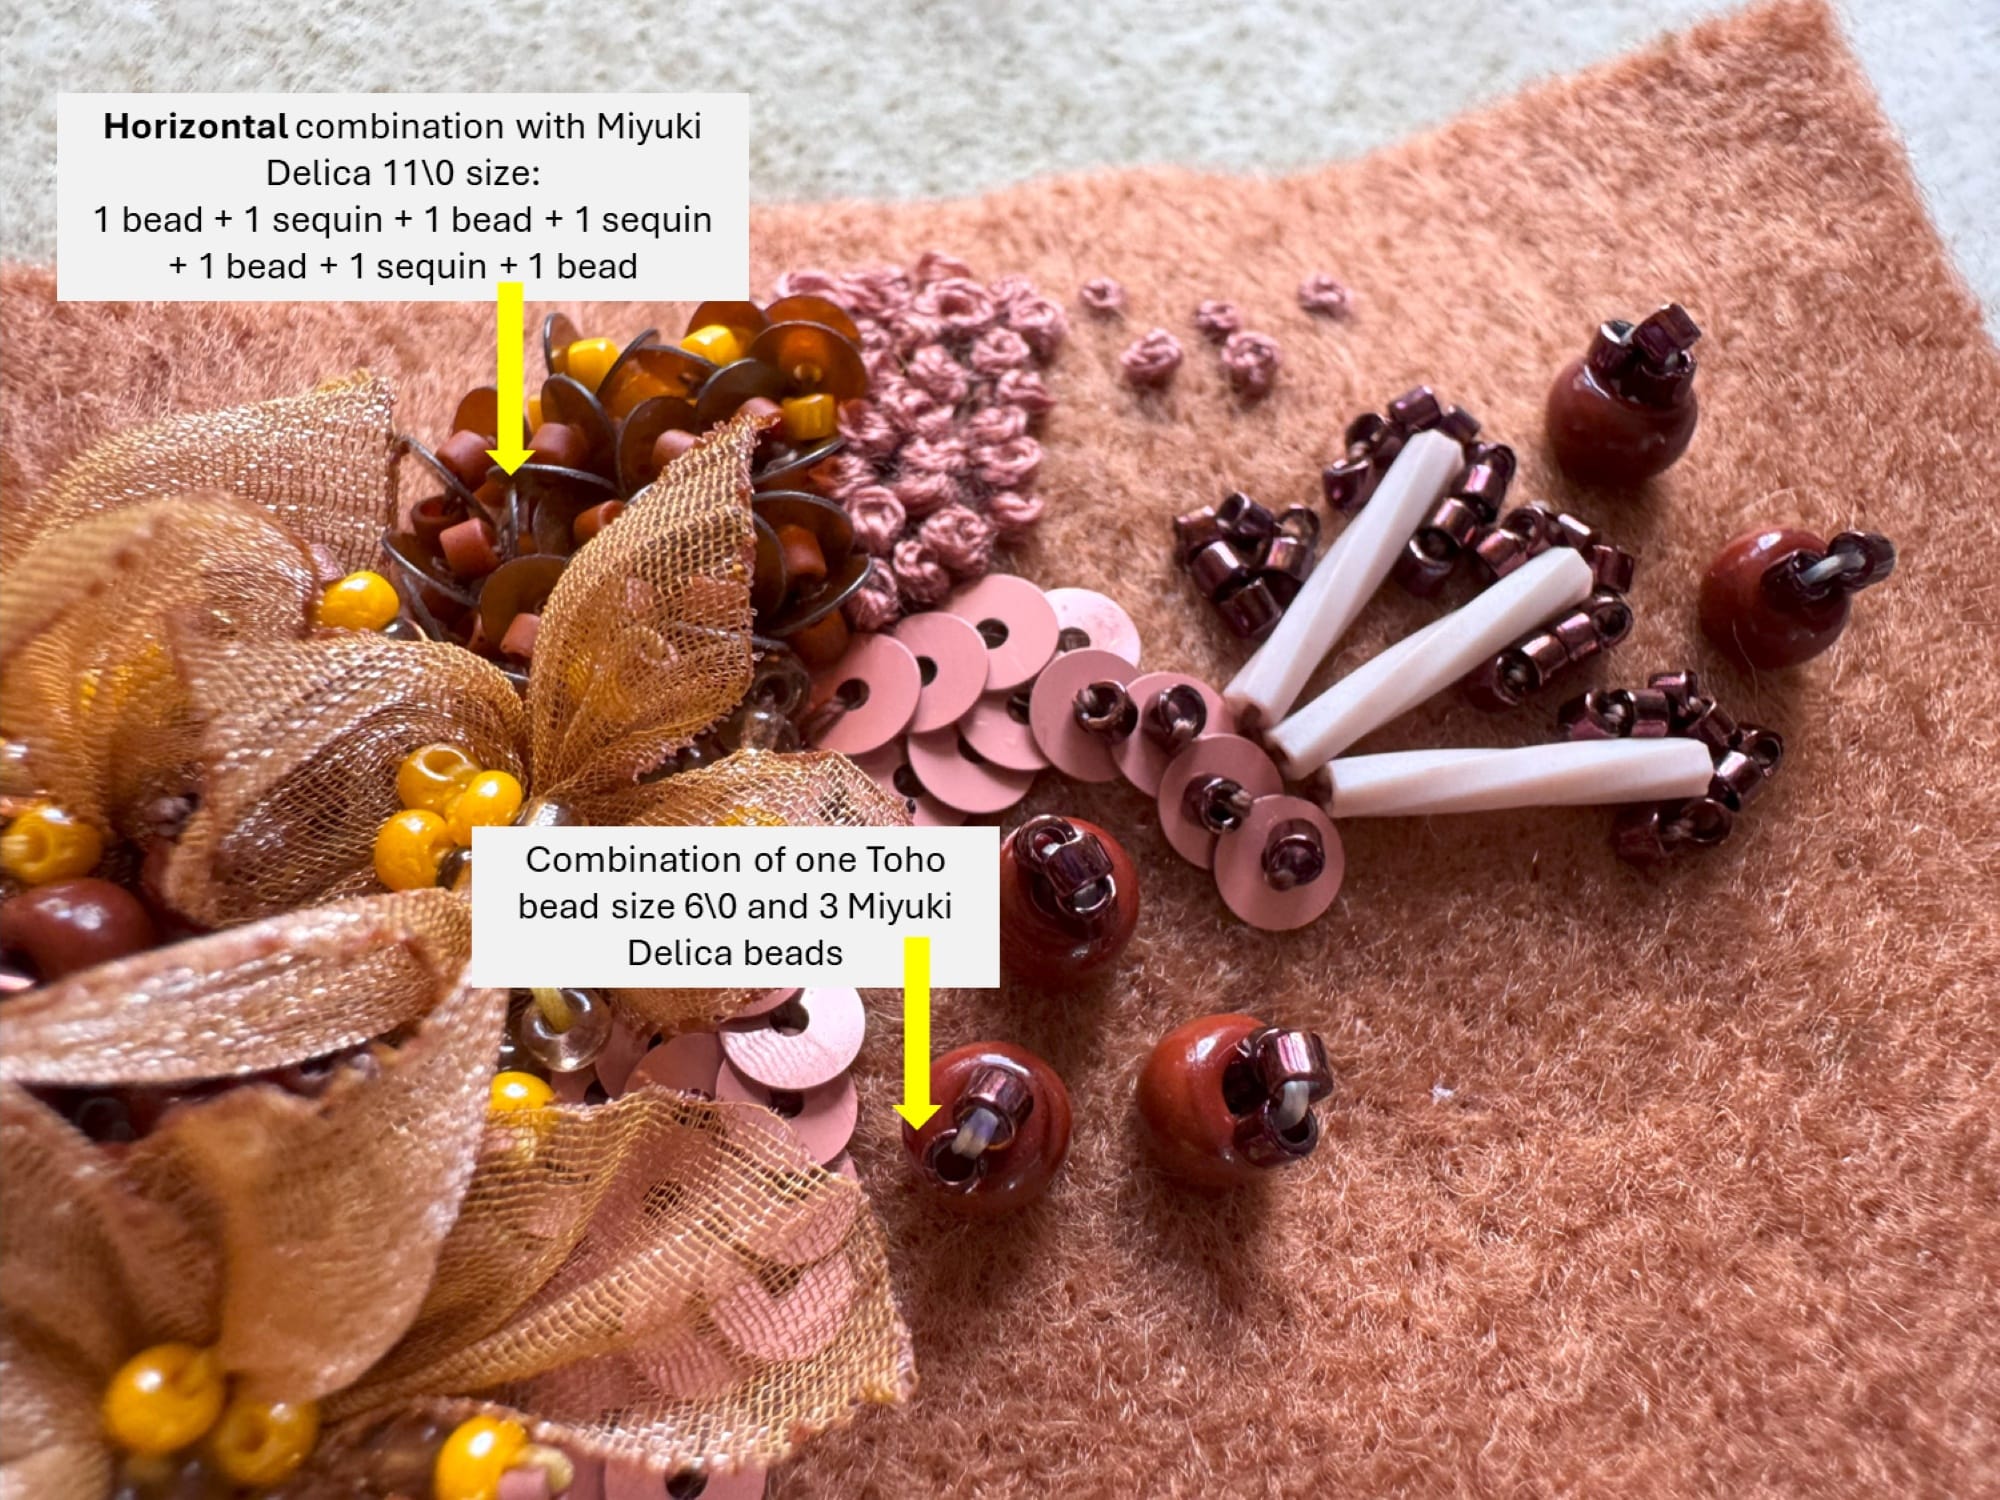
To highlight pale flowers, I added brighter or more contrasting combinations next to them. These included light yellow sequins with dark brown beads, and arc stitches with four bright green beads. Flowers gave the decor some volume, and to compliment it, I used a few vertical combinations, for example, a combination of 3 Toho beads with one Miyuki bead on top. At the borders of the composition, I added a few French knots to make the whole design look finished.

I recently did a lot of volume beading. By the way, I have a detailed post about creating various 3D beading stitches in case you want to learn more about this technique. One of my favorite stitches is a combination of several beads and several sequins. When put together, such combination looks like a small succulent. To make it look natural, I used different amounts of beads at the base of the combination: sometimes it was four Toho beads, sometimes three, and close to the edge of this element, even two beads at the base.
Another combination that I like is the so-called 'caterpillar'. It is an arc stitch in which you alternate one bead and one sequin. When you put a few of such stitches next to each other, they add this curly effect to your design. And, as you have already seen in previous photos, I added a few big Toho 6\0 size beads all around my work, leaving some air between dense embroidery and such standalone beads.
Originally, I was planning to fill the whole surface of the pocket with the embroidery. However, when I started crafting element by element, I understood that filling the whole pocket would be too much. So I ended up with this diagonal composition going from the bottom right to the top left. The majority of the composition is created with muted colors accented with bright yellow, deep green, and chocolate brown.
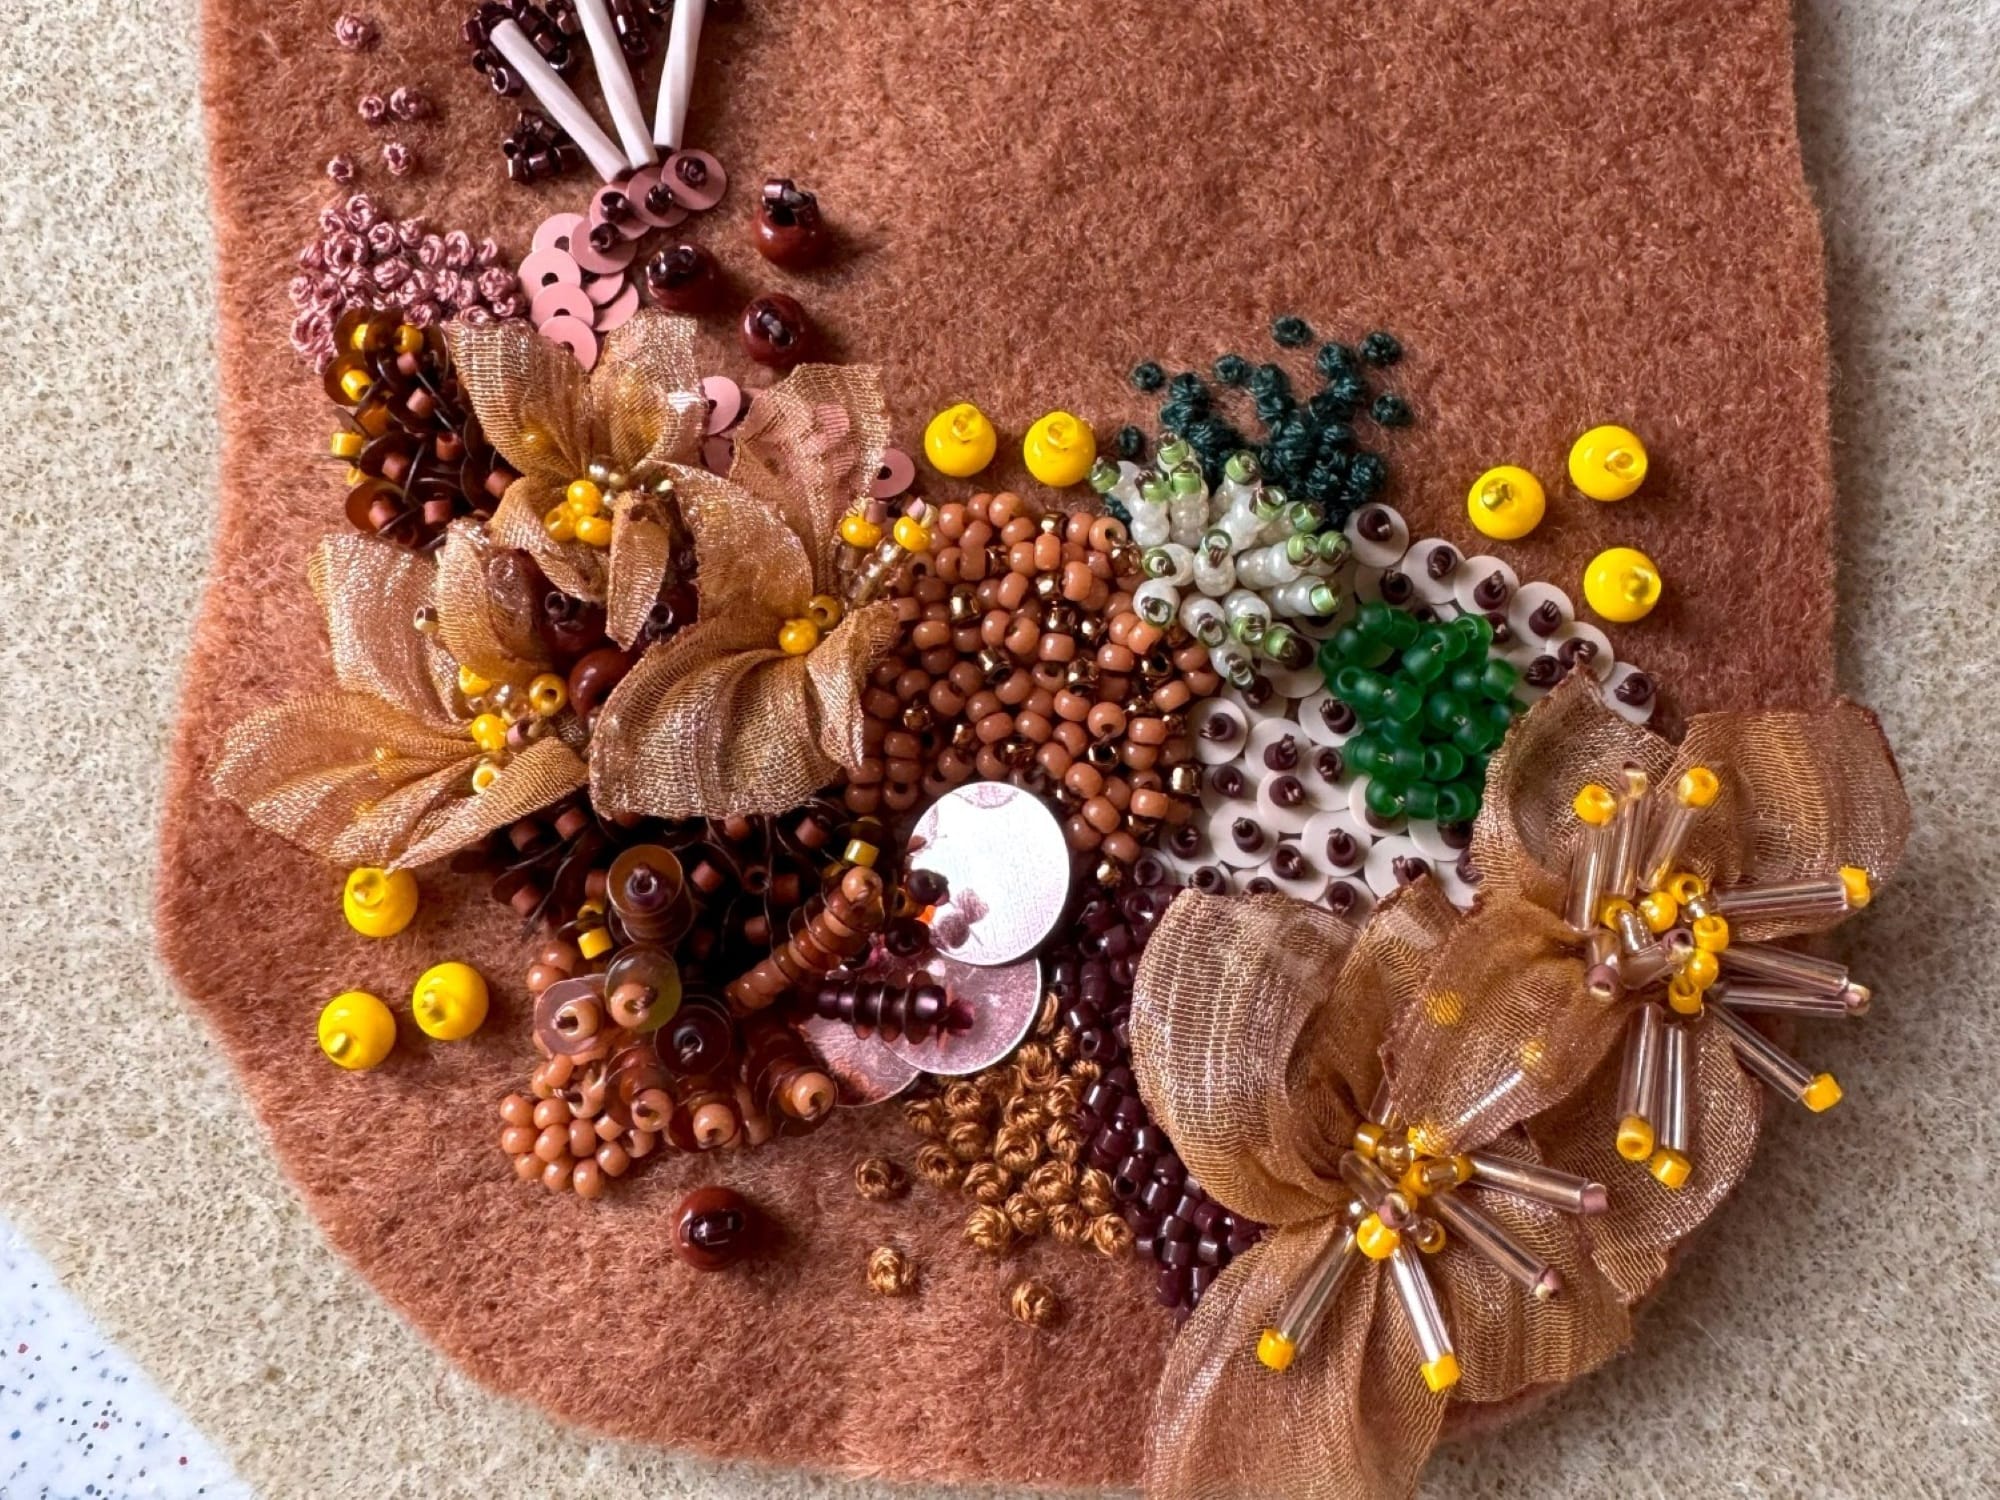
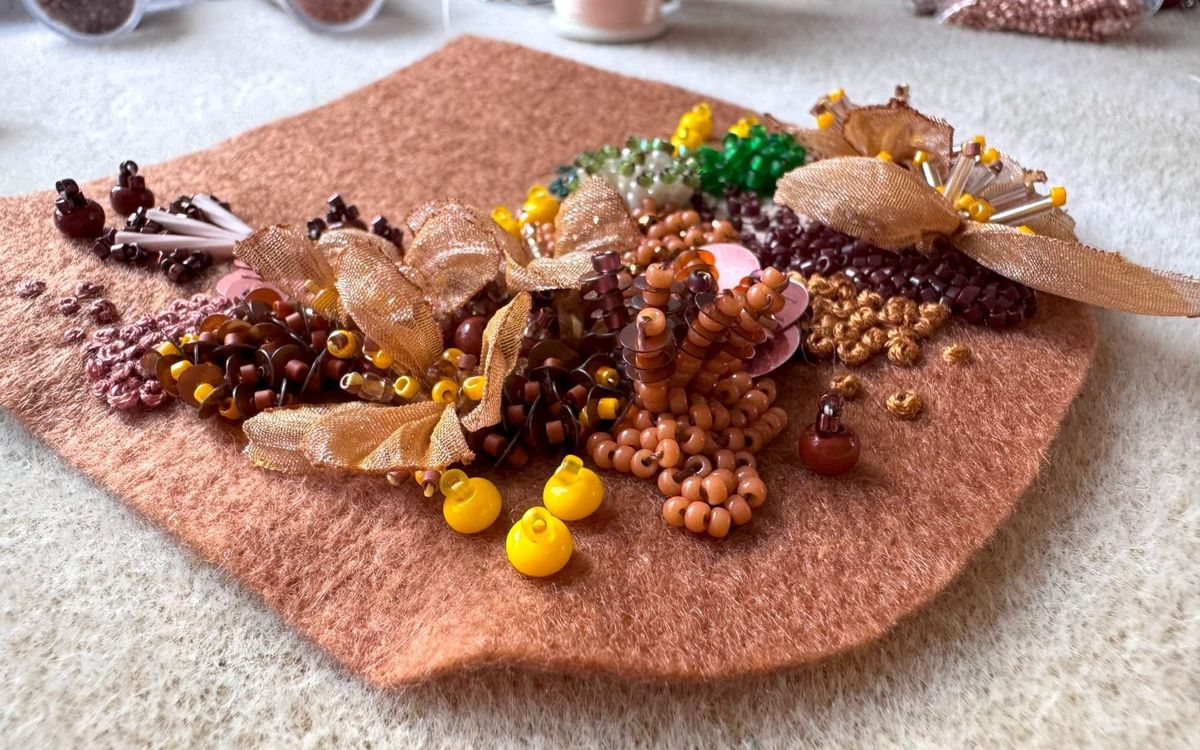
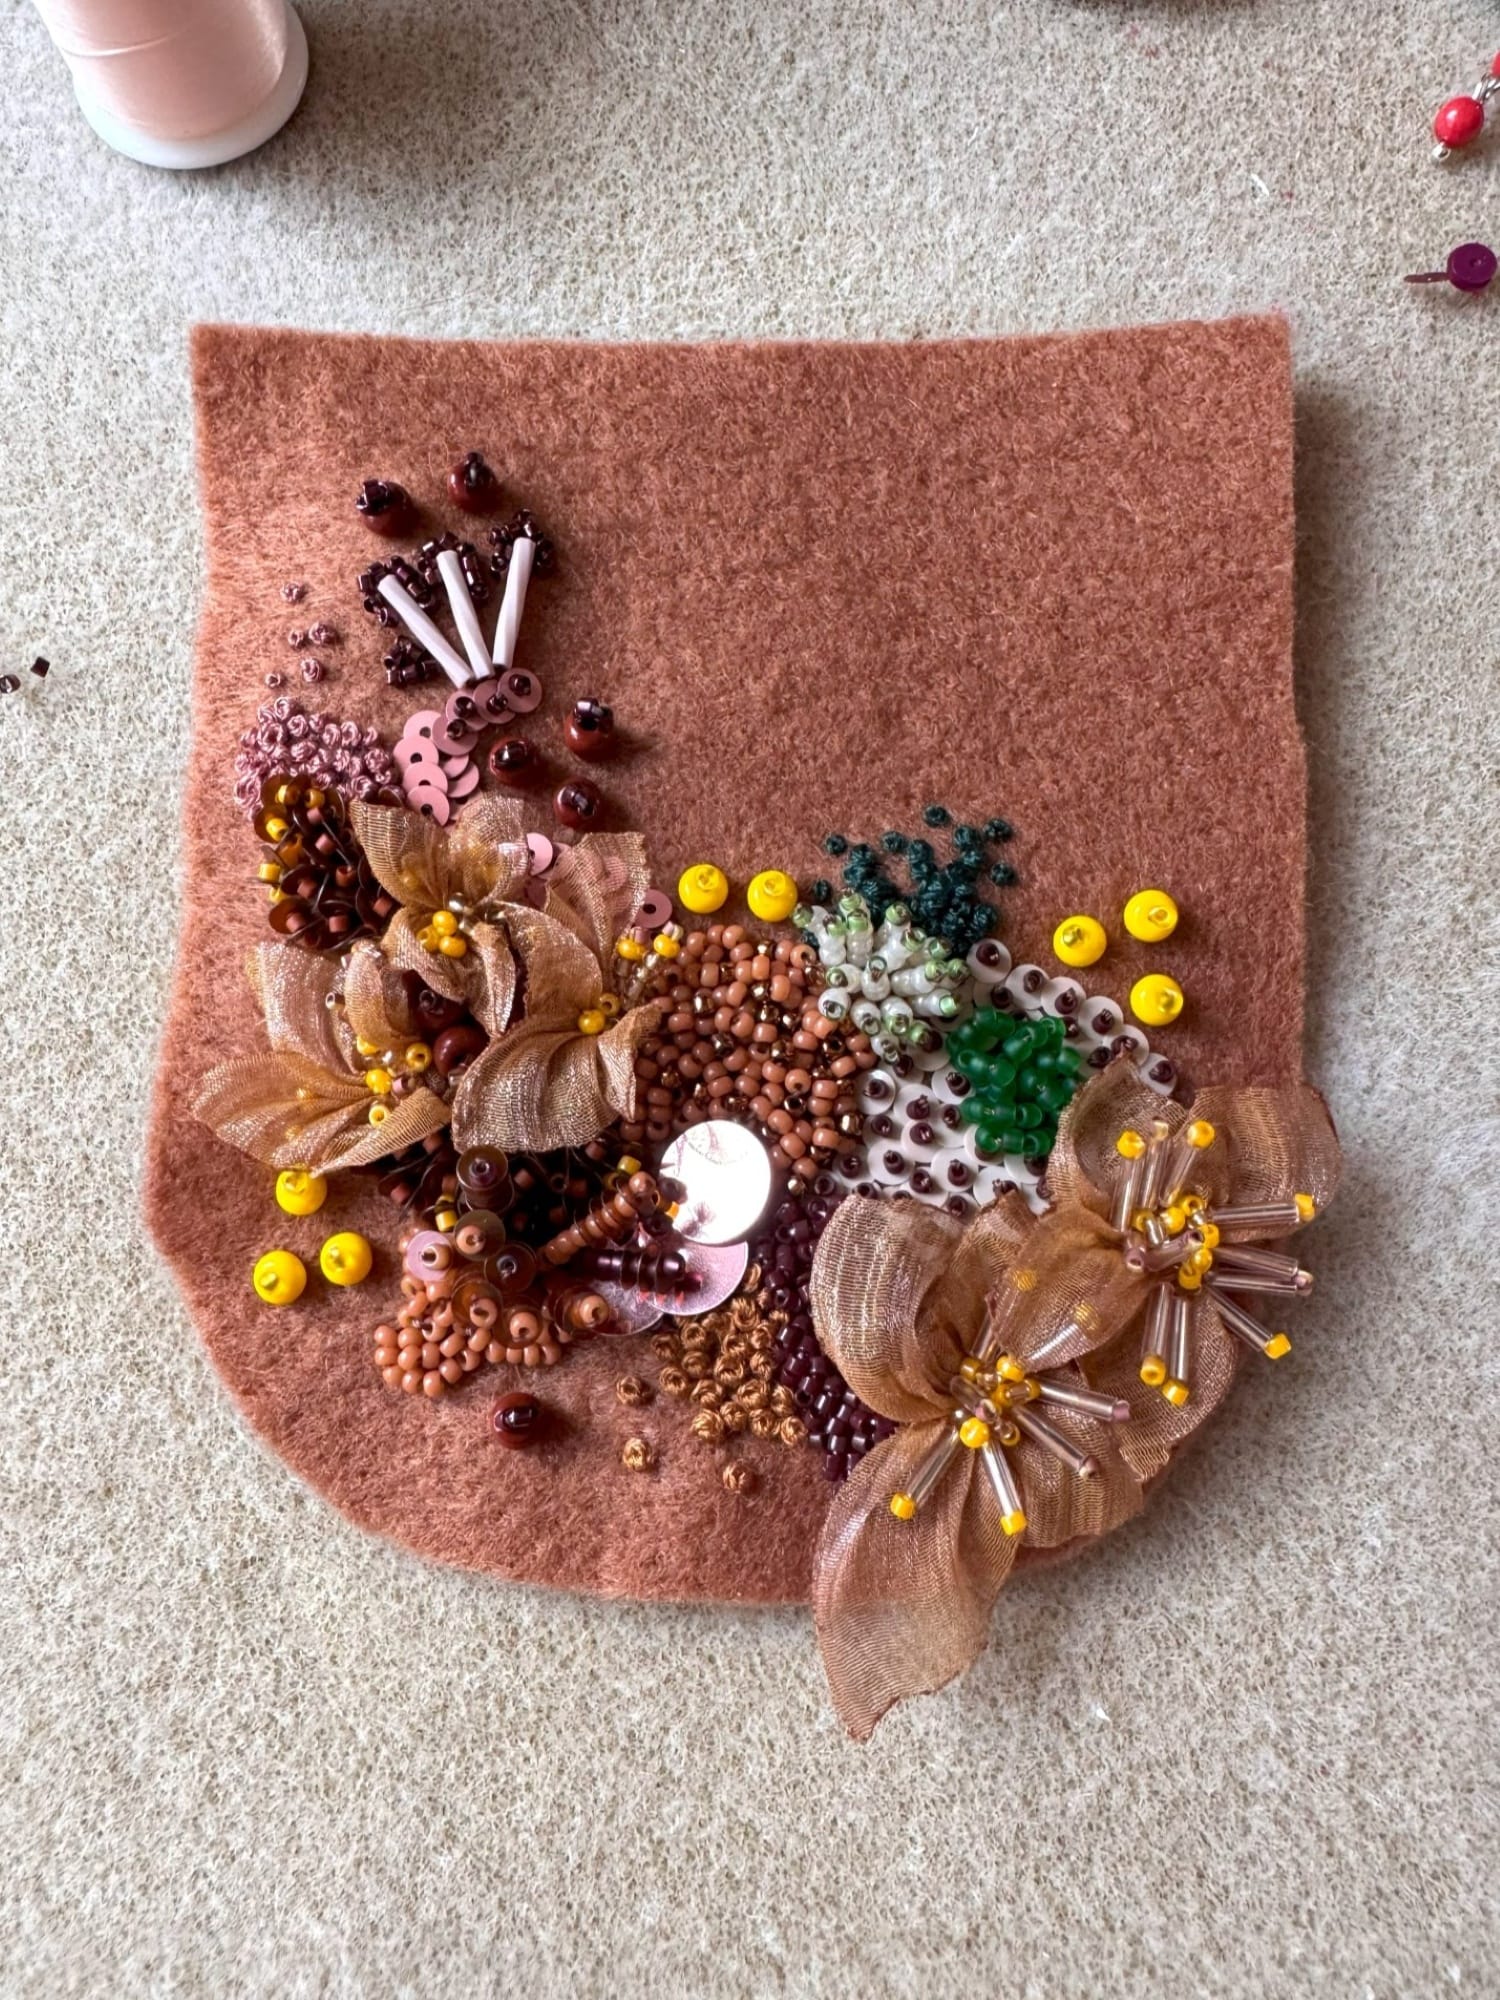
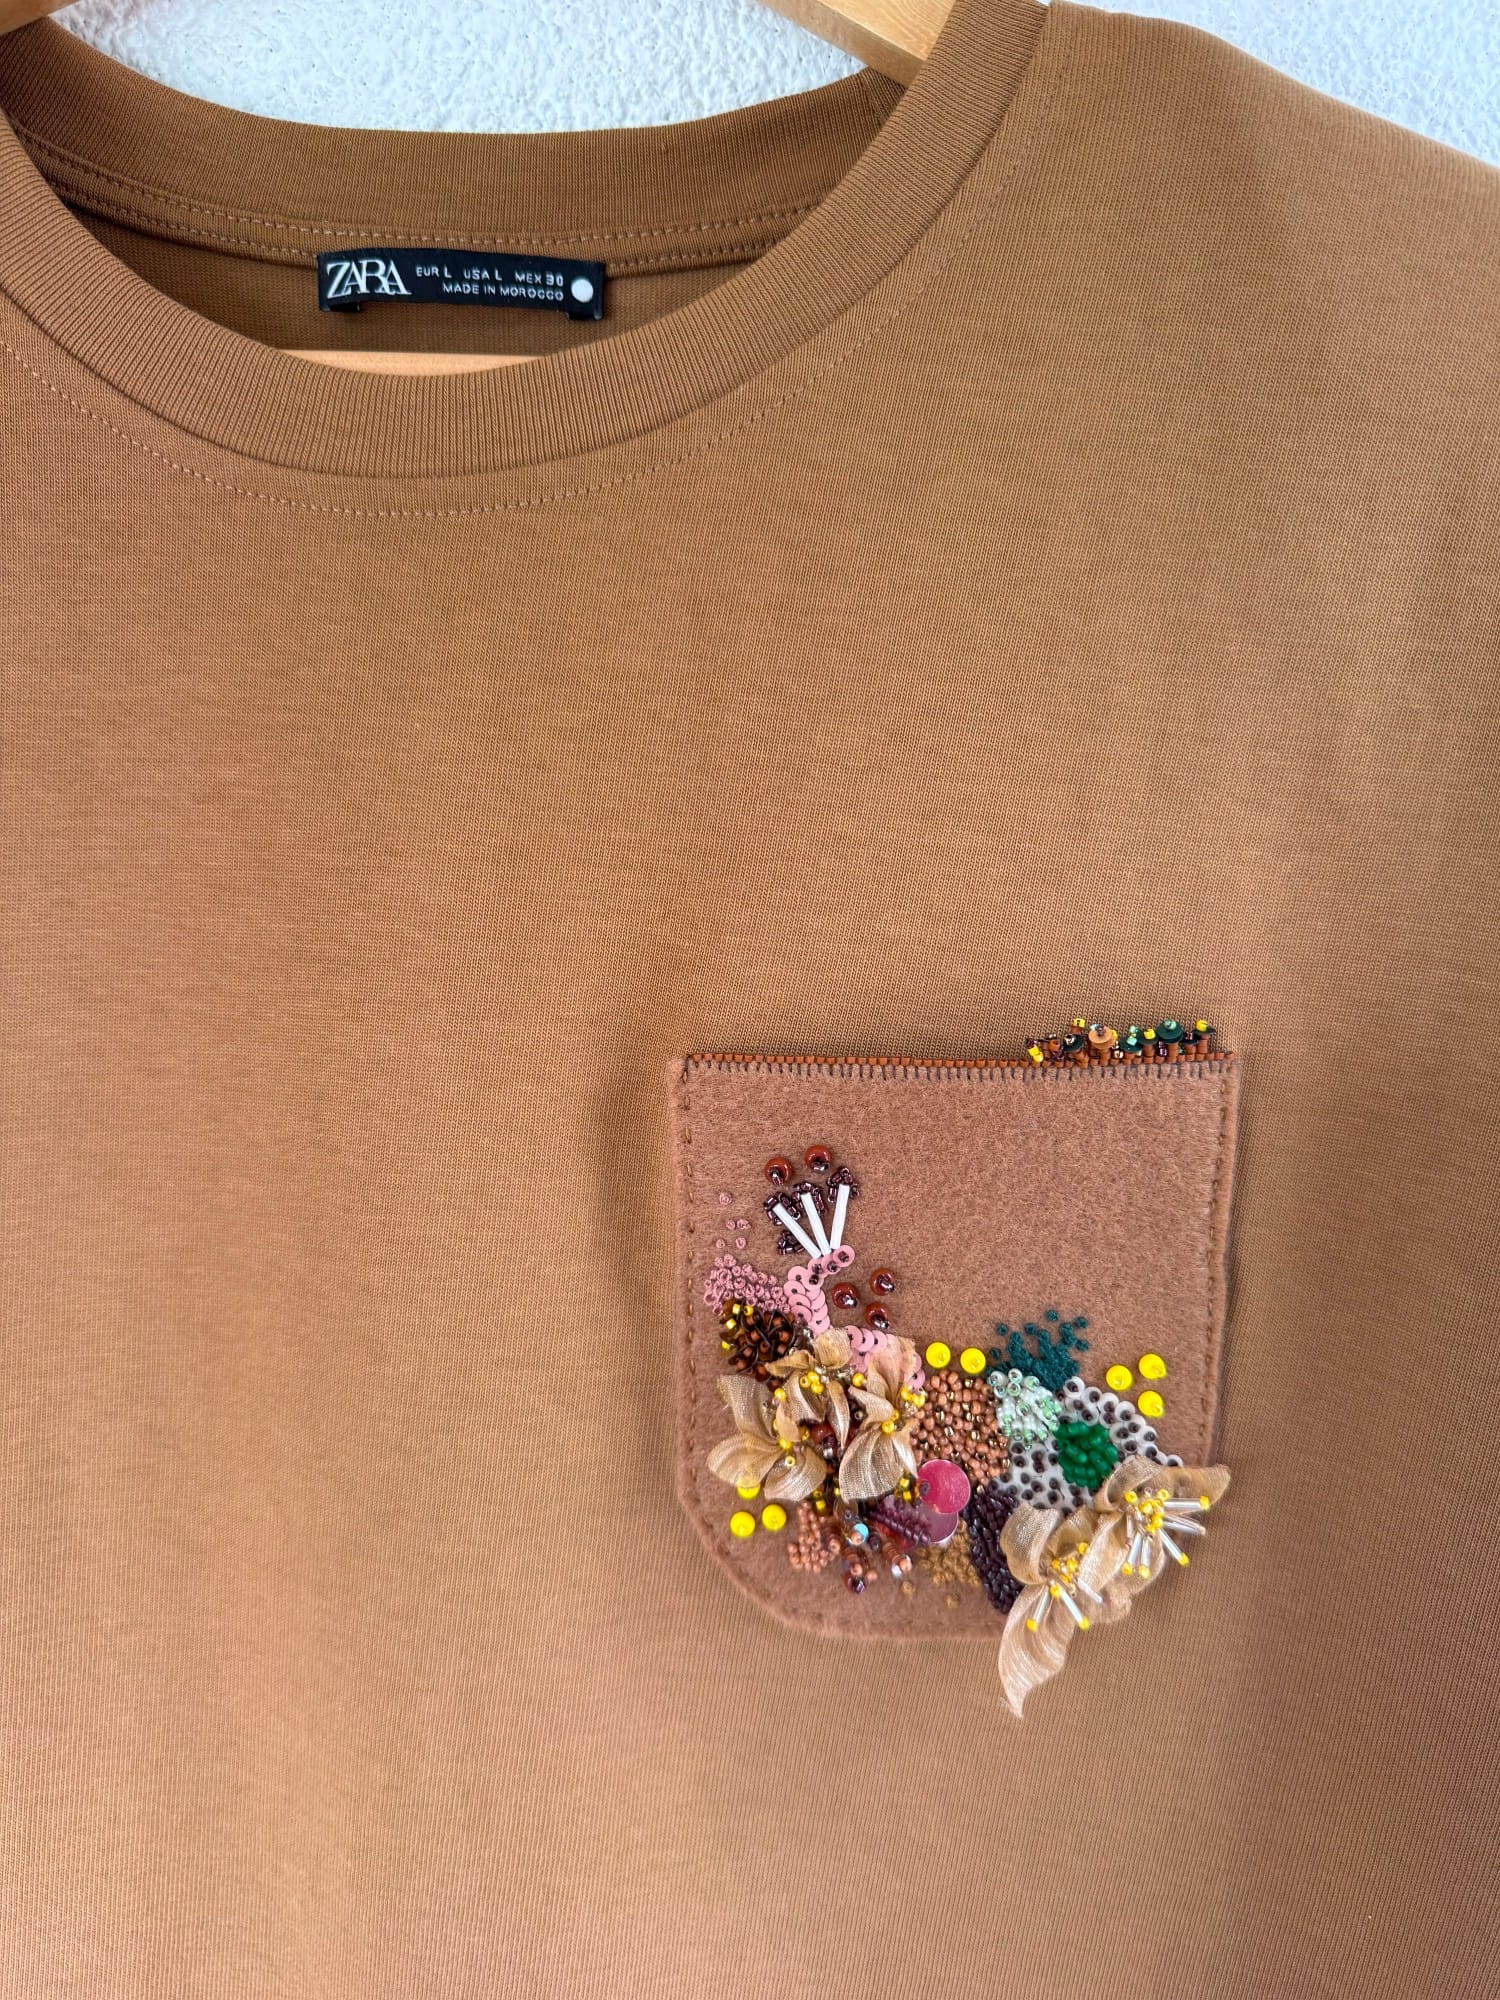
Here is how the final design of the felt detail looked.
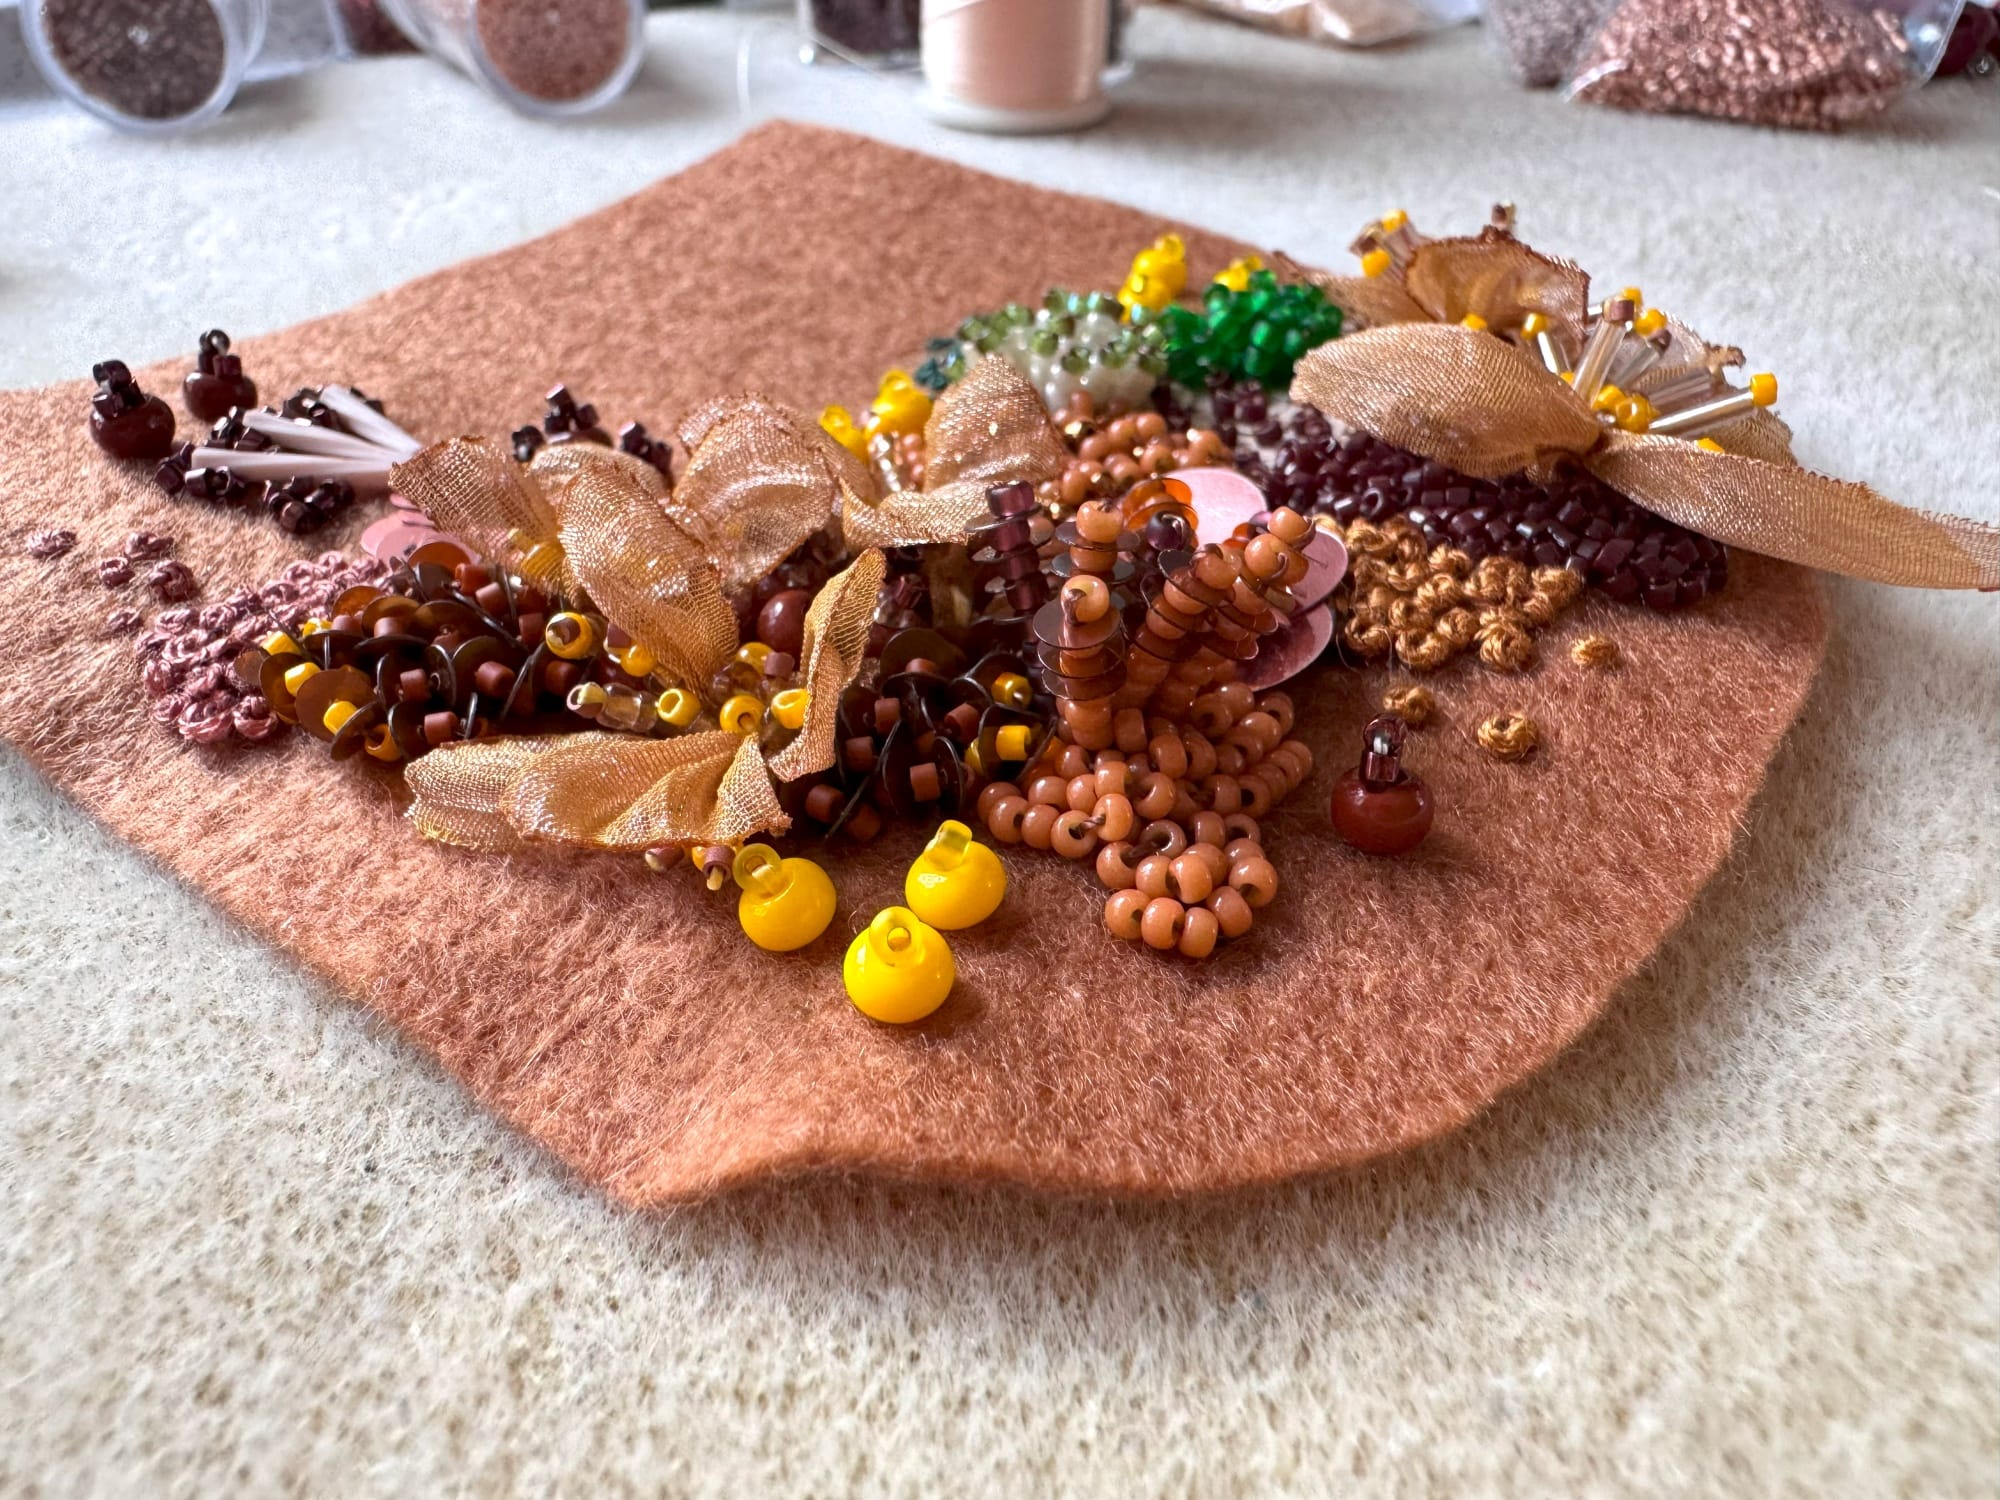
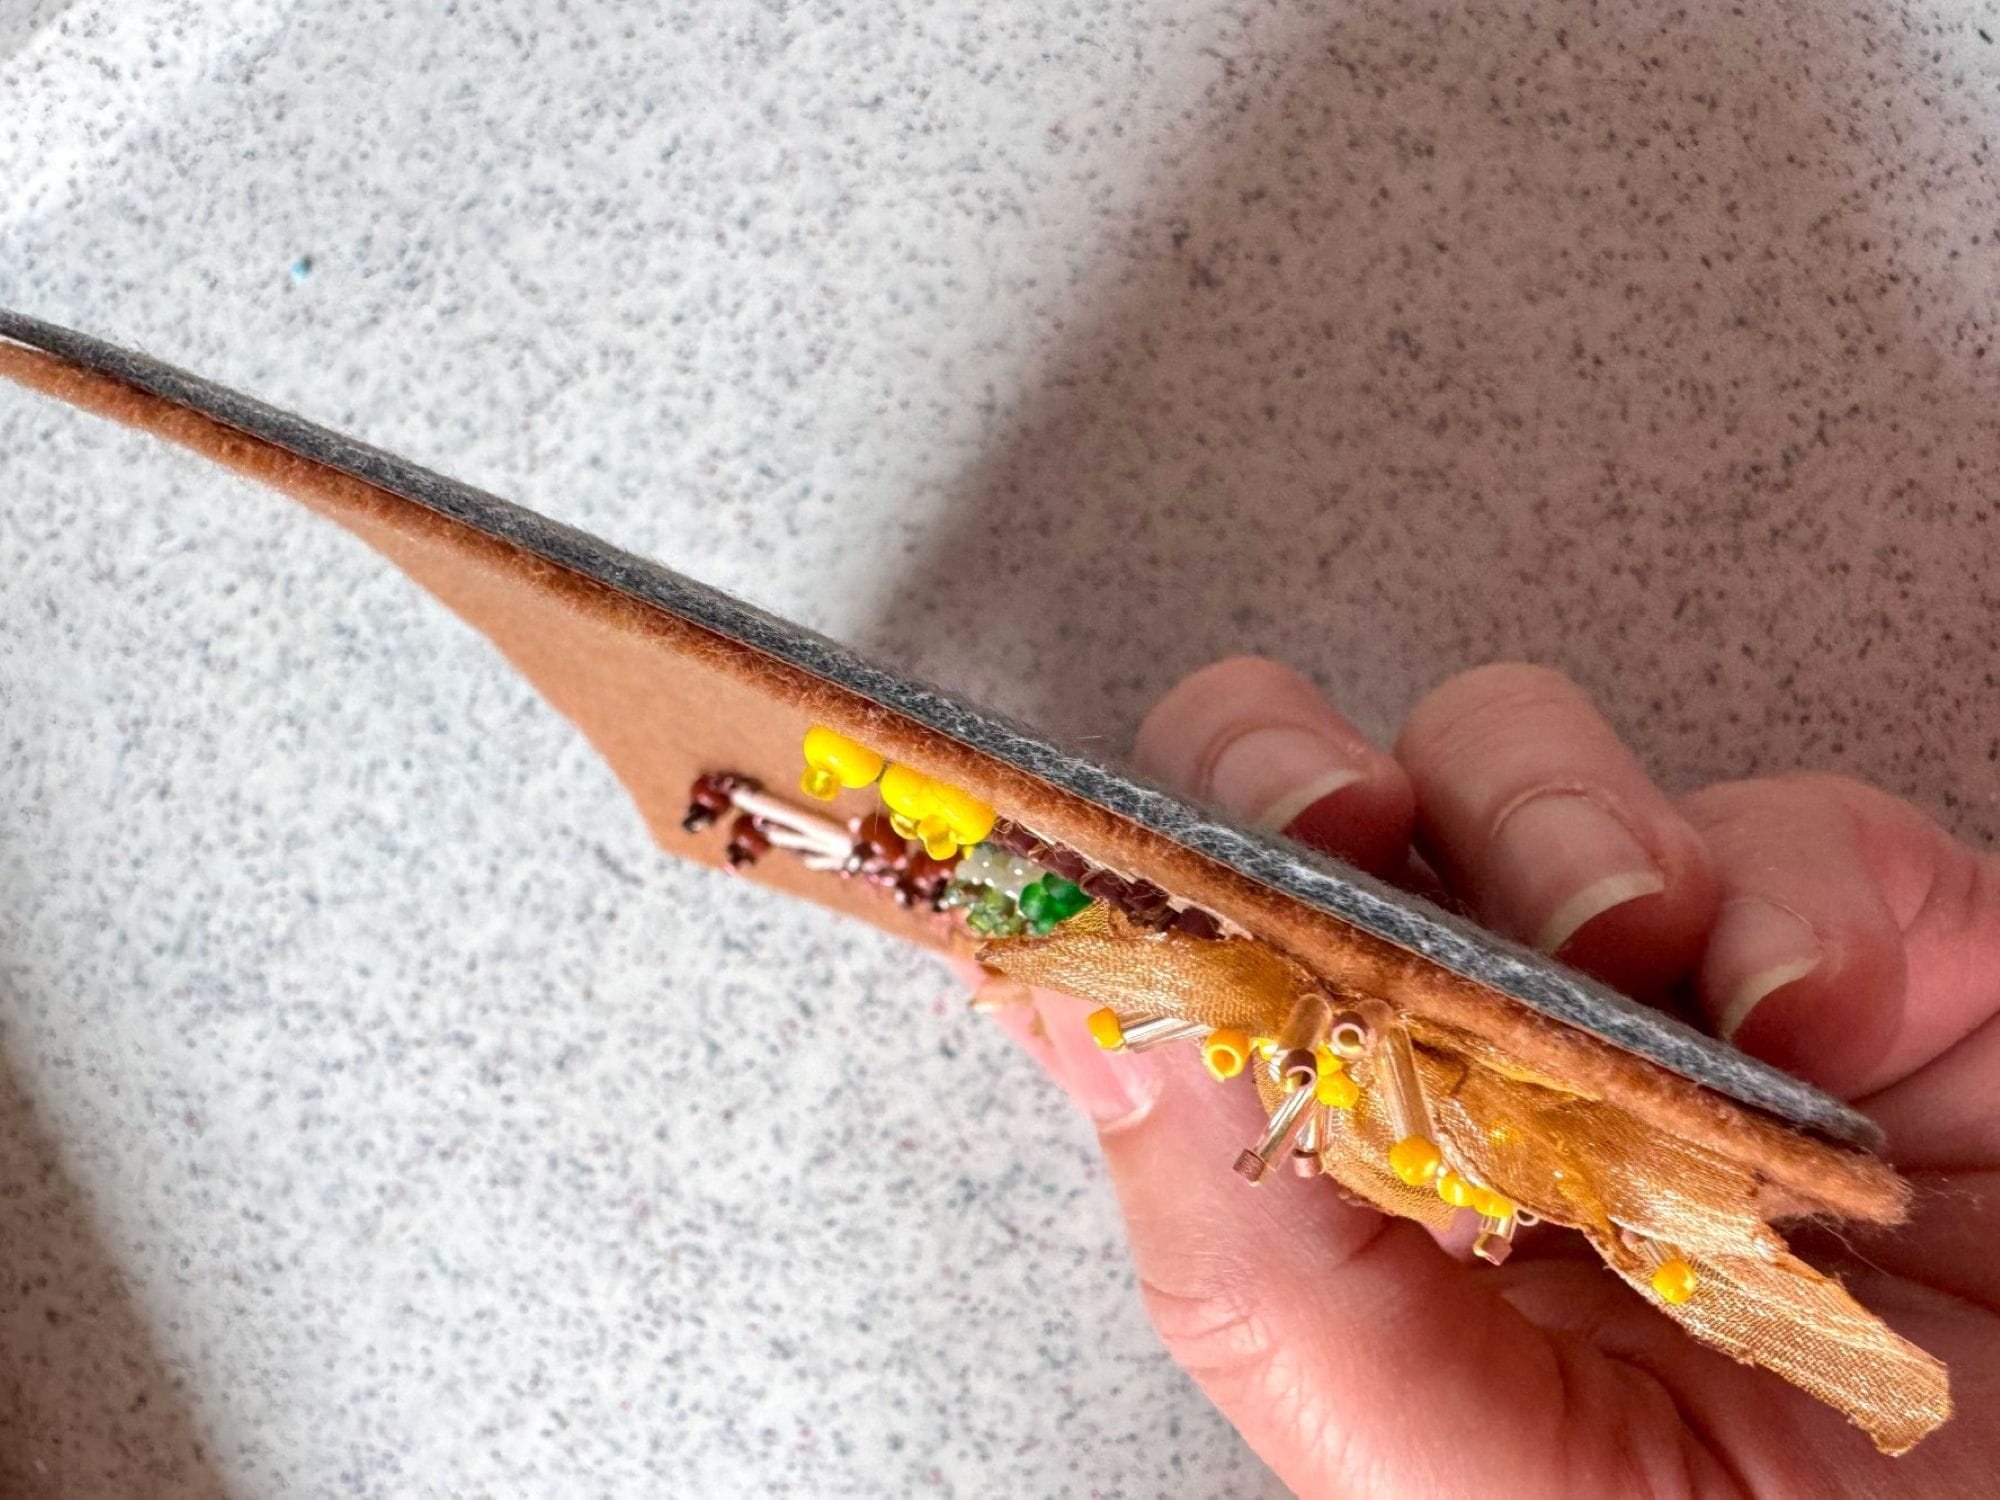
This is how the felt detail looks from aside. As you can see, 3D beading adds to your craft volume and gives it additional shades.
After the felt detail was ready, I took the original faux leather pocket and covered it with glue. I used the regular wood glue (Pattex), which I mixed in a 50:50 proportion with water to make it less dense and ensure it will not to leave any traces on the felt, which absorbs glue quite well.
Then I carefully glued my felt detail to the faux leather pocket and left it for a day to completely dry out.
The good news was that the faux leather pocket was not thick. As a result, my total 'sandwich' of leather and felt also ended up being quite all right to be stitched back to the blouse.
After my pocket was ready, I stitched it back to the blouse, using the traces of the original stitch to position it correctly. I used the same DMC thread that I used on the pocket to make French knots. For me, it looks ok that the stitch is visible.

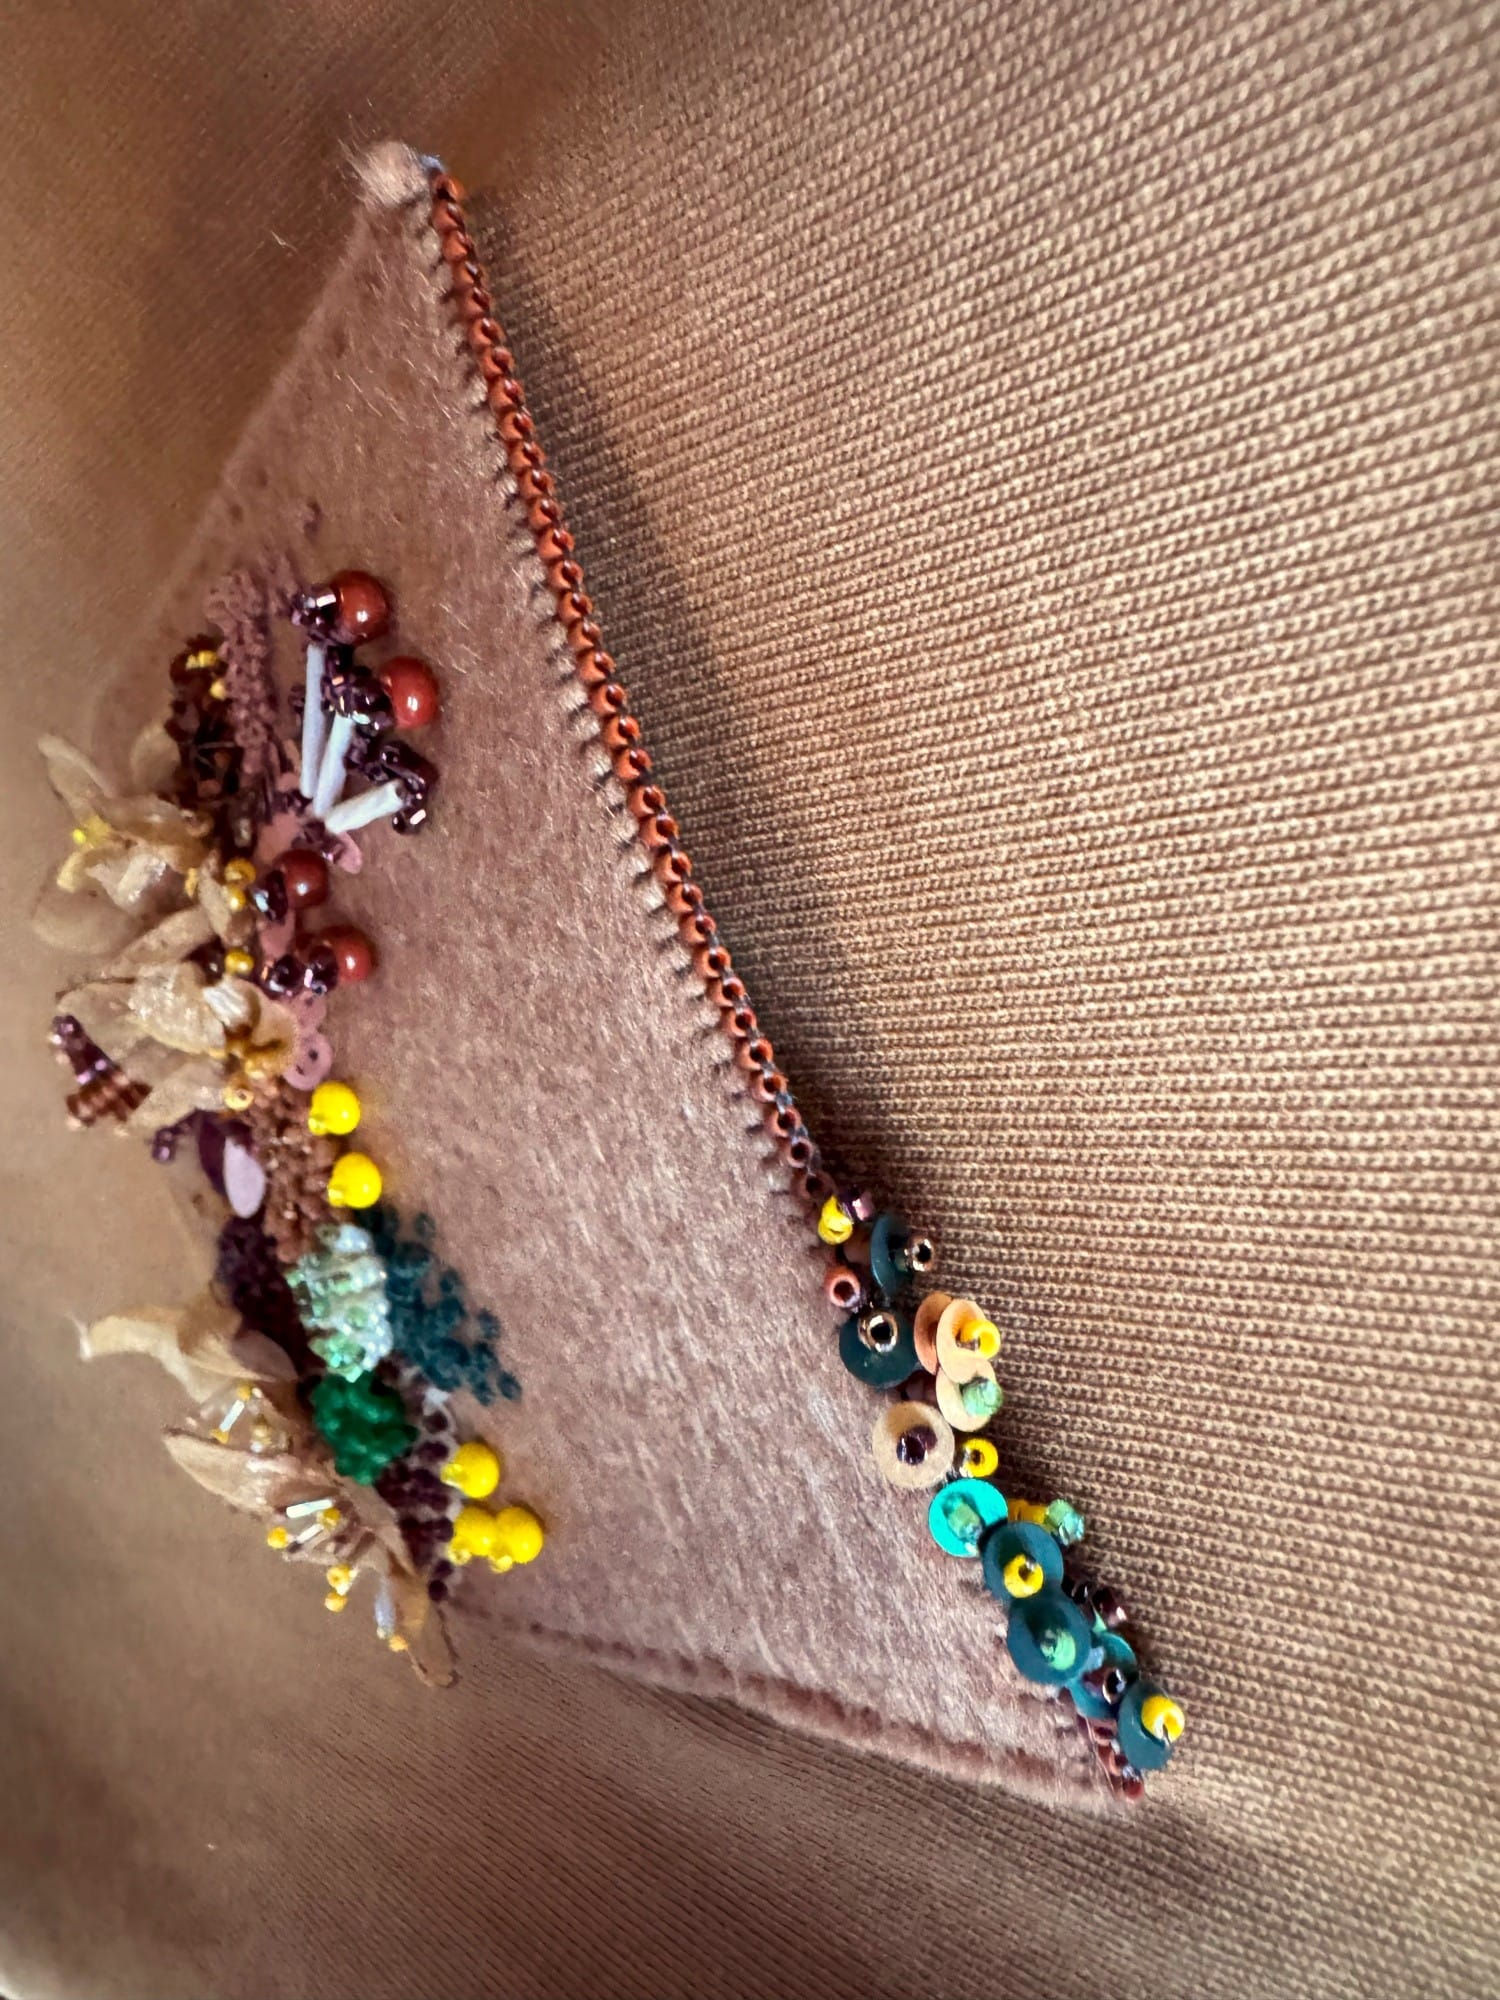
And yes, as you have noticed, after I stitched the pocket, I decided to add a couple of additional decorative elements. First, I used the basic beaded edge technique to finish the top edge of the pocket. I doubt I am going to use this pocket at all, but it still protects the edge from fluffing and gives it a neat finished look. And then, I "planted" a few more floral elements on the very top right corner of the pocket, stitching them directly to the beaded edge. These small plants are made from a combination of 2-3 Miyuki Delica beads, sequins, and another bead.
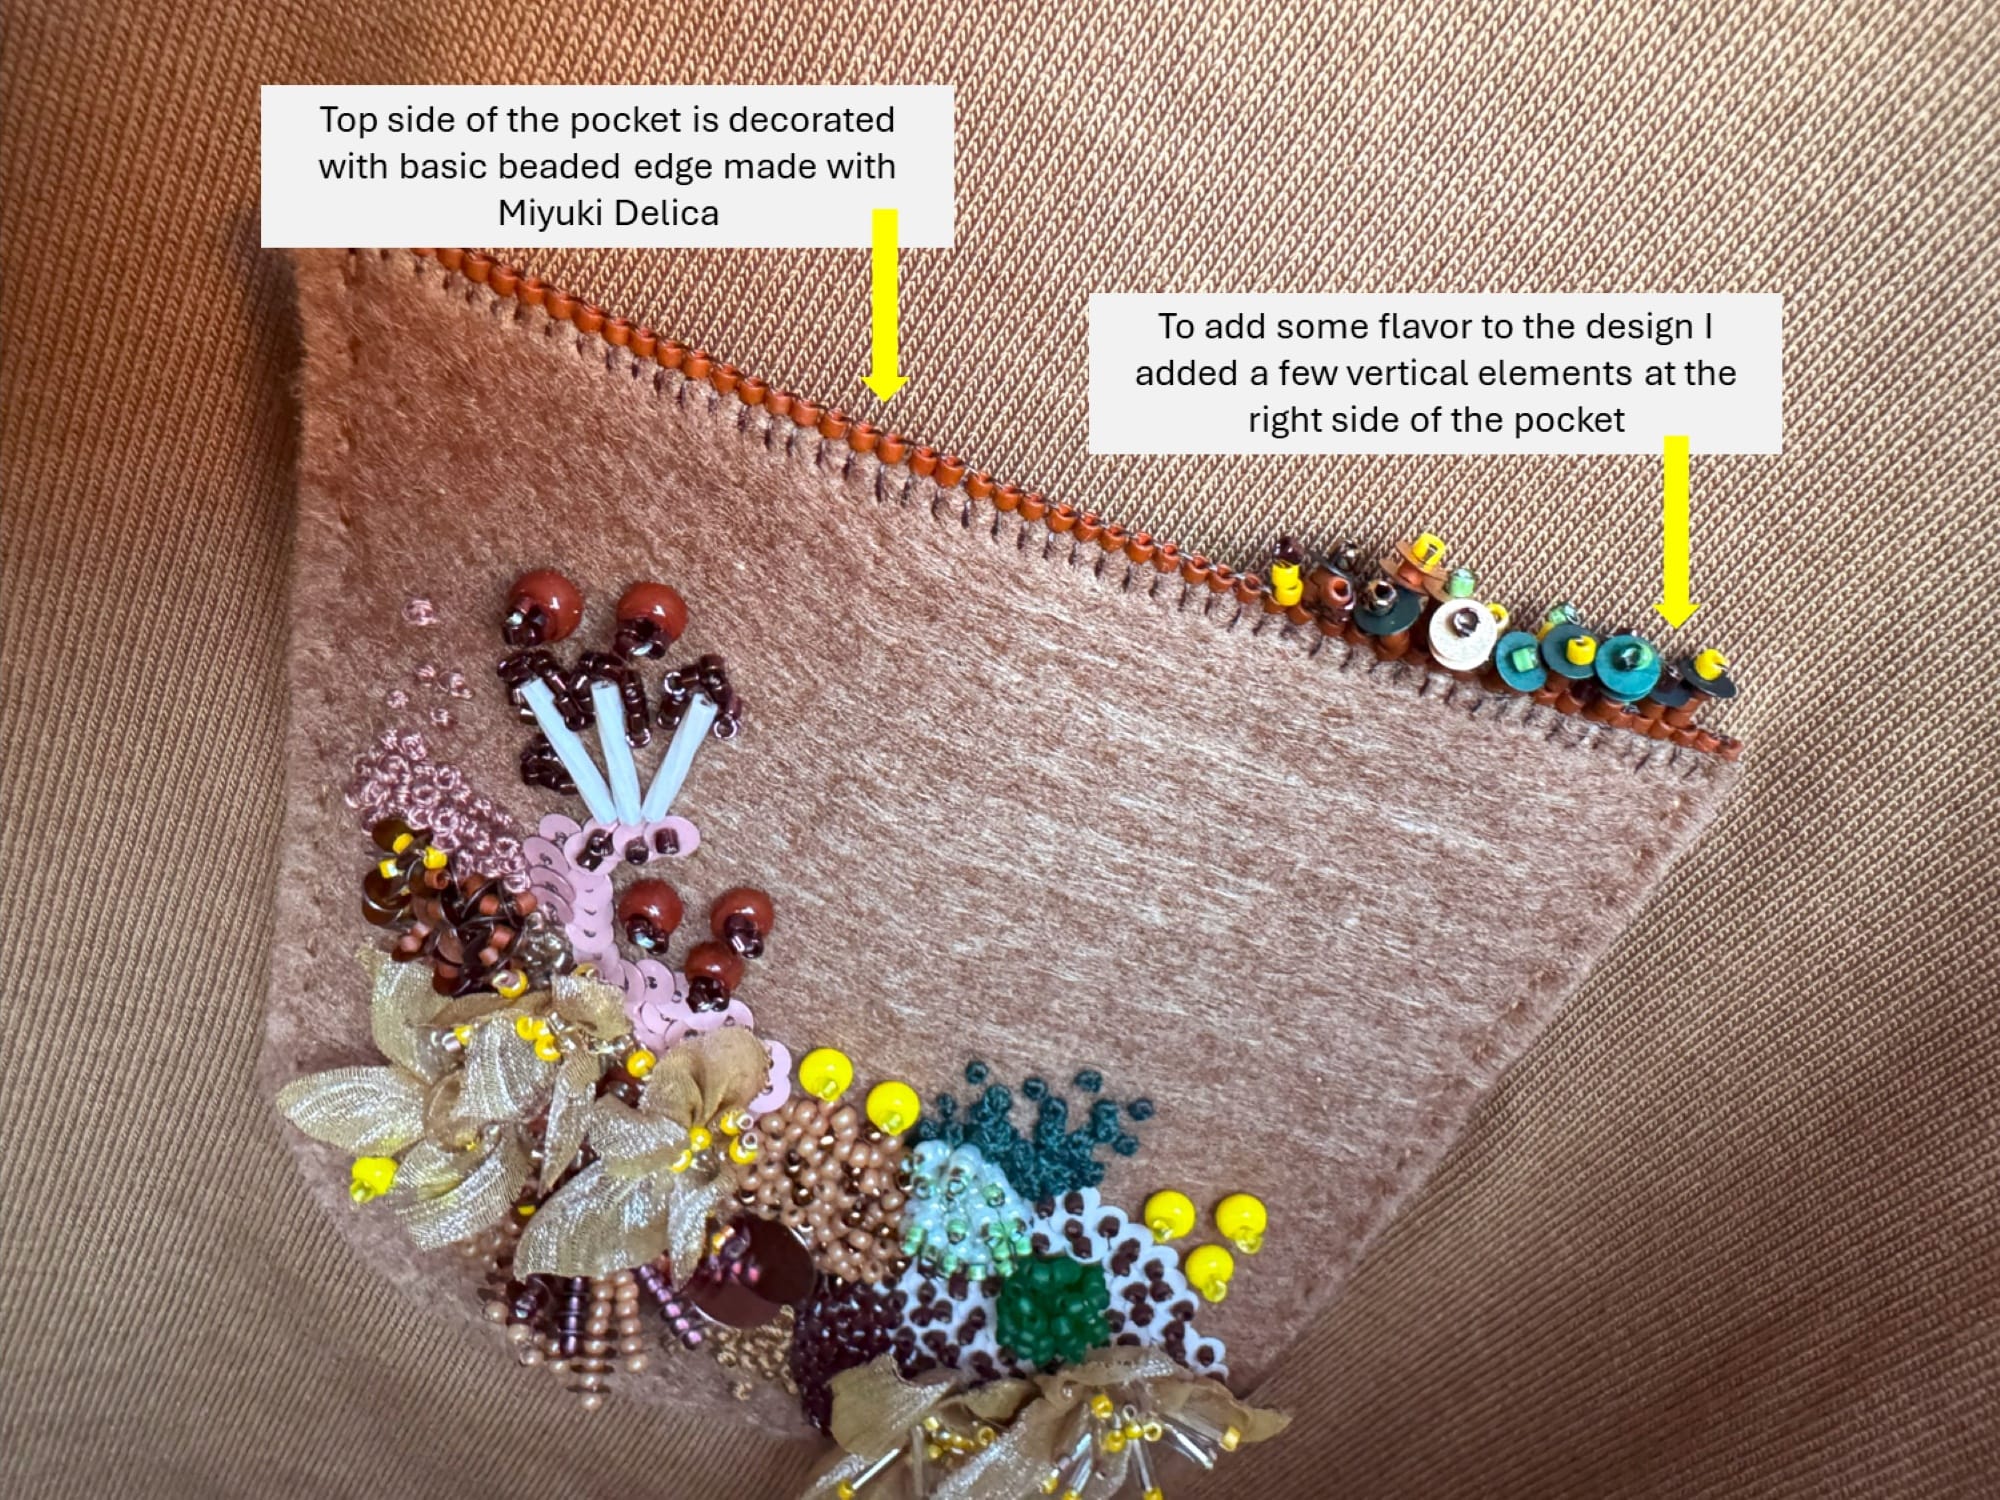
This is how the pocket looks from the top.
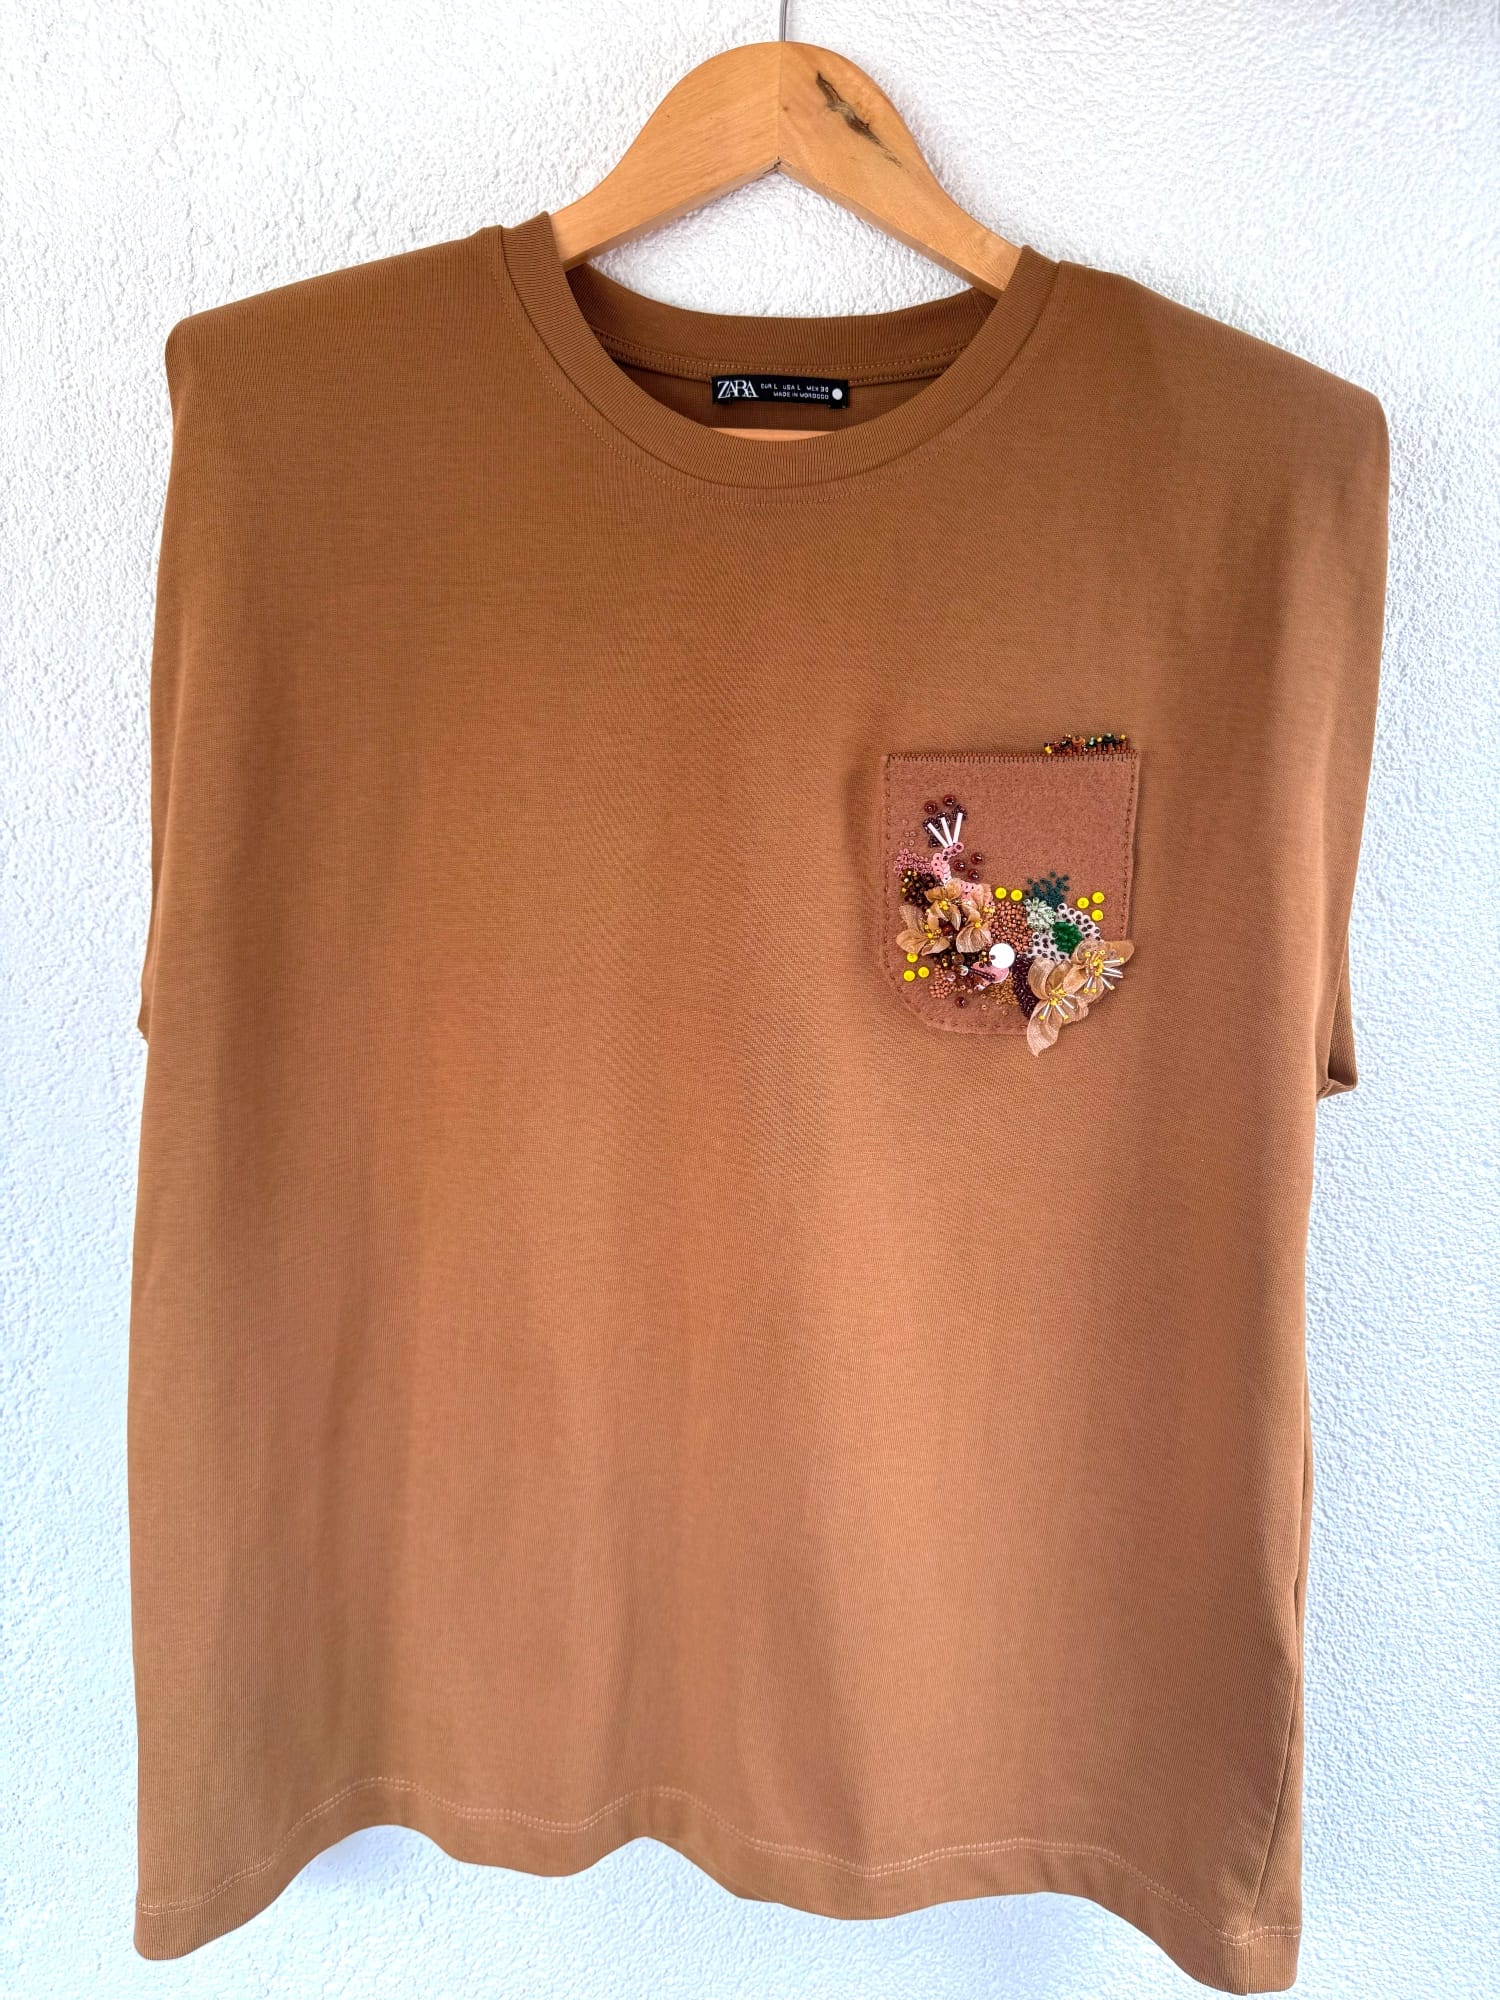
And this is the final result.
I see a huge difference between the original blouse, which I purchased, and a customized version, which I crafted for myself. My blouse now has a personal touch, a floral accent, and it will stand out from the world of regularity and mass market.
I hope you like this project. It is not complicated to make, and it requires only your creativity, a small stock of beads, and a bit of patience. If you are new to beading or do not have a natural taste for colors, here is a hint! In the beading shops, you can find preset mixtures of beads, which are already combined to give you a great color palette as well as a variety of shapes. Usually, such sets include 5-6 colors of beads of various sizes, a pile of bugle beads, as well as some beads of unusual shapes (hexagon, spiral, floral, or alike). You can buy such a set to start your journey with free-flow beading, before your eyes will get used to creating your combinations.
Thank you for reading. Once again, please write if you want us to create a tutorial about making fabric flowers. Subscribe to this blog to be the first to get our next posts, subscribe to our Instagram, or visit our online shop to check up our jewelry and home decoration pieces.
Happy crafting!