How I created jewelry images with help of AI
Detailed step-by-step explained process of creation unique images for the stud earrings using AI-generation tools of Canva, photo shoots and a pinch of creativity.
Hi there! Hope you're enjoying June's beautiful weather, sunshine, and the start of summer. We certainly are! Here in the Julian Alps, the weather is incredibly pleasant. We've been taking advantage of it with walks through lovely Alpine valleys, meditating while enjoying picturesque mountain viewы, and admiring the blossoming flowers. It's a wonderful way to take a break from sitting in front of the PC, especially when we're busy creating social media content and editing new jewelry photos.
And that's exactly what today's post is about! I recently experimented with AI to create some unusual photos of our newly crafted stud earrings, and I'm excited to share the detailed steps I took to create these bright, eye-catching images.

Now, I'm not claiming to be an advanced AI artist (or even an artist at all!), but for social media, this quality of picture is more than sufficient. I hope you agree! So, let's dive in.
Step 1: The Photo Shoot
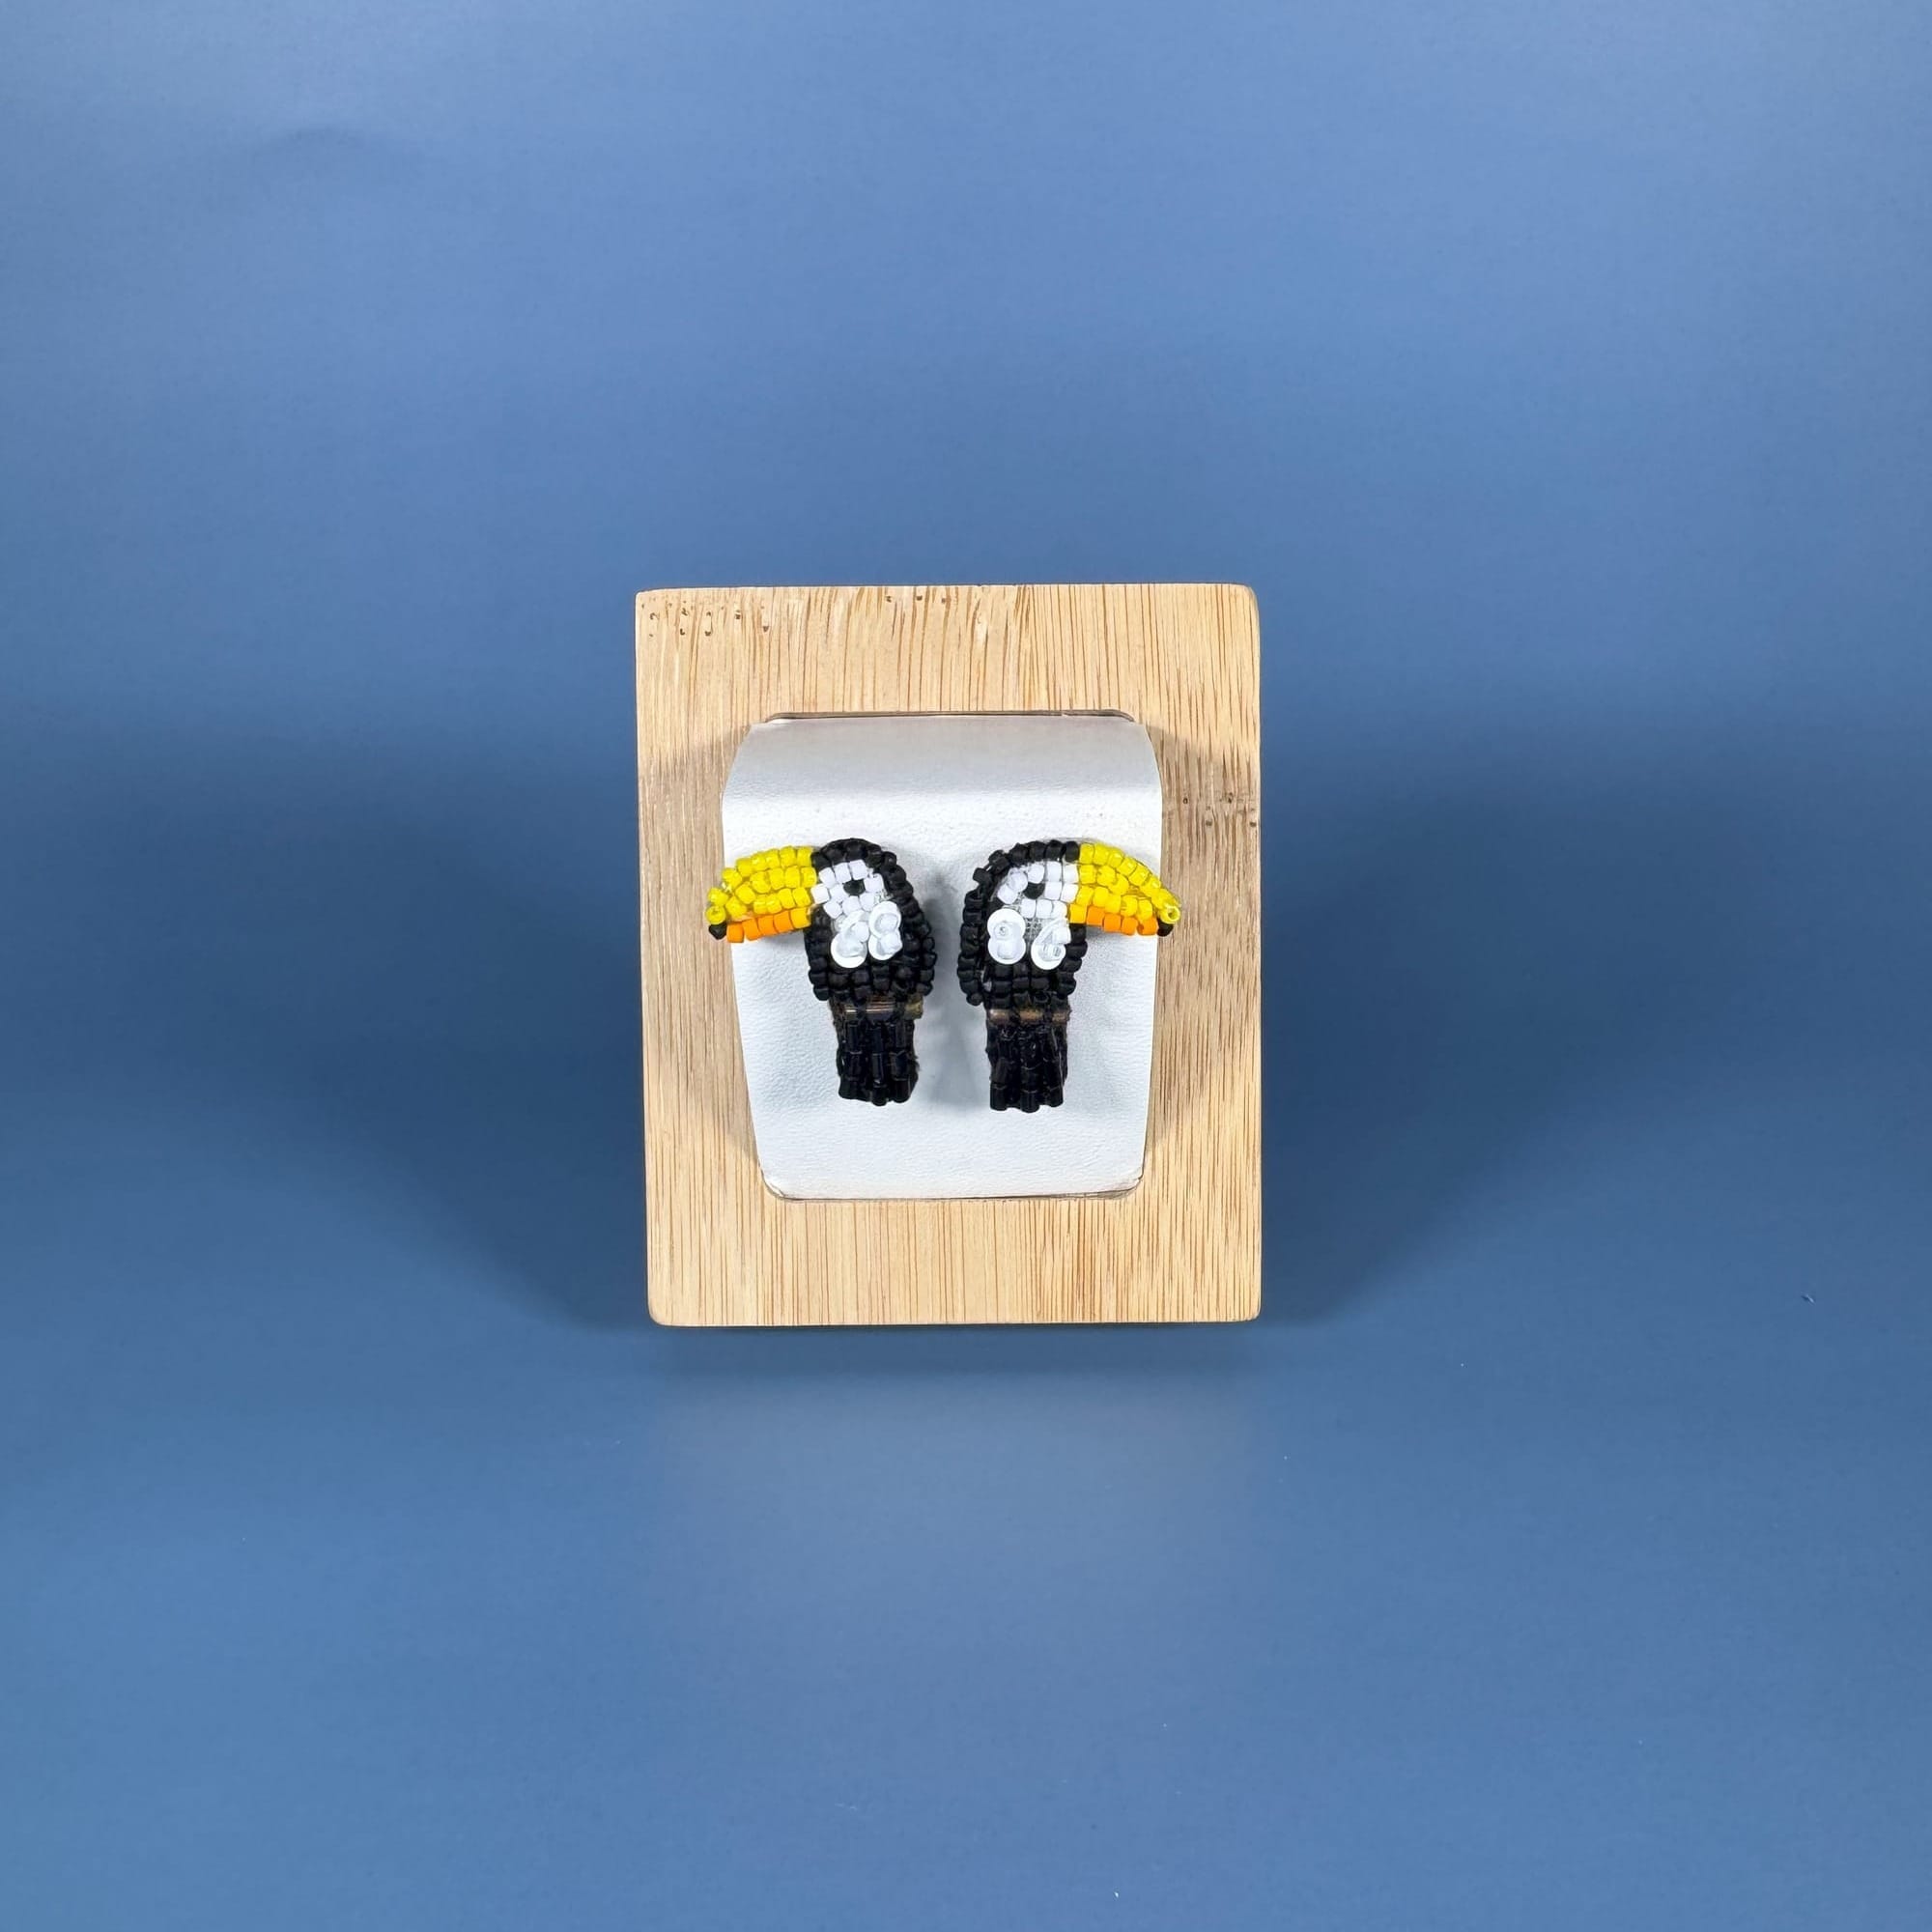
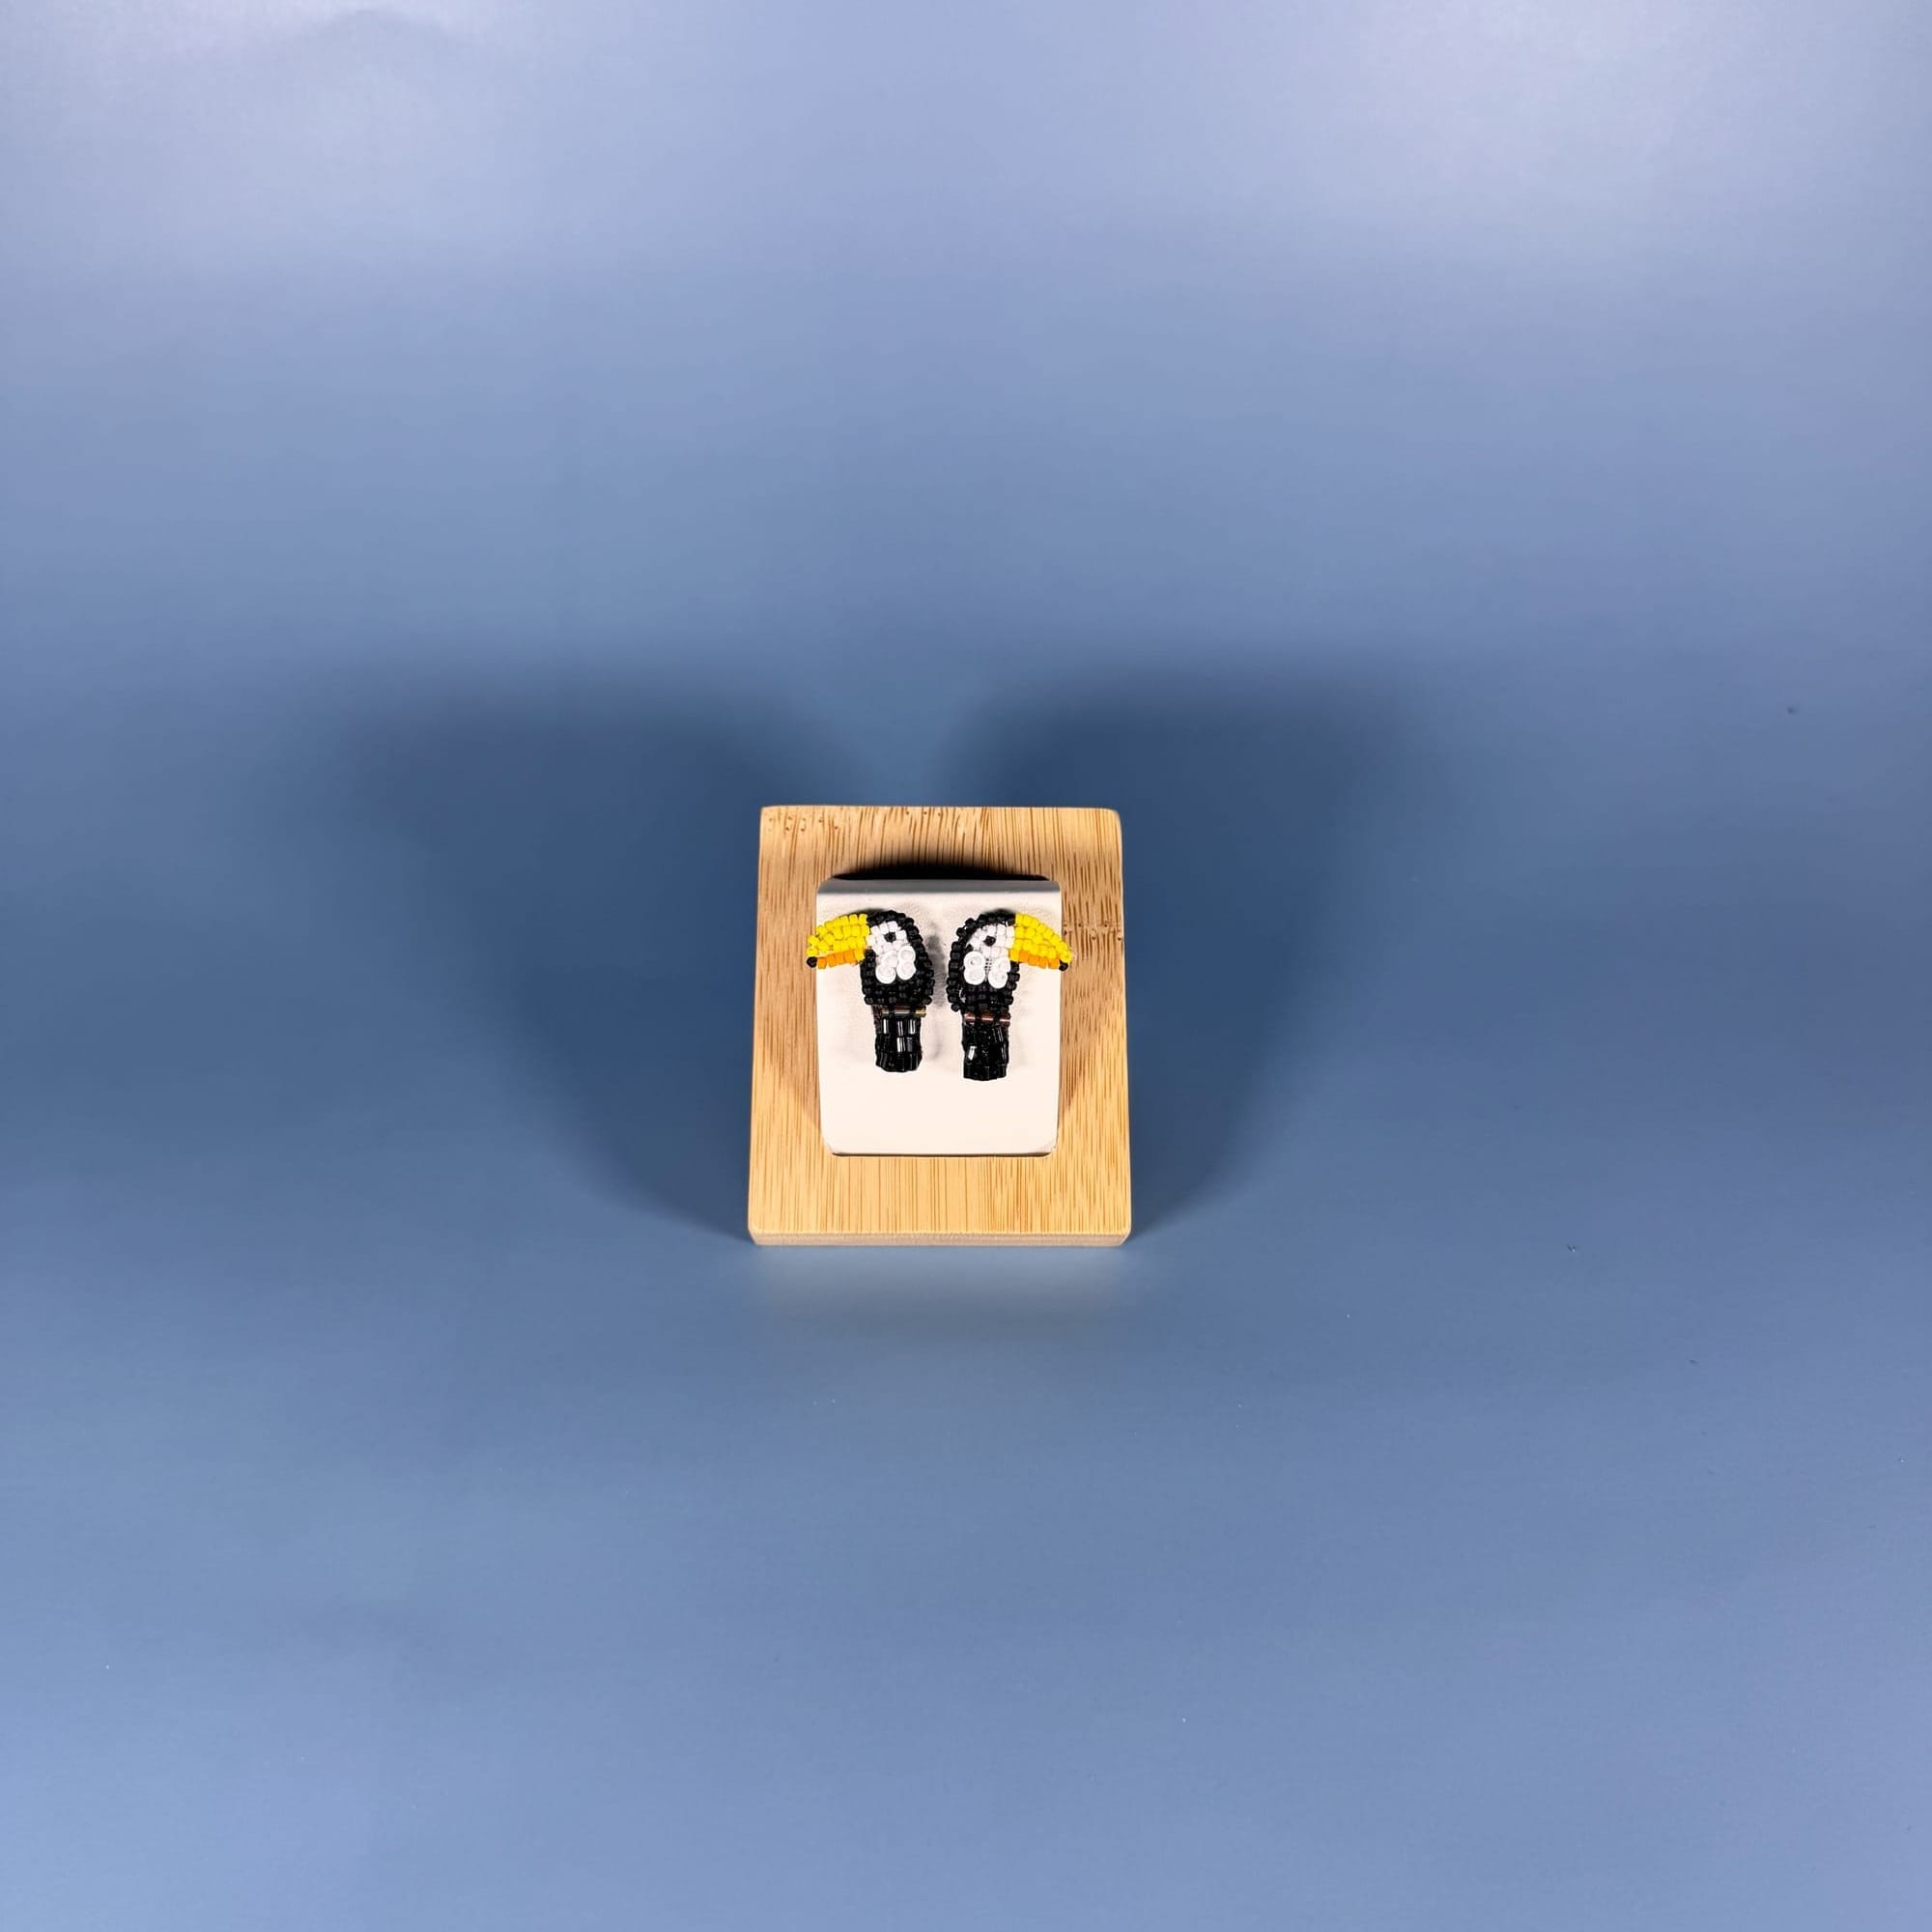
First, you'll need to take several photos of your jewelry piece. In my case, it was a pair of toucan-shaped stud earrings. These earrings are quite small, about 2 cm in height and 2 cm in width. I already had the final result in mind, so I knew I needed a front-facing shot.
Stud earrings can be a bit tricky to photograph vertically because of the earring back and tiny pin at the bottom. To ensure the earrings were stable, I used an earring display stand – the same kind I use for jewelry fairs.
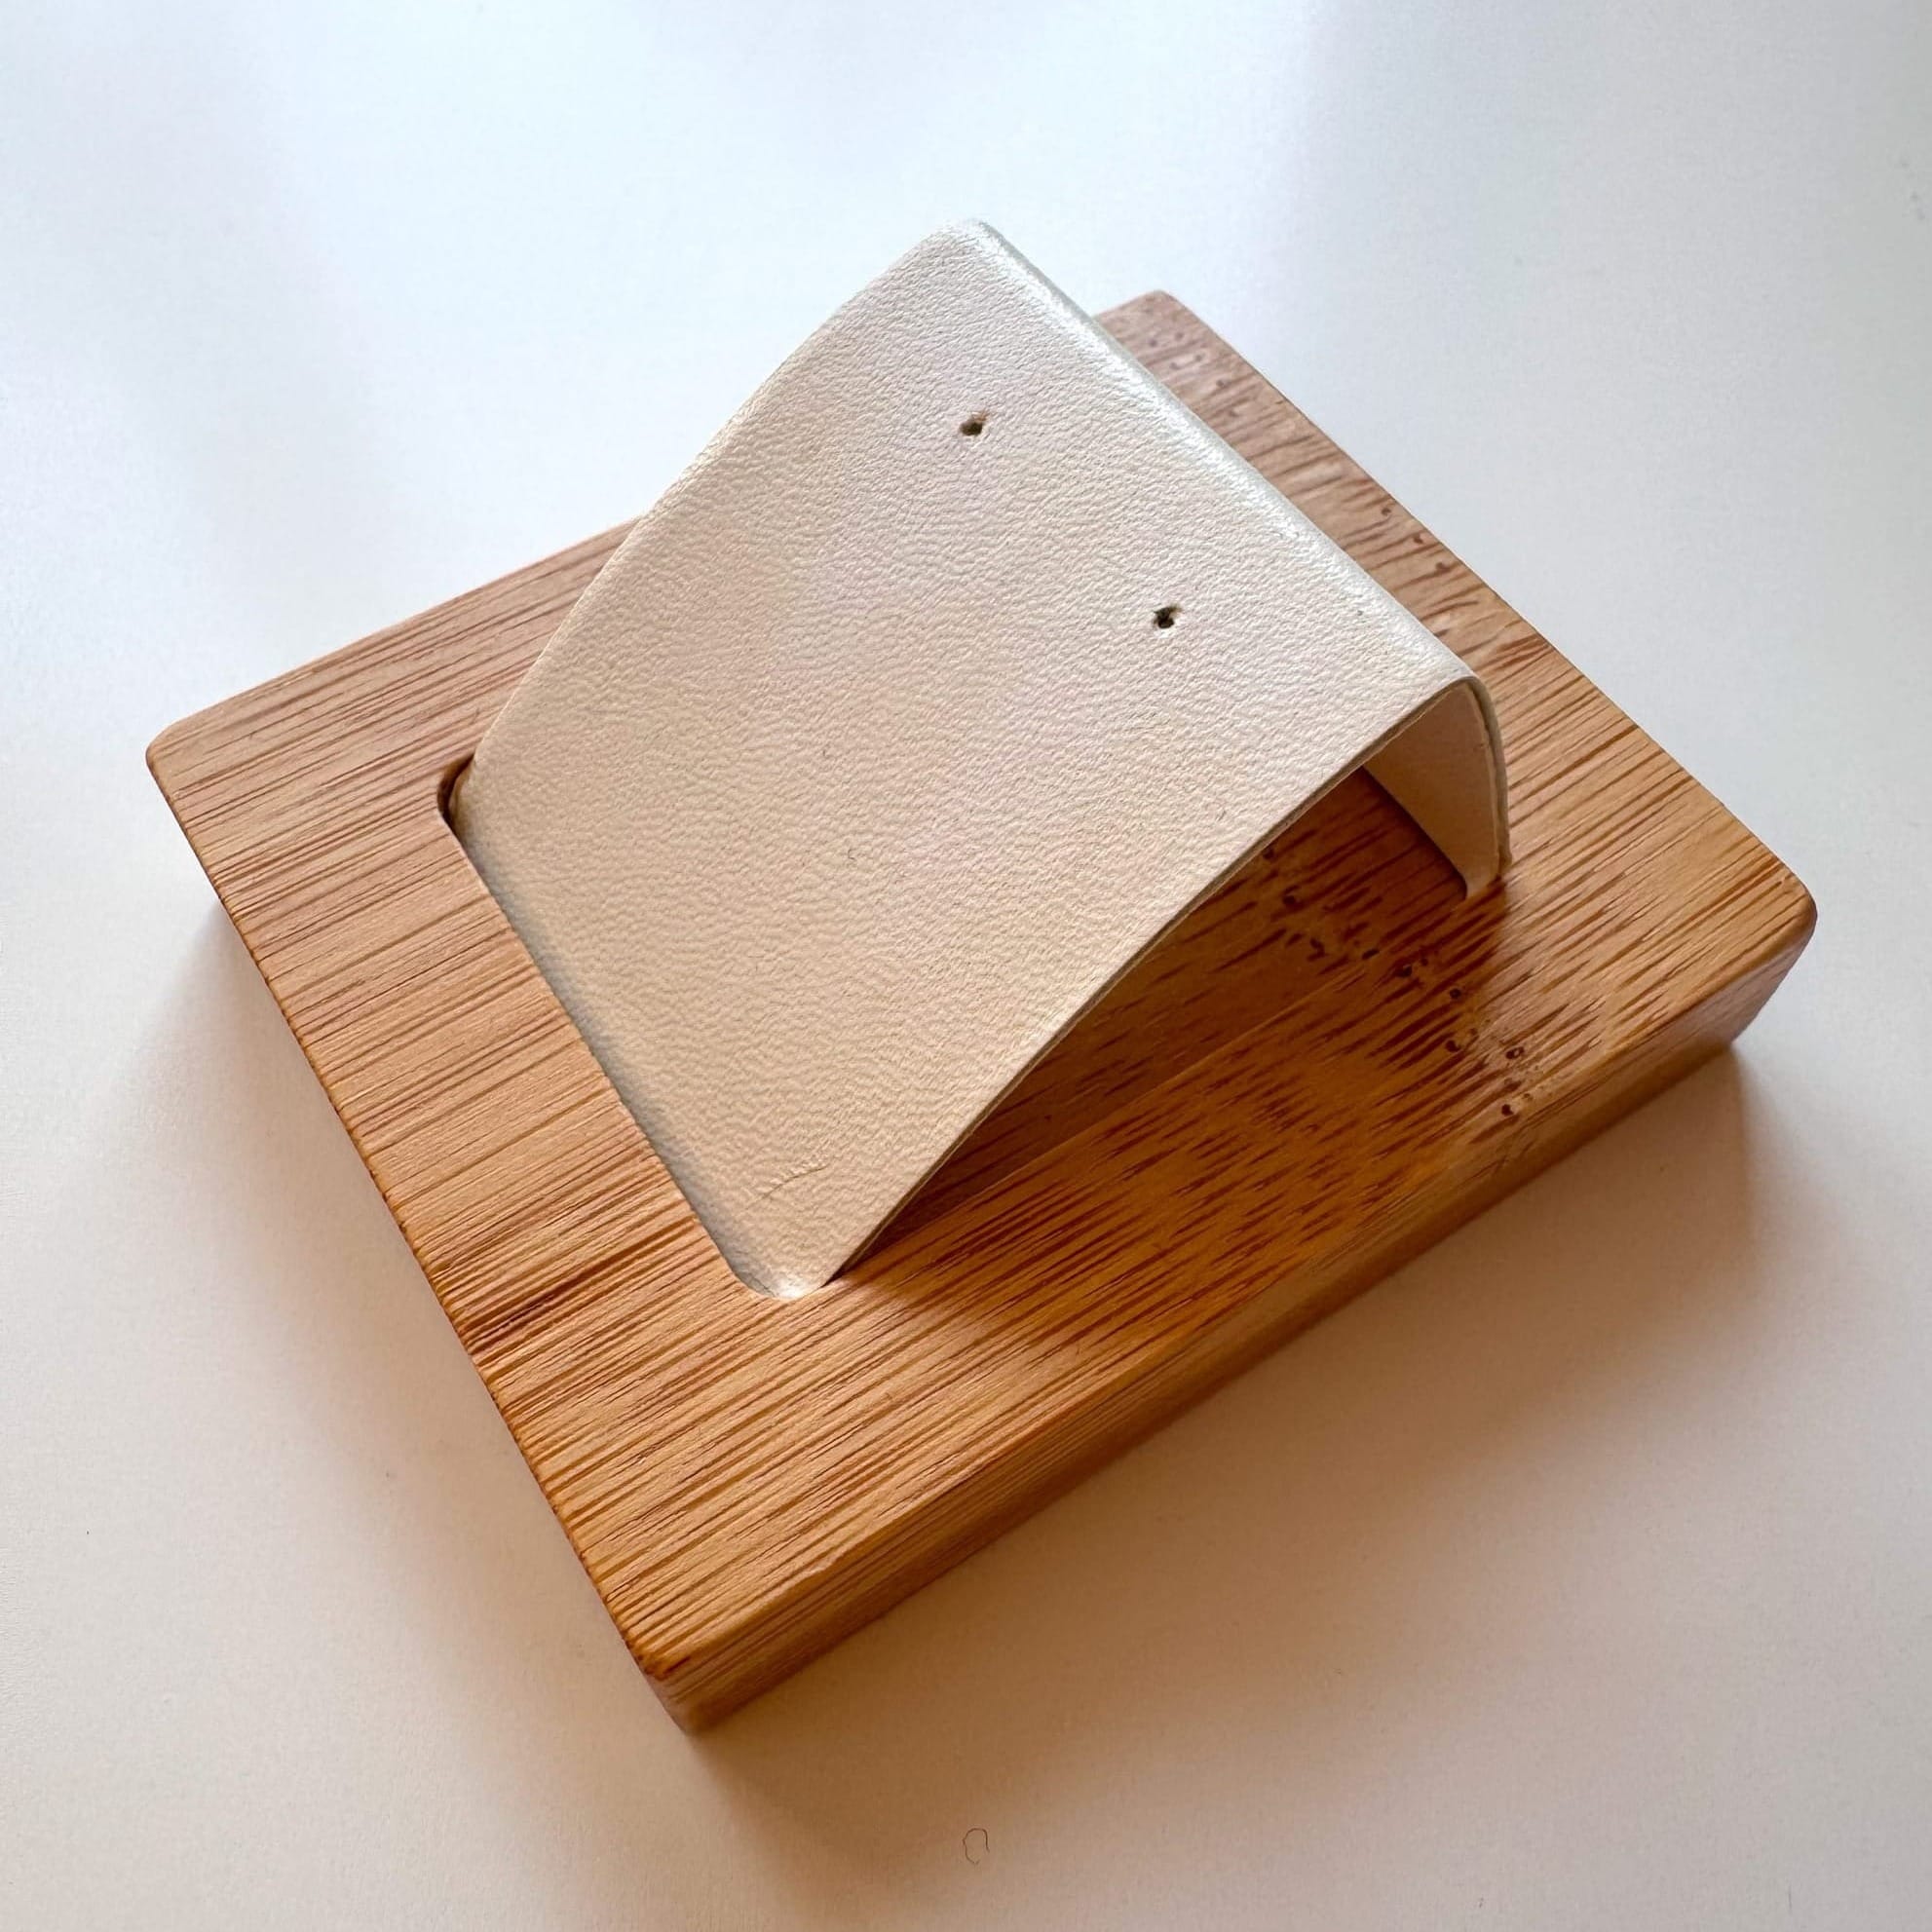
I placed the earrings on the stand so they were stable, then positioned the stand so the earring platform was vertical. I even used a spool of Miyuki thread to support the stand and keep it perfectly upright!
Step 2: Organize Your Background
To make background removal easy, I set up a dedicated background. I wasn't sure how large or small I wanted the earrings to appear in the final designs, so I opted for a larger background. I chose one of my two photo background sets, specifically the one that includes:
- A photo background holder with clips
- A set of various solid-color backgrounds. Each background sheet is double-sided with different solid colors. I have six large-format (A0) sheets, giving me a choice of 12 different backgrounds in total. These are specially designed for photographers: they're coated, water and dirt resistant, and very durable.
You simply clip your chosen background to the stand, and your small home photo studio is ready!
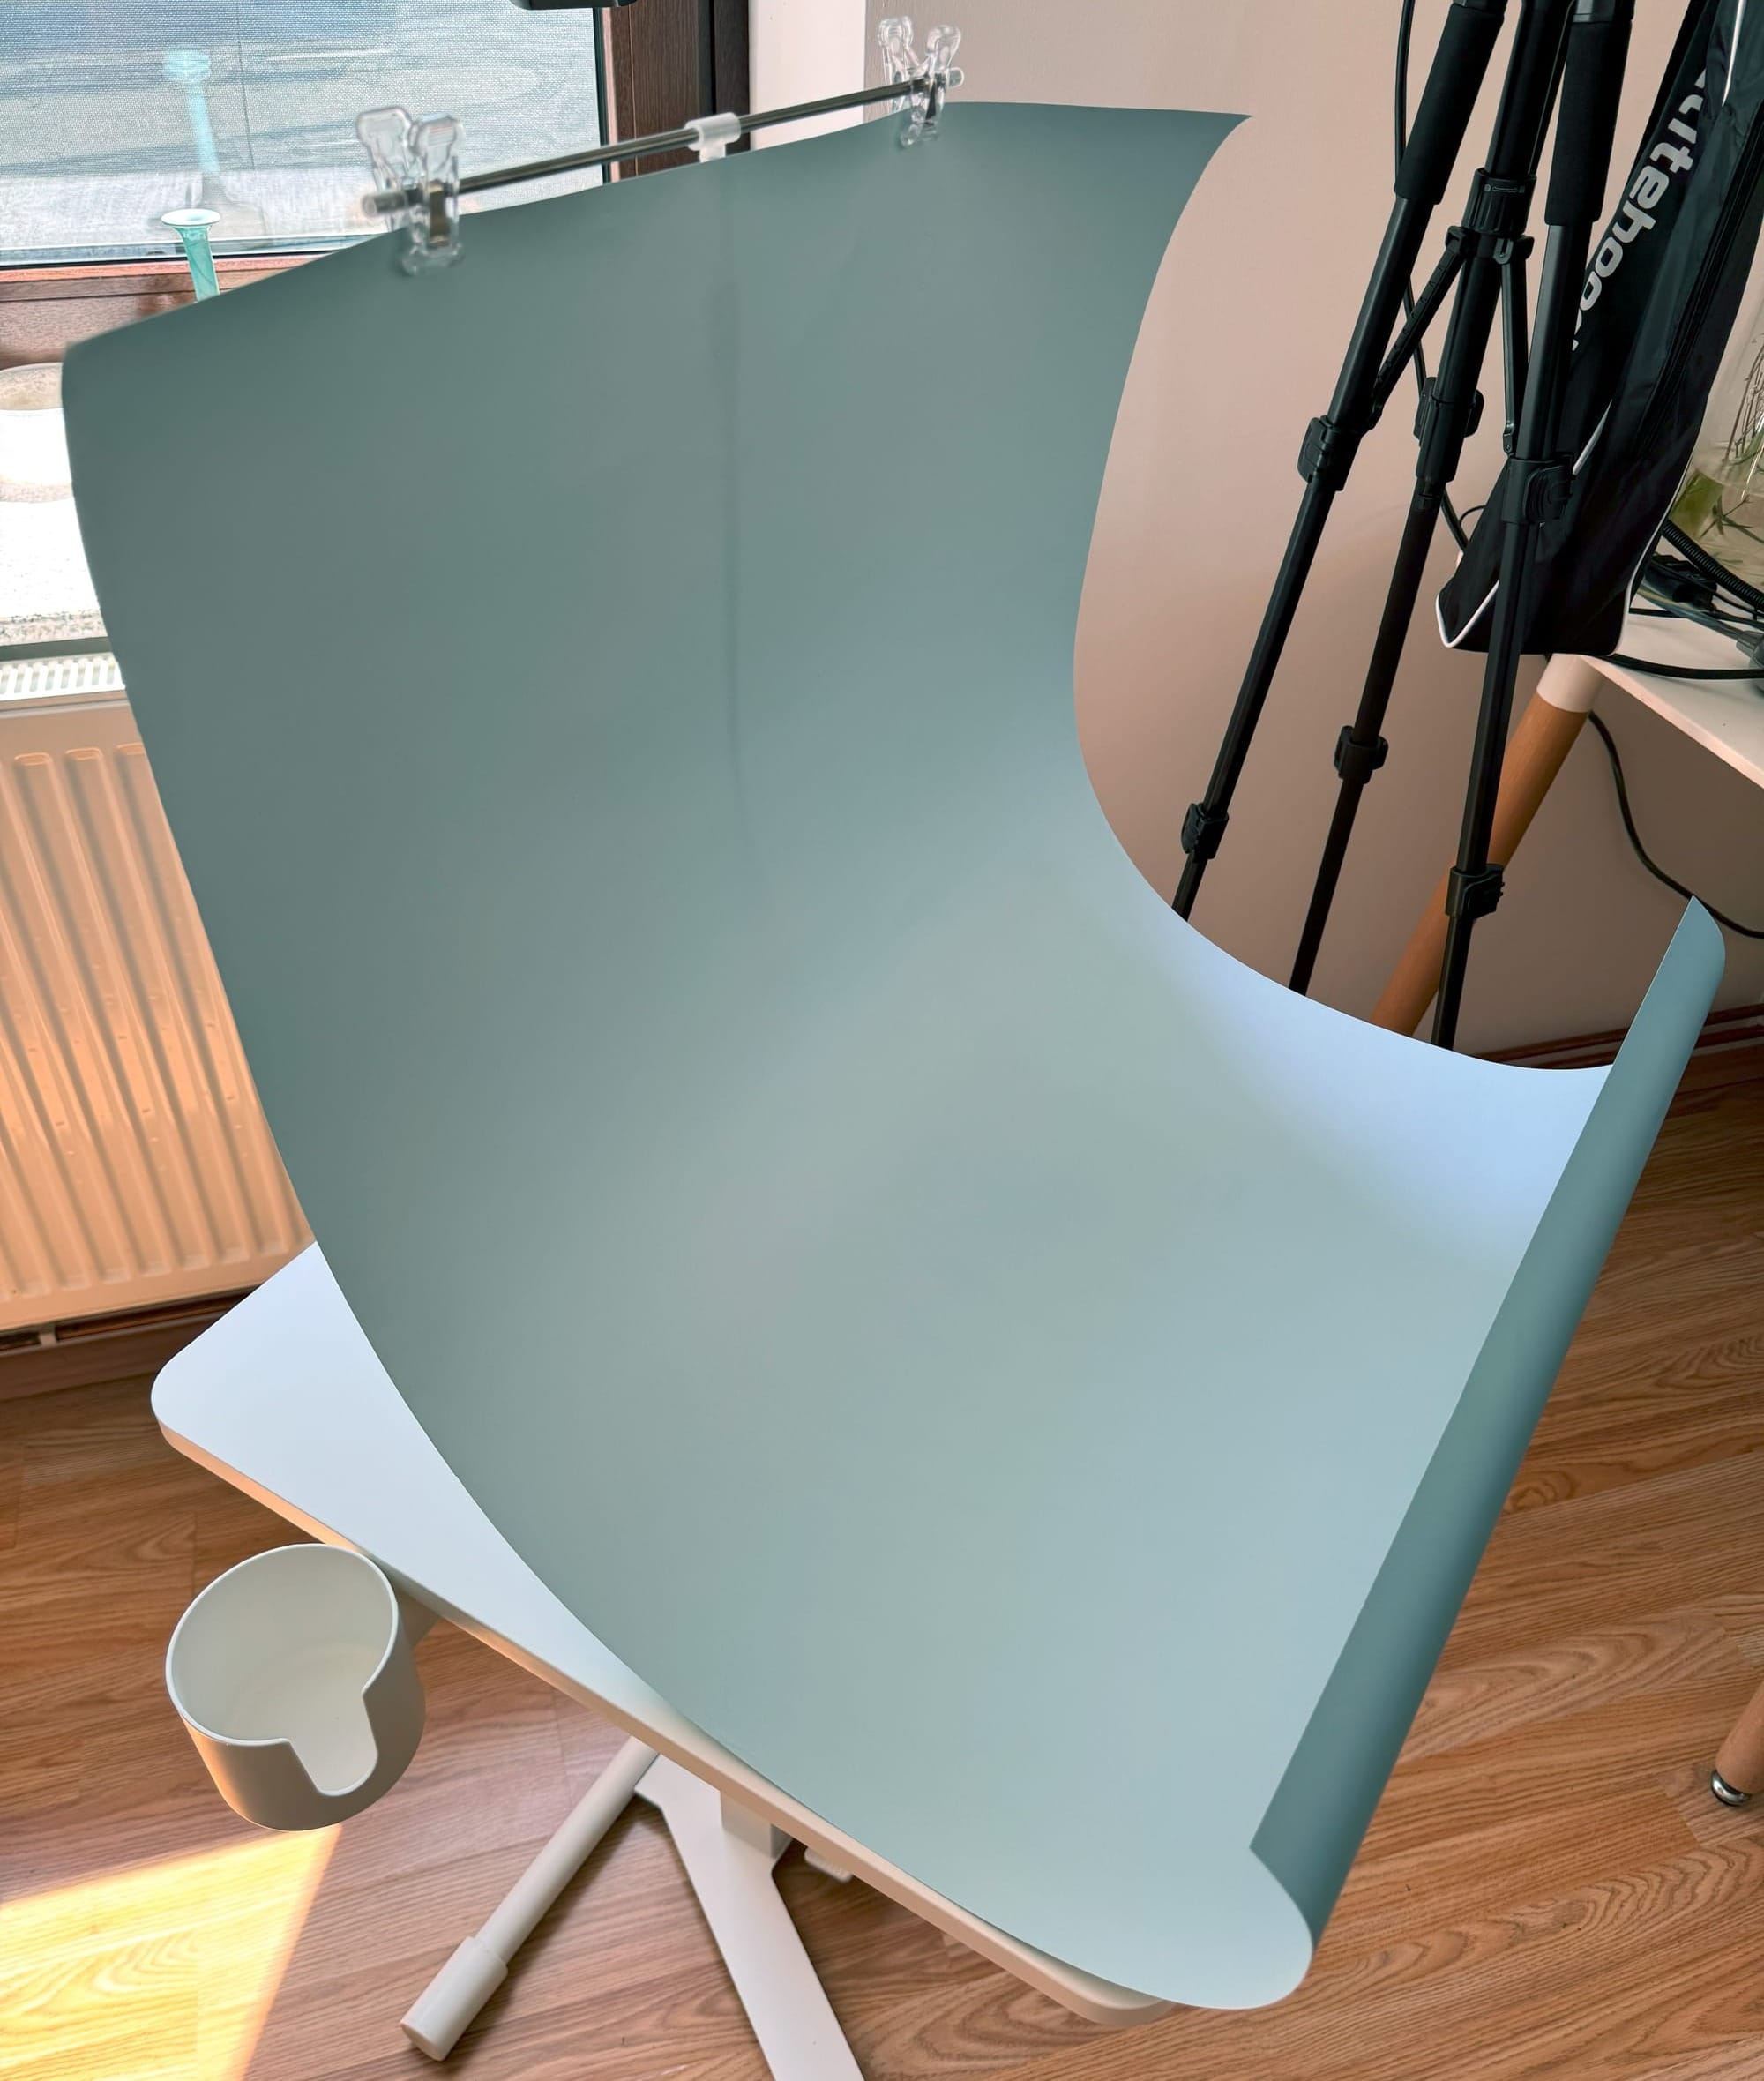
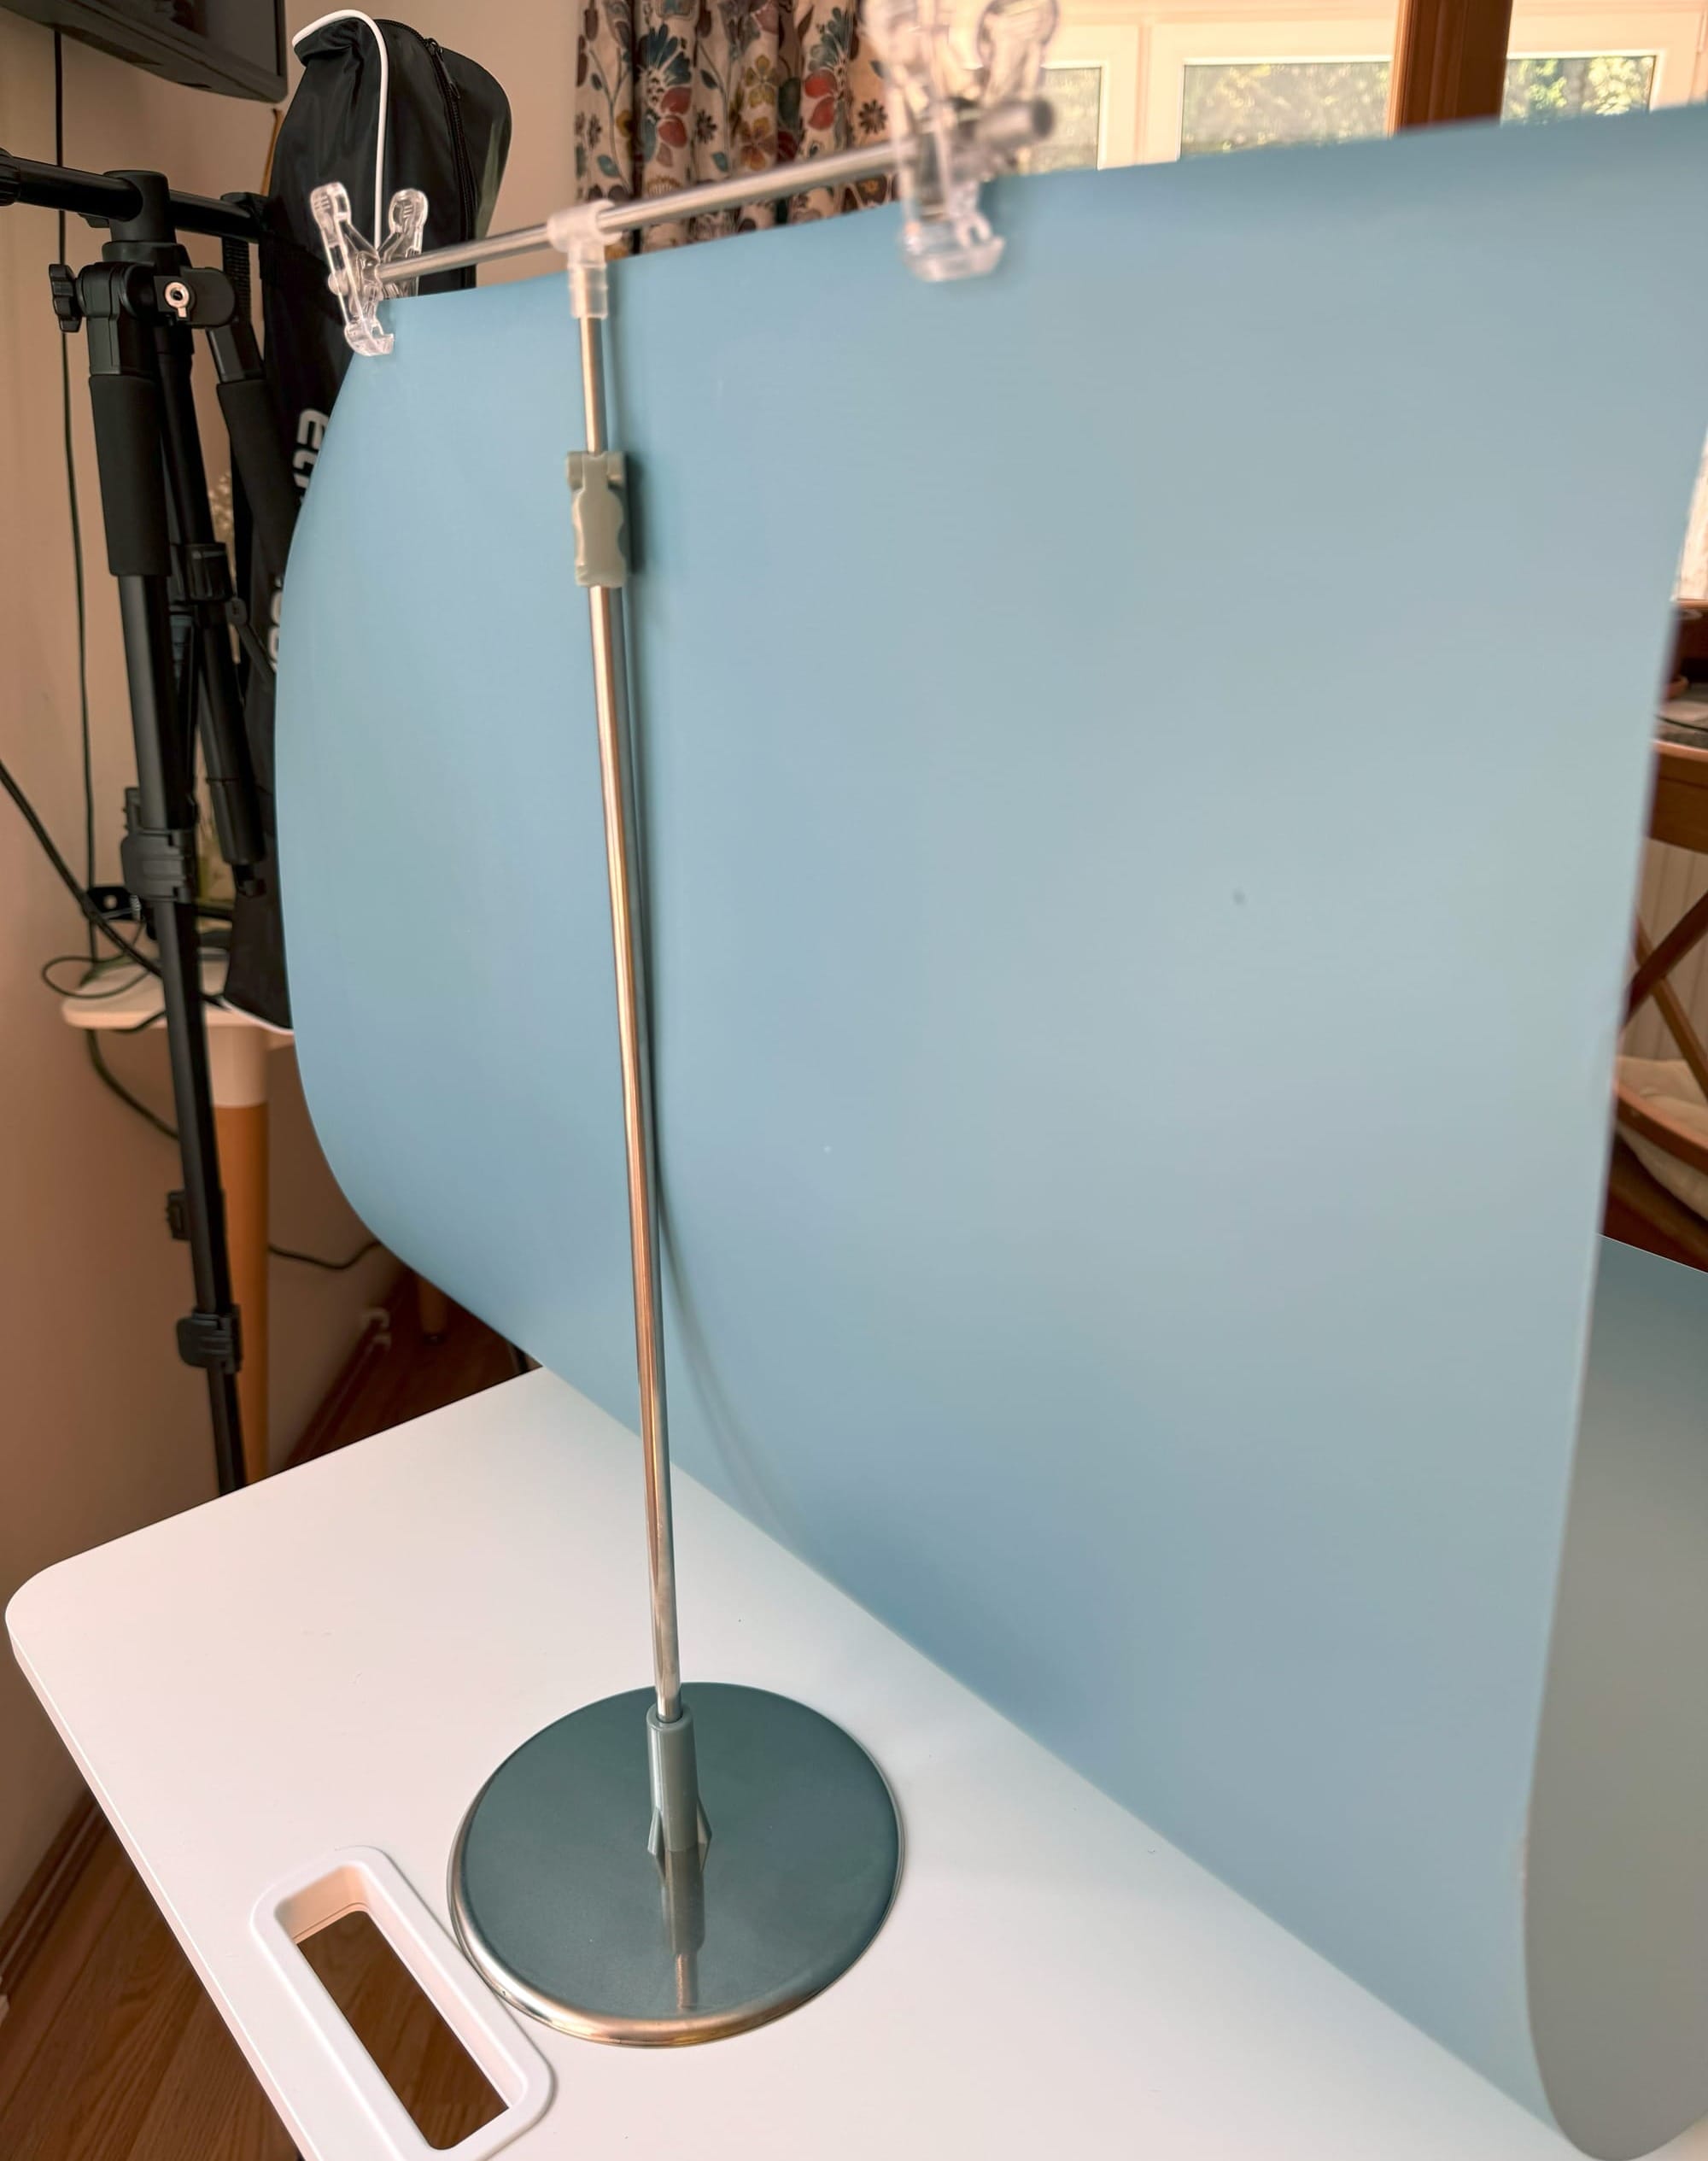
IMPORTANT: The color of your background should be completely different from your earrings. For example, my toucan earrings were made in black, white, red, and orange hues, so I chose a blue background. For the next pair of earrings, which were small tit bird shapes crafted in blue, yellow, and white, I chose a green (chromakey-like) background.
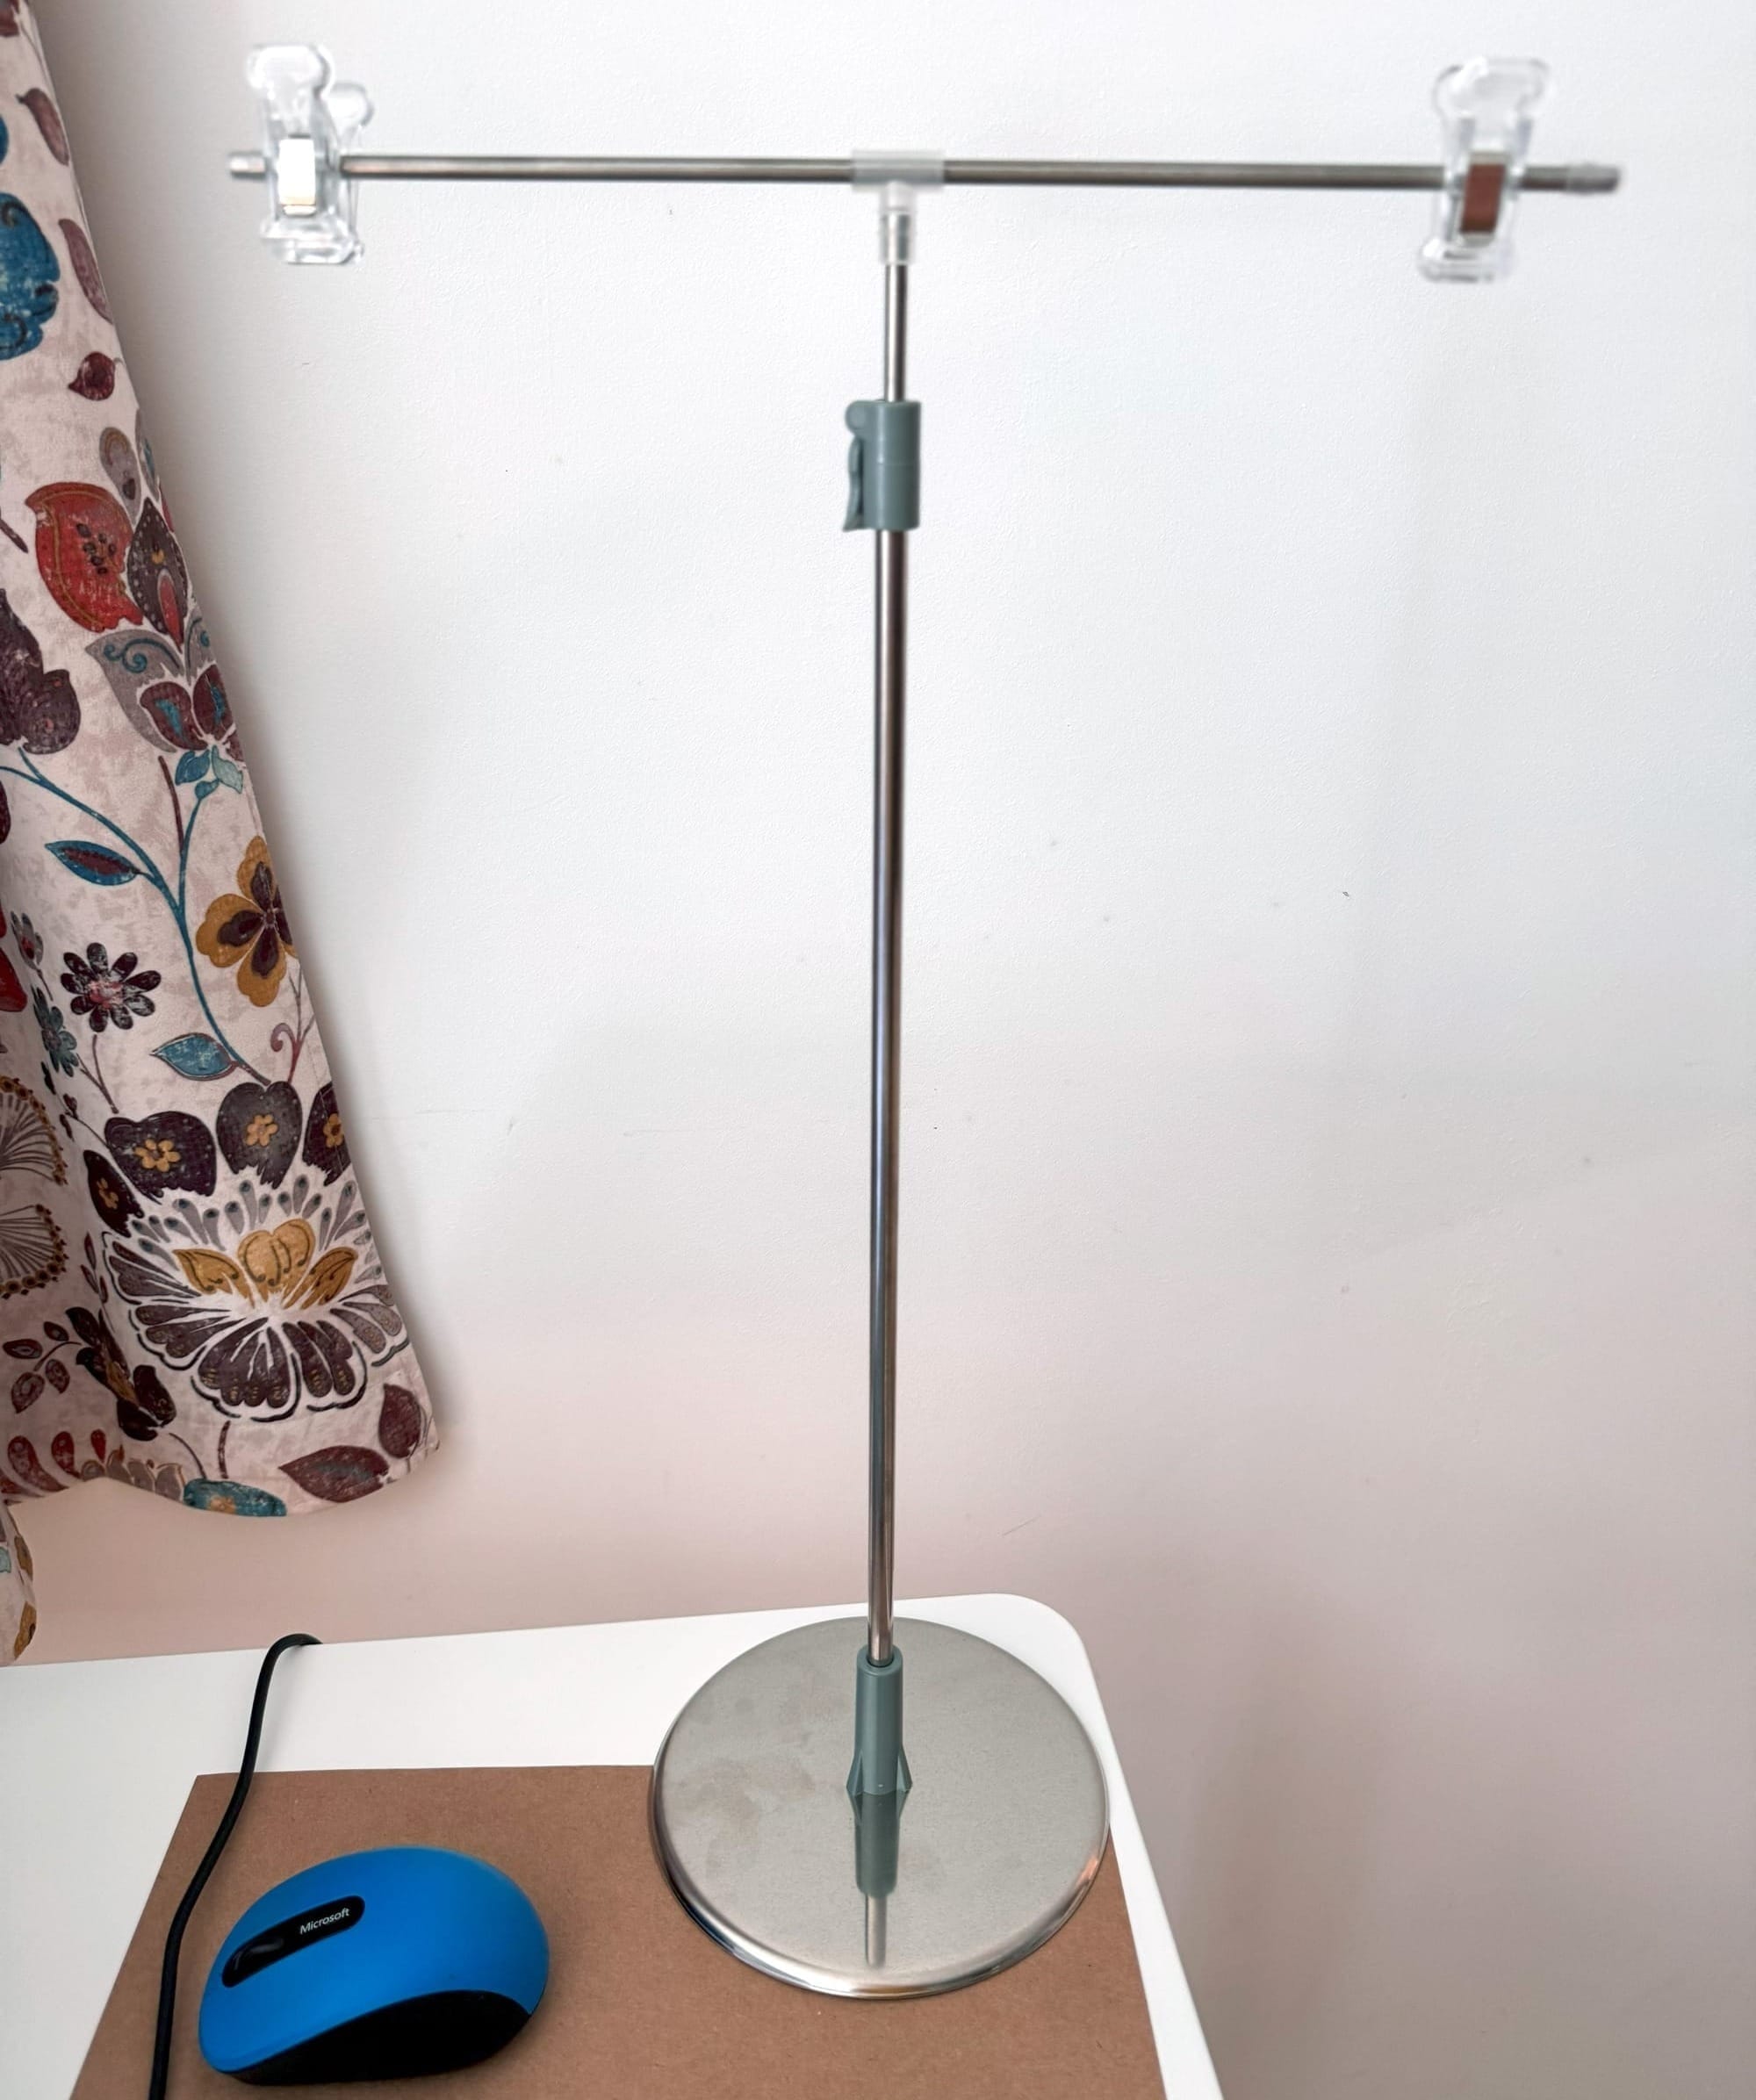
Step 3: Set Up Your Camera or Mobile Phone
I use my mobile phone for taking pictures. Since this particular photo shoot took place in the afternoon (I'm a night owl, and unfortunately, I often do video and photo shooting under artificial light!), I used a photo lamp with a special mobile phone holder. I adjusted it so my shot was at the right level, horizontal, and the light was perfect for my object and the conditions.
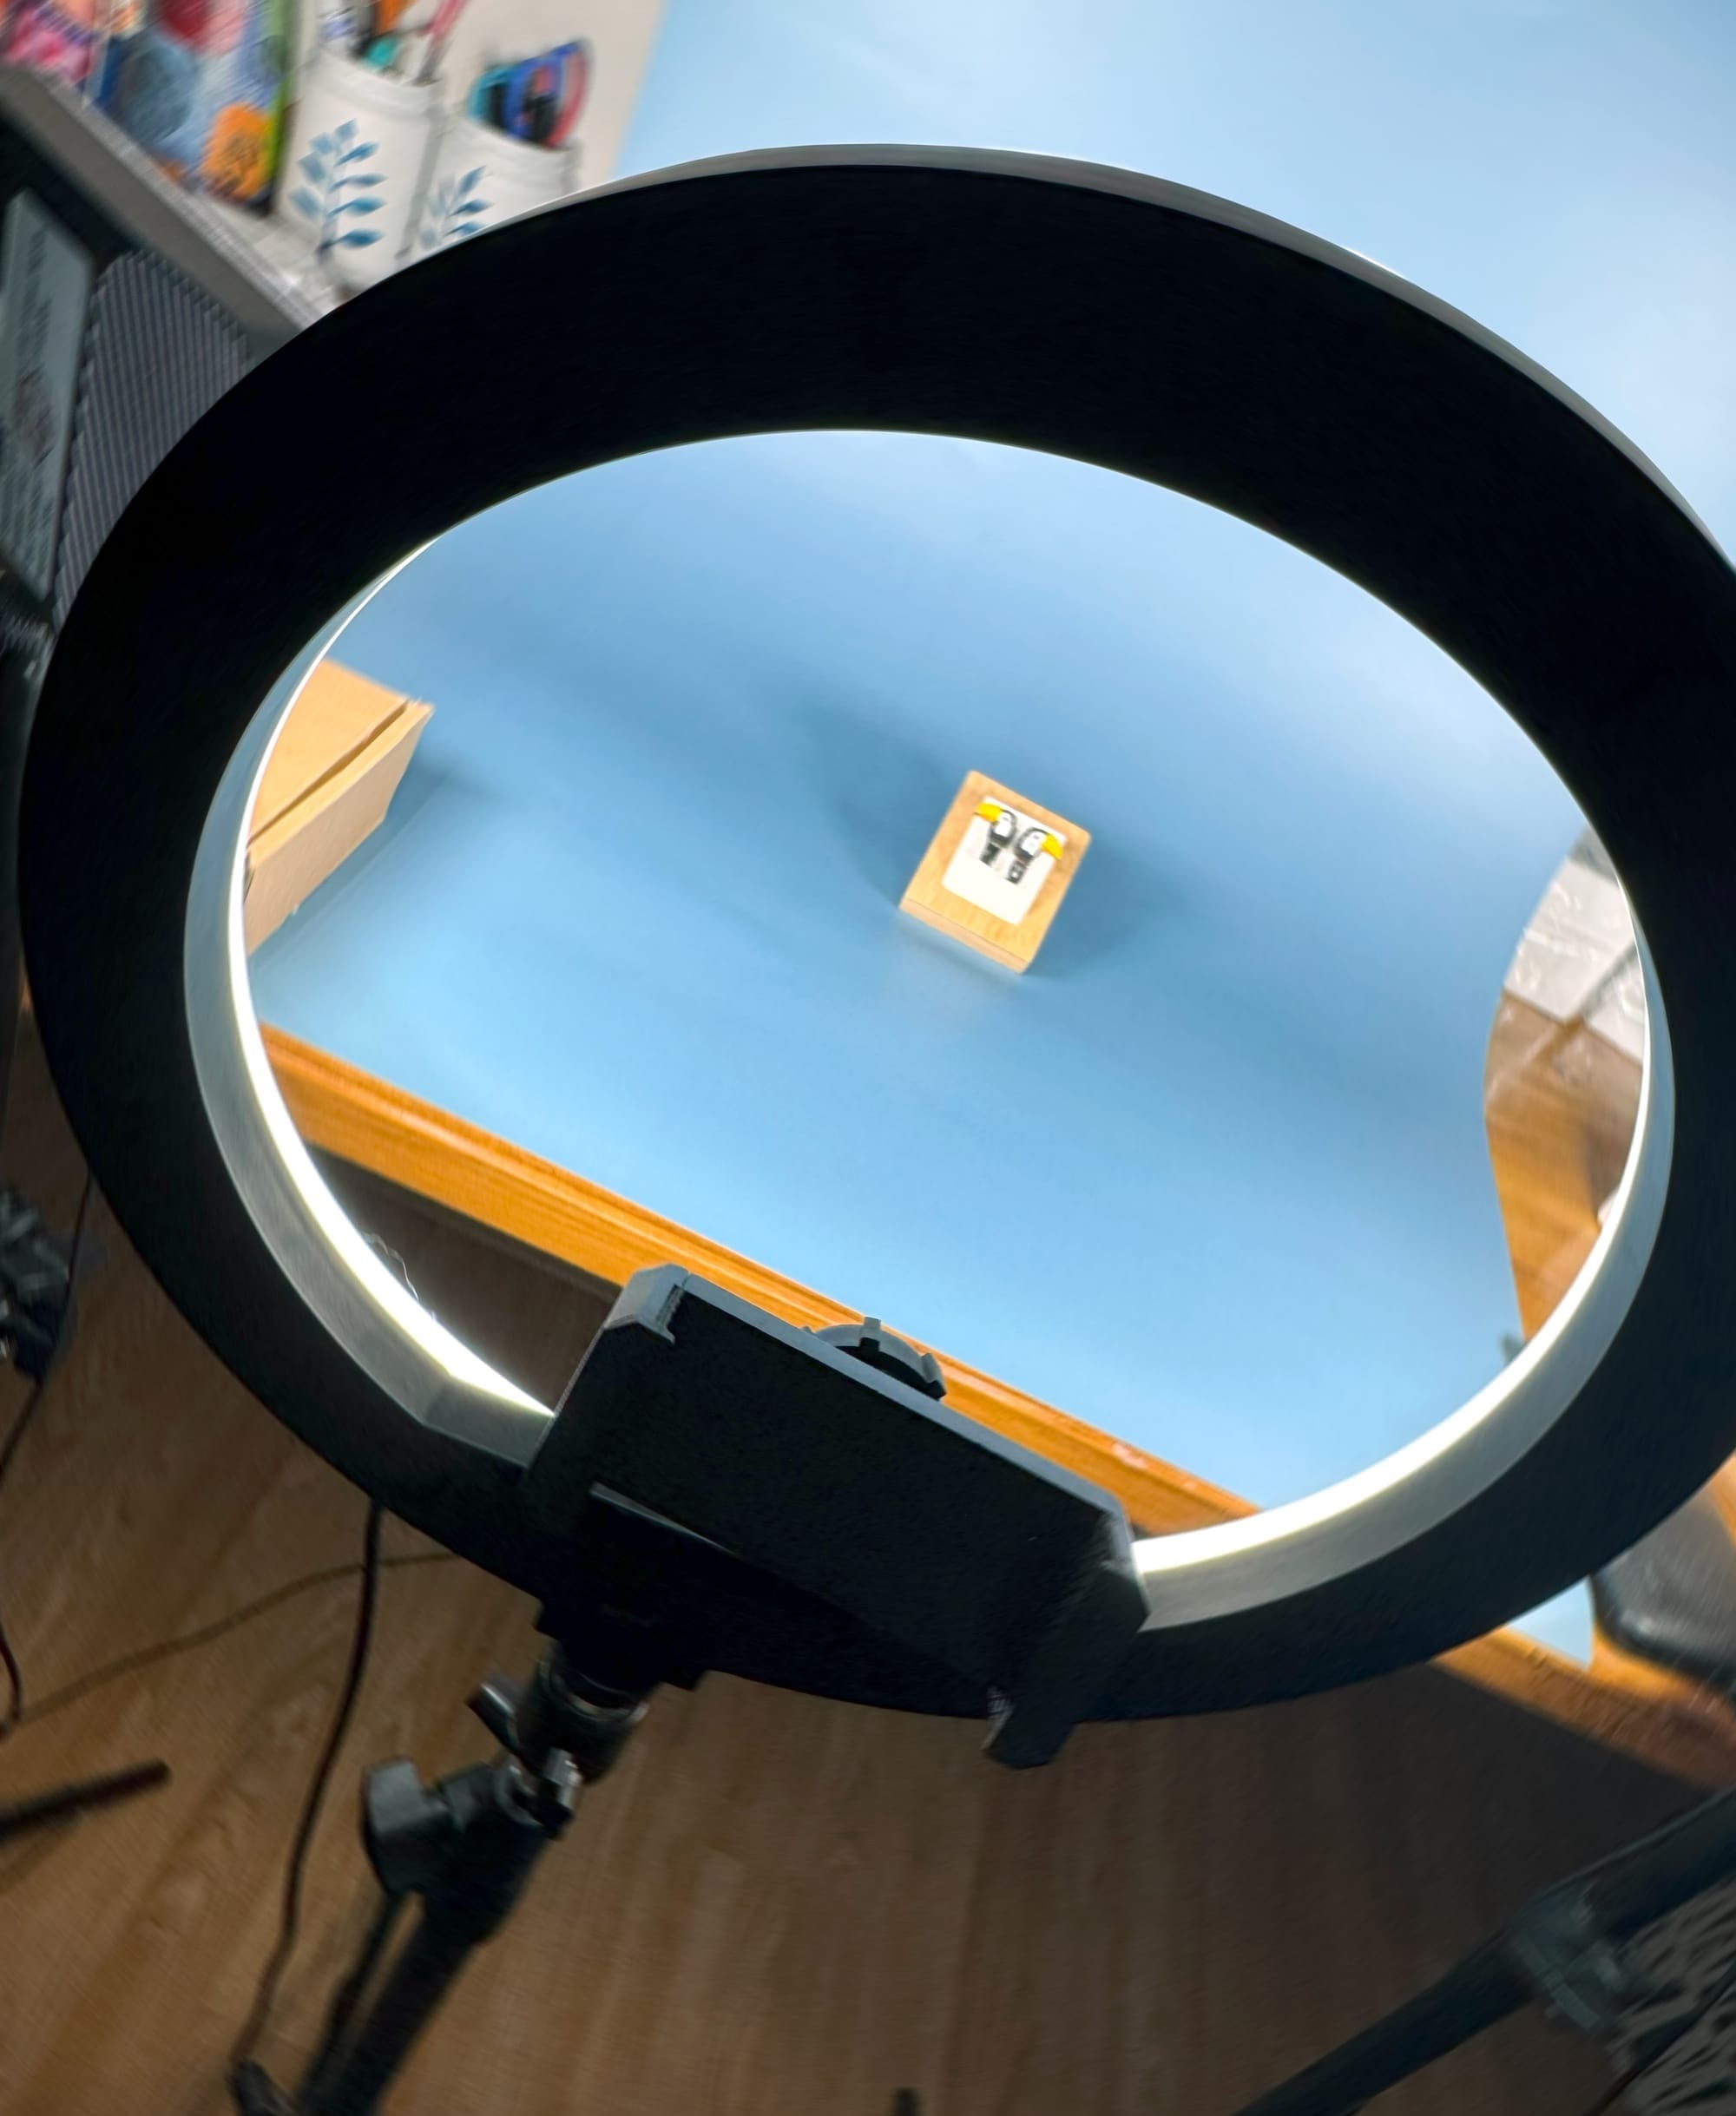
In the next photo (taken from the side), you can even spot a tiny trace of the thread spool behind the earring stand!
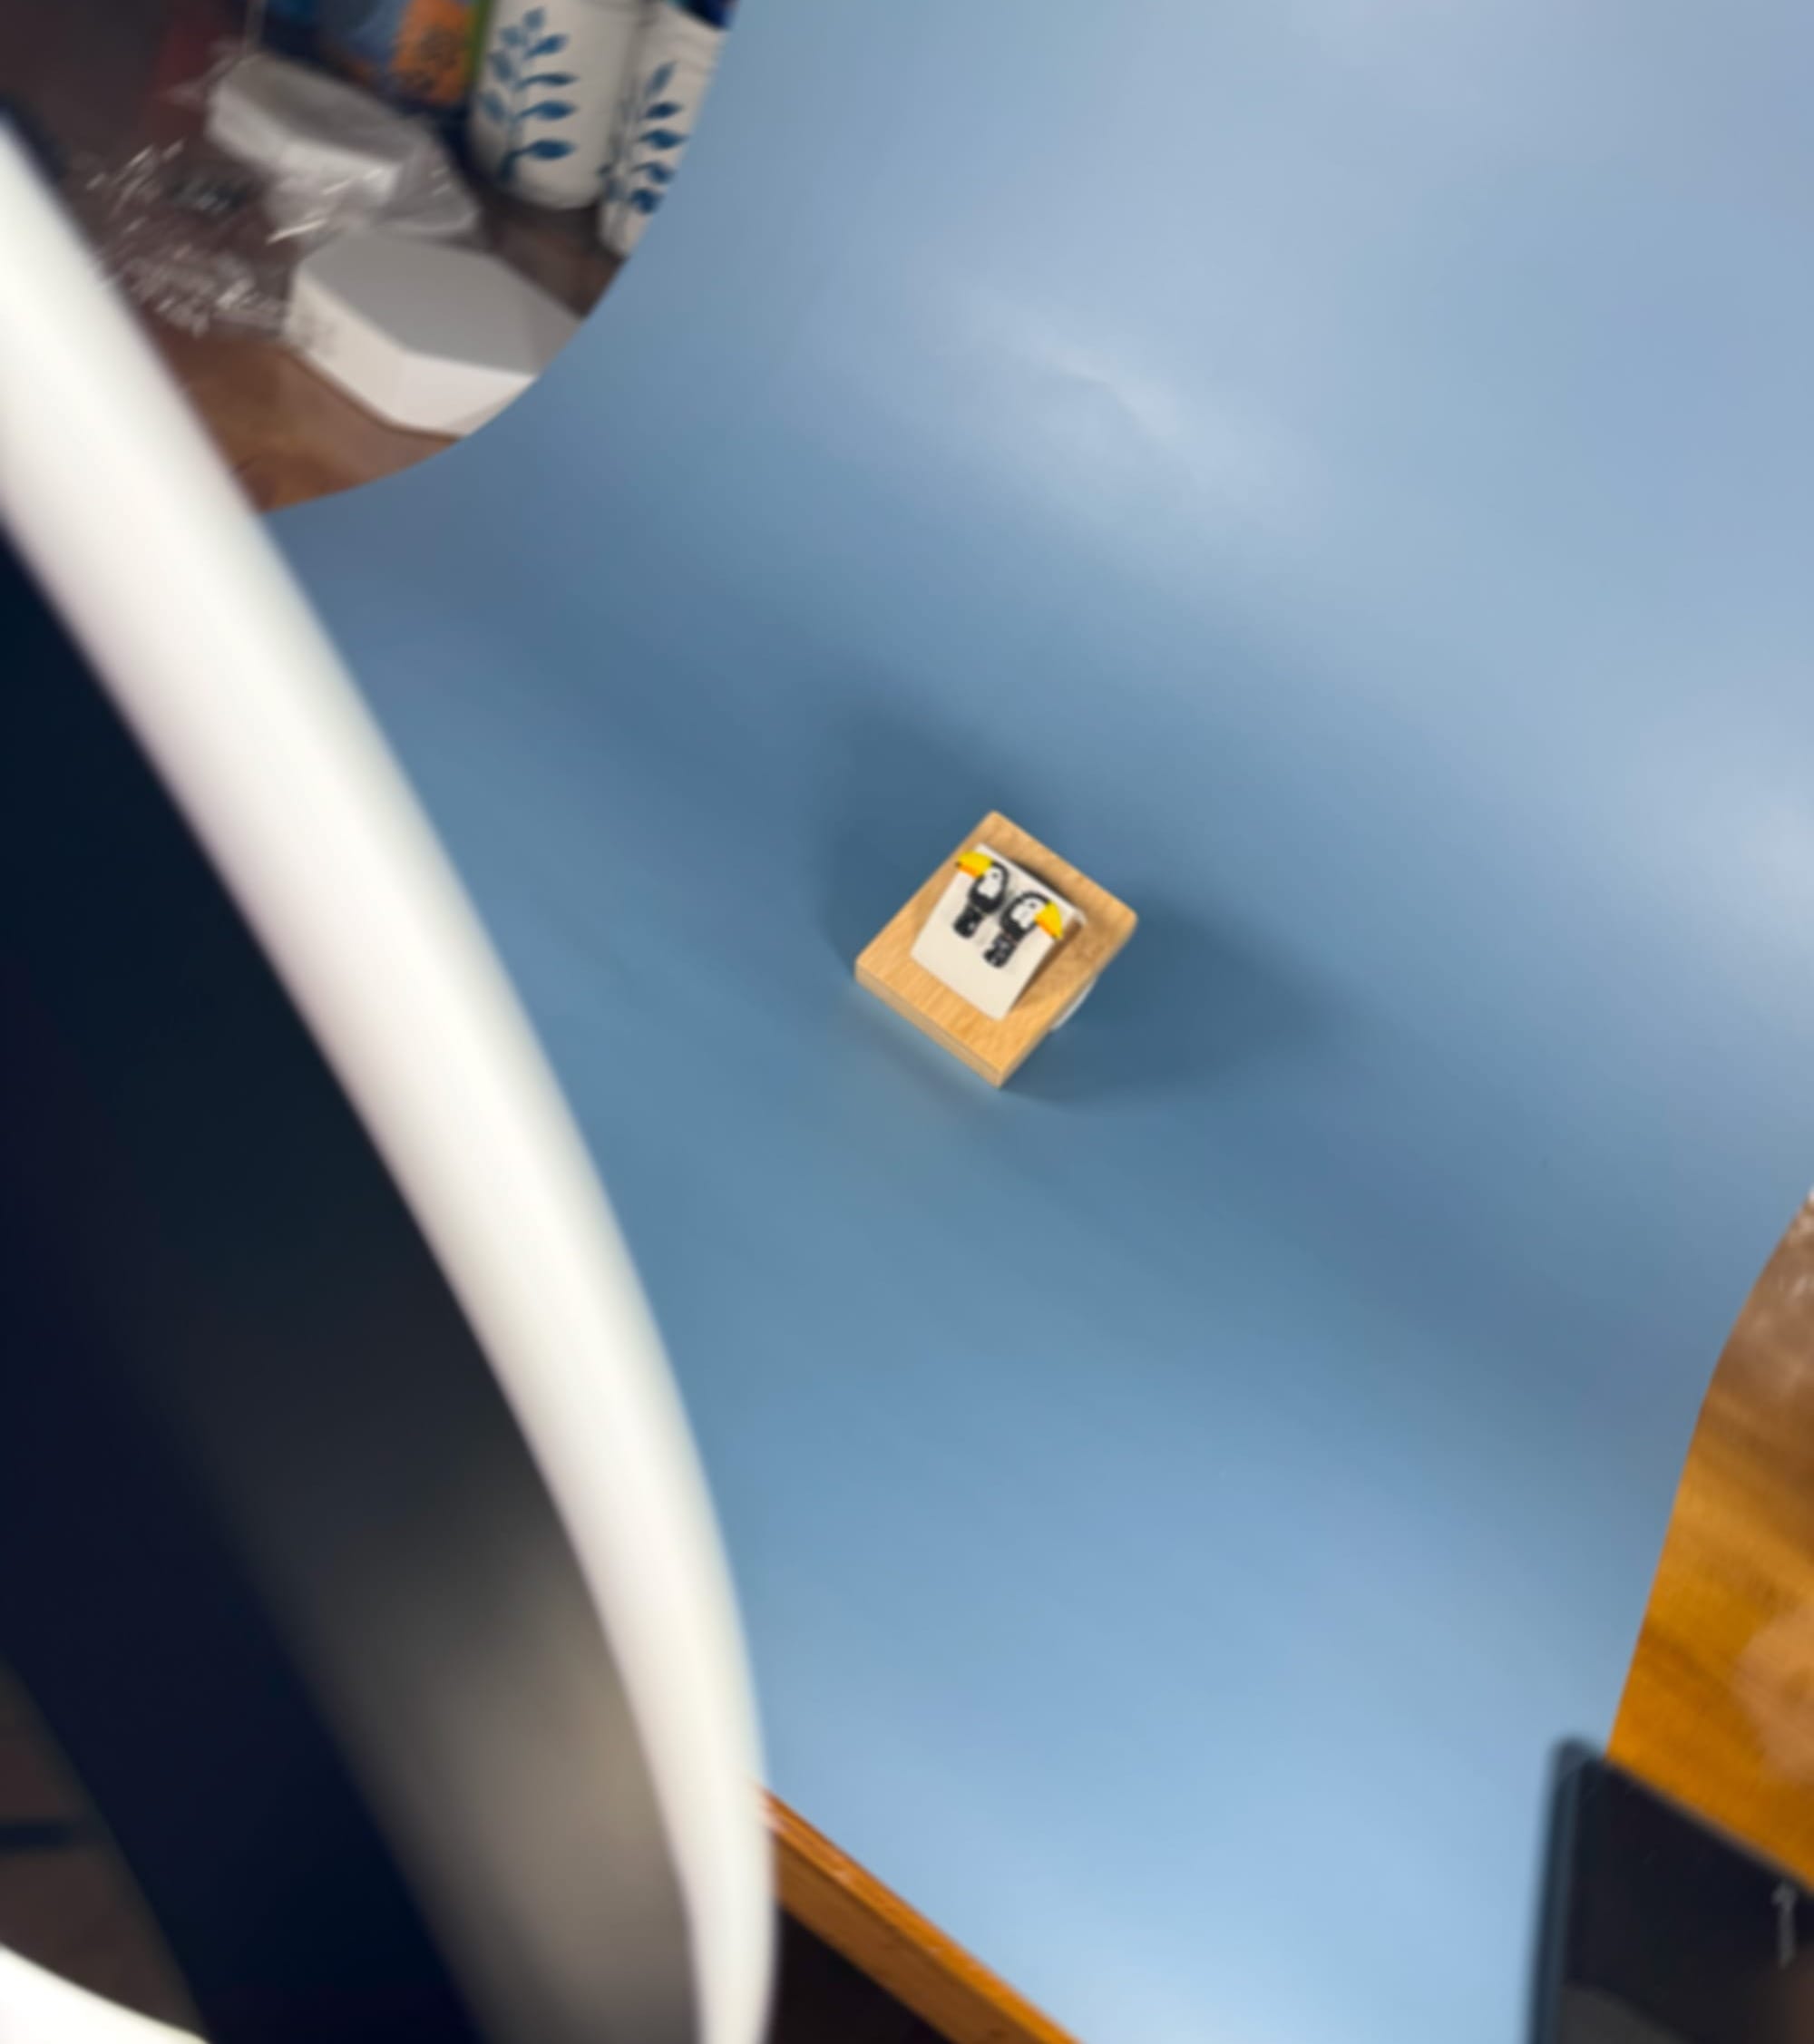
Now, start taking photos! Take many. You never know which one will best fit your final design. Here are a few I took this time:
- First shot (after this one, I added the thread spool behind the earring stand):

- Shot two, which turned out nicely:
- A couple of shots with the earrings further away:
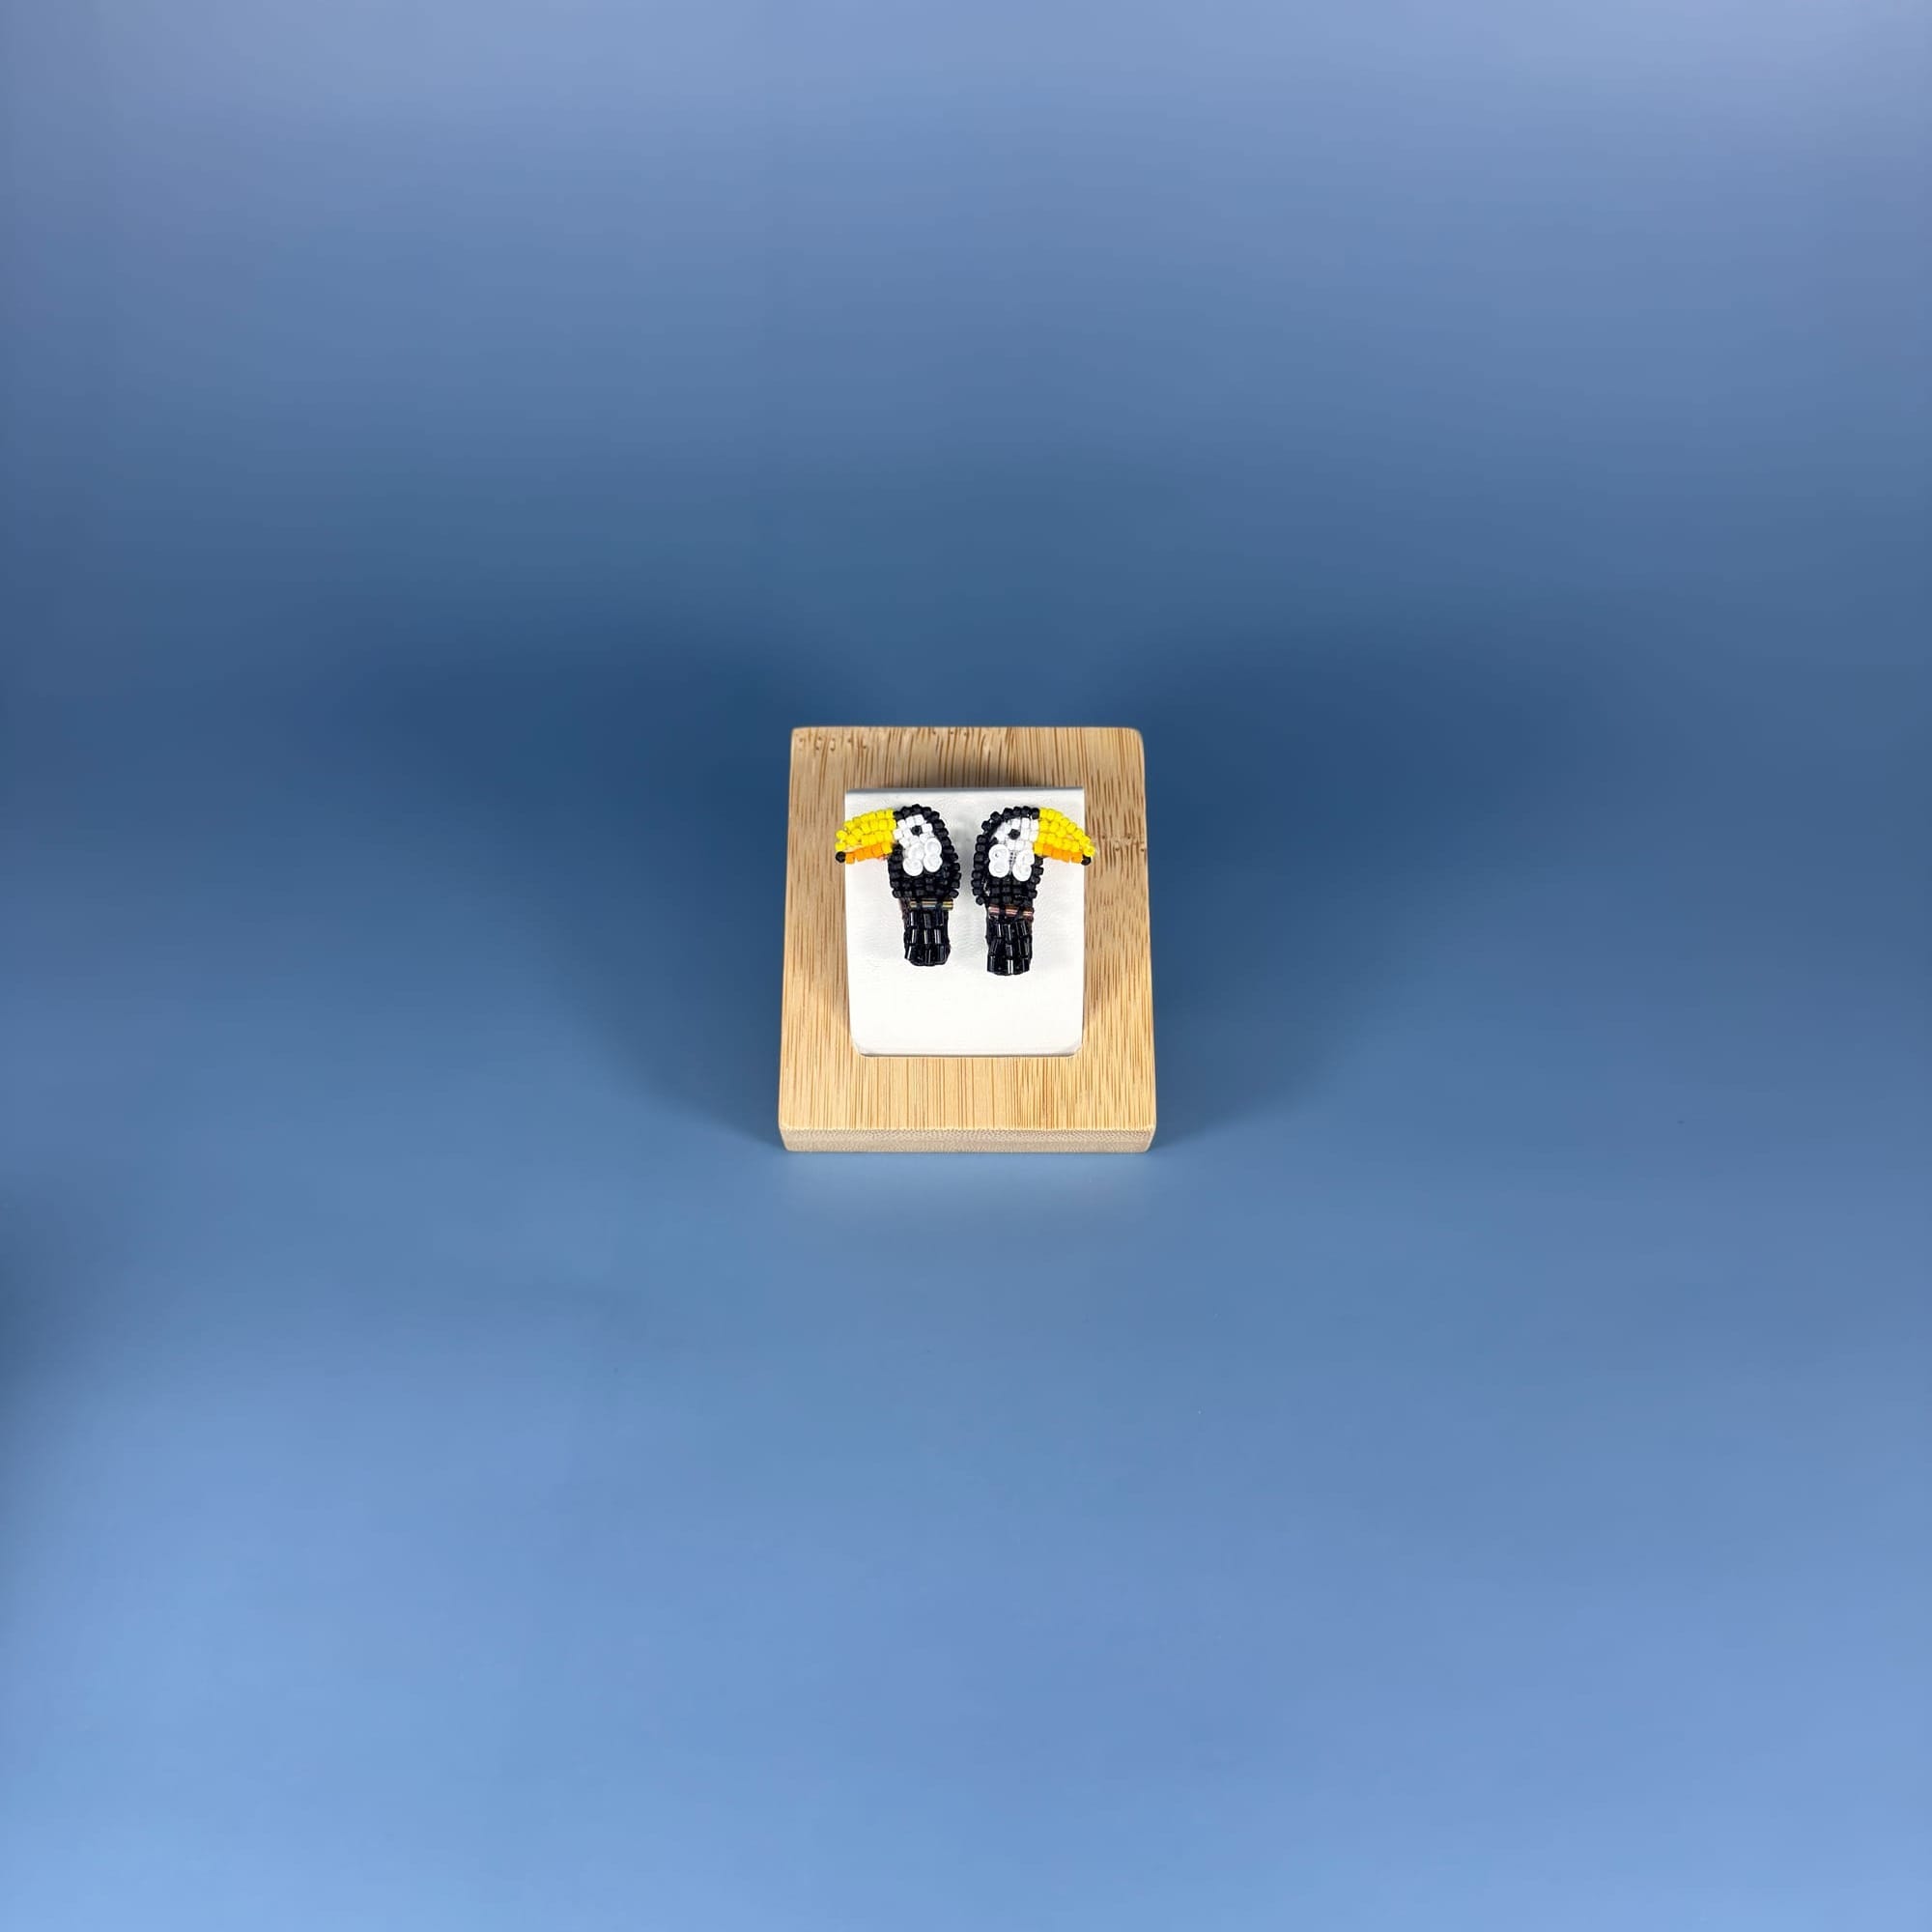
In reality, these are just four examples out of probably 15 photos I took.
Once I was happy with the shots, I moved to my PC to process the images. I use Canva as my go-to photo editing tool. I create a lot of things there, from collages and Instagram carousels to basic video creation and editing.
Step 4: Removing the Background
I opened a blank Instagram post template in Canva and uploaded a few of the photos I'd taken. Then, I used Canva's automatic background removal function. You simply click on your image and select "BG Remover" from the top menu.
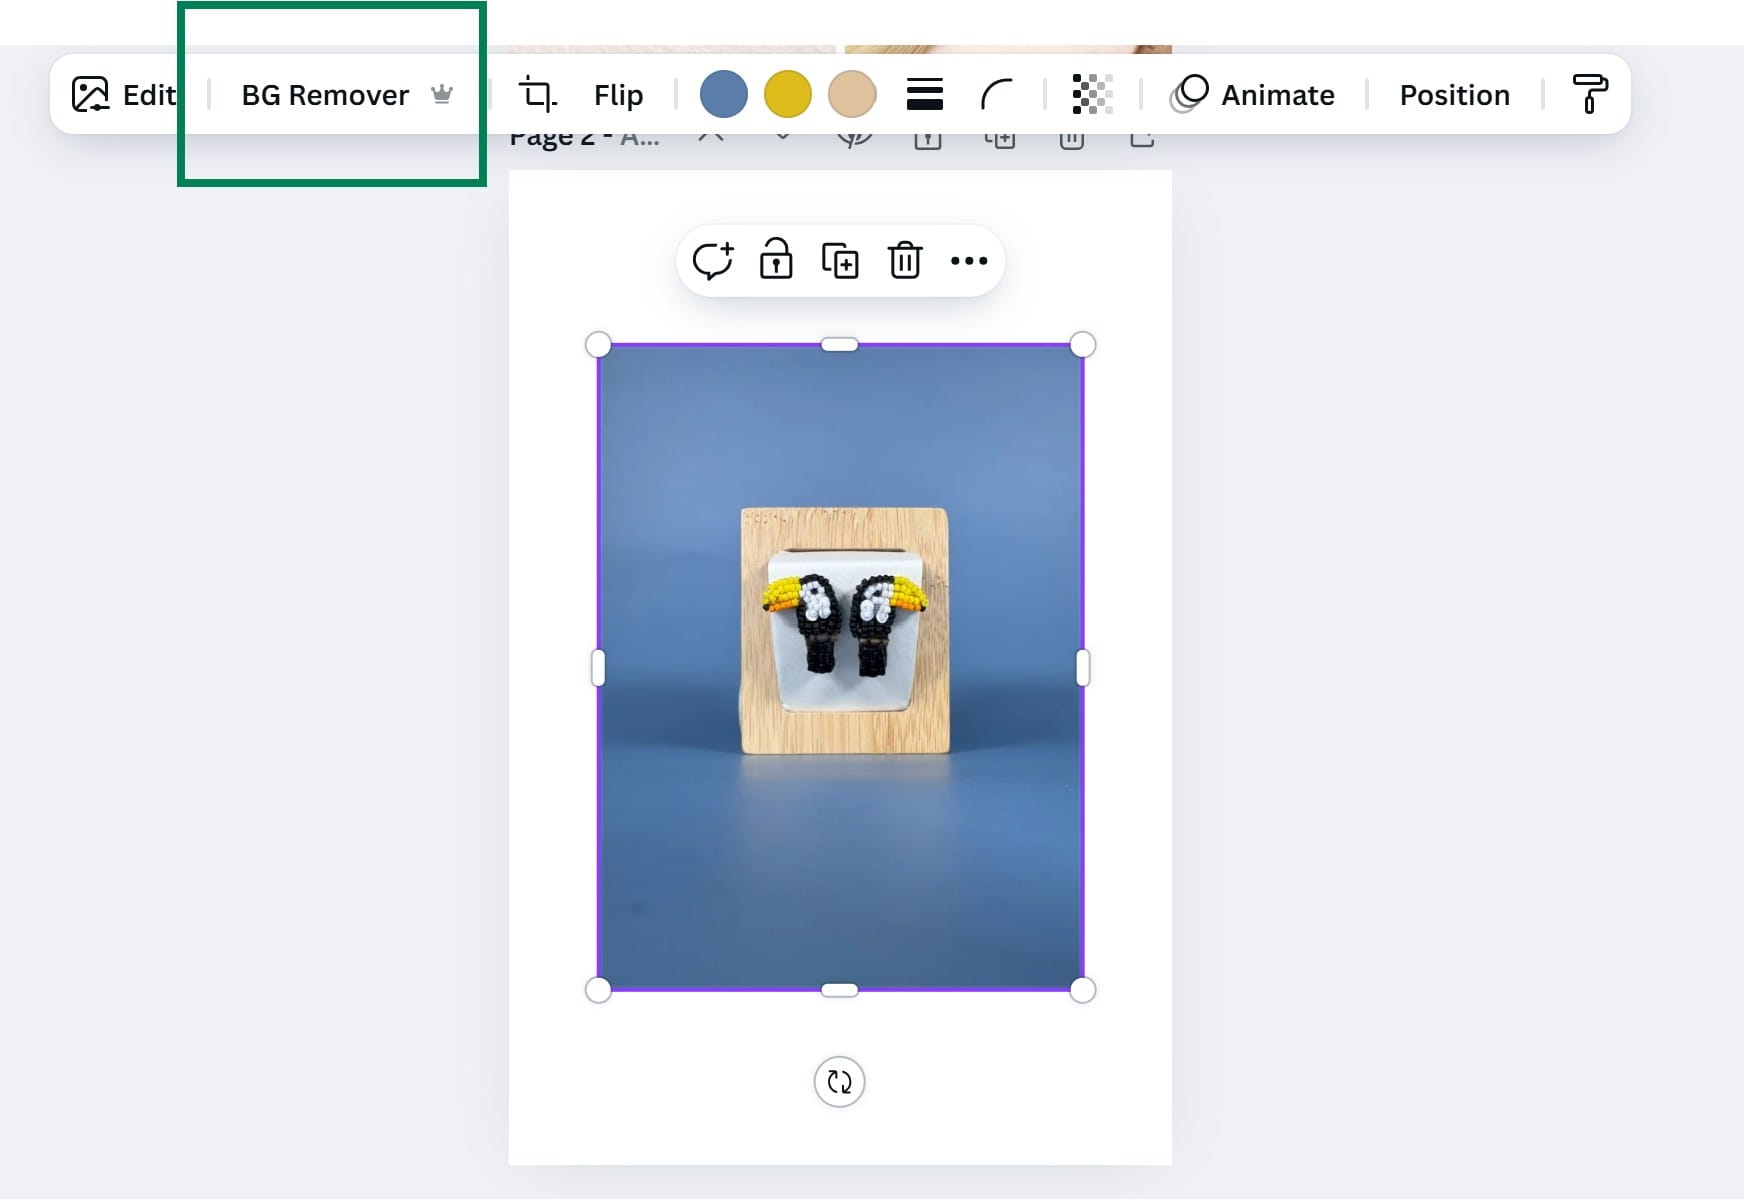
After processing, your image's background will be removed.
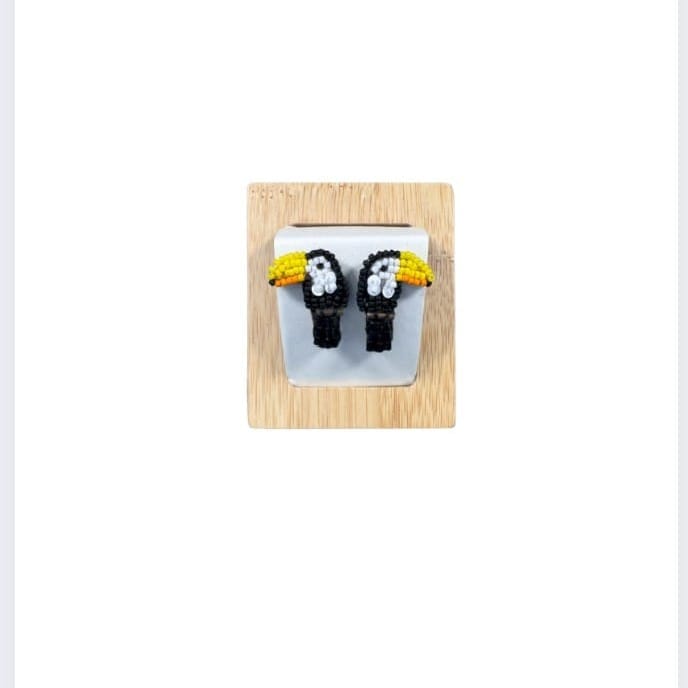
A couple of notes here: Choosing this particular wooden rectangular earring holder was a big advantage. Its simple shape helps Canva recognize the background well and remove it cleanly. This function doesn't work as well with complex shapes. For example, yesterday I tried to remove a background from an image with a volume-beaded ring, and it didn't work nearly as well as it did for these toucan earrings.
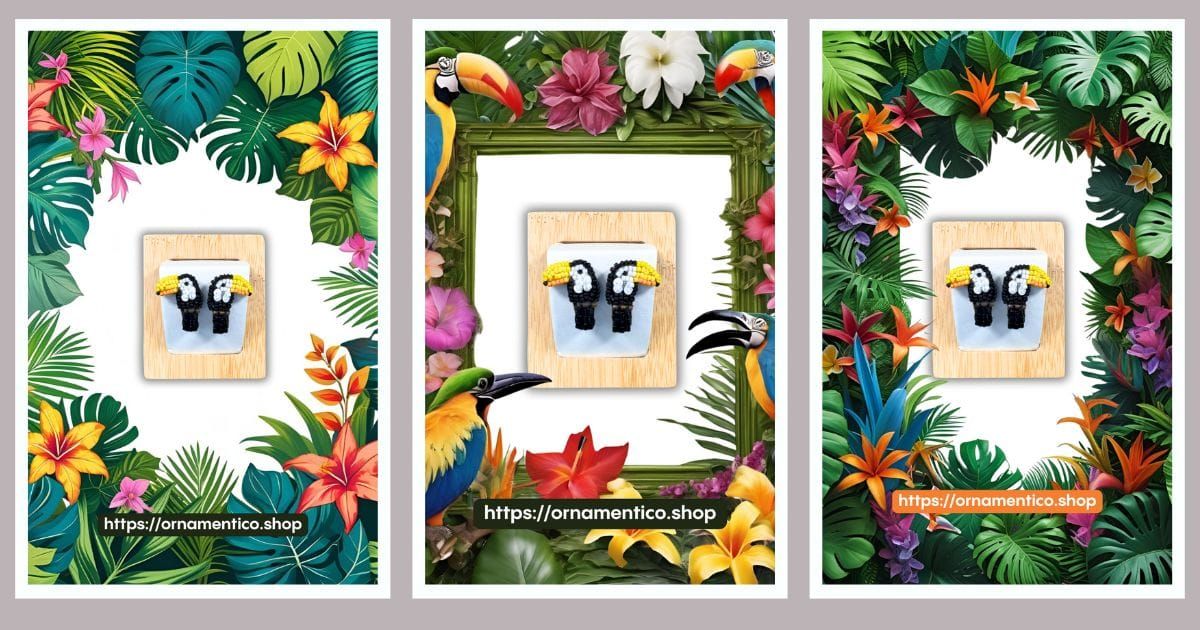
Step 5: Generating AI Images
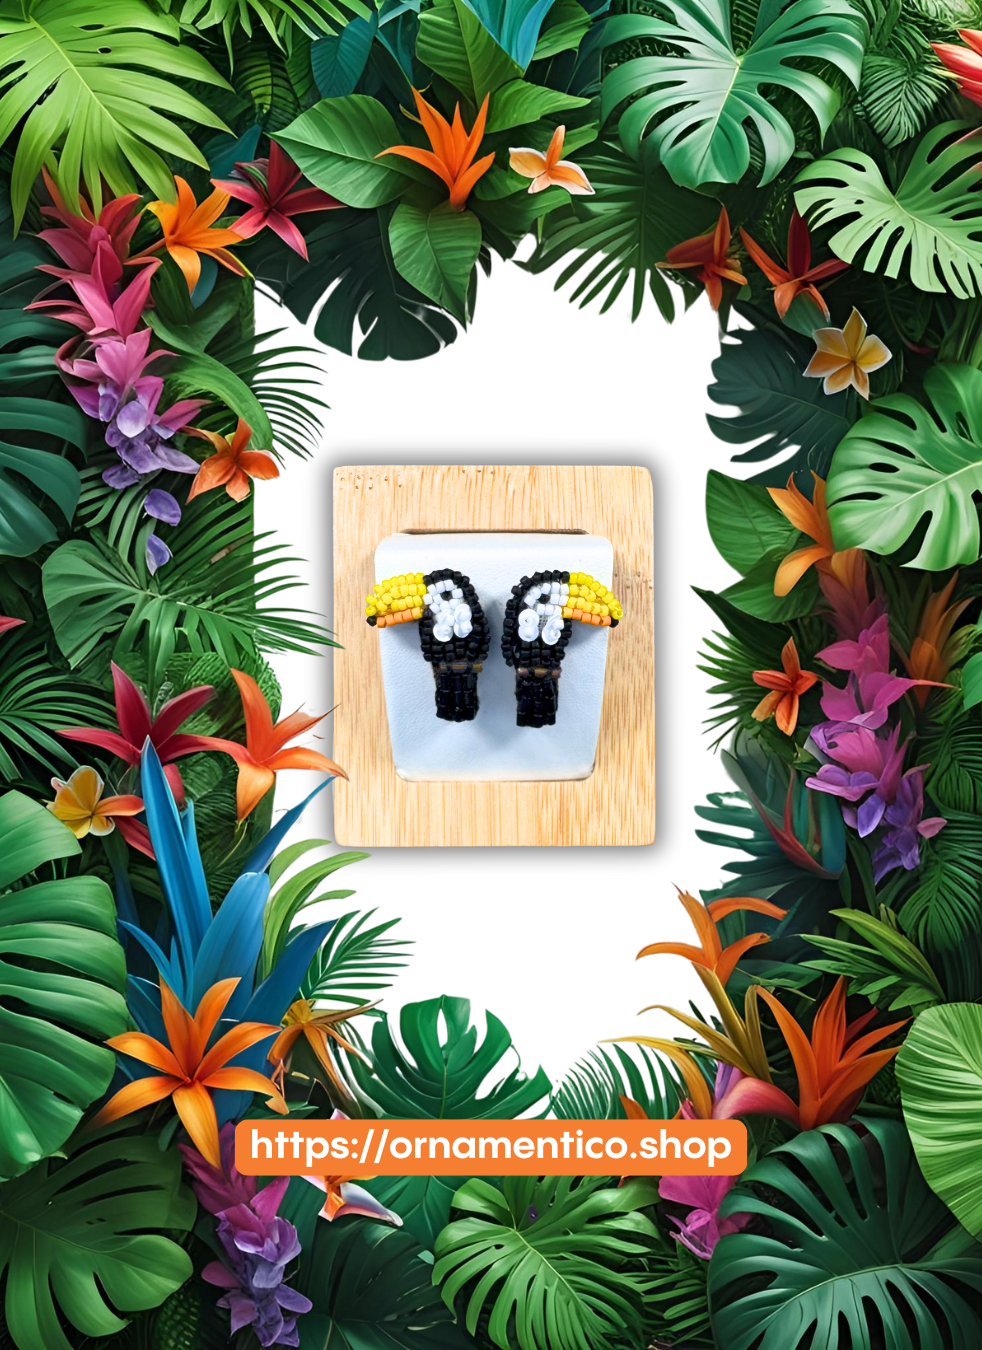
Now for the fun part! My initial idea for the image was to have a photo of the earrings in the middle on a light (white or cream) background, surrounded by tropical plants.
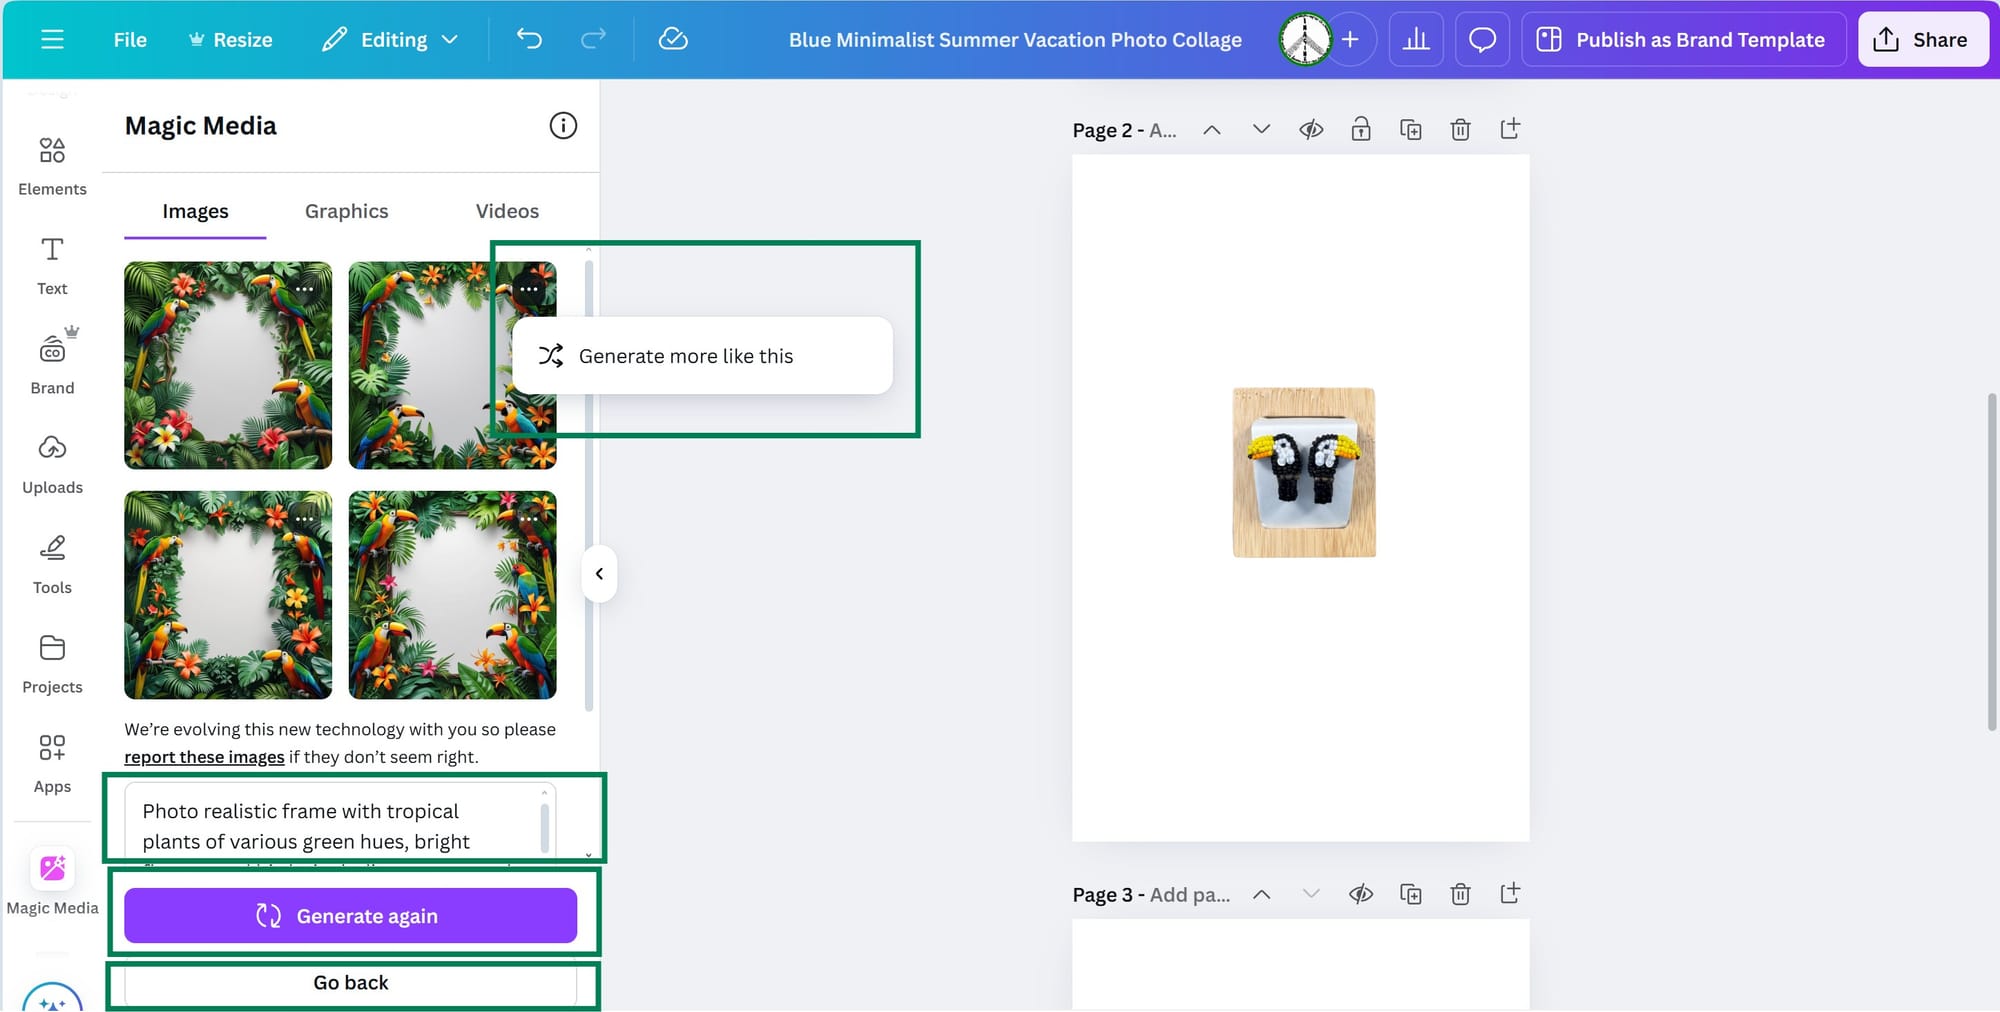
To create a colorful tropical setting for my earrings, I used Canva's built-in AI image creation functionality. To access it, go to the left-hand menu, select "Elements," and then choose the "Generate your own" option.
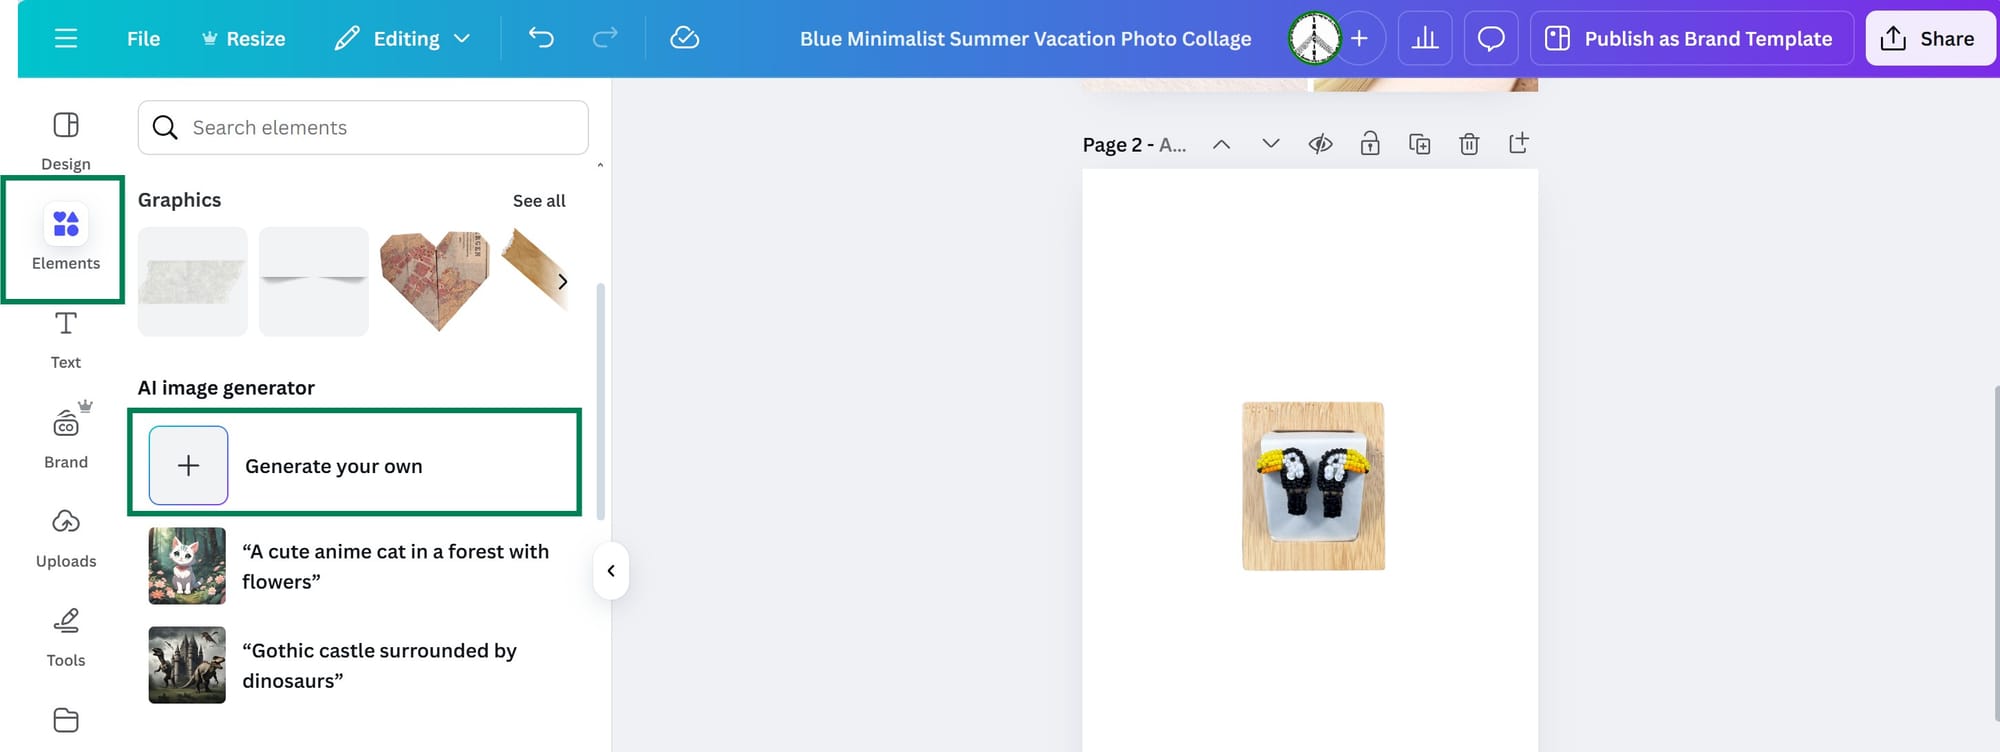
A new window will open with a special field where you need to input your prompt for the AI to generate an image.
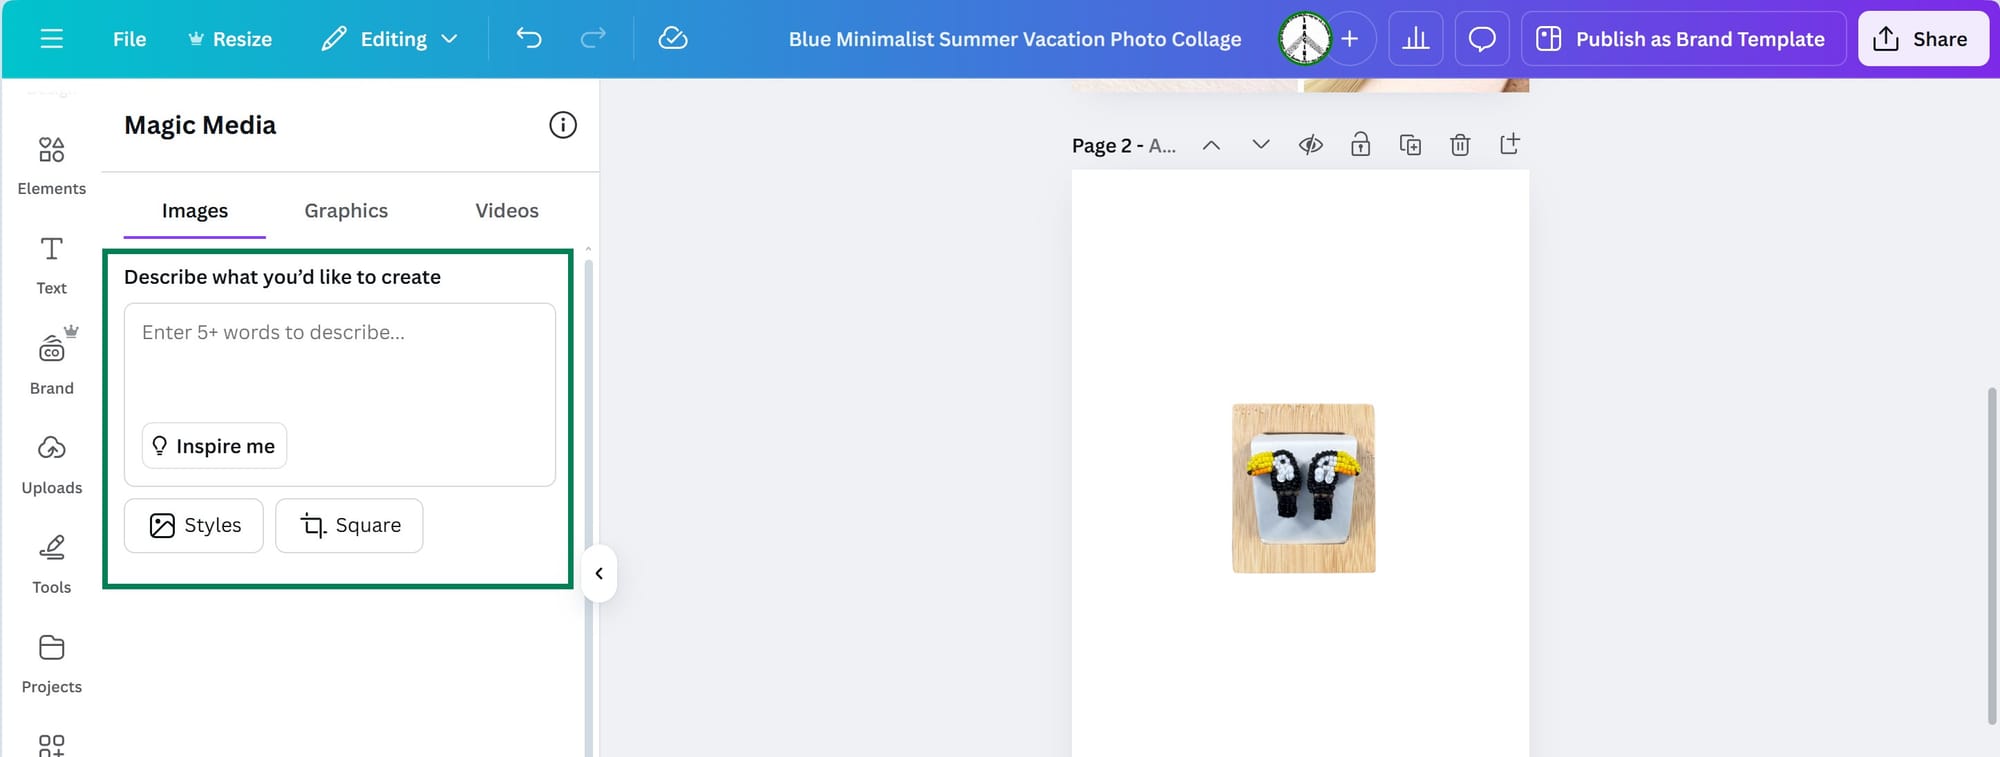
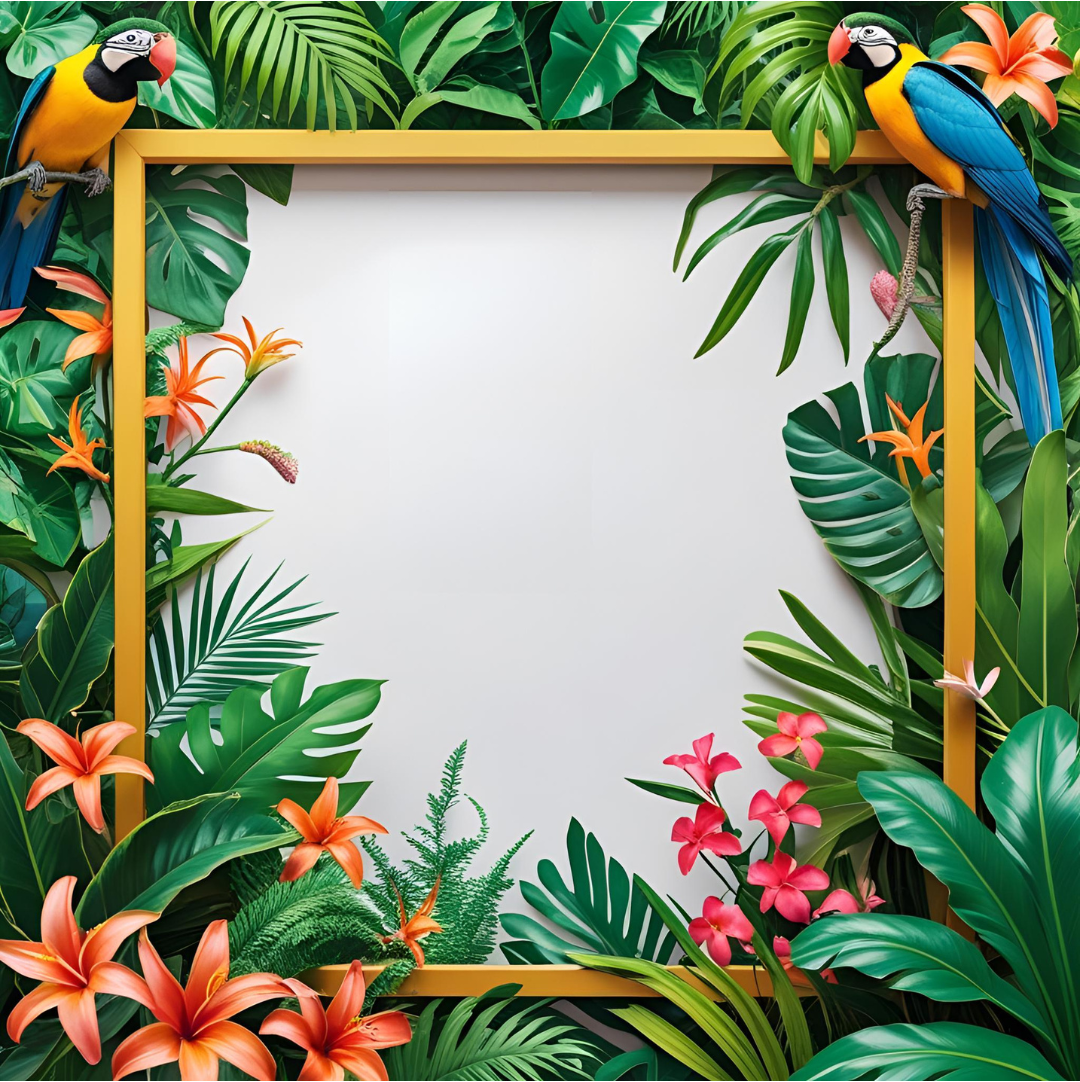
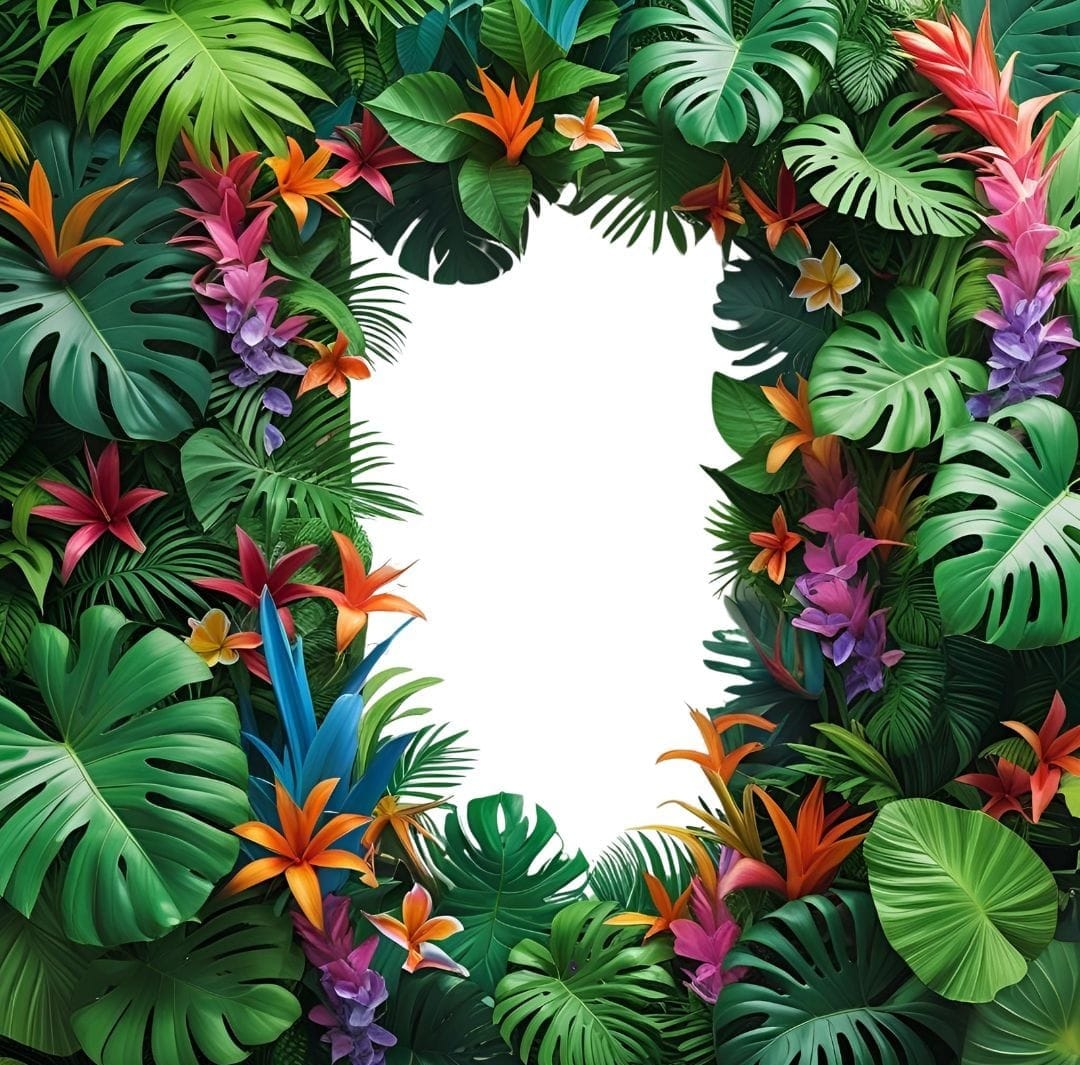
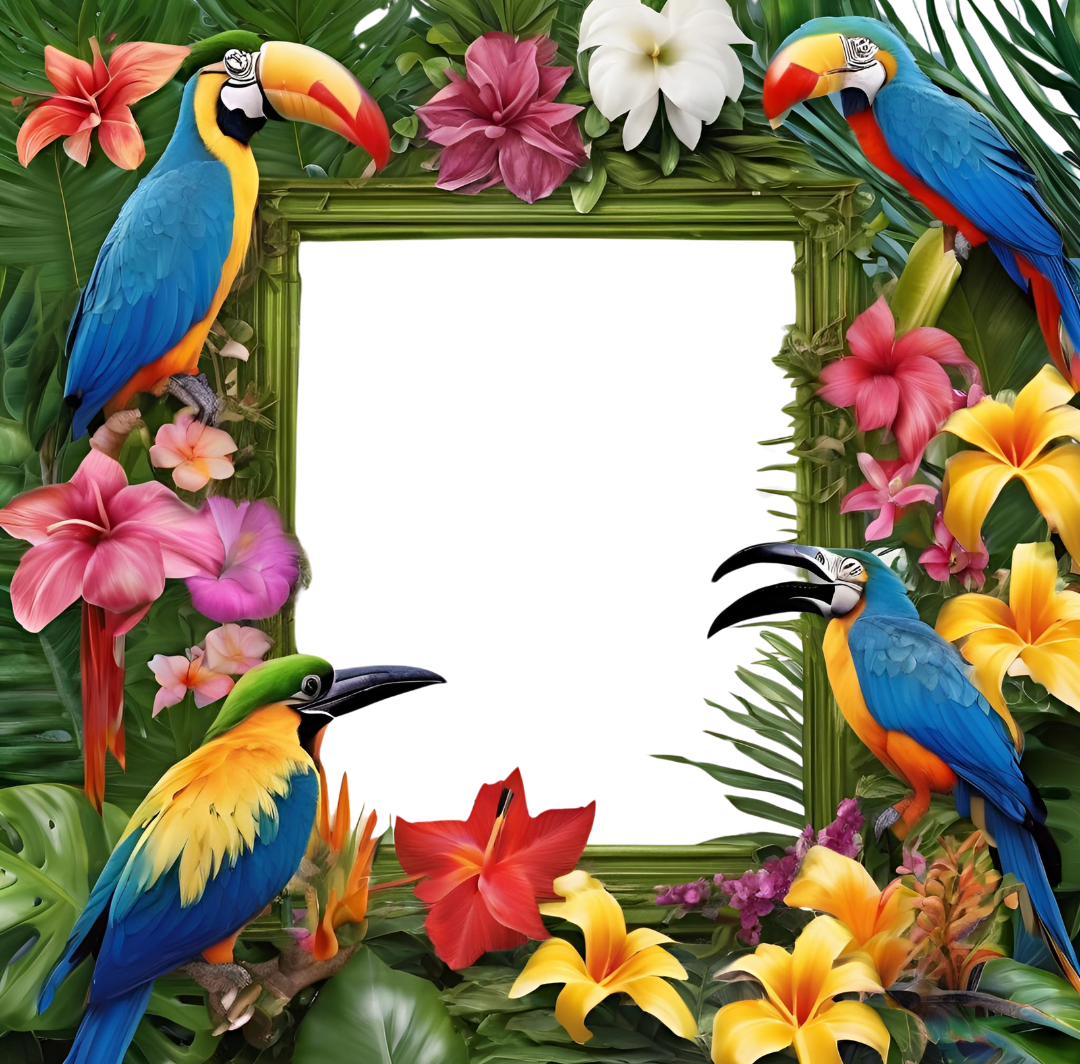
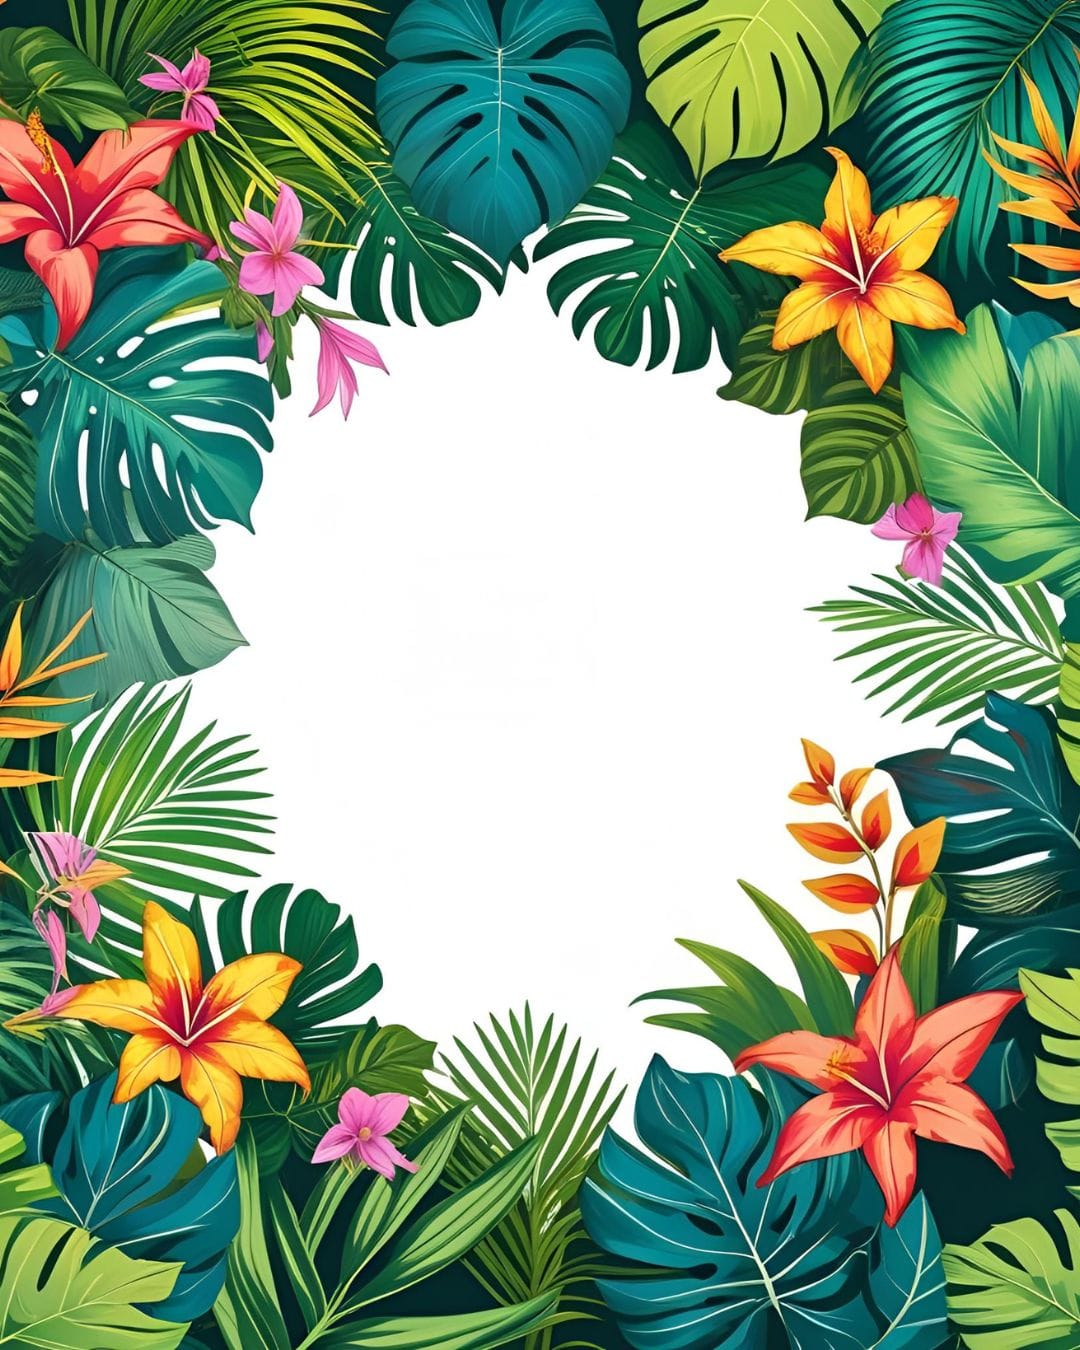
This is where your idea and your ability to formulate precisely and with detail what you want as a result really come into play. Here's the final prompt that worked for me: "Photo realistic frame with tropical plants of various green hues, bright flowers and birds, including parrots and toucans at the edges, and white space in the middle." Yes, it took me a few iterations to create this exact prompt, which ended up working the best!
Of course, it takes the AI some time to generate something close to what you envisioned. The first few attempts weren't ideal. For example:
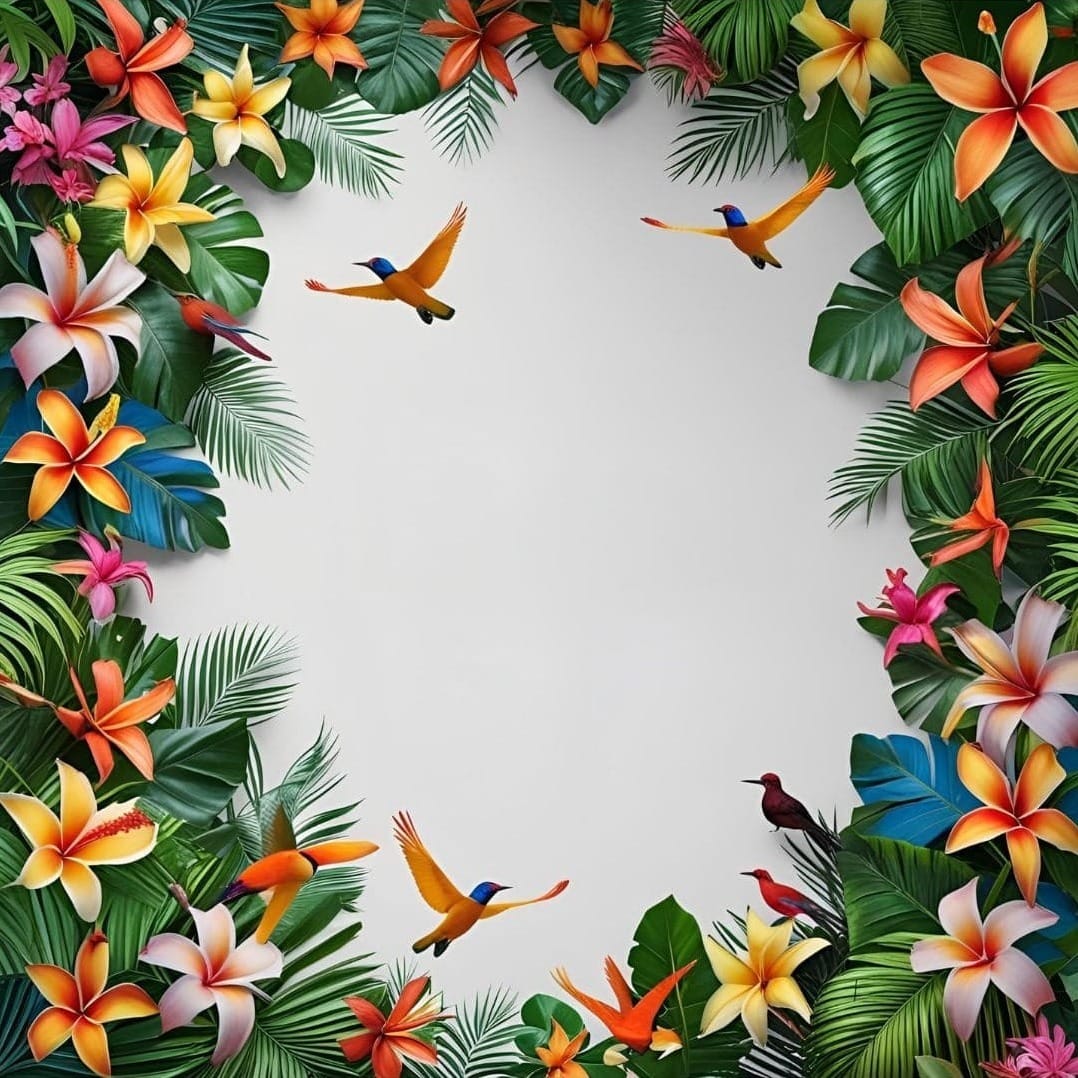
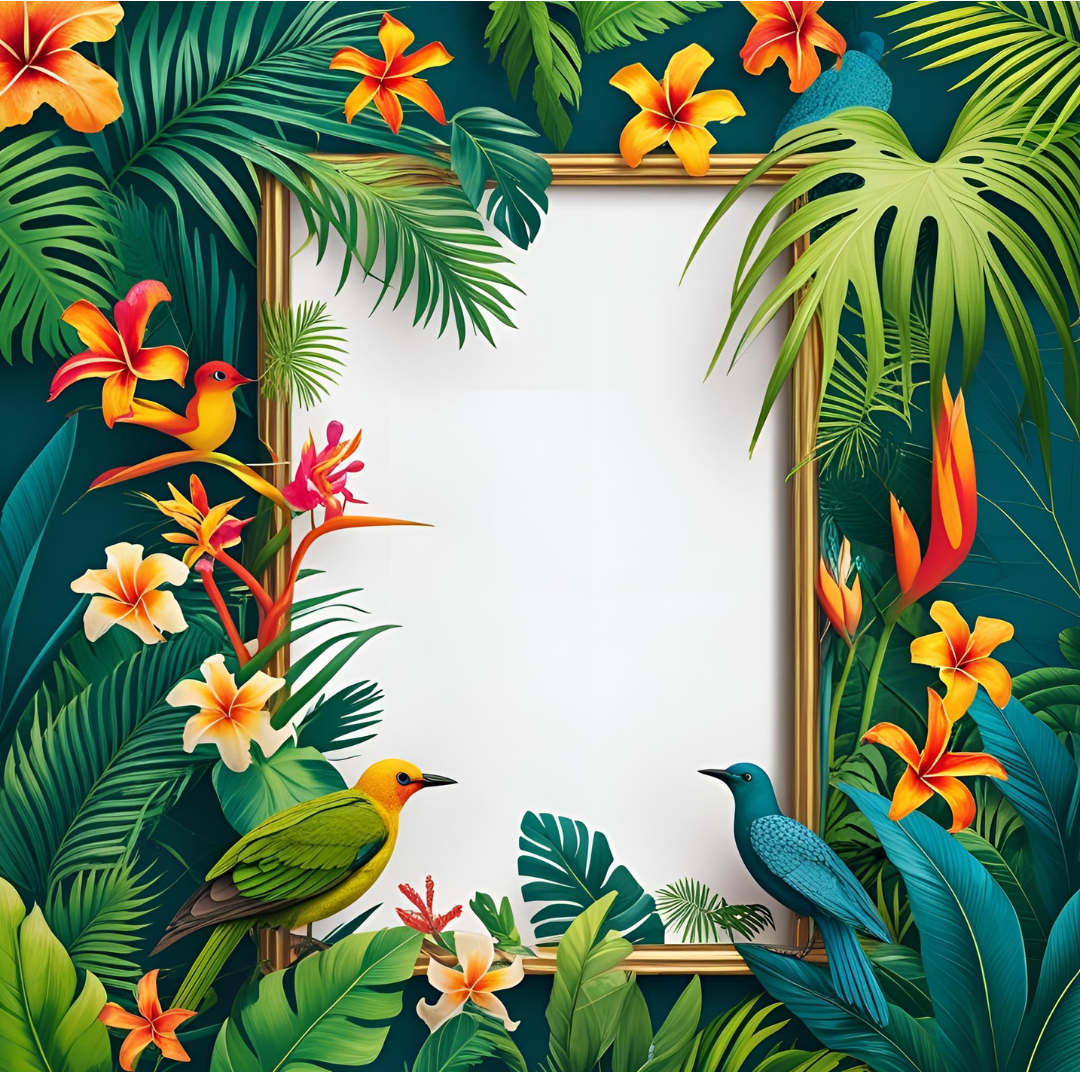
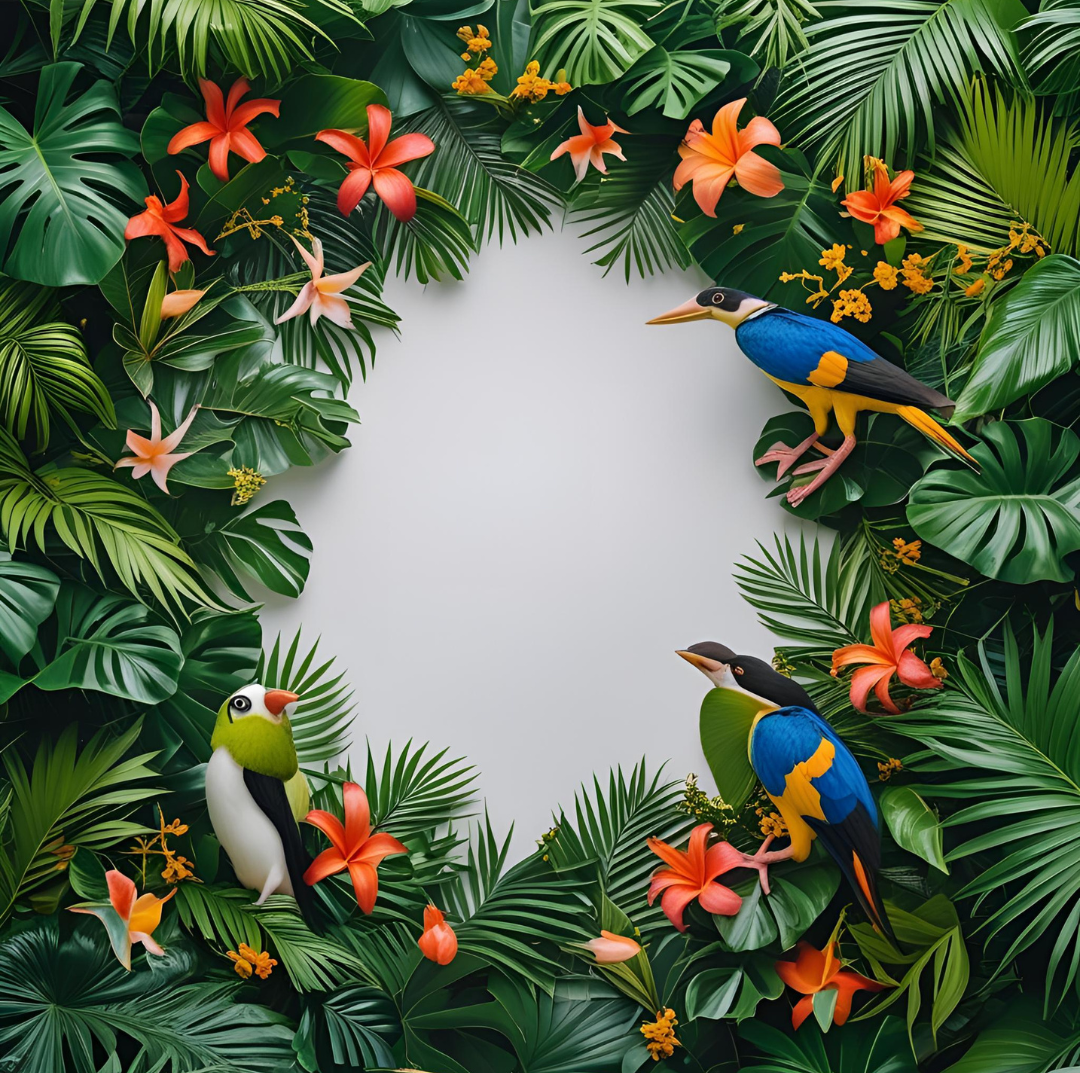
Something wasn't quite right in these images – either the shape of the flowers, the birds, the picture was too busy, or the whole composition didn't leave enough space for my earrings' photo. Canva's built-in tool creates four different versions based on your prompt. Once the first four images are created, you have several options:
- You can use "Generate again" for the AI to recreate results.
- You can edit your prompt to add more details about shapes, colors, or objects.
- You can go back and start from scratch.
- But the most useful option is to generate additional images using the one closest to your vision. To do this, click on the three small white dots in the top right corner of the image and choose "Generate more like this."
Step 6: Compile Your Final Image
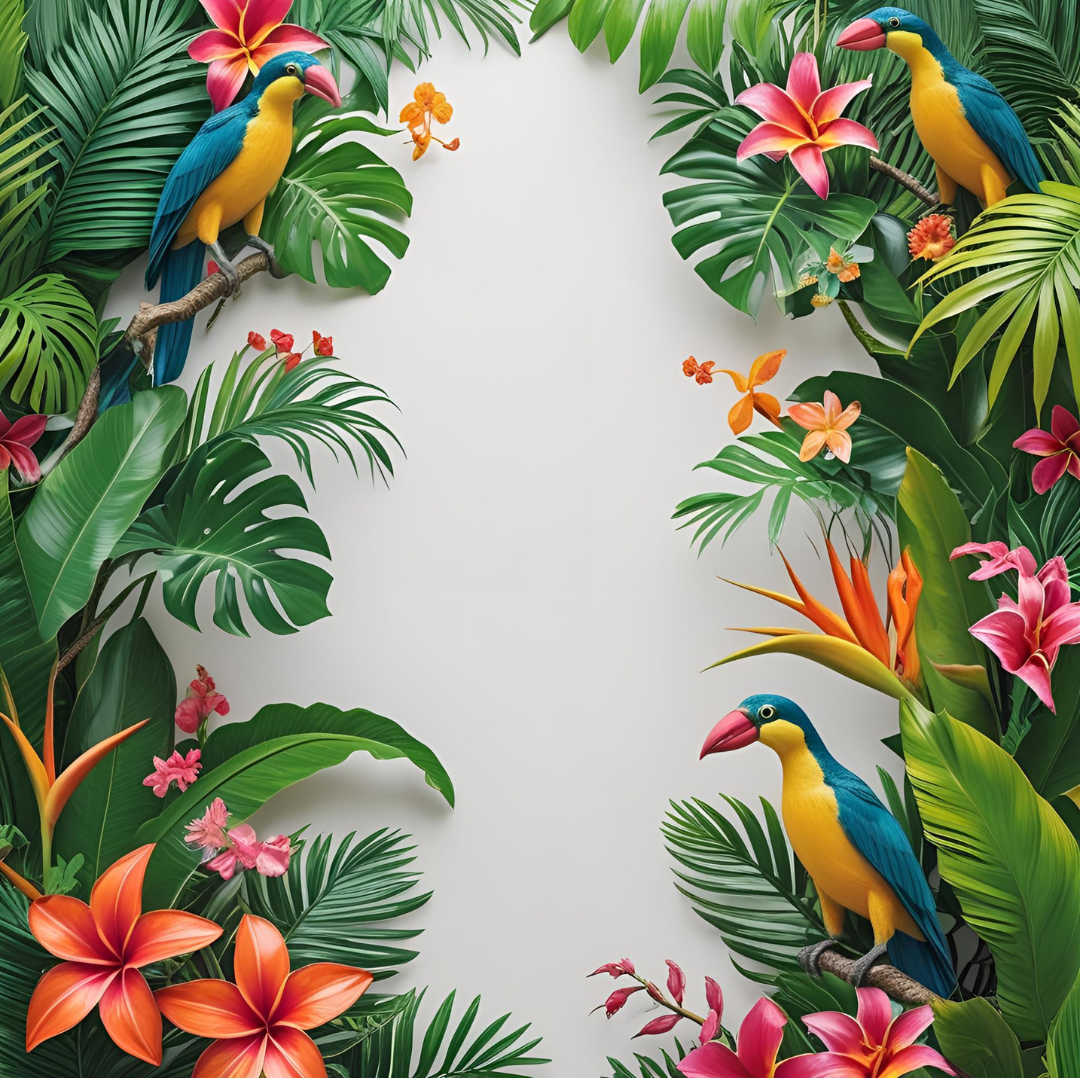
Once you're happy with the results, you can move on to creating your final image. In my case, I had three images that were generated after a few attempts and were good enough:
As soon as you click on a generated image you like to add it to your Canva design, it's automatically added to your "Uploads" section, so you can easily find it later.
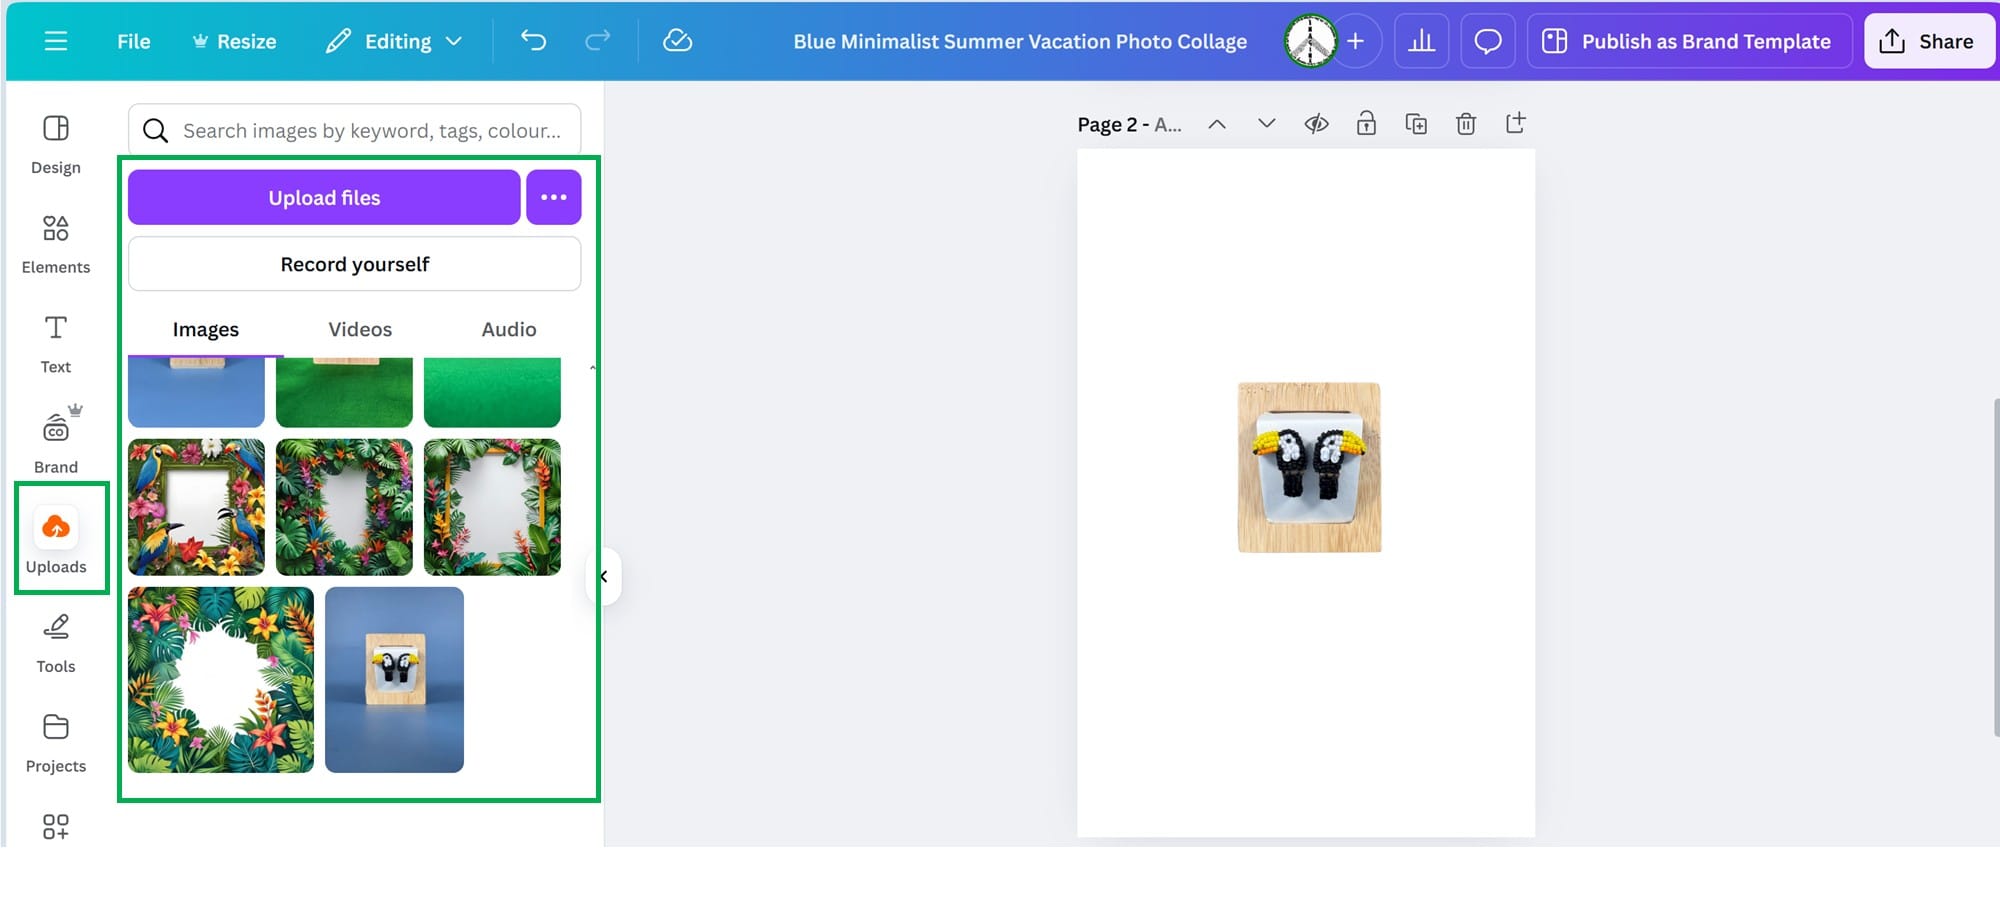
Now, drag the AI-generated image onto your canvas, edit the composition, add your website or product information, and you're done!
HINT: For two of the images below, I also used the "BG Remover" option to remove the background from the floral frame that the AI created for me. As I mentioned earlier, it doesn't work perfectly with complex shapes, so you'll need to do a bit of work on the details, especially when your image (like mine) has so many tiny elements: petals, leaf edges, or beaks. But it was absolutely worth my time! As you can see, removing the background from the AI-generated image allowed me to place the earring image on a back layer, with the plants or birds partially covering it for a more integrated look.
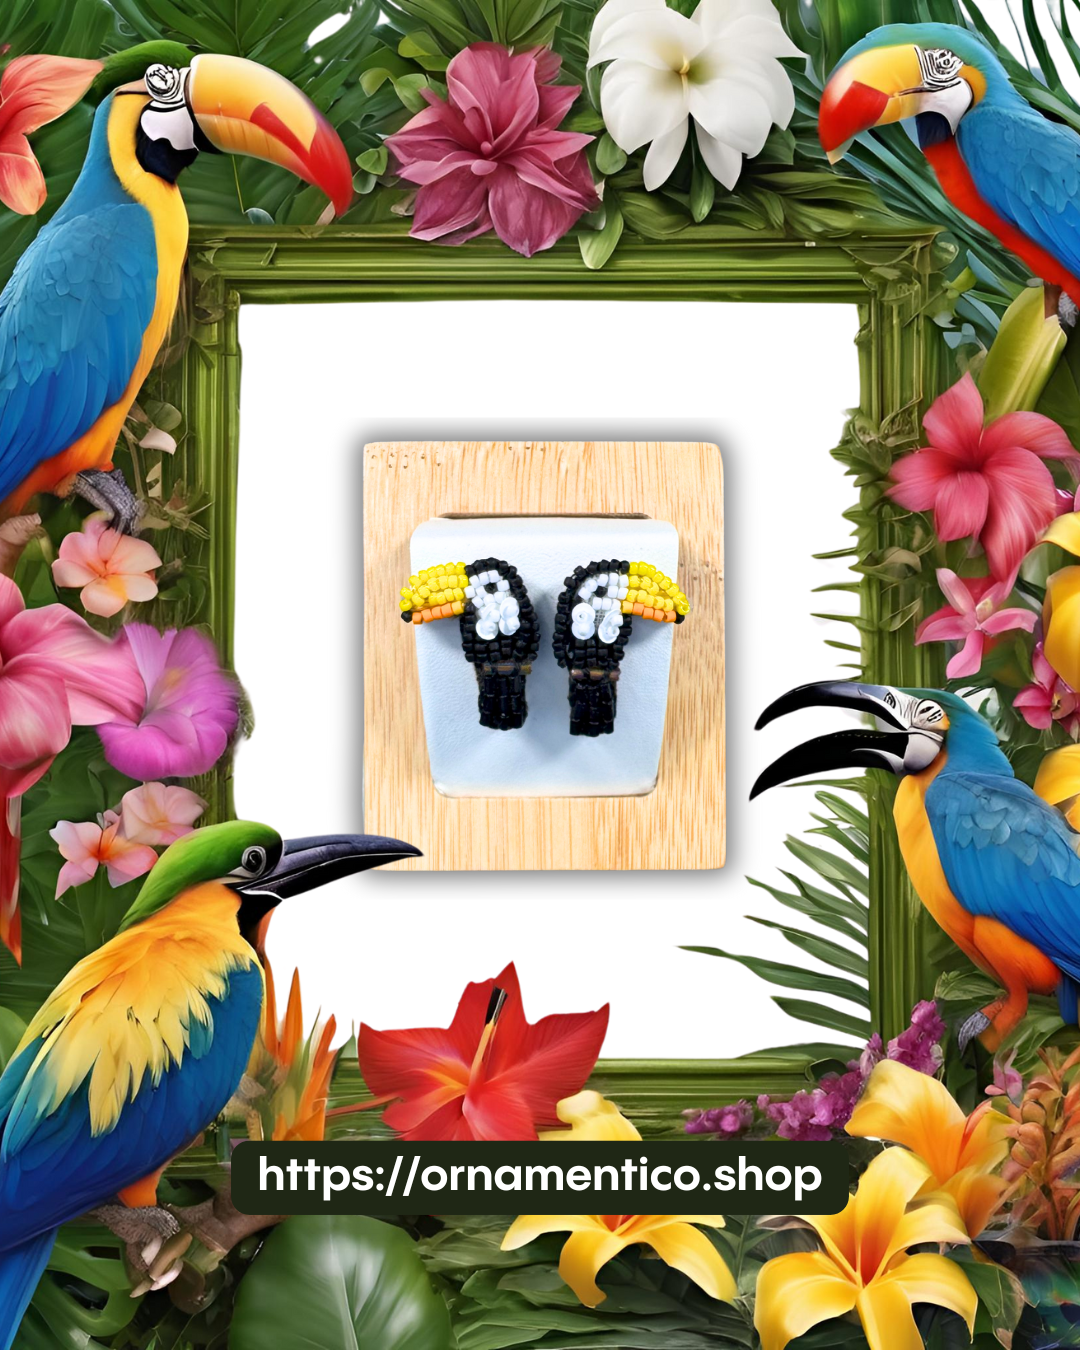
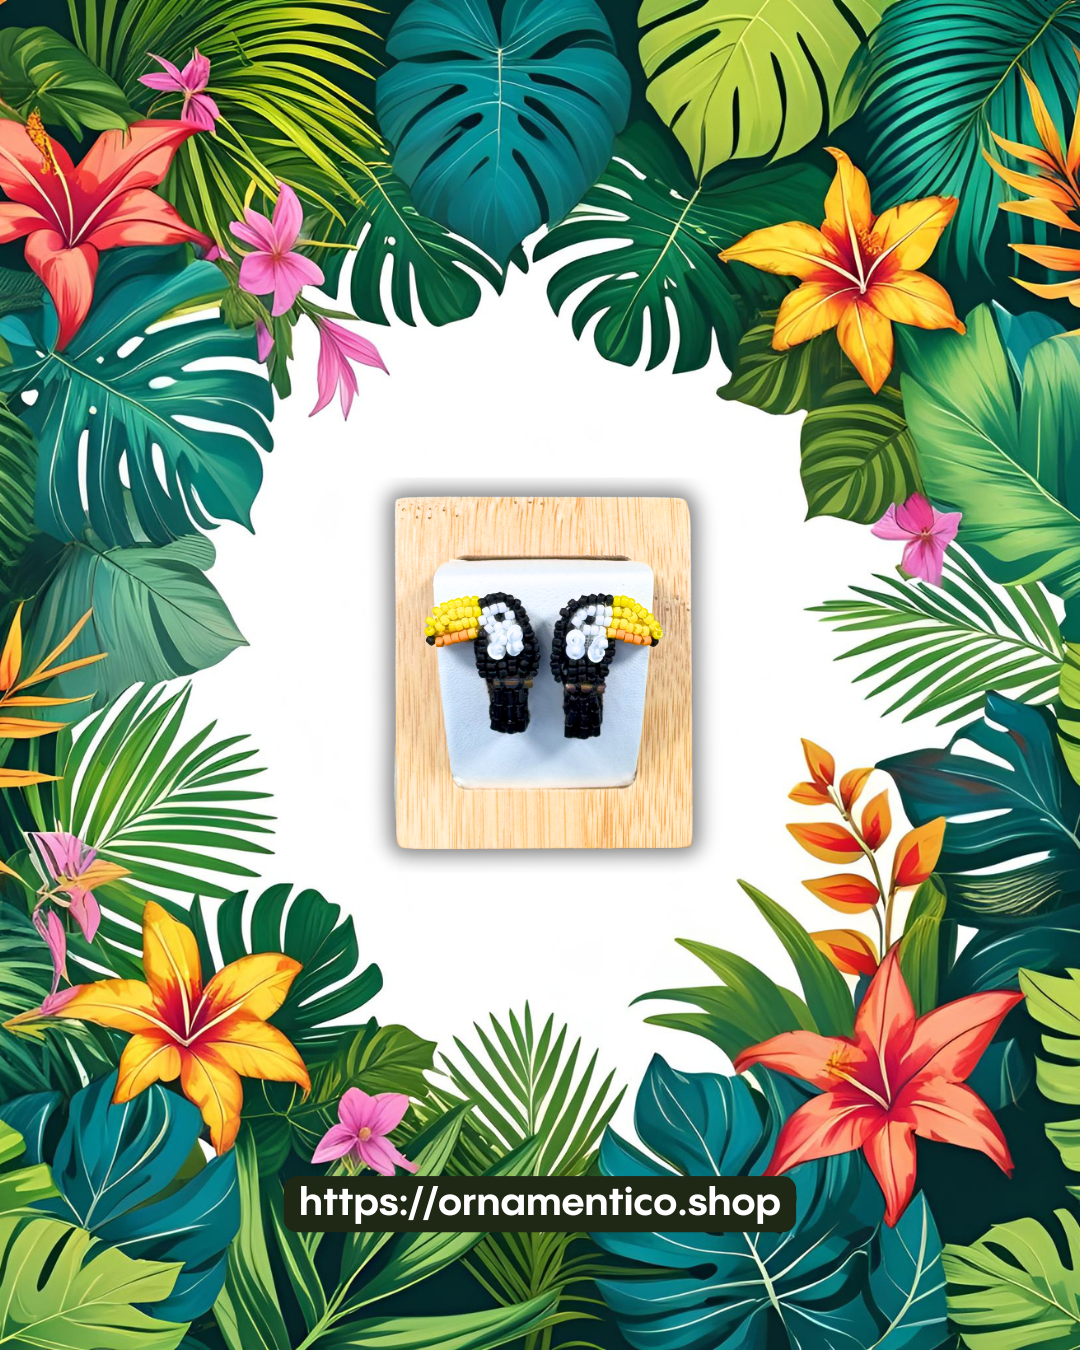
Now your social media post is ready! Can you guess which image our followers chose as the best during the voting process?
The process described above isn't very time-consuming at all. If you already have your photo shooting sets ready, the approximate timing for the whole process is:
- 20-30 minutes for the photo shoot
- 5 minutes for photo uploads
- 10 minutes for jewelry photo adjustments in Canva
- 30 minutes - 1 hour for generating a satisfactory AI image
- 10-15 minutes for the final composition and download
So, in about 1.5 hours, you can have something truly unique to represent your crafts online.
I hope you found this post useful and interesting. Let us know in the comments if you have any questions about any of the steps described above. Don't forget to subscribe to our blog to get information about our new posts!
Happy crafting!
Yours, Ornamentico Team