Floral Earrings from Organza Embroidered with Beads
Want to handmade unique floral earrings from organza and Miyuki beads? Check out our step-by-step detailed tutorial.
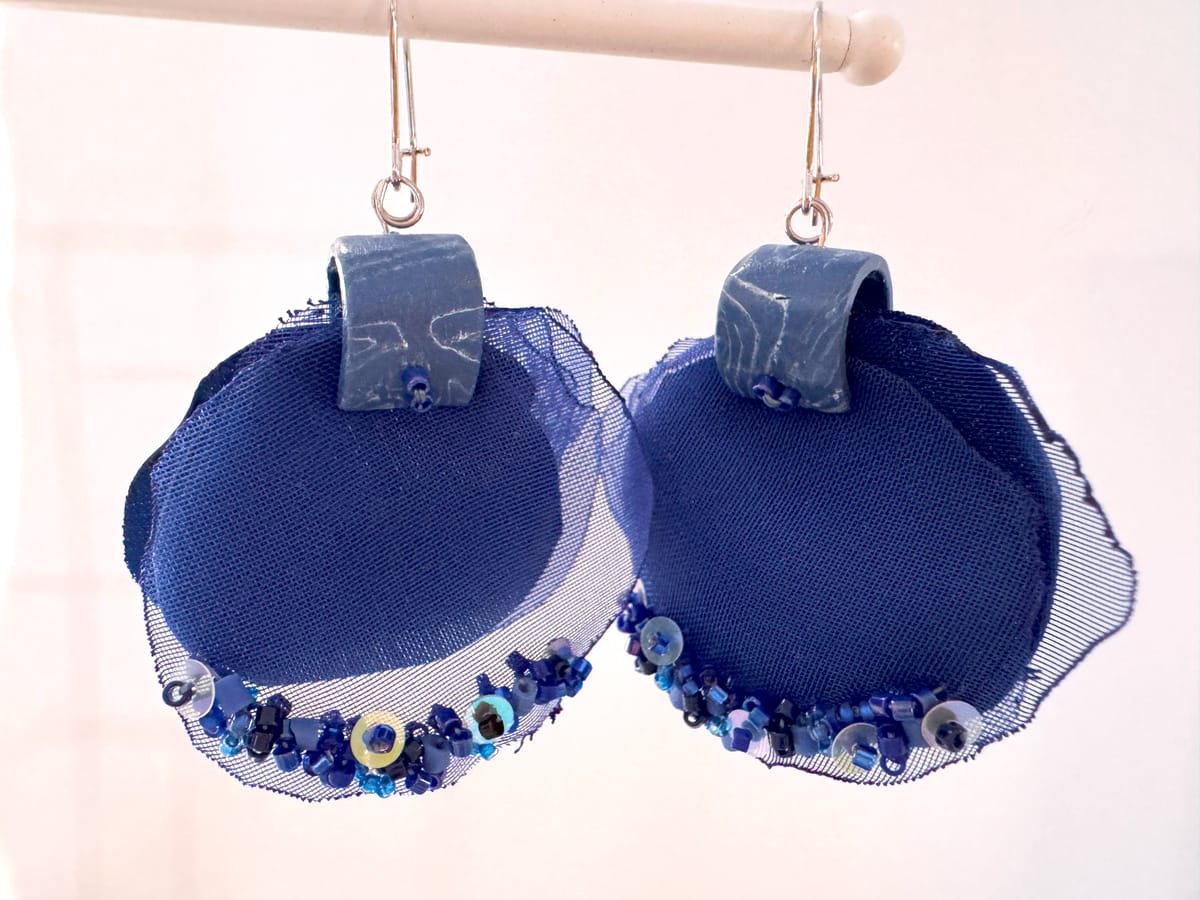
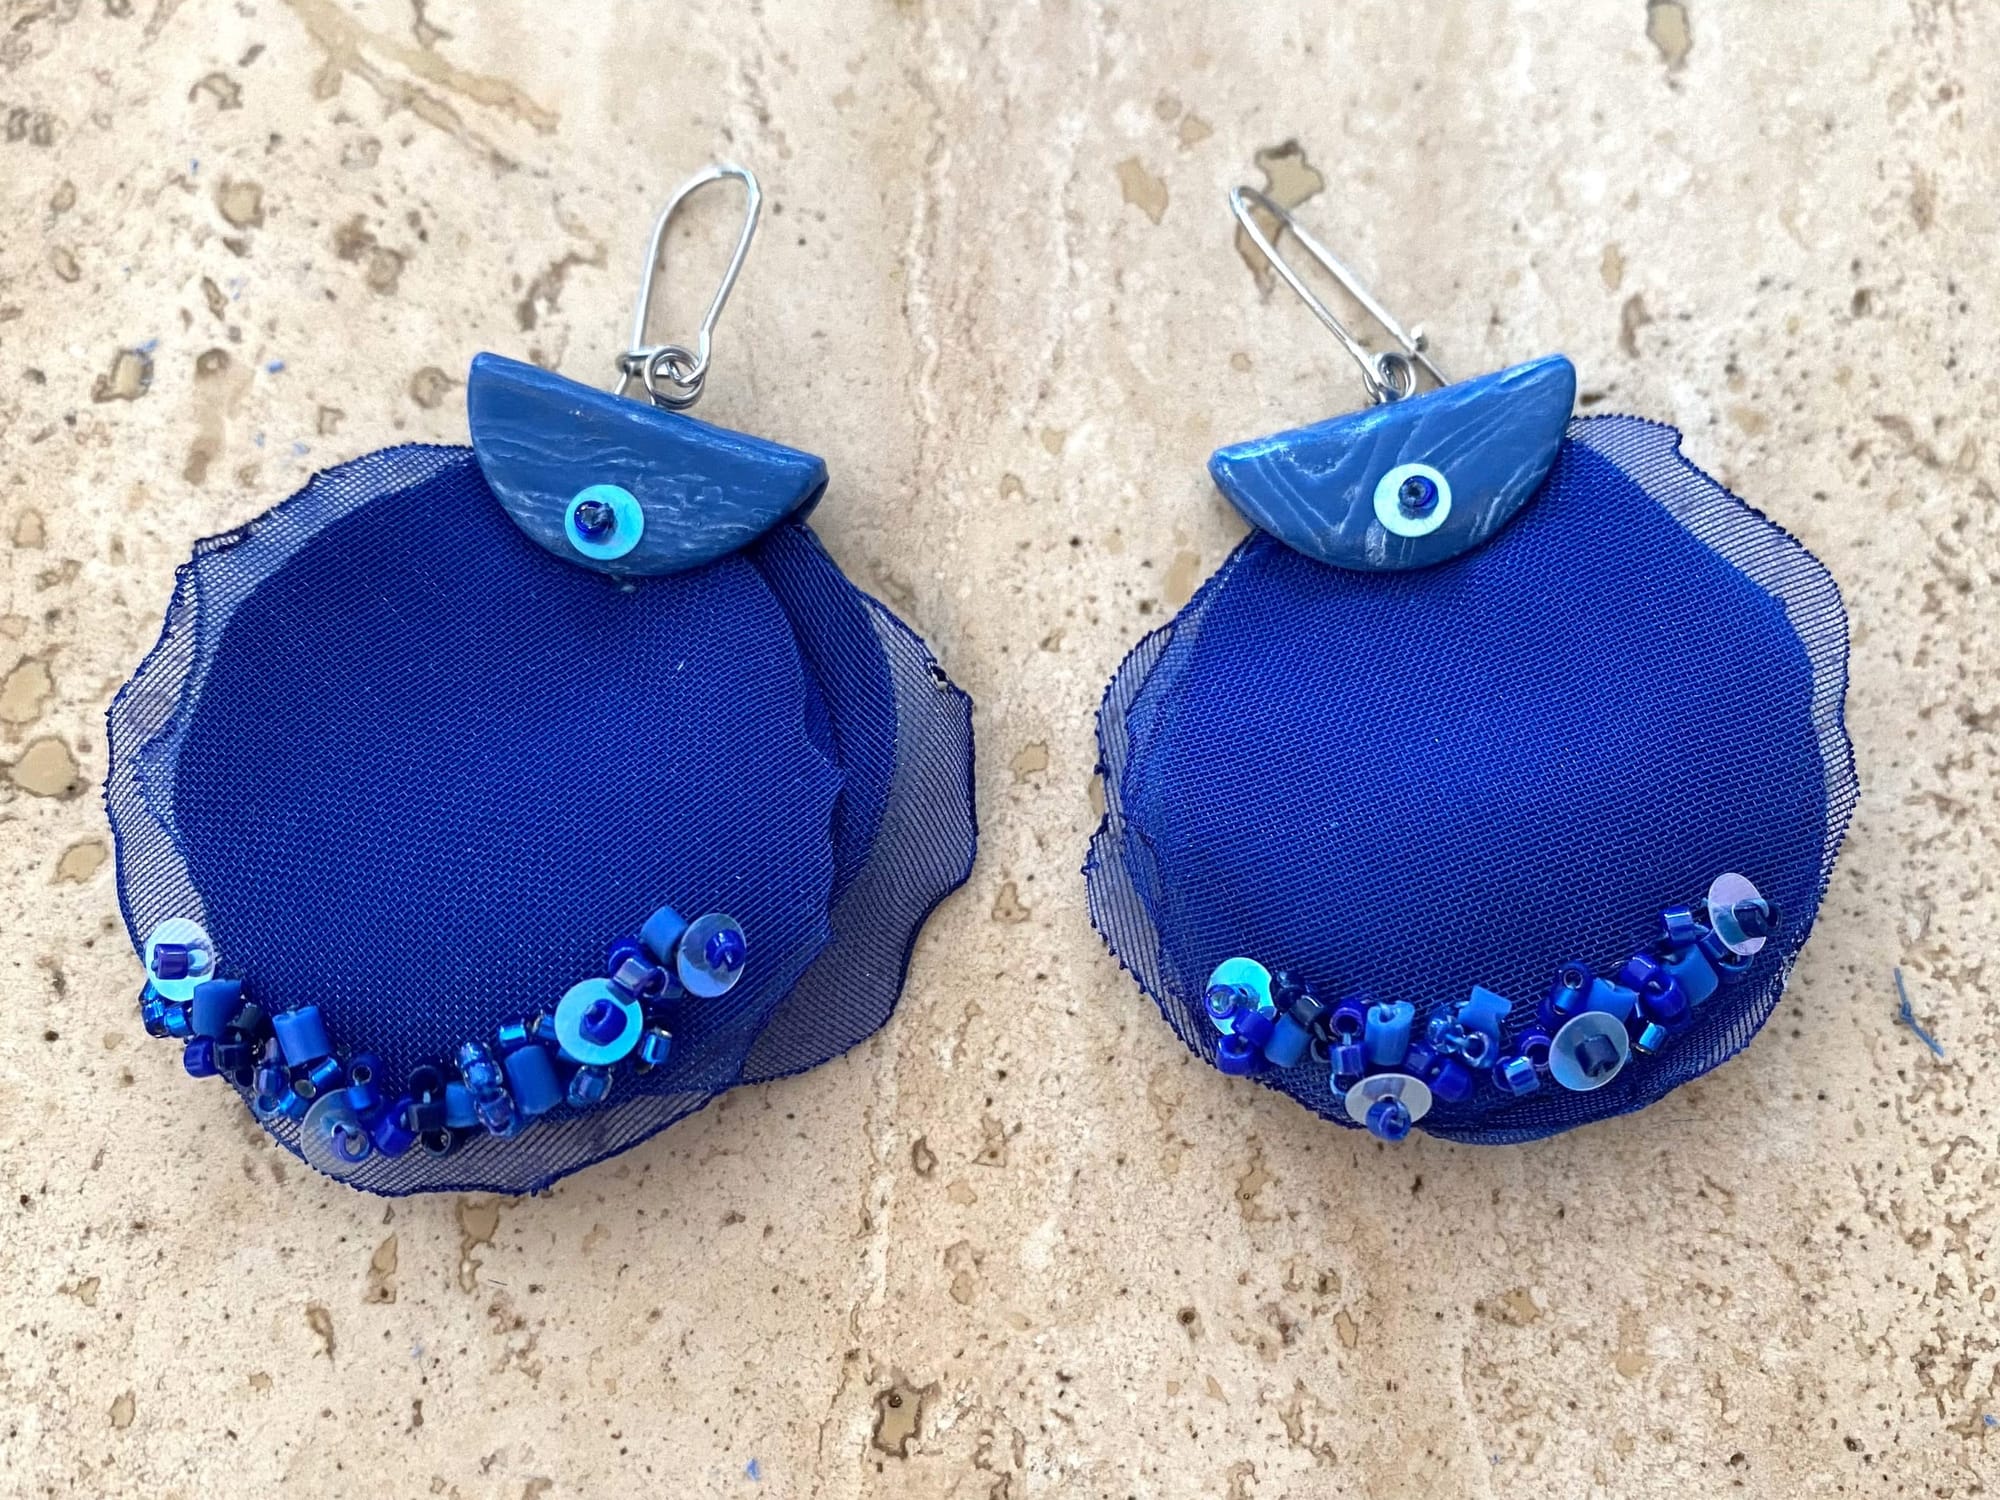
Today I am going to share with you the process of creation lovely bright floral earrings crafted from organza fabric. These earrings feature organza petals embroidered with beads and sequins and a mix of plain organza and polyester petals. All petals' edges are burned to avoid fringes. The earrings are then further decorated with a hand-made polymer clay element connected to an earring hook.
We have similar earrings in our online store if you want to buy them. We also have a detailed tutorial for those earrings on our YouTube channel, in case you prefer watching to reading. However, the earrings we are going to talk about today are slightly modified from the original version, as I decided to decorate them with embroidery of beads and sequins. Let's start.
First, let's look into the list of materials, I used to make these blue earrings.
Organza fabric, a piece about 30x30 cm. Any color of fabric will work; in this tutorial, I am using deep blue organza. A piece of non-transparent polyester of the matching color. In my fabric floral jewelry I prefer to combine different types of fabric to make the creation look natural. You can go with only one fabric as well. It is though important that you use 100% synthetic fabric to ensure good burning of the edges of petals. Make sure the size of your organza piece fits into your earring hoops.
Any round shape to mark petals on organza fabric. I am using round shapes for polymer clay. It is better to use two different sizes. In my case, the diameter is 3.5, and 4 cm. You can use any round shape to mark petals on fabric. Only make sure your petals are not smaller than 3 cm in diameter (smaller petals will be harder to burn).
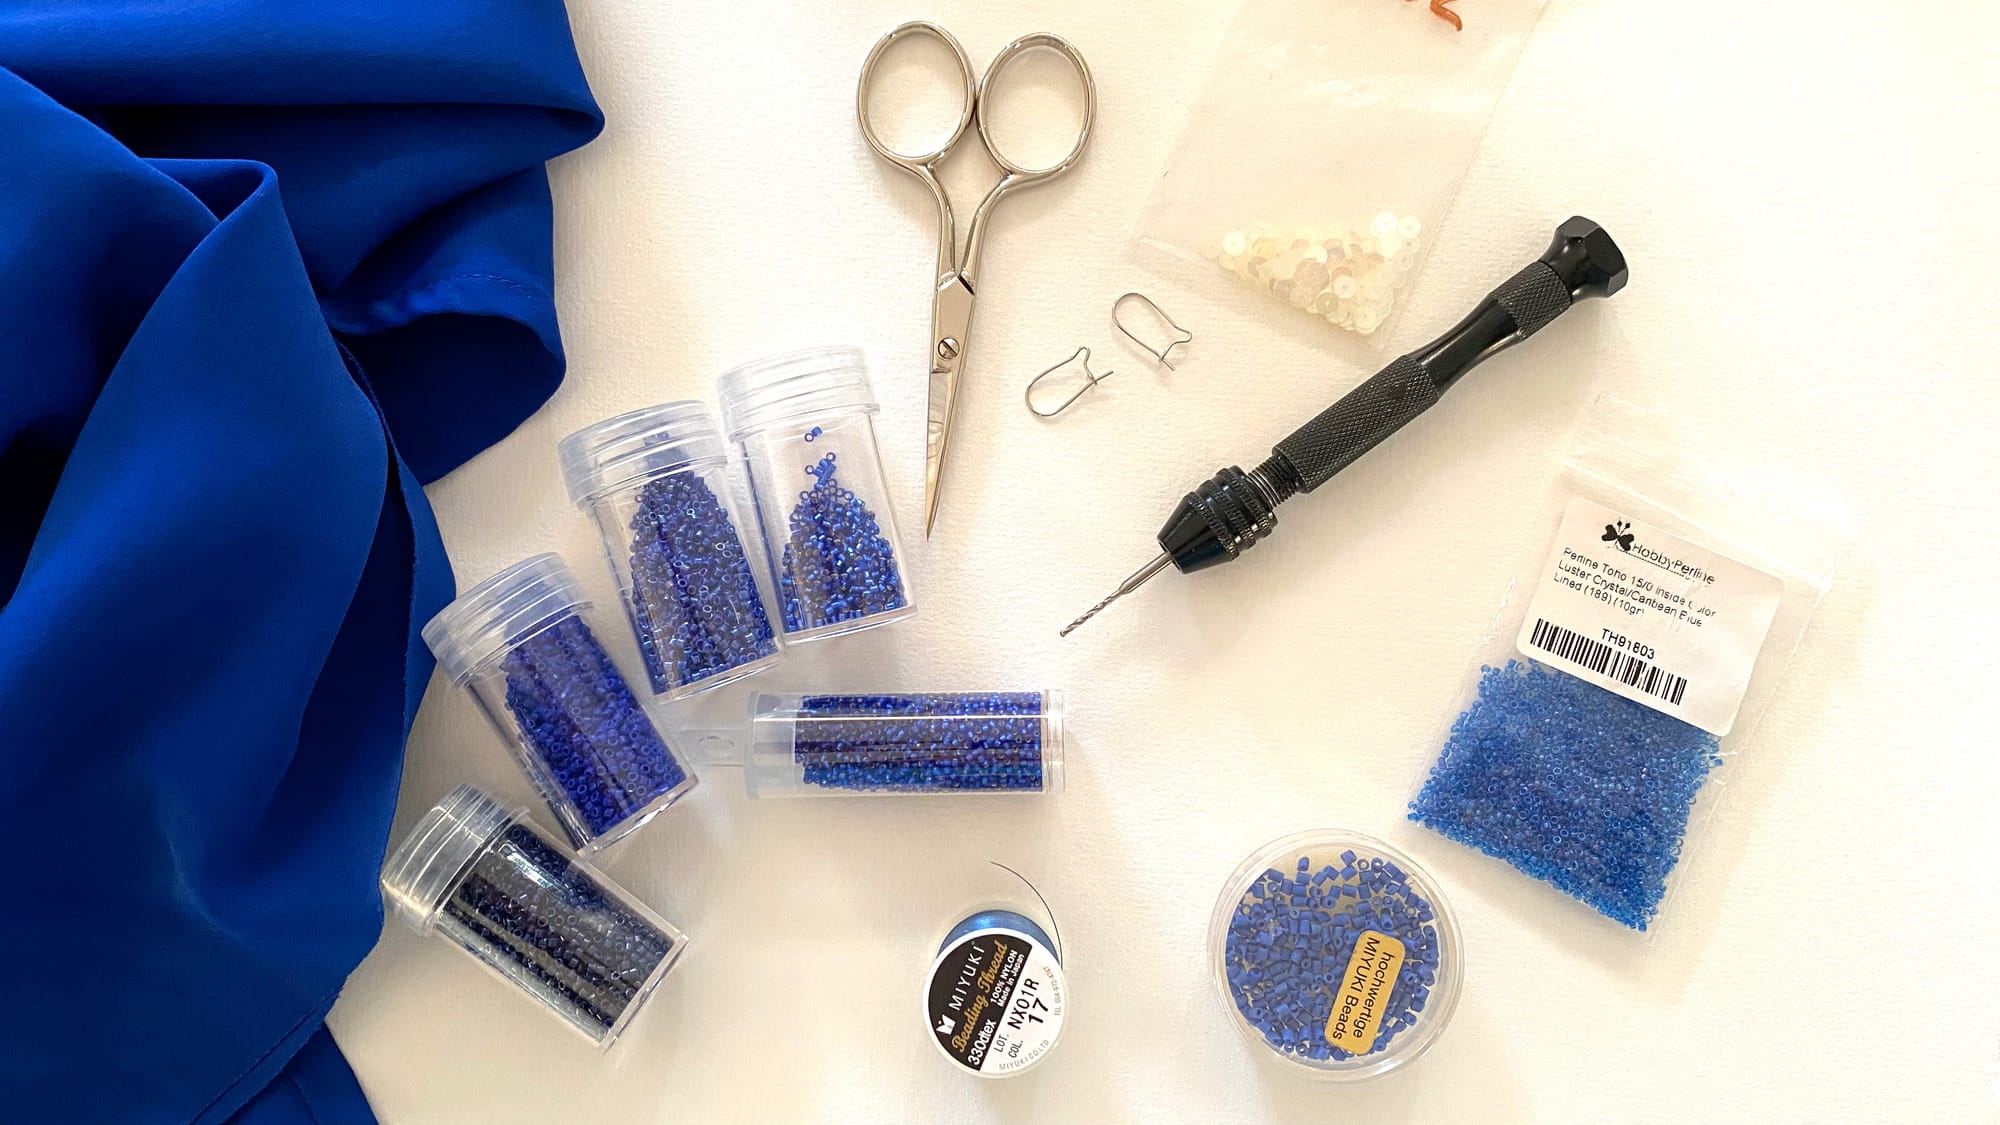
Mix of matching beads and sequins. I am using Toho beads size 11, Toho beads size 15, Miyuki Delica beads size 11, sequins, and small cylindric beads. You can also use other embroidery knows (like French knot) or any other types of beads. I would not recommend using stones in such earrings, as they will make them heavy. Therefore, I only used as lightweight materials as possible.
Beading thread of matching color. Beading needle. Earring hook or stud earring fitting. A pair of embroidery hoops. I have three different sizes to work with embroidery and beading and I also bought on AliExpress a set of four 'legs' for my hoops. They connect simply to the hoops and allow your hoops to stand above your table. And they are awesome! There is no need to hold your work in your hands as well as it is easier to navigate your decoration path. Tea candle. Pair of tweezers. A couple of pliers to connect your earring hook.
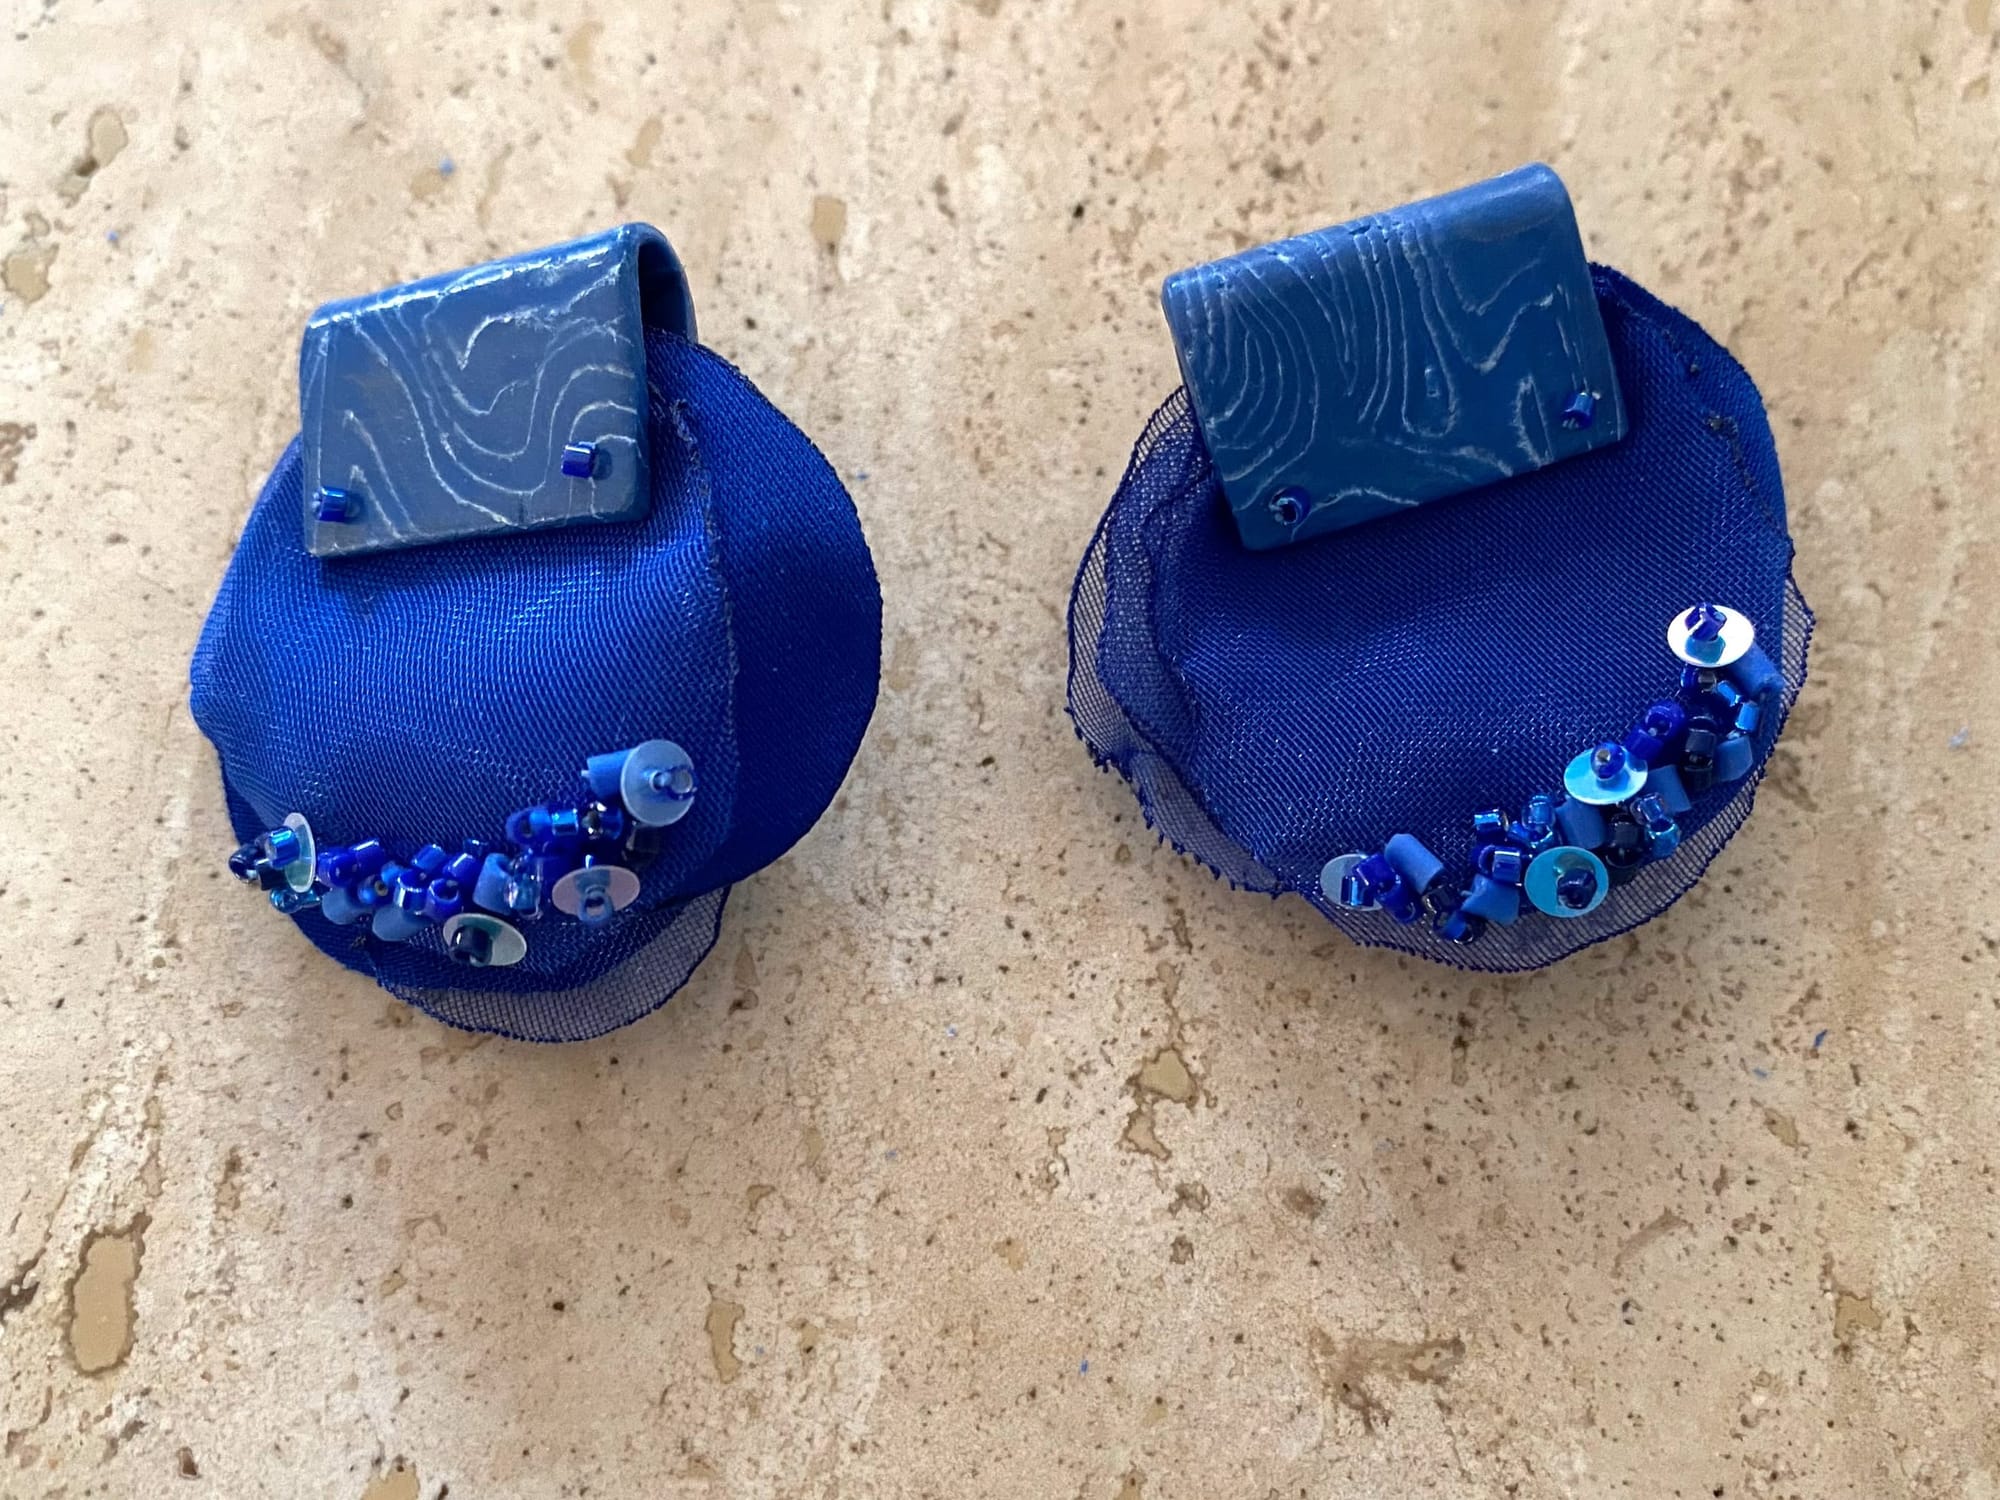
When your flower is shaped, you can decide how to make an earring out of it better. There are multiple options. You can attach your flower to a piece of felt and glue it to the stud earring setting. Earrings from our YouTube tutorial are made in this way. You can simply connect your flower to a normal earring hook by stitching a jump ring to the fabric part. I decided to experiment with a couple of hand-made polymer clay pieces, which you can see in the photo below. Leave your comment if you want me to write a post about the creation of those polymer clay elements.
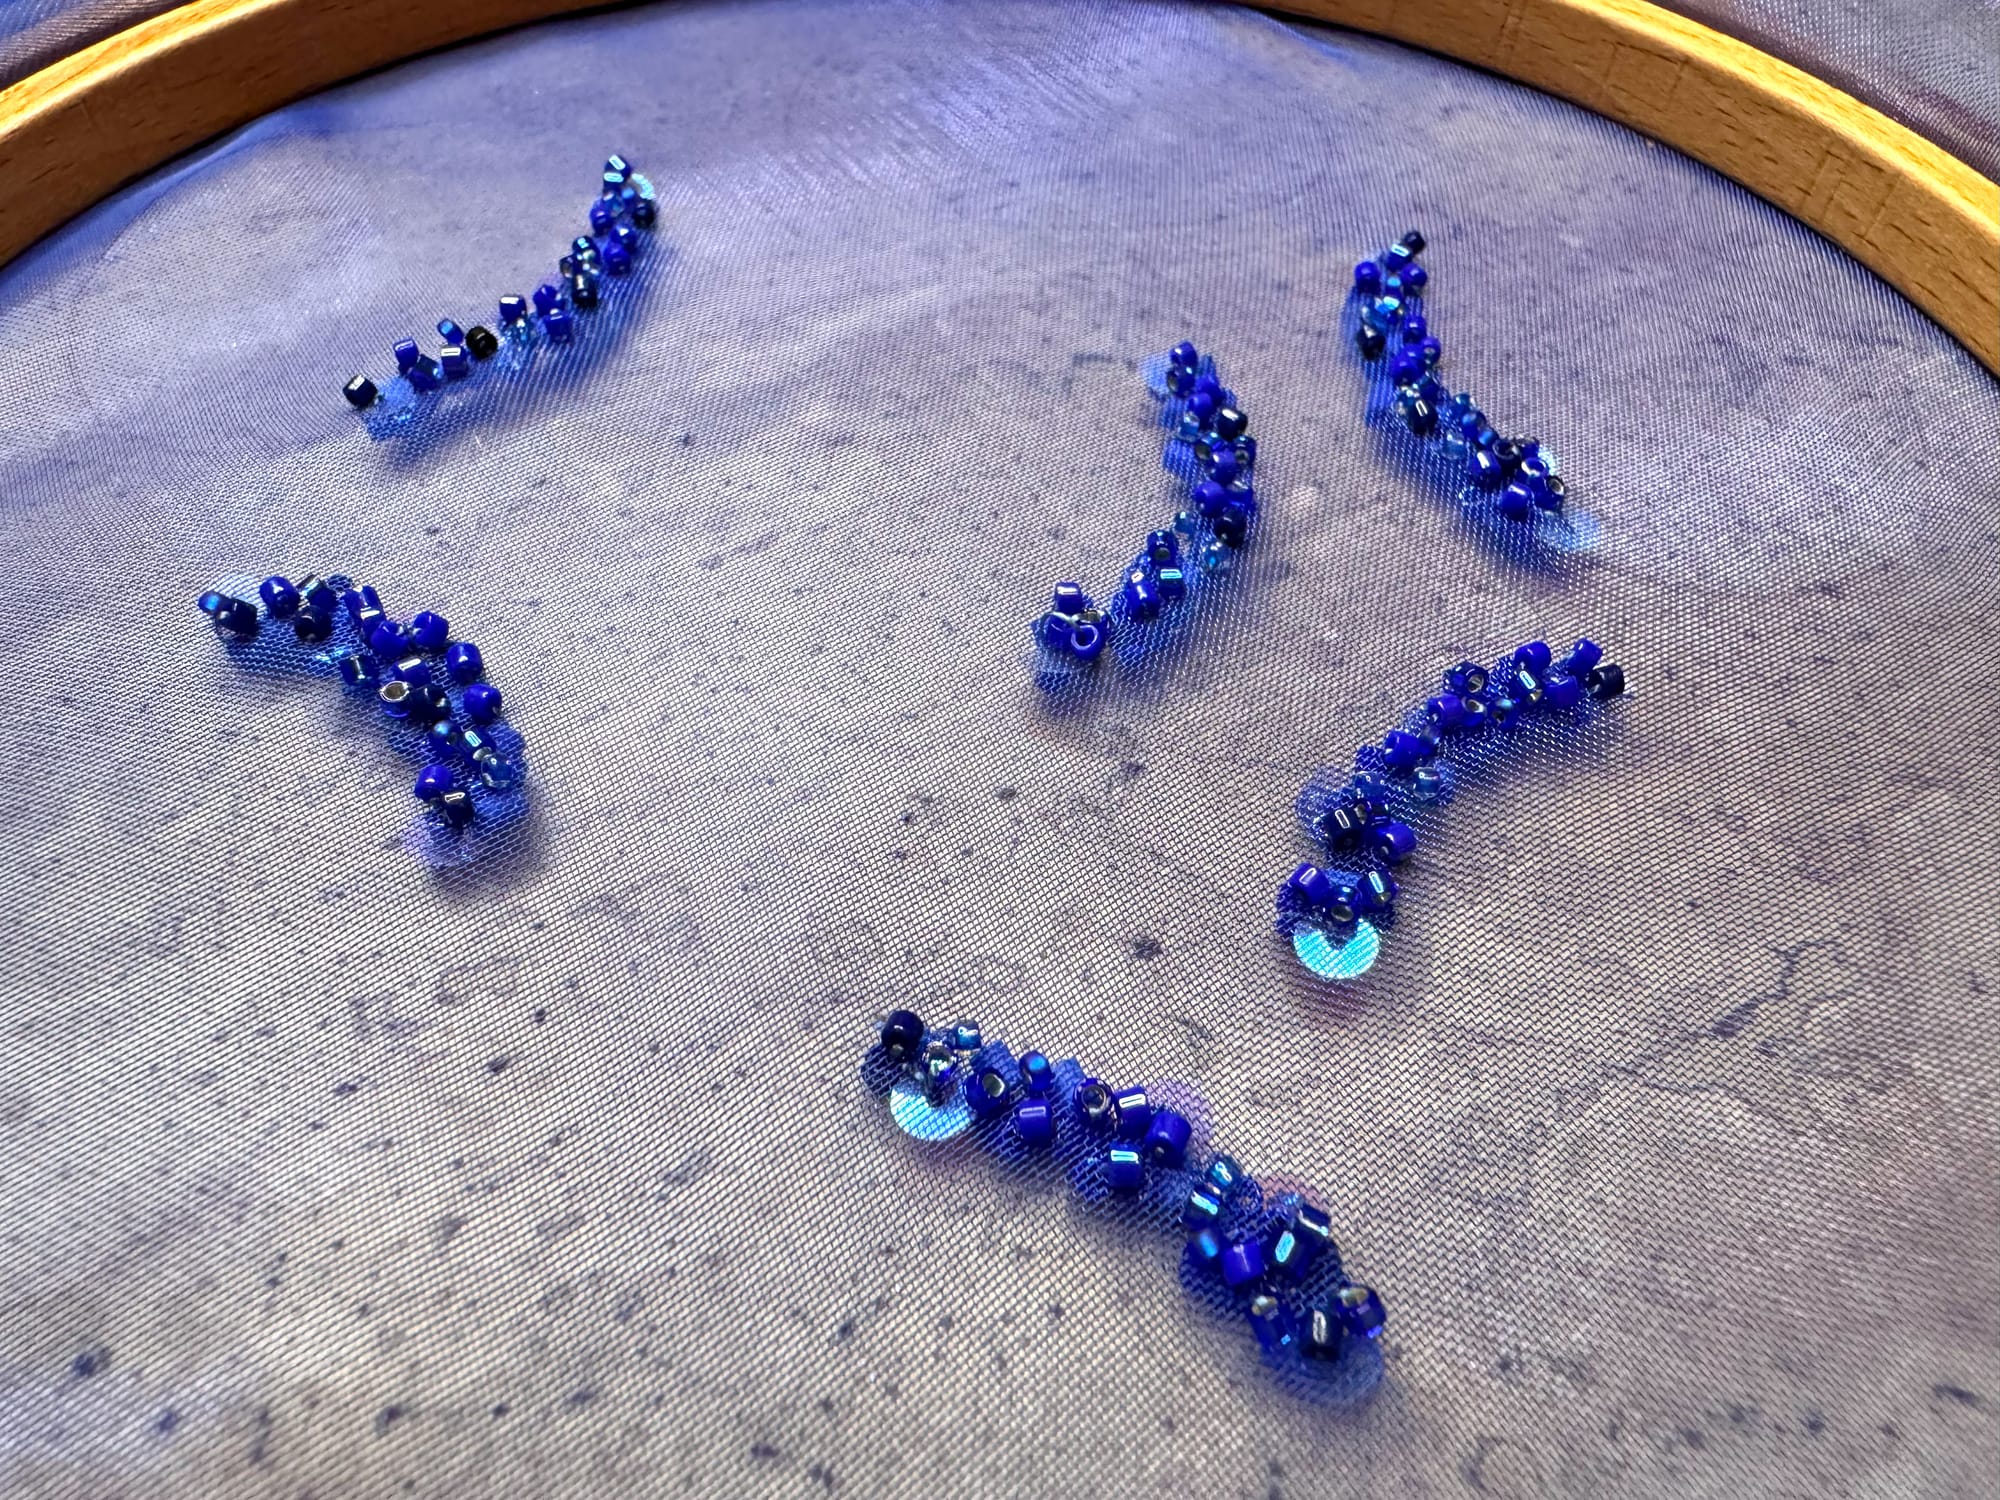
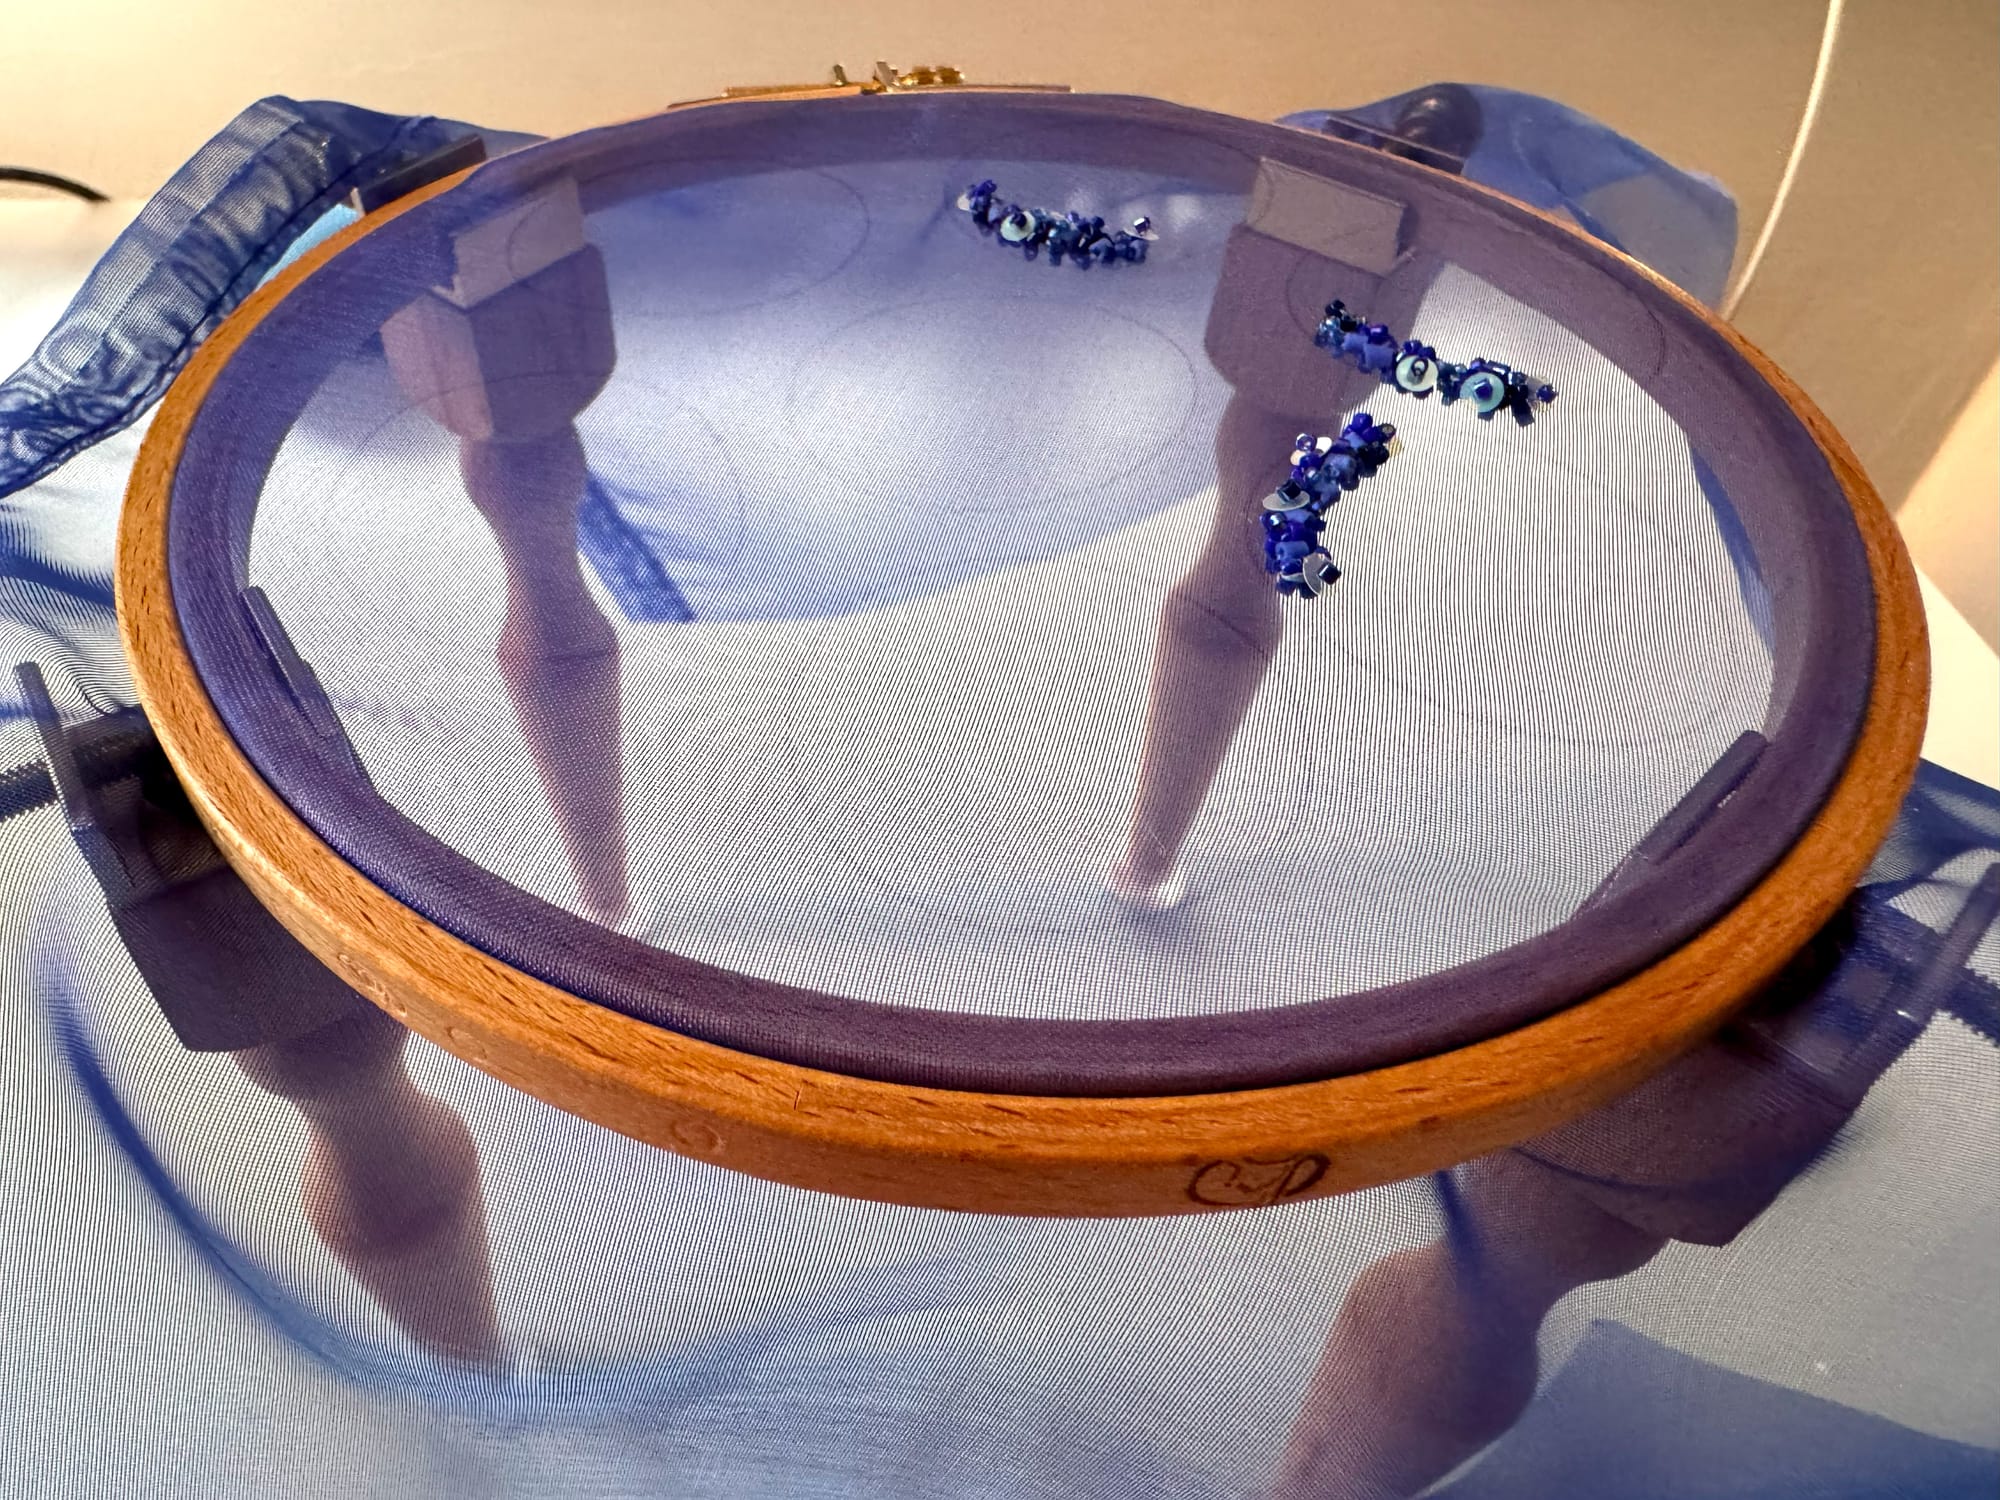
Step 1. We start by ironing our organza fabric piece and drawing 2 bigger circles on it. I was crafting 3 different pairs of earrings at the same time and that's why in the photo you will see 6 marked circles. We fix this piece in the embroidery hoop and start beading our decor with beads and sequins.
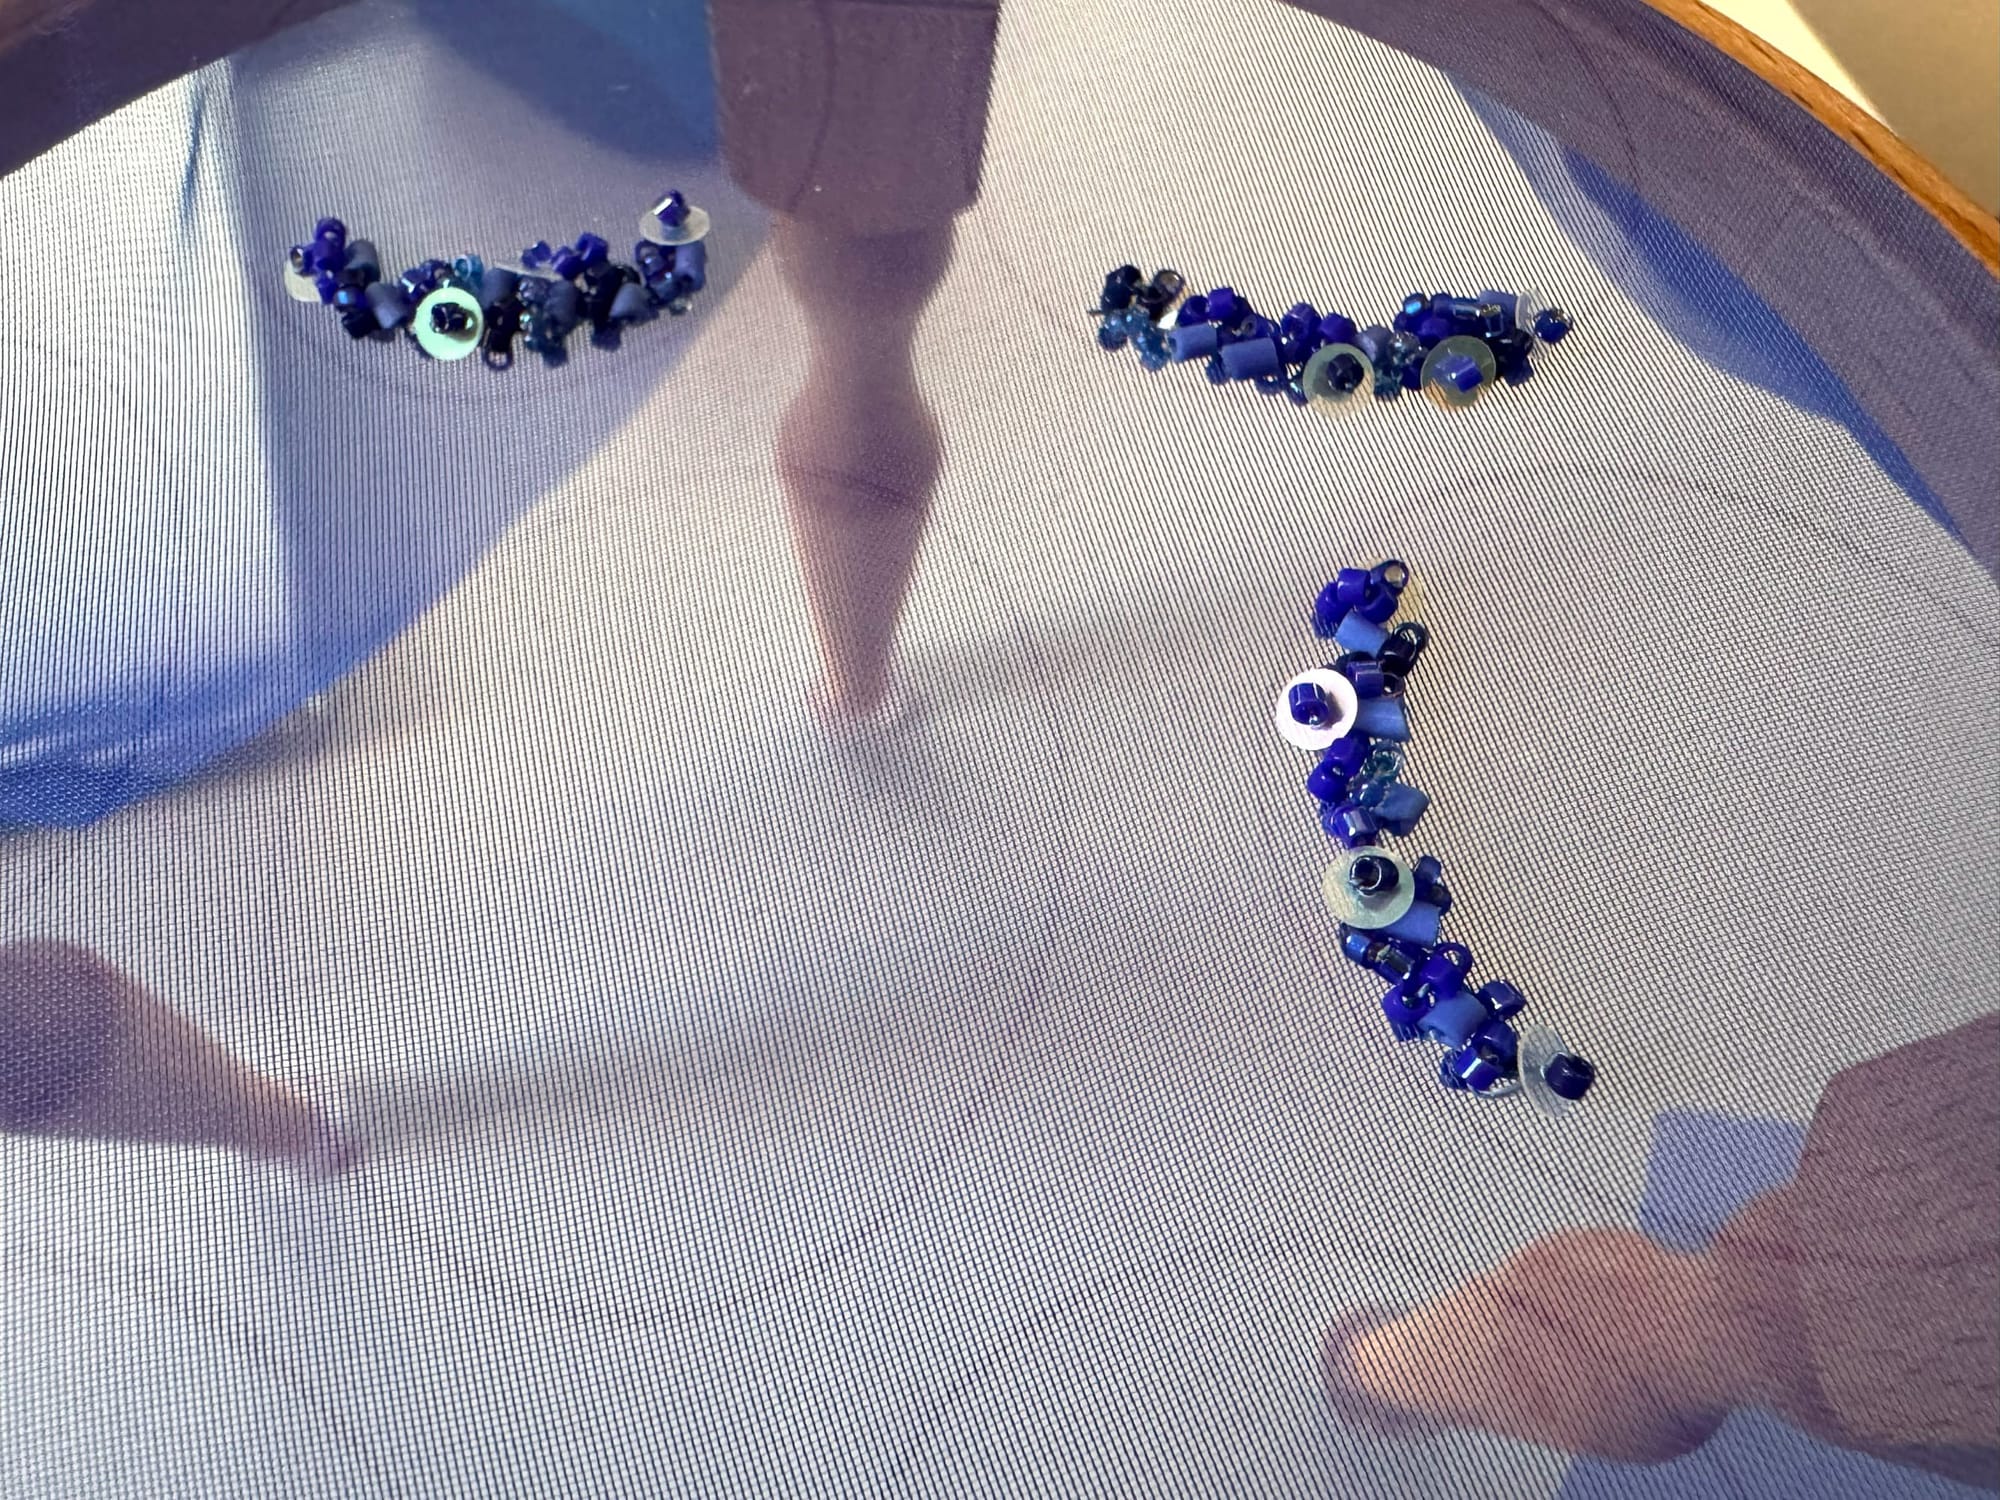
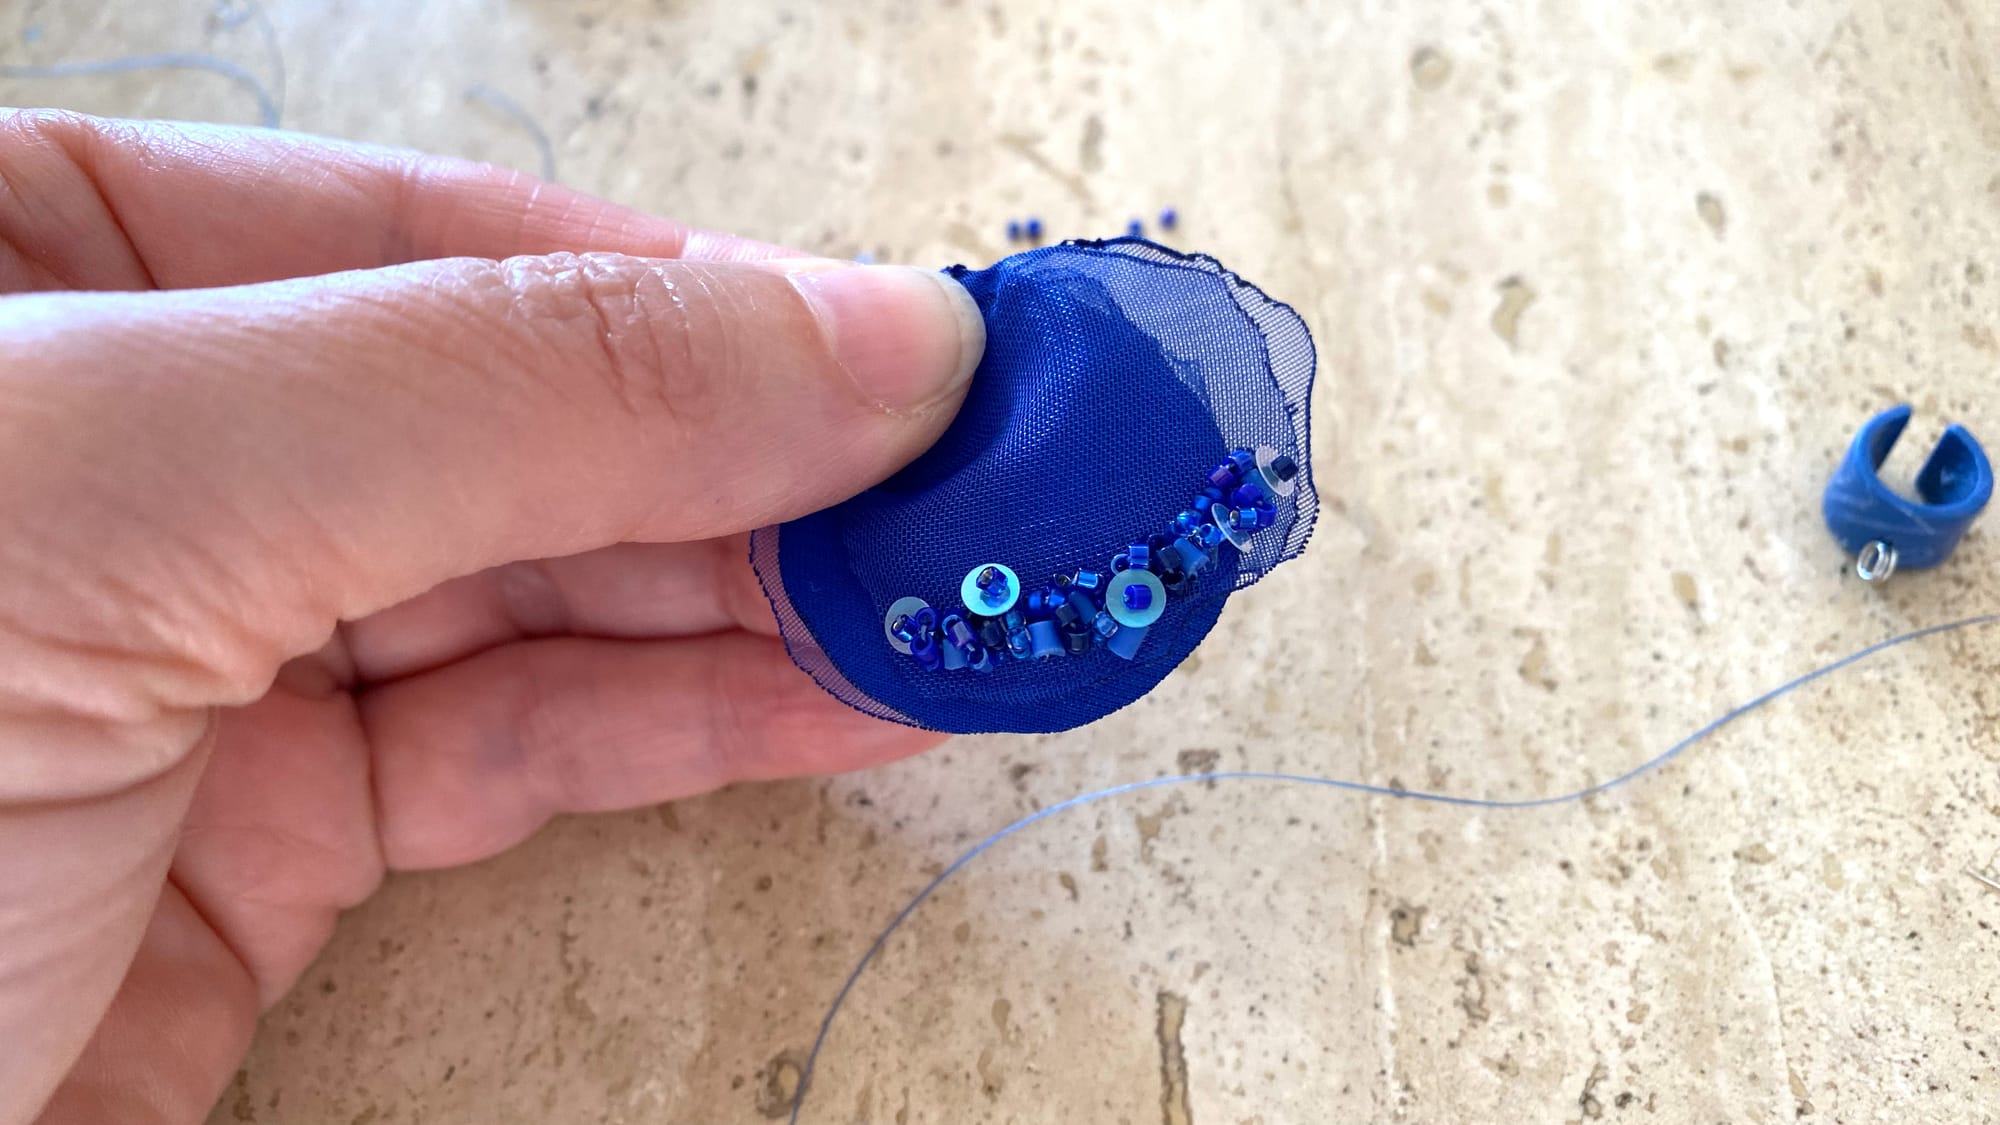
Step 2. I do free-flow beading embroidery. I do not have any prepared design. I usually put 3 or 4 beads size 11, a sequin with one small bead to secure it, a small bugle bead, and then another 3-4 beads size 11. Beads size 15 I use at the very end of my work to 'polish' the edges of my embroidery. For this project I also did something new: I put beads not only on the front side of my work but also on the wrong side (to camouflage my thread from both sides of the petal). I thought that since these earrings are dangle, petals might be seen from the back of the head and I decided to also keep the wrong side of my work neat.
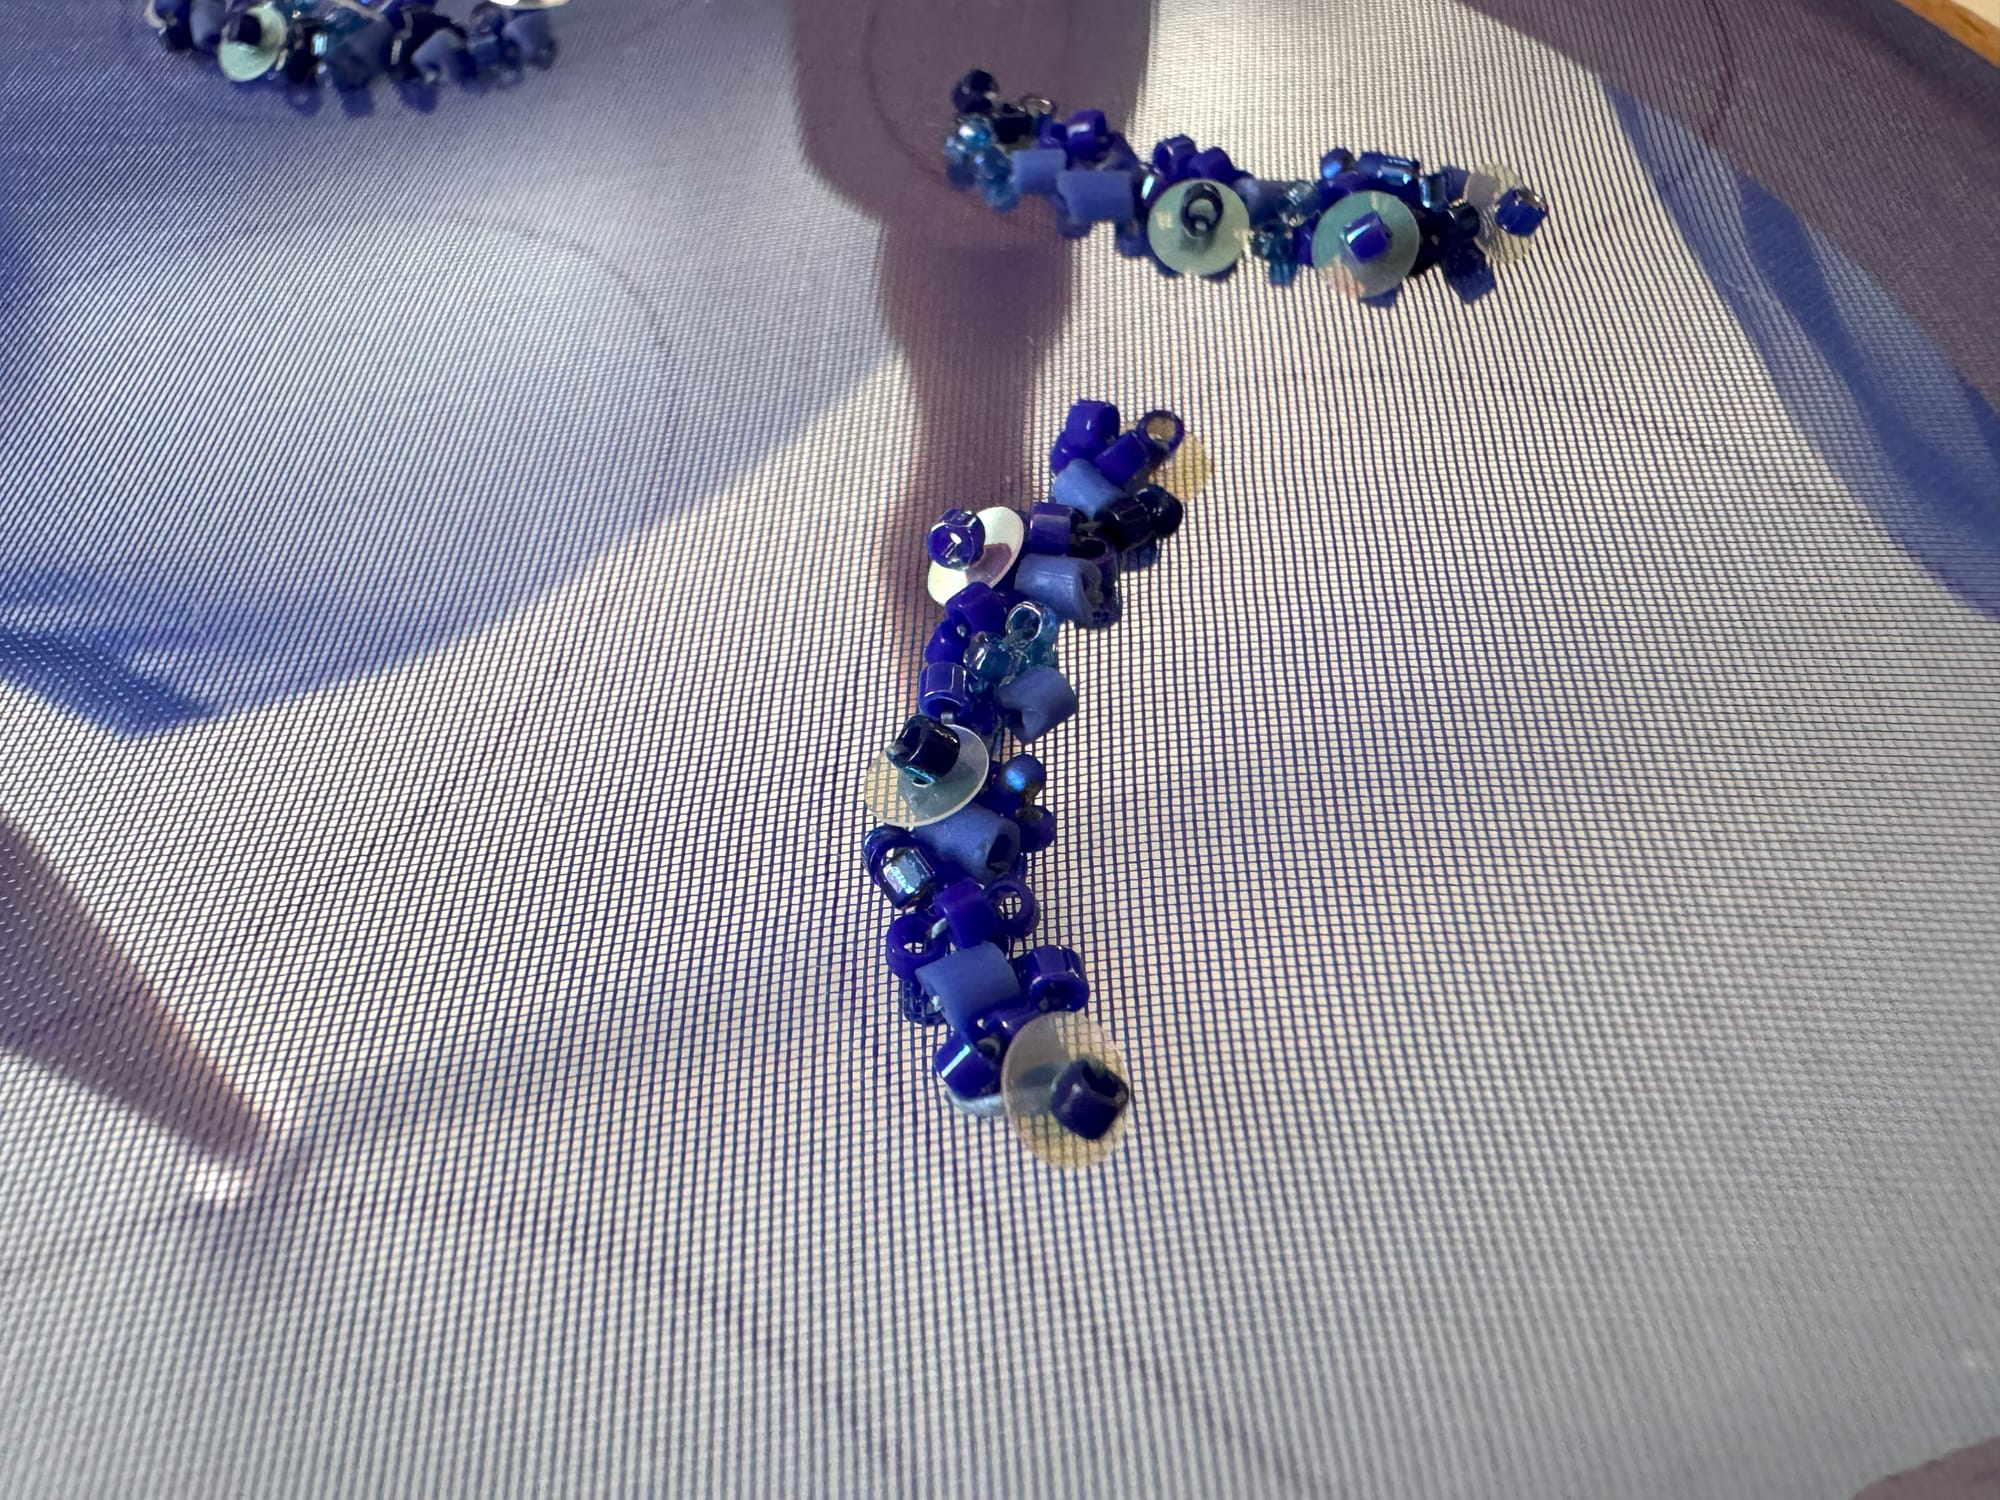
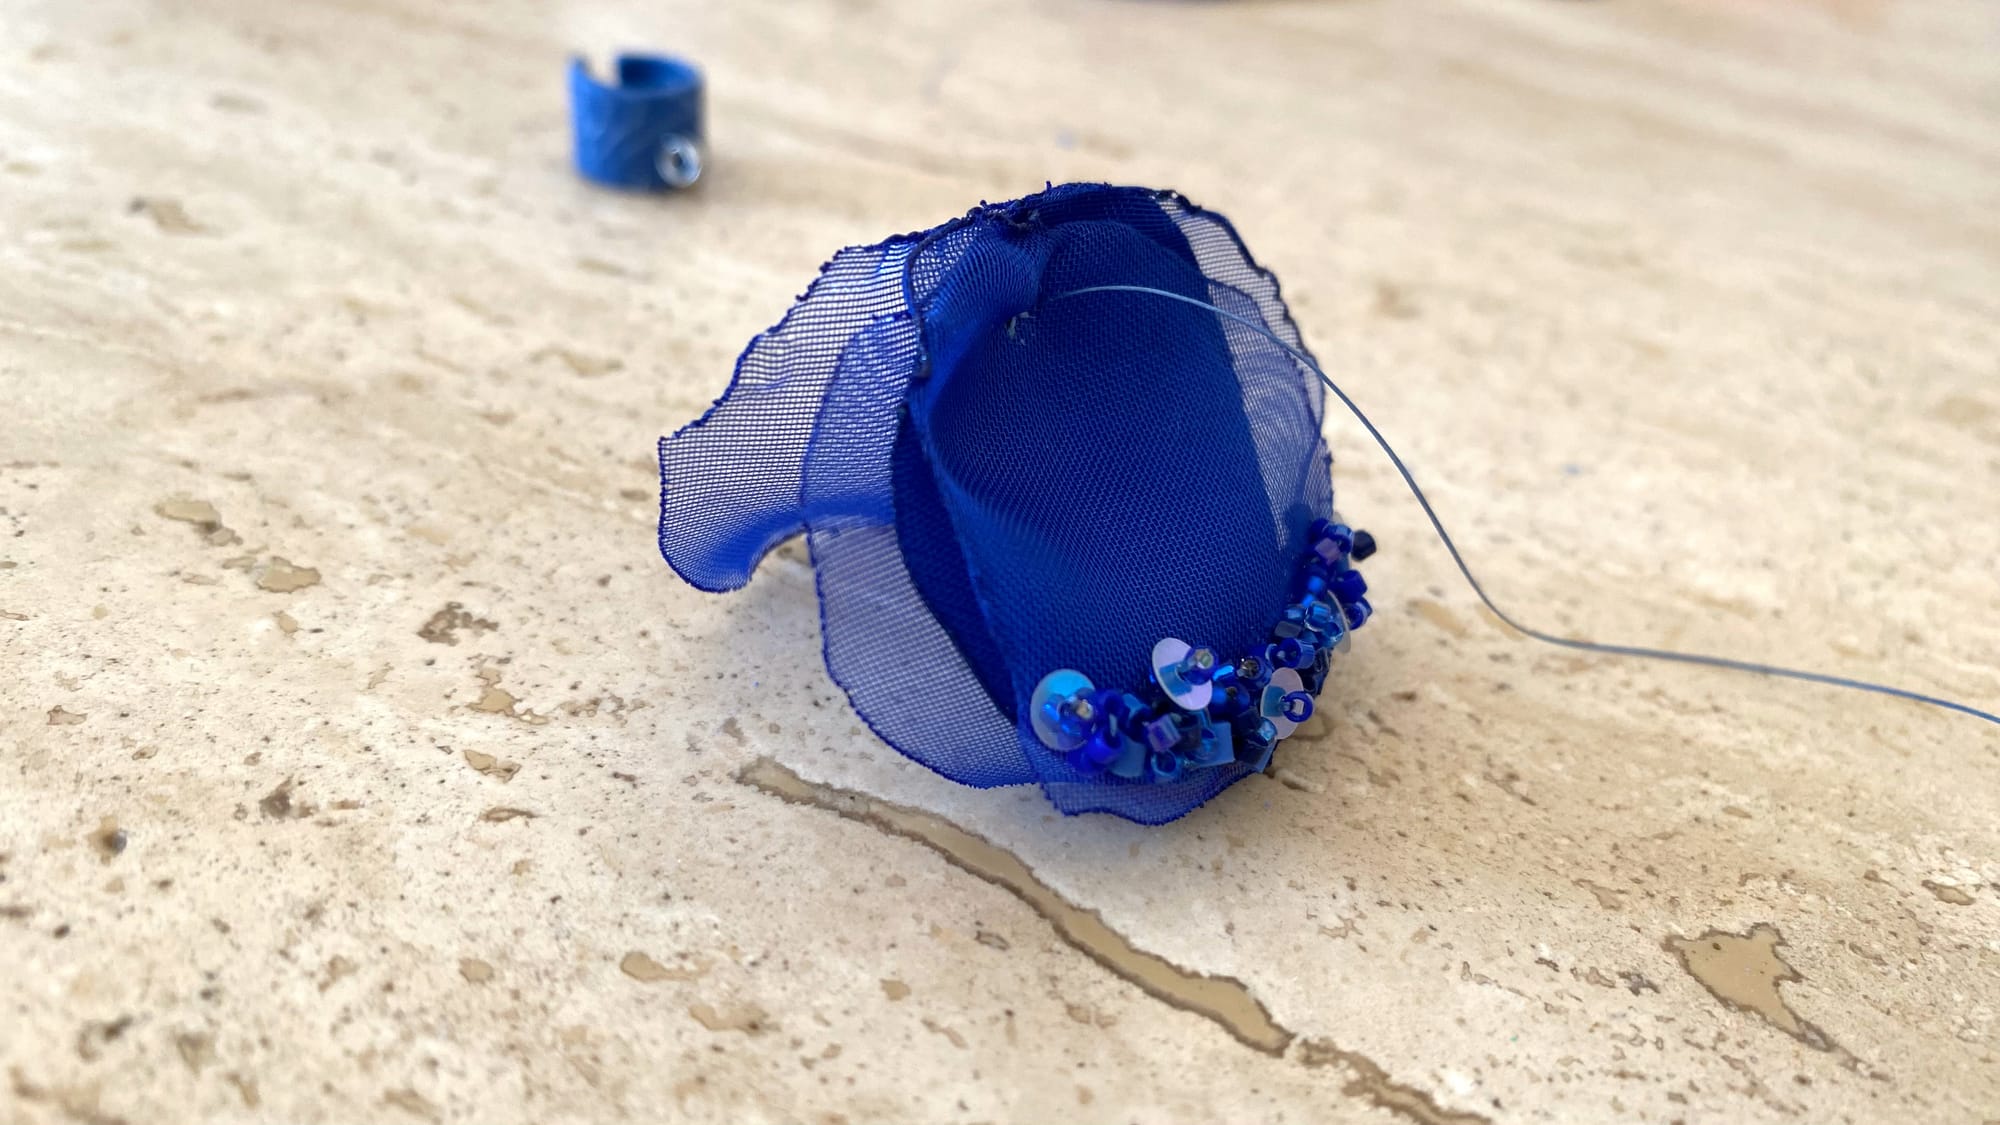
I put embroider only at the bottom edge of my future petal. When the earring is made, it will be visible, but as the embroidery is small, it won't make the earring heavy (I myself prefer light earrings)
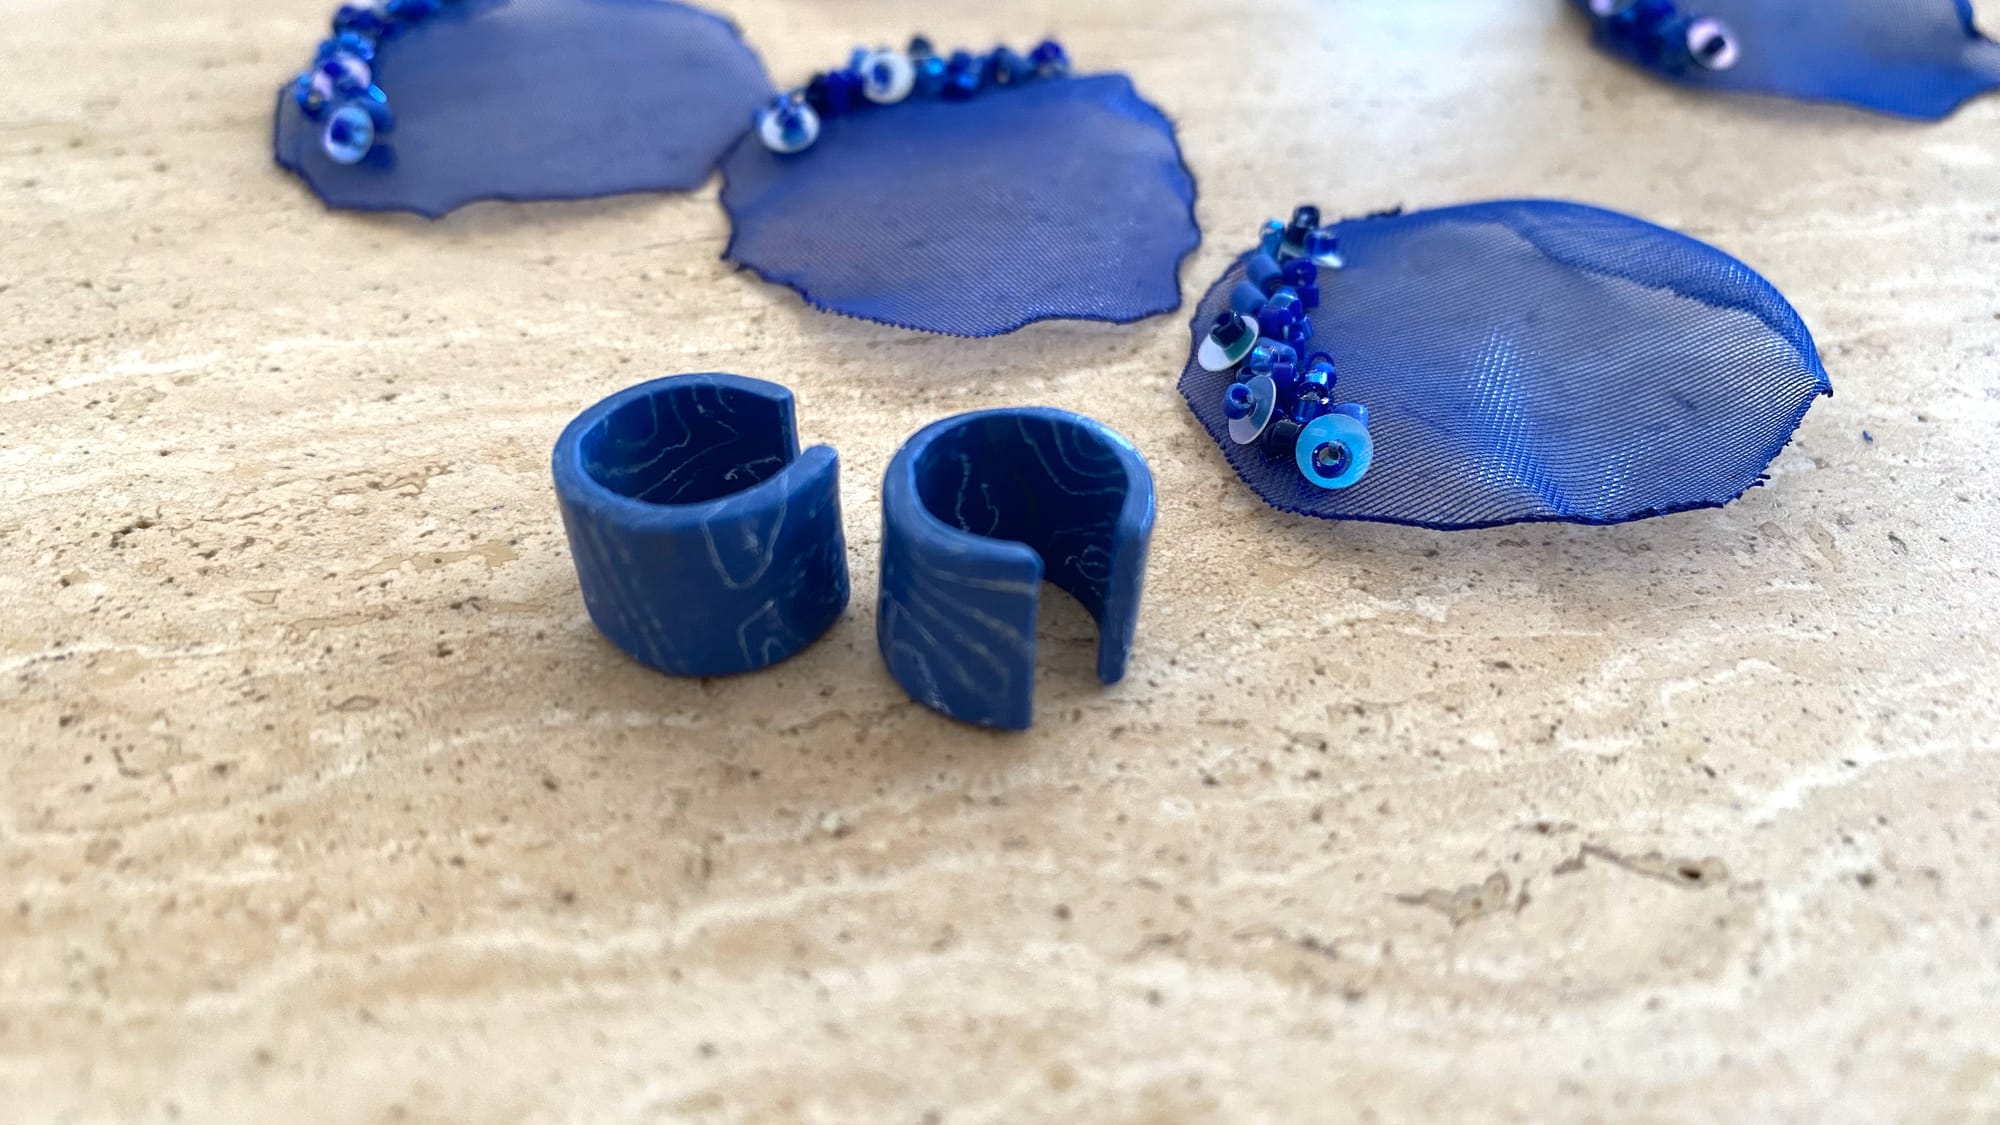
Here are a couple of more photos of embroidered petals.
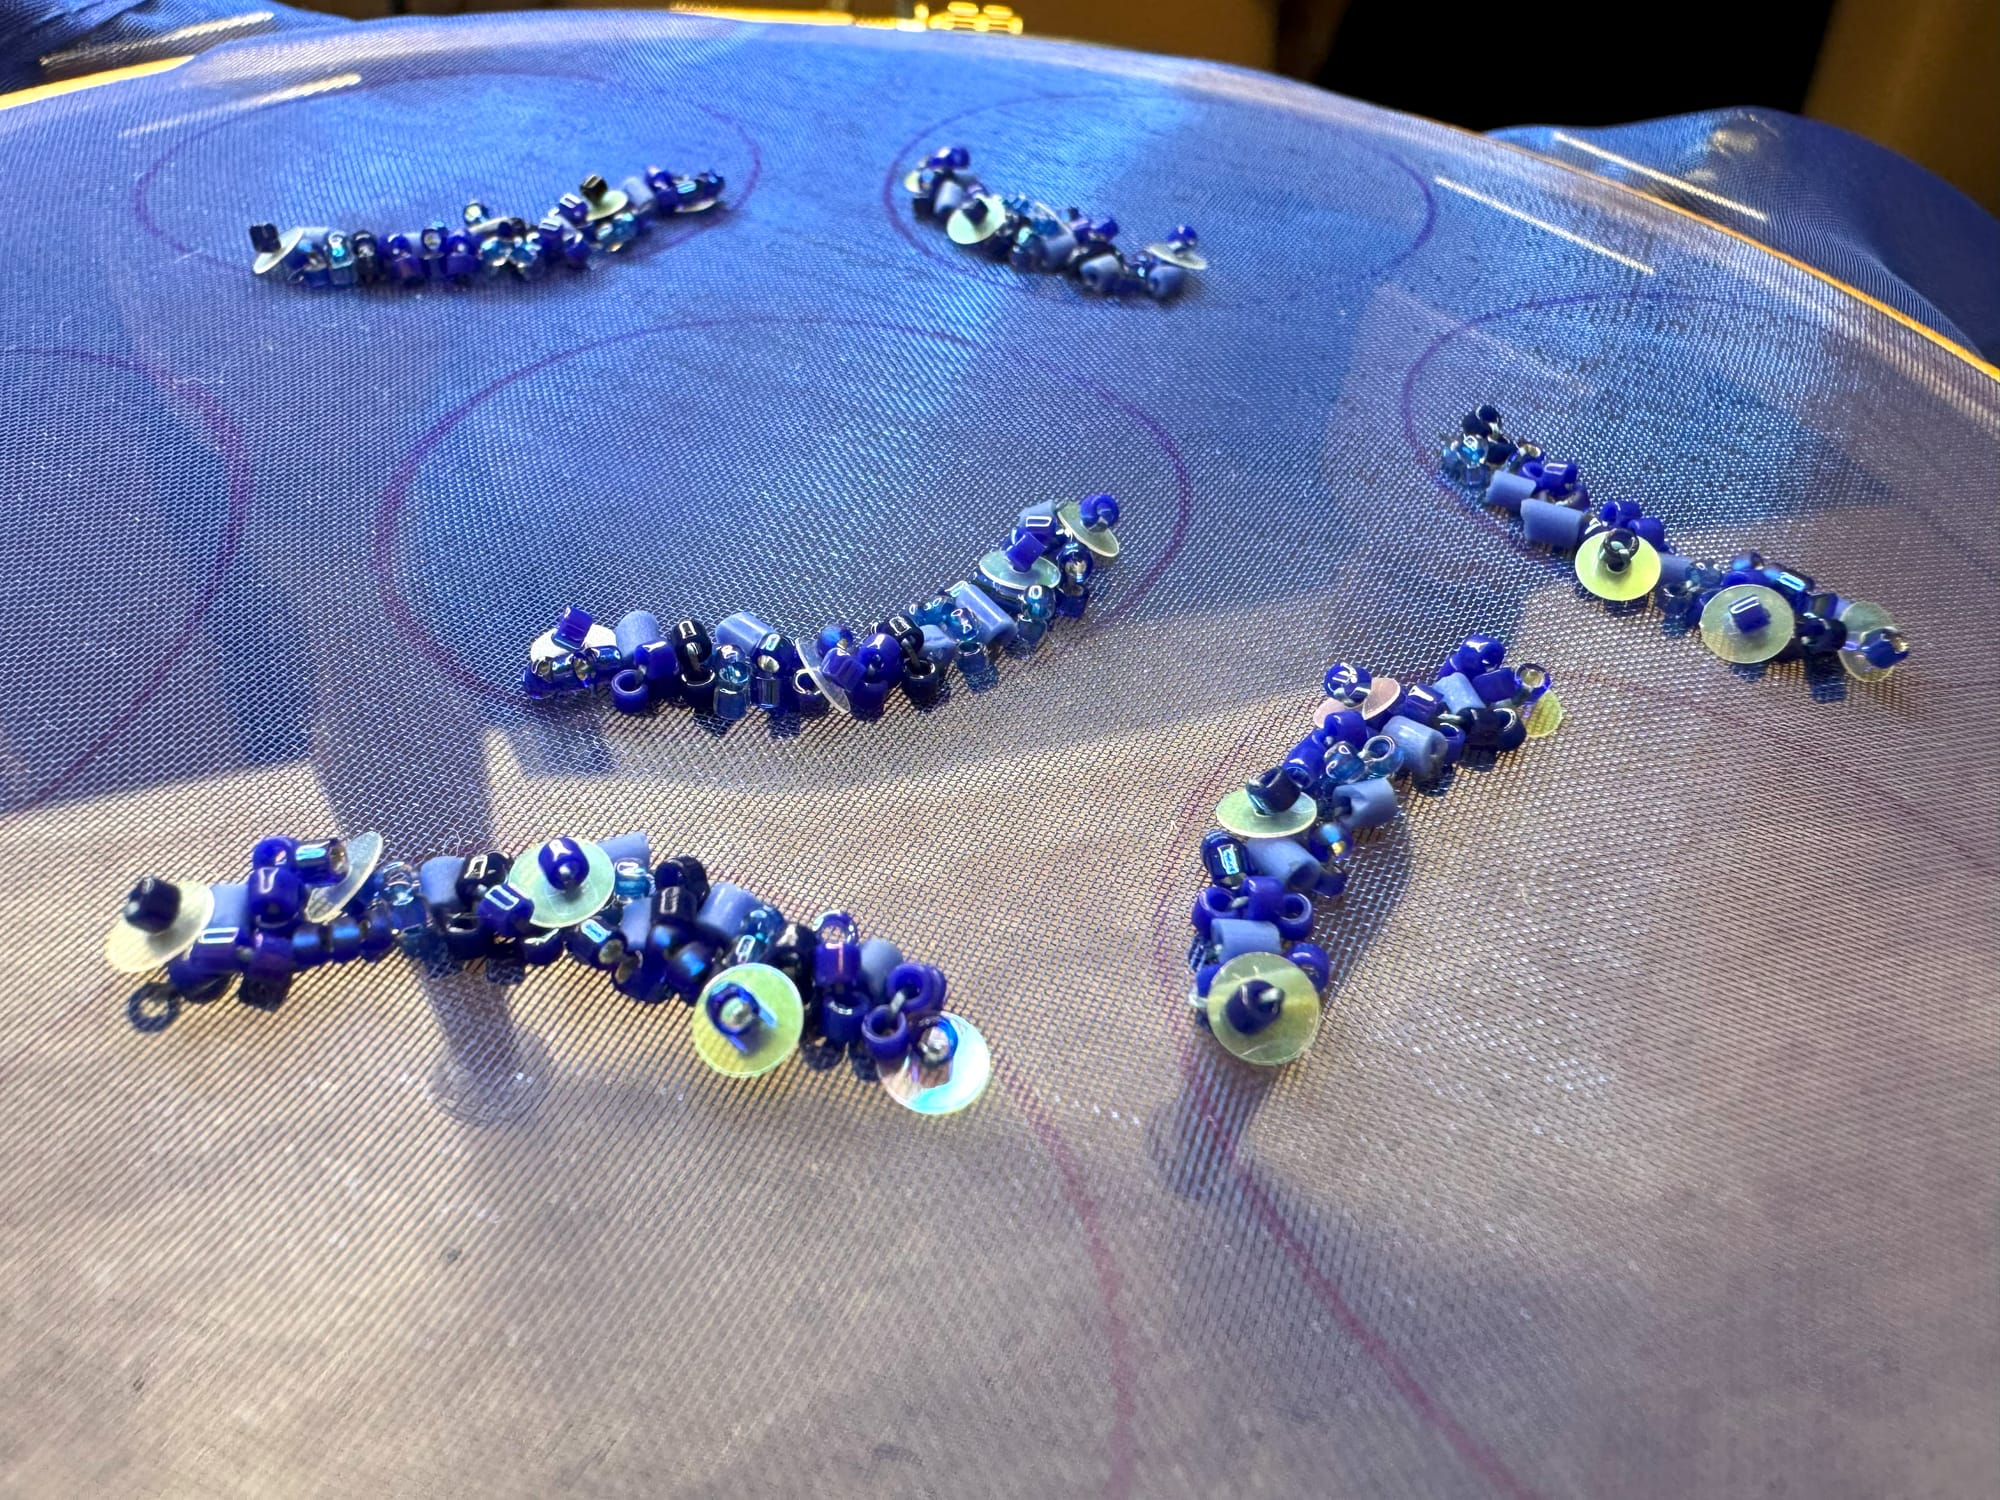
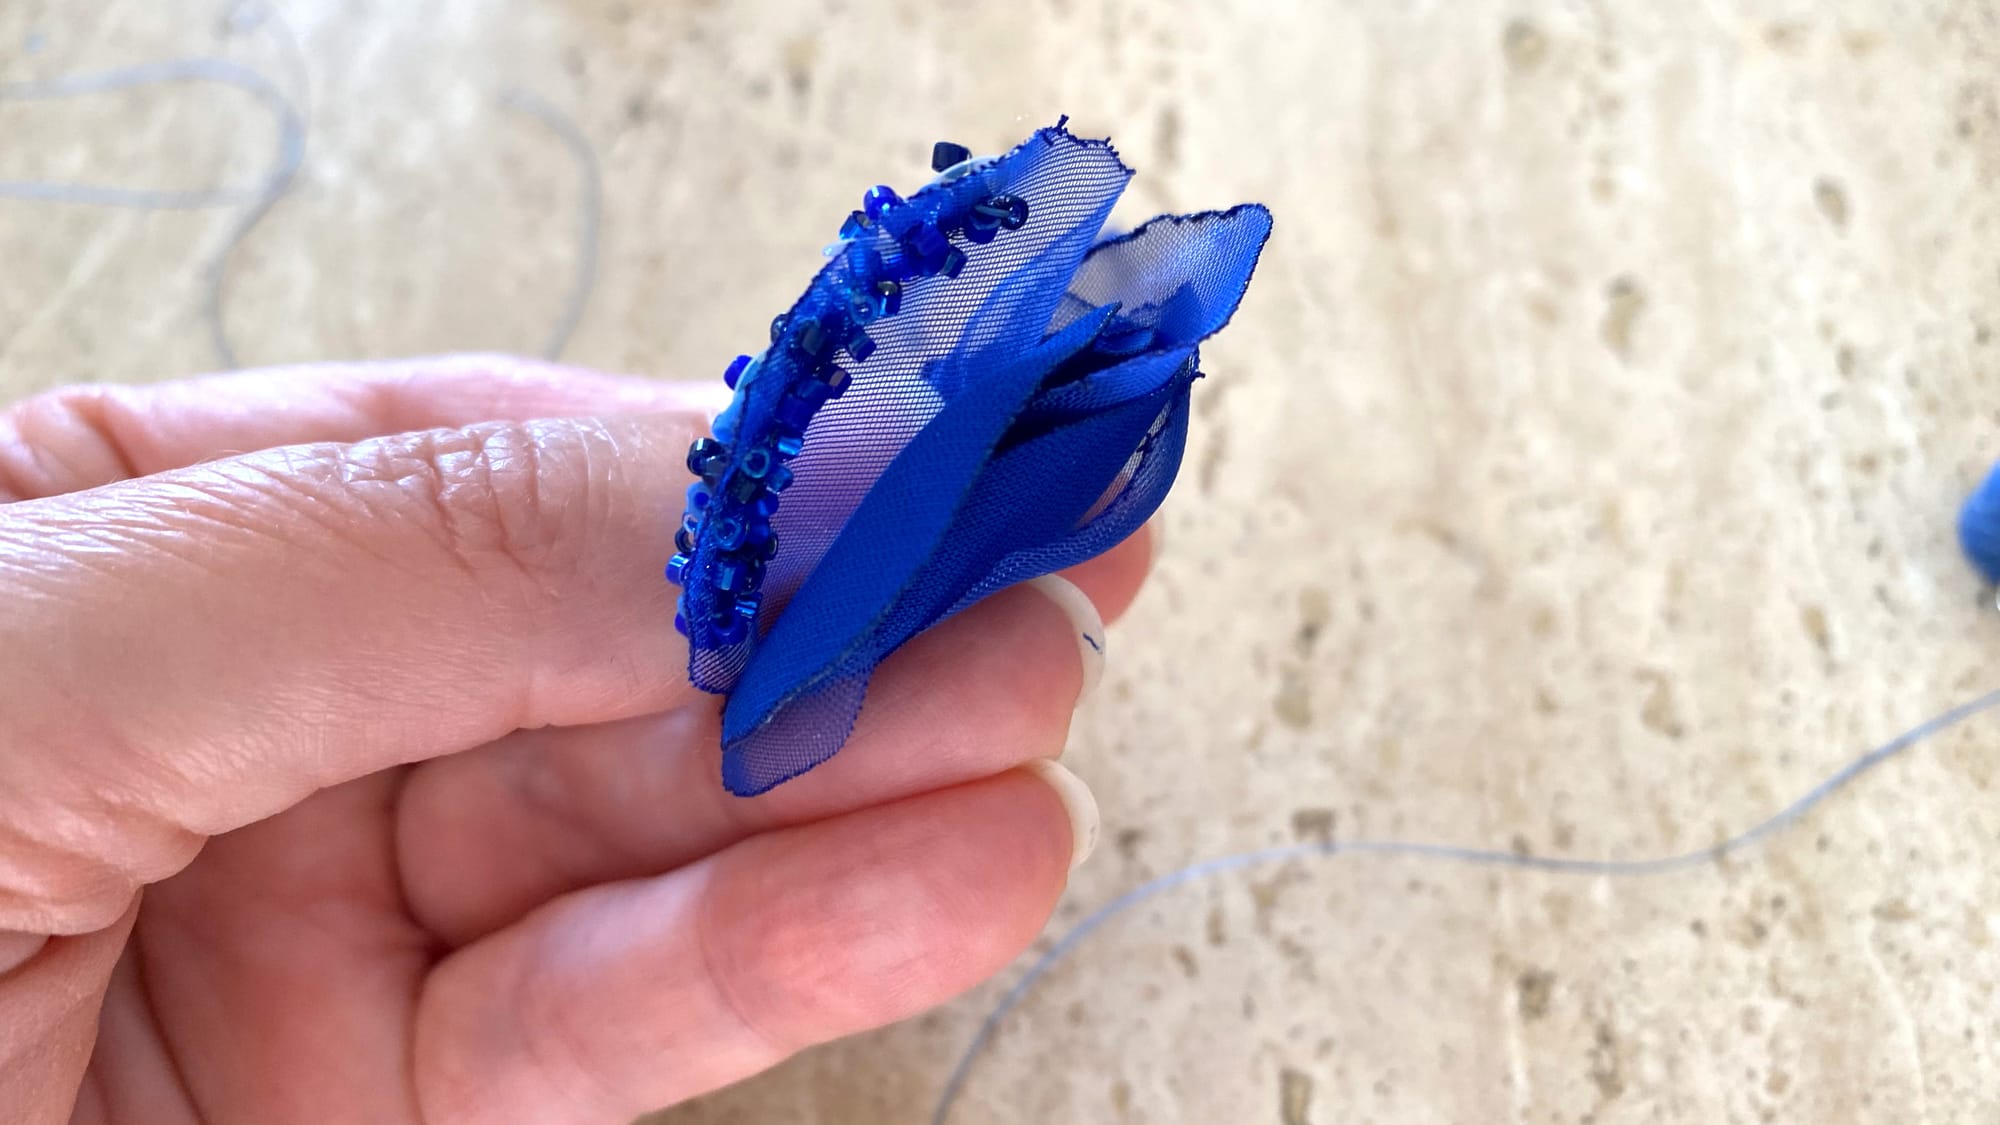
Step 3. After you finish embroidering, you take your organza from the hoops and carefully cut each petal, leaving about 4-5 mm of organza around your embroidered element.

Step 4. After you are done with embroidered petals, you can also mark them with a pen and cut the rest of the petals needed for your work. In total, I used: two embroidered organza petals (diameter 4 cm), one simple big organza petal (diameter 4 cm), one simple small organza petal (diameter 3,5 cm), one big blue polyester petal (diameter 4 cm), and one small blue polyester petal (diameter 3,5 cm). In total, I used six petals for one earring.

If you never burned the edges of the fabric before, I recommend you cut 2-3 extra petals. When I first tried to make them, I burned a few of them incorrectly (either I overburned them or the shape that came out was ugly). Whenever you cut all your petals, you are ready to move to the next step.
Step 5. Now you take the tea candle and a pair of tweezers. You light your candle, take one petal with tweezers, and slowly move the petal close to the fire, leaving about 0.5 cm distance between the petal and the fire. Don't rush, breath )) and move slowly. When organza or other synthetic fabric is close enough to the fire, the edge will melt. Melting edges allow you to secure them and ensure that your fabric will stay whole with no fringes. You need to move your petal so that all the circle is burned.
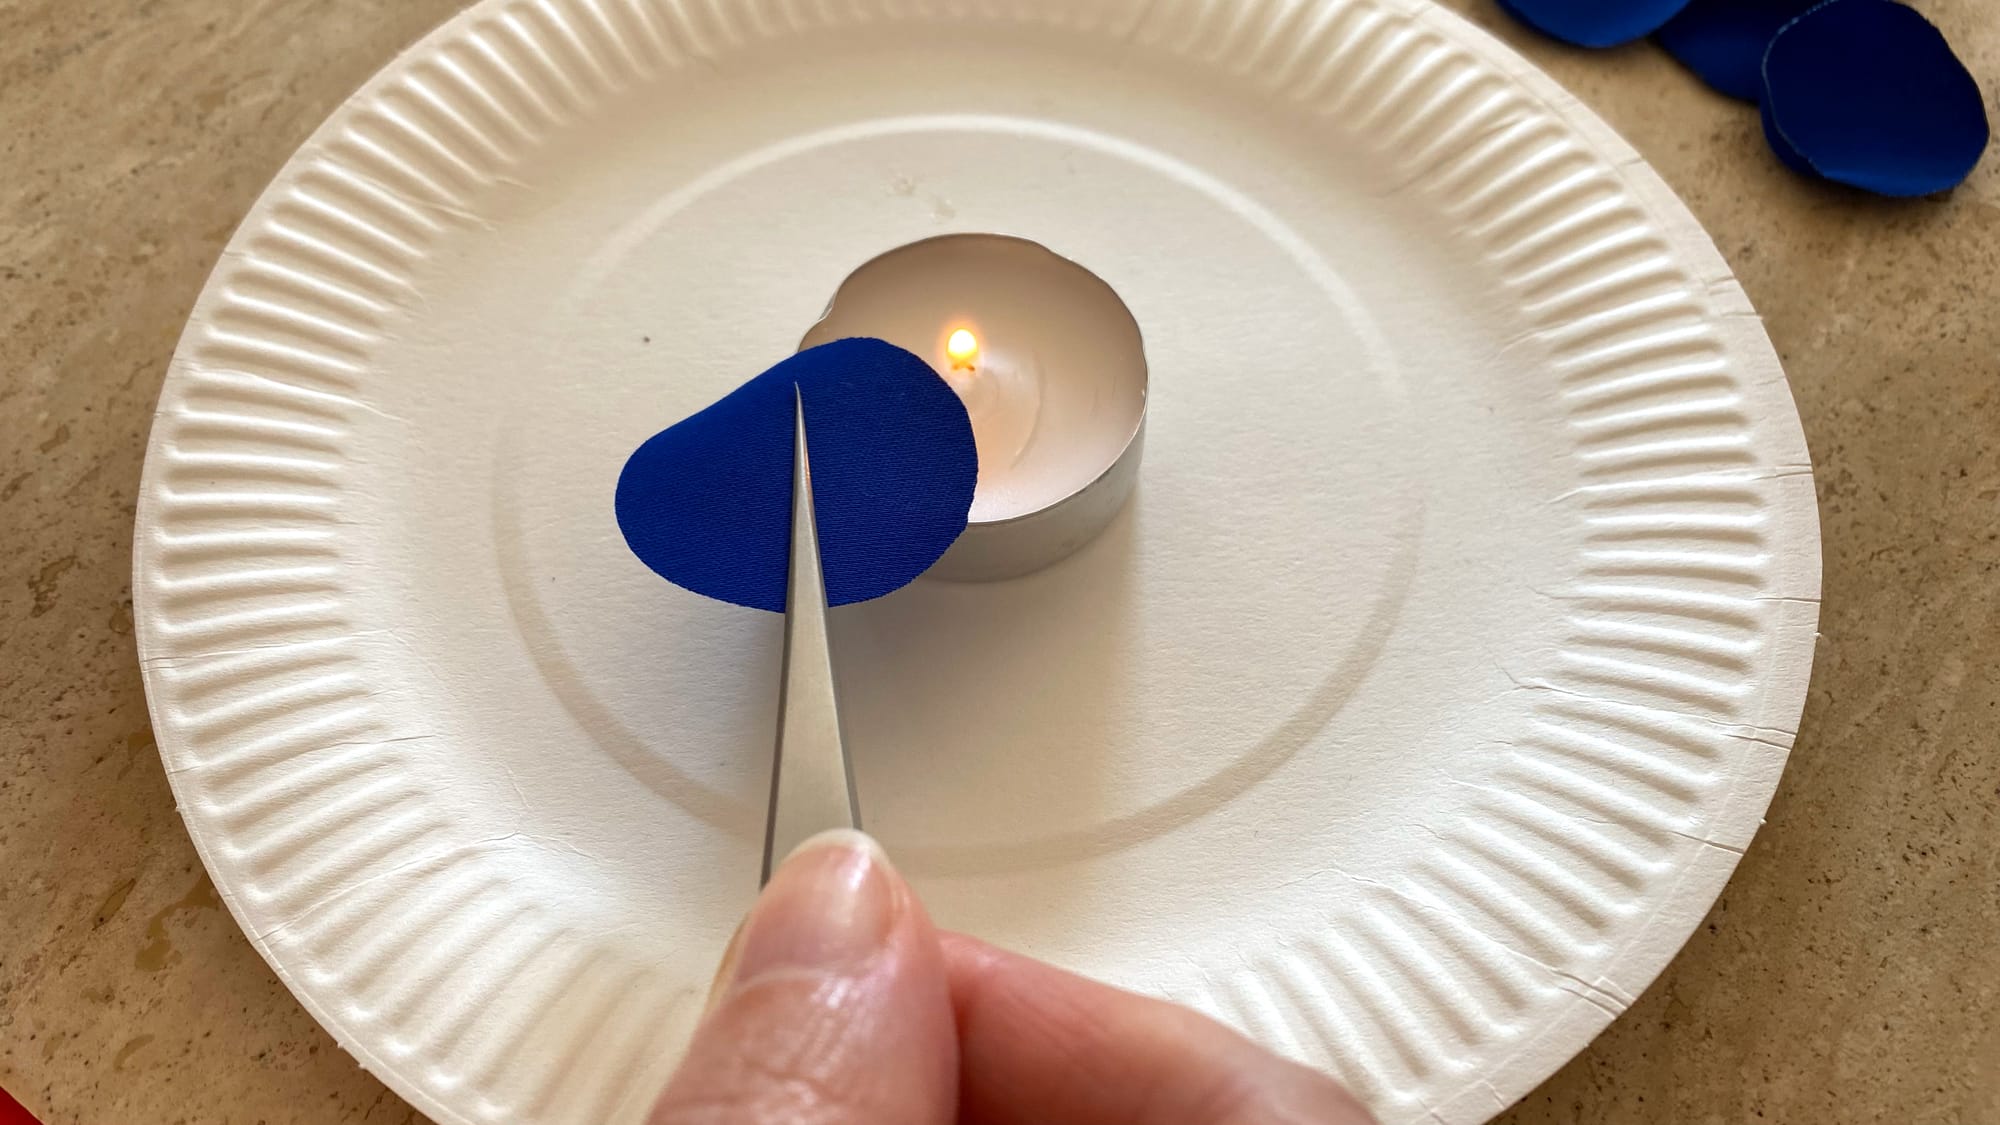
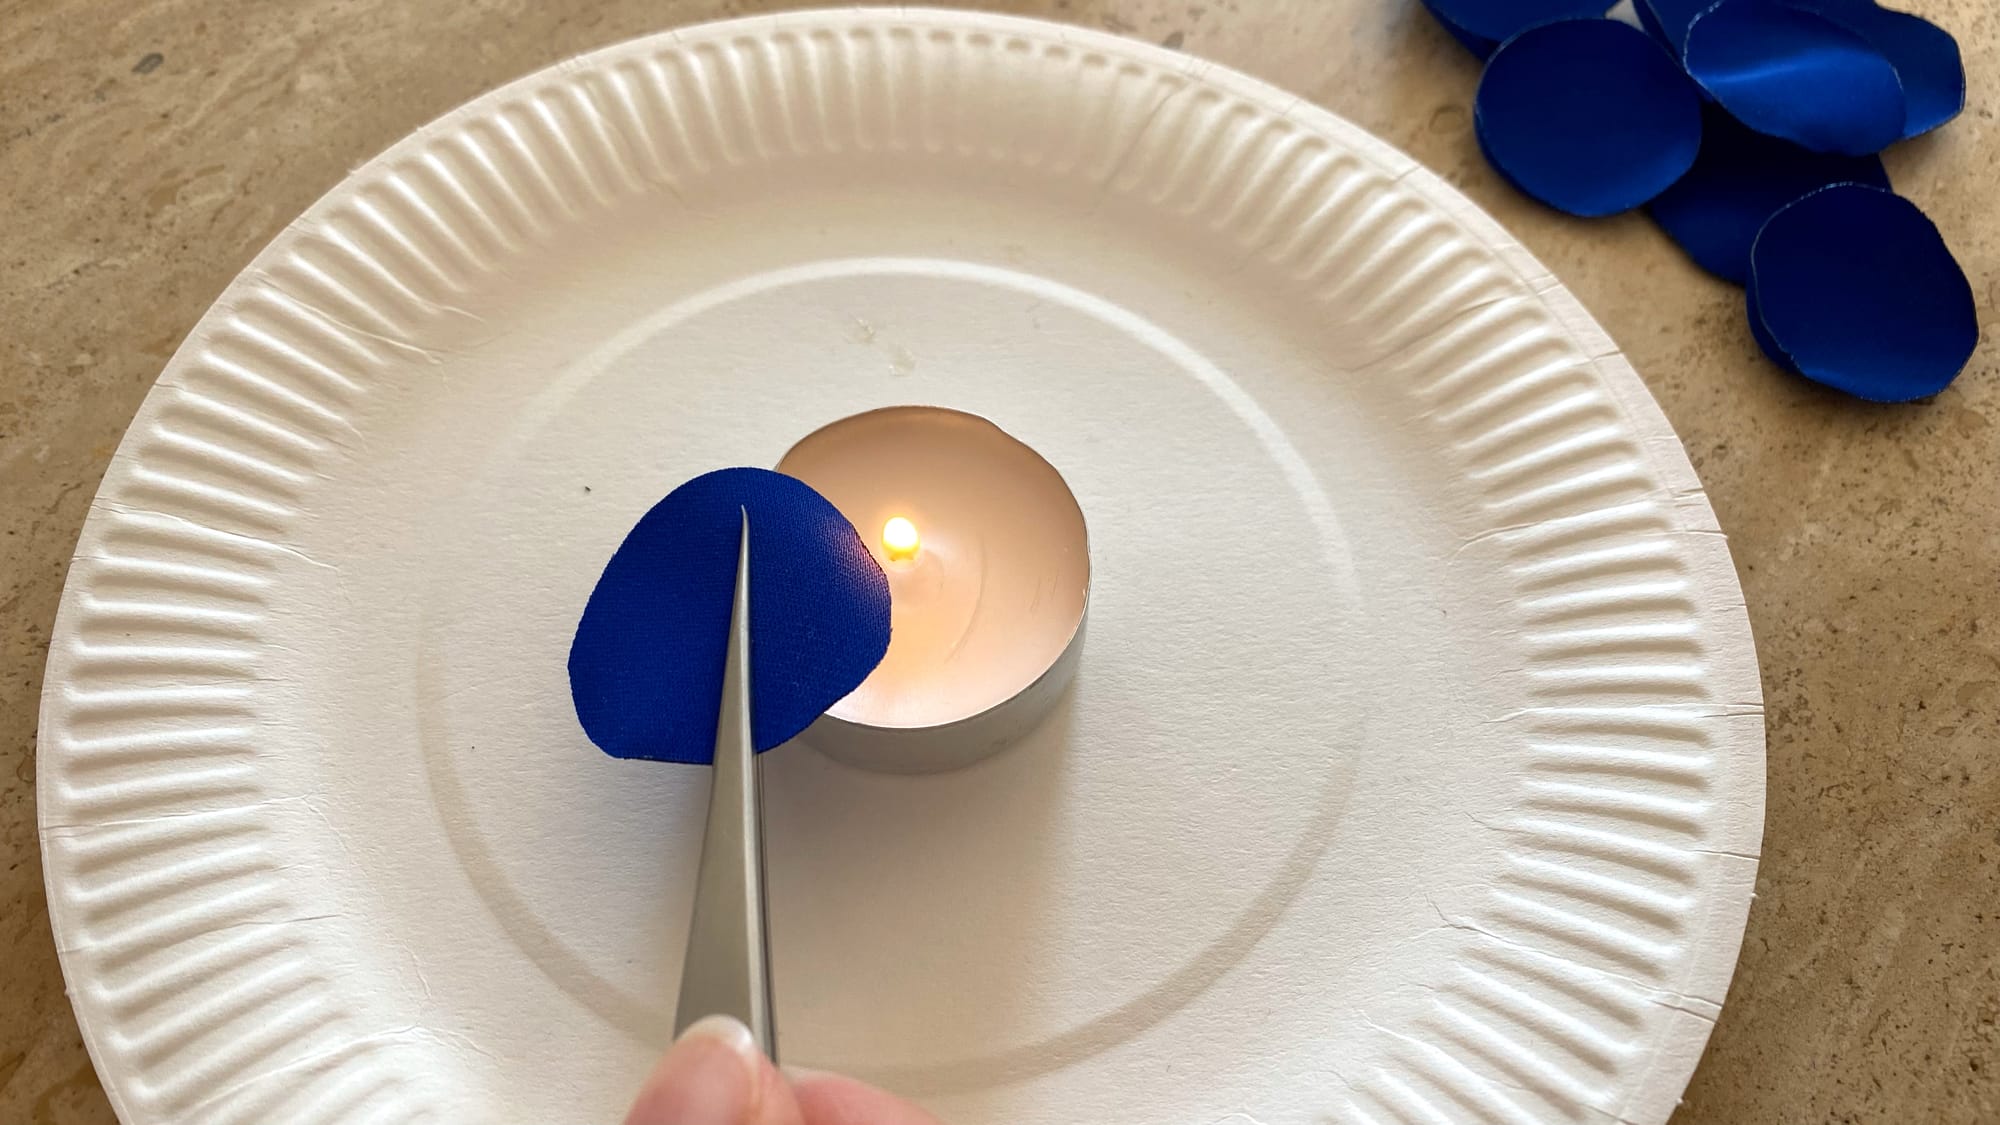
Please don't forget you are working with the fire! Pin up your long hair, make sure you use tweezers. If you do it for the first time, you can even put a small bowl with water next to your working place, so you cool down the fire in case your petals start burning too much.
When all your petals are ready we can assemble our earrings.
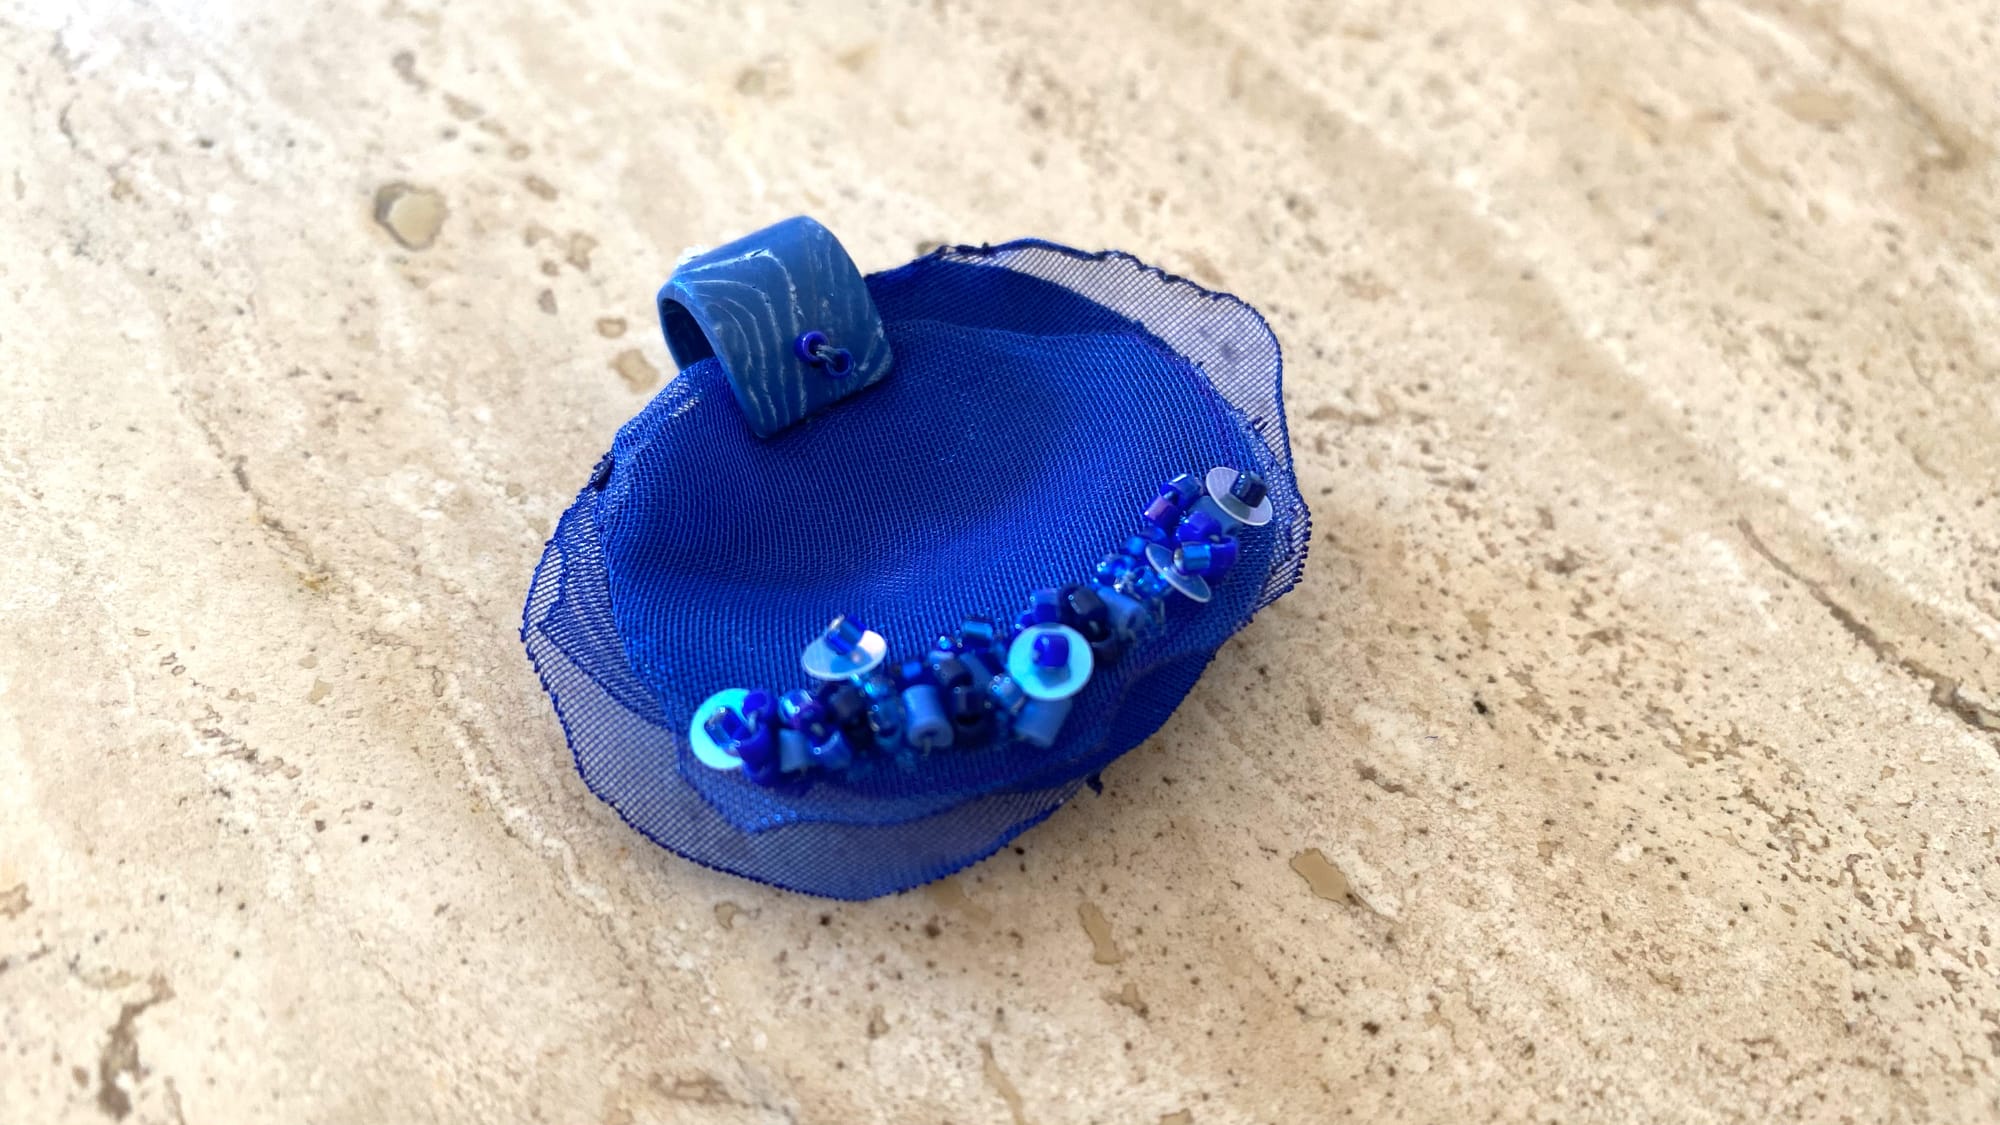
Step 6. I put all 6 petals together taking a mix of big and small ones and putting the embroidered petal on top. I fix them together at the top center with thread making a few small stitches.
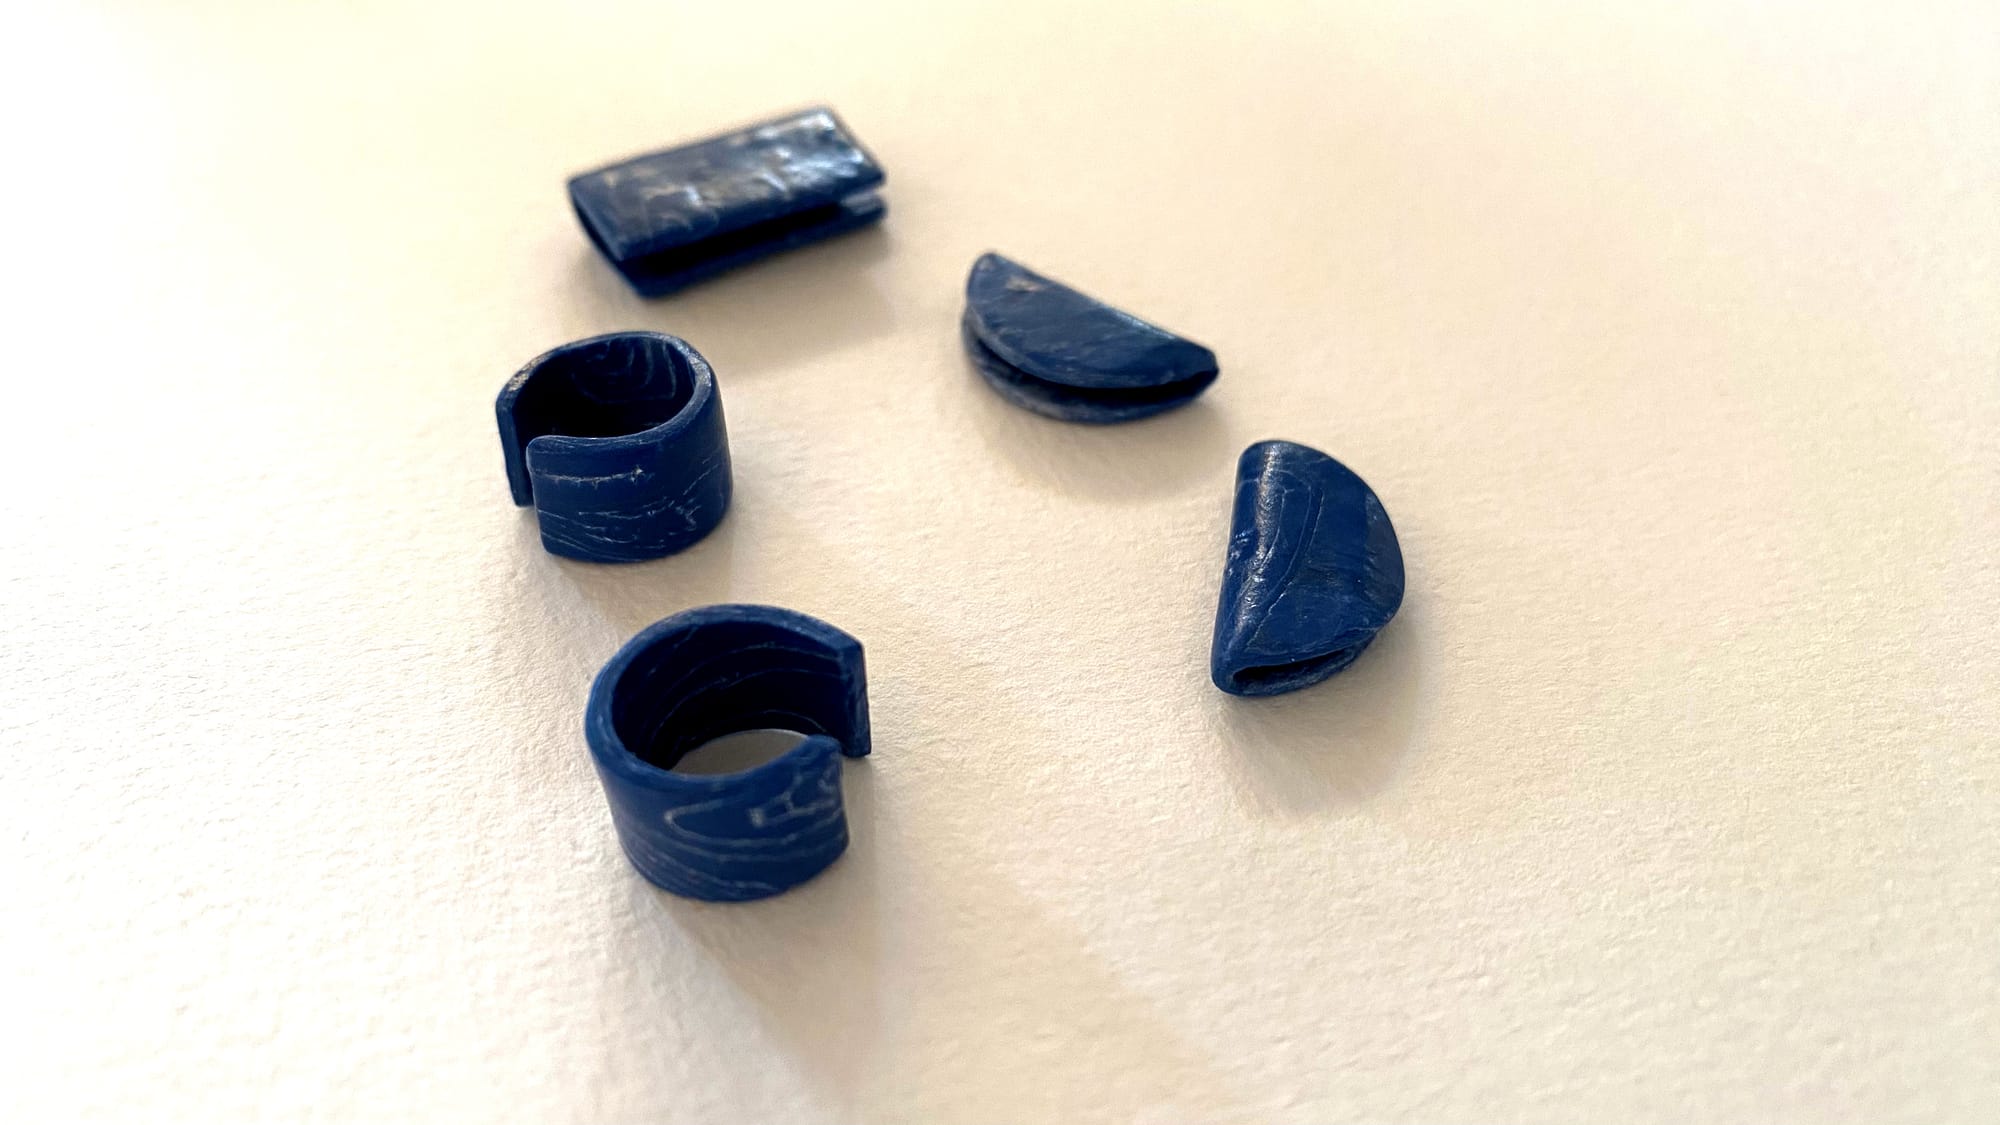
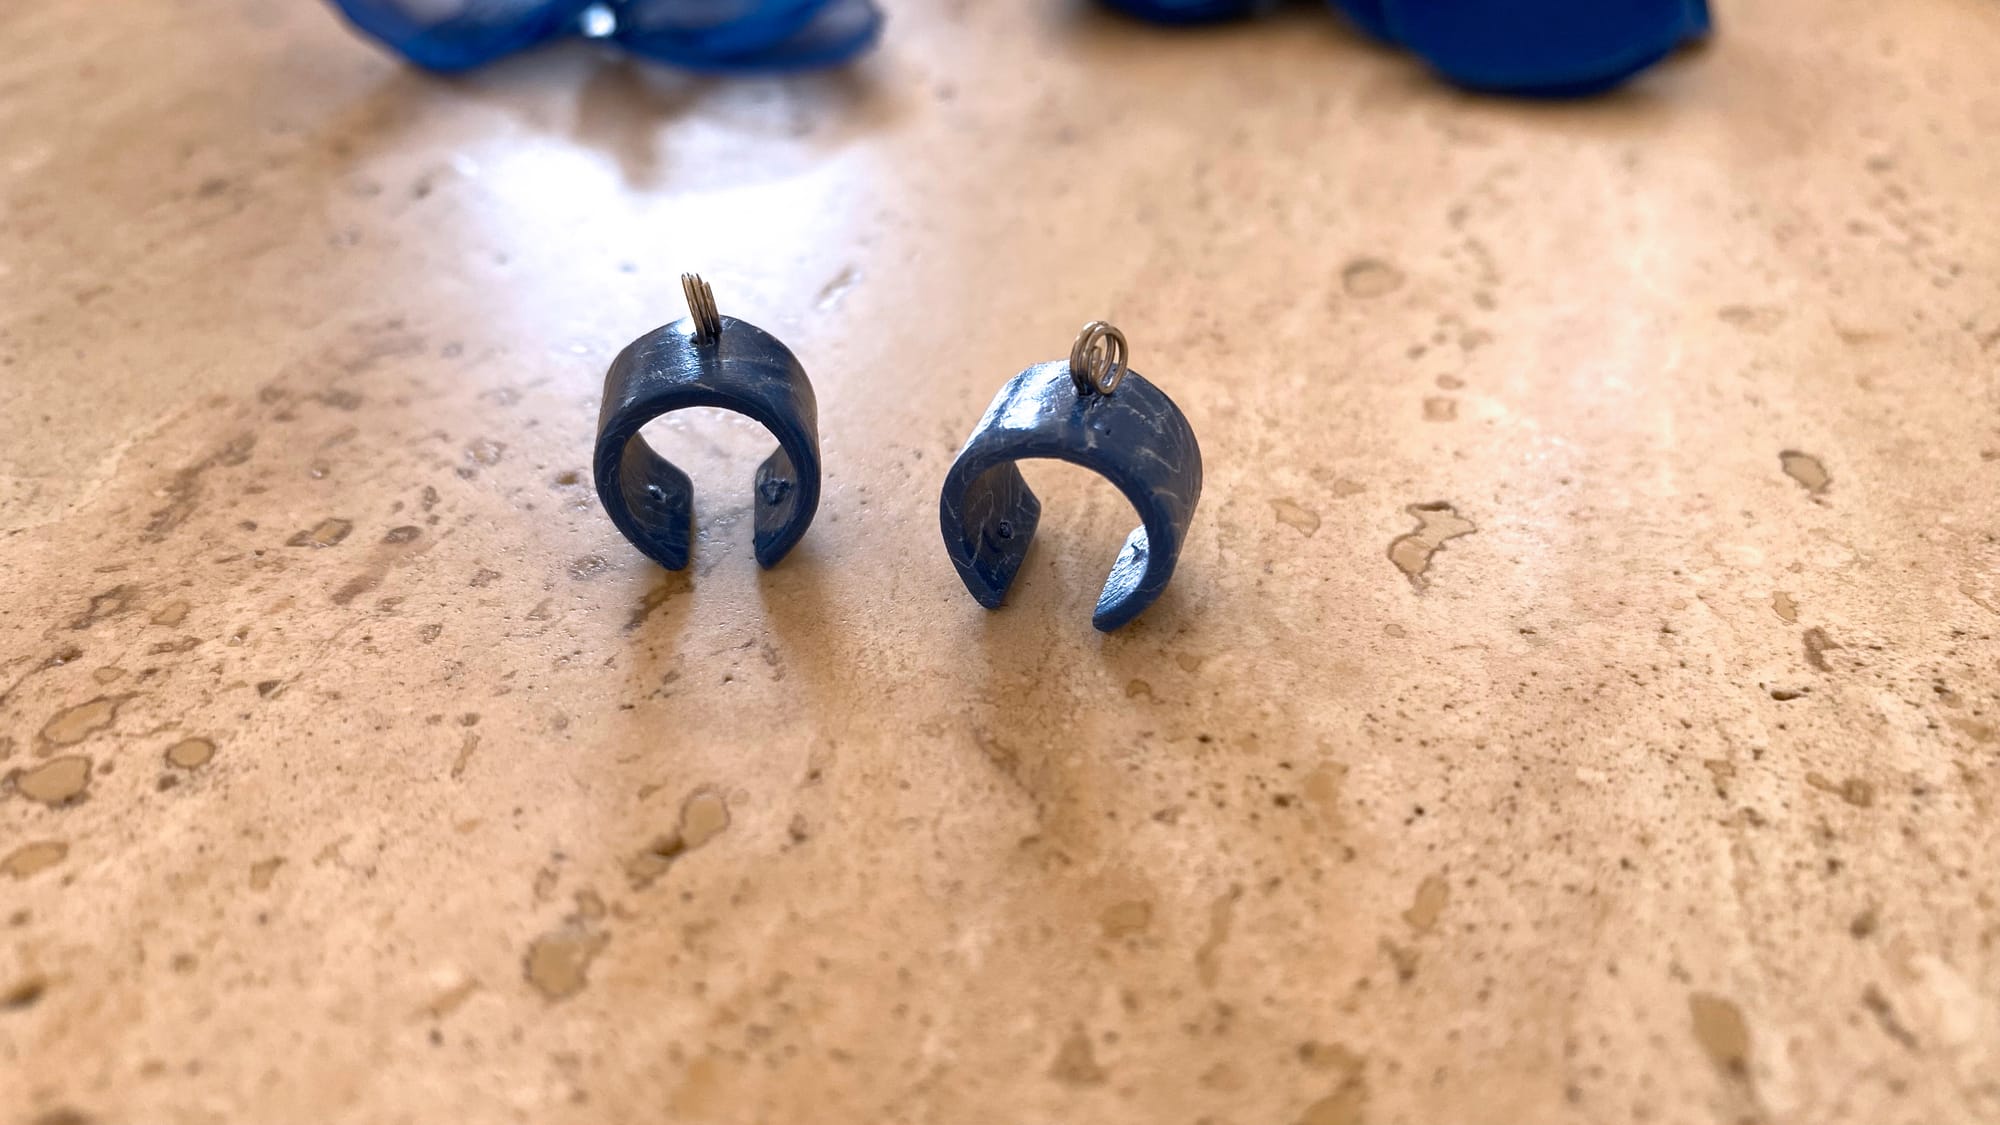
As I said at the beginning, for this project I used small elements made from polymer clay. Please leave us a comment if you want me to create a post about how to make those small polymer clay elements.
For the first pair of earrings, I used these small cylinder-shaped elements.
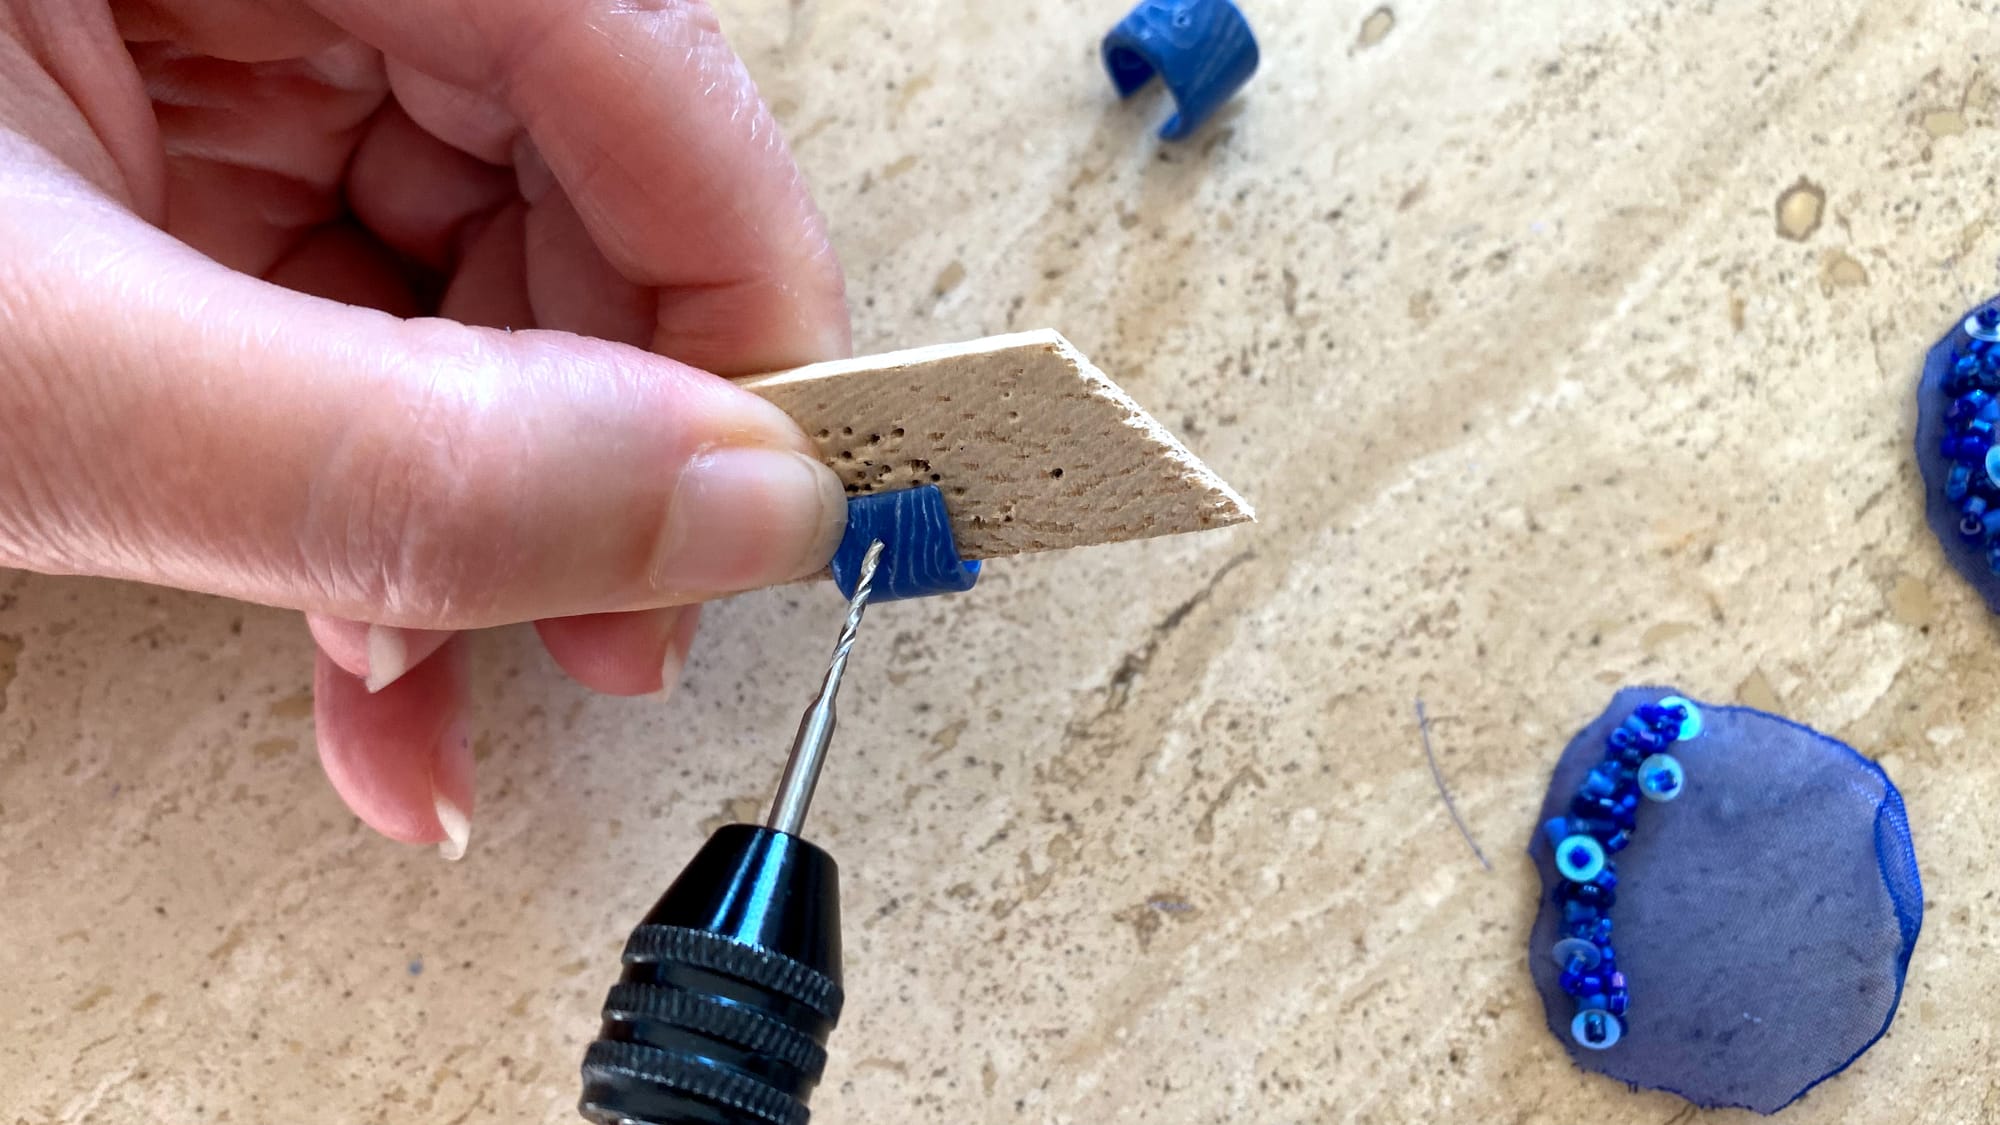
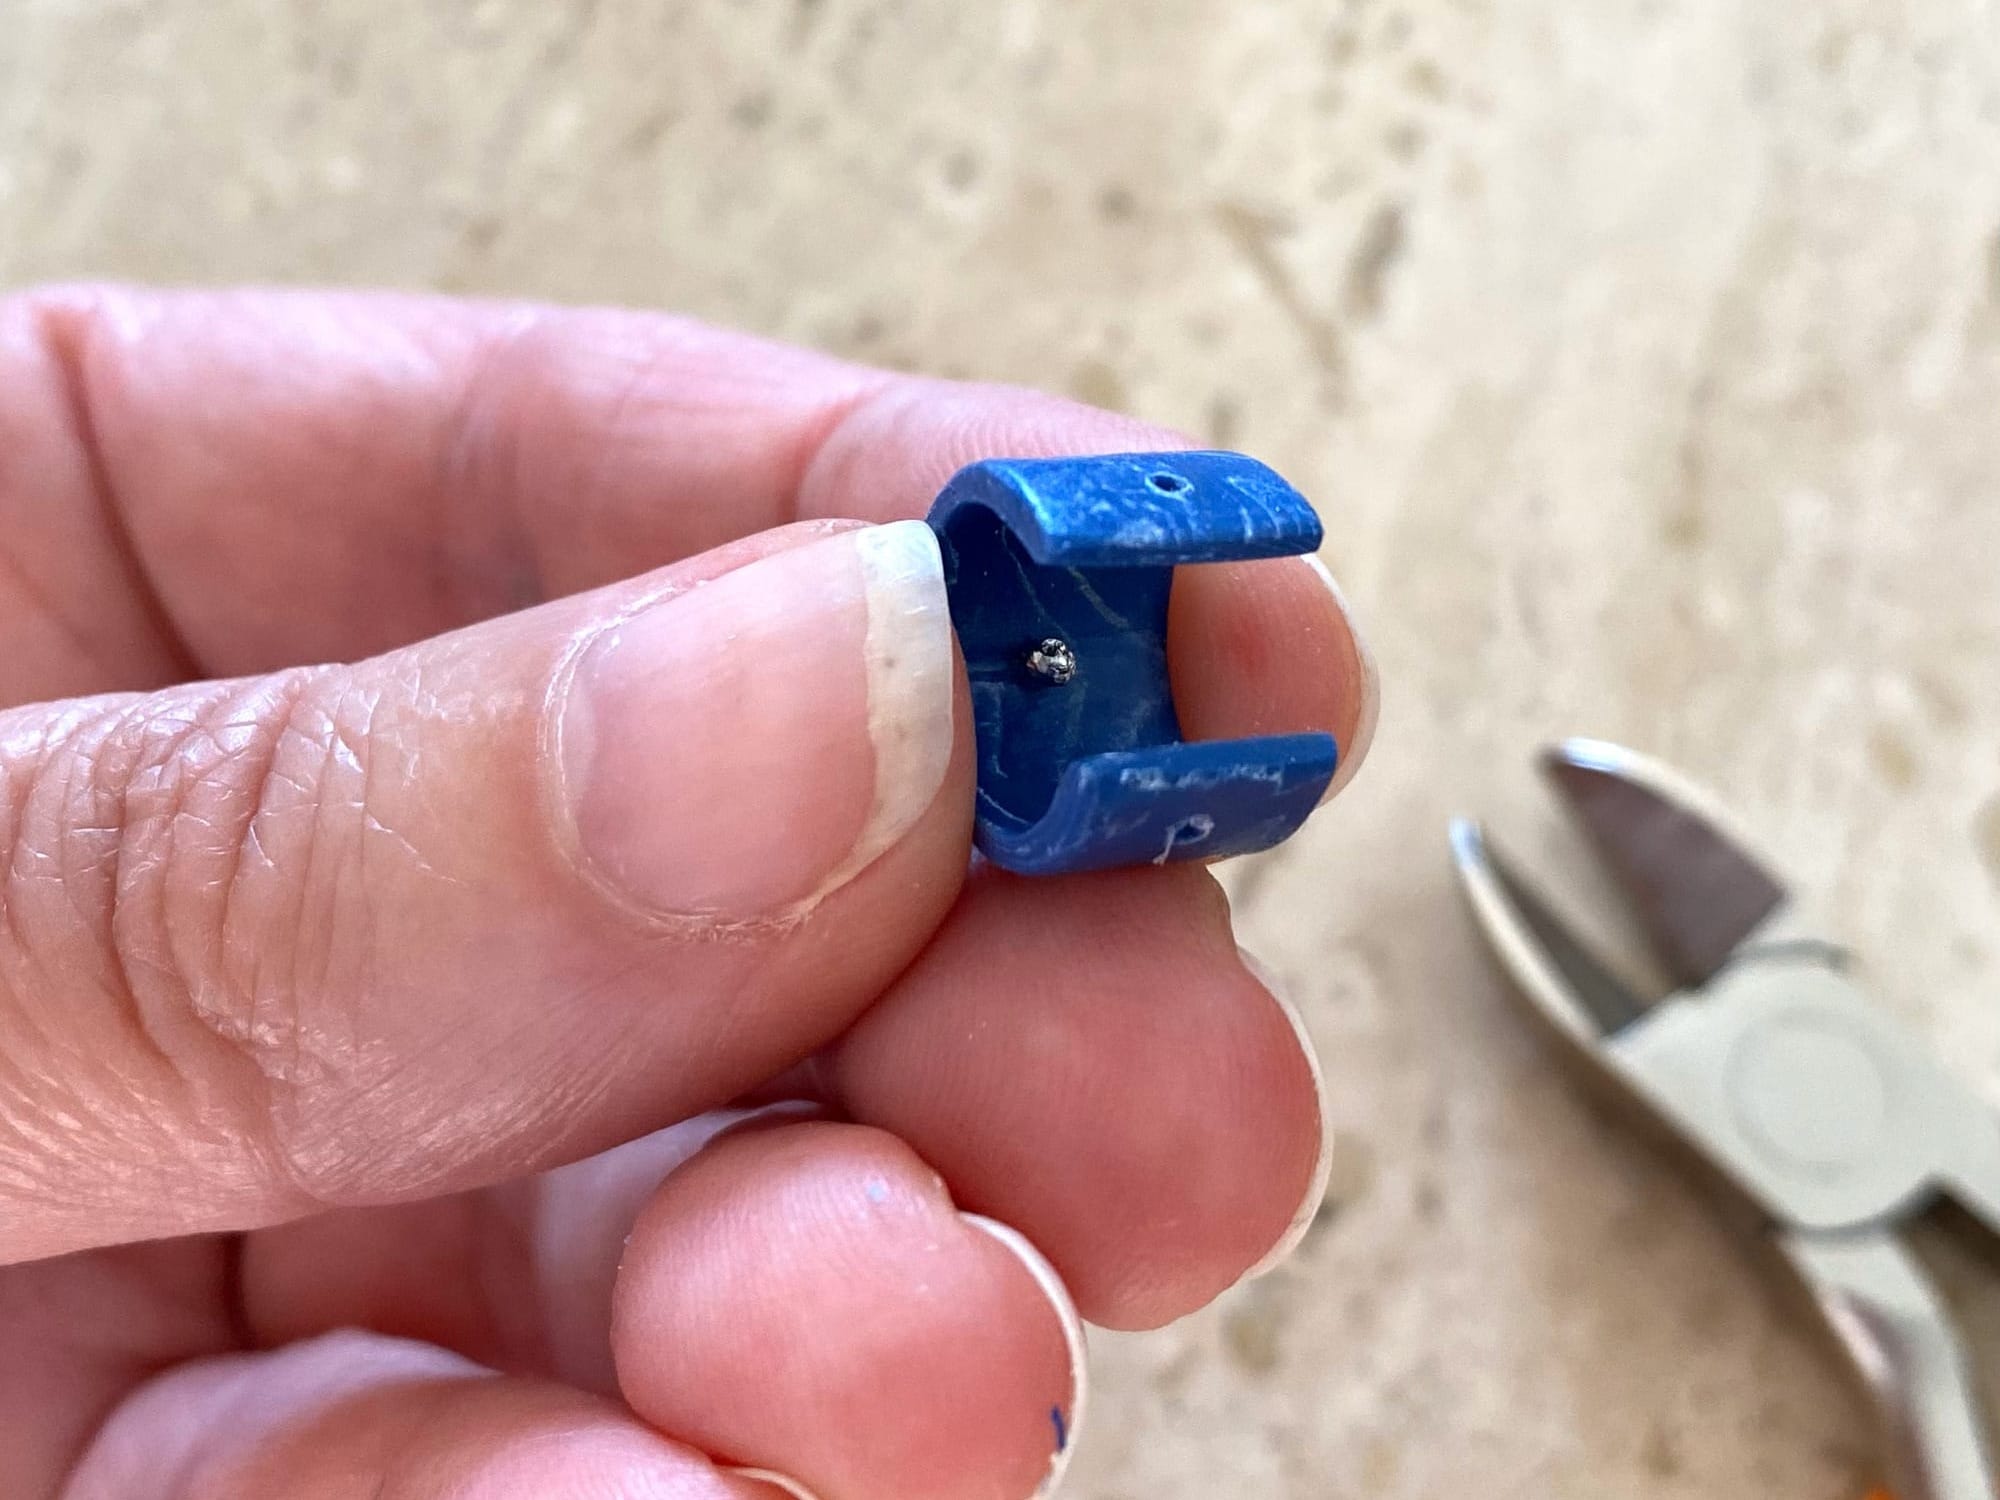
Step 7. I made small holes in it using my manual screwdriver for tiny drill bits.
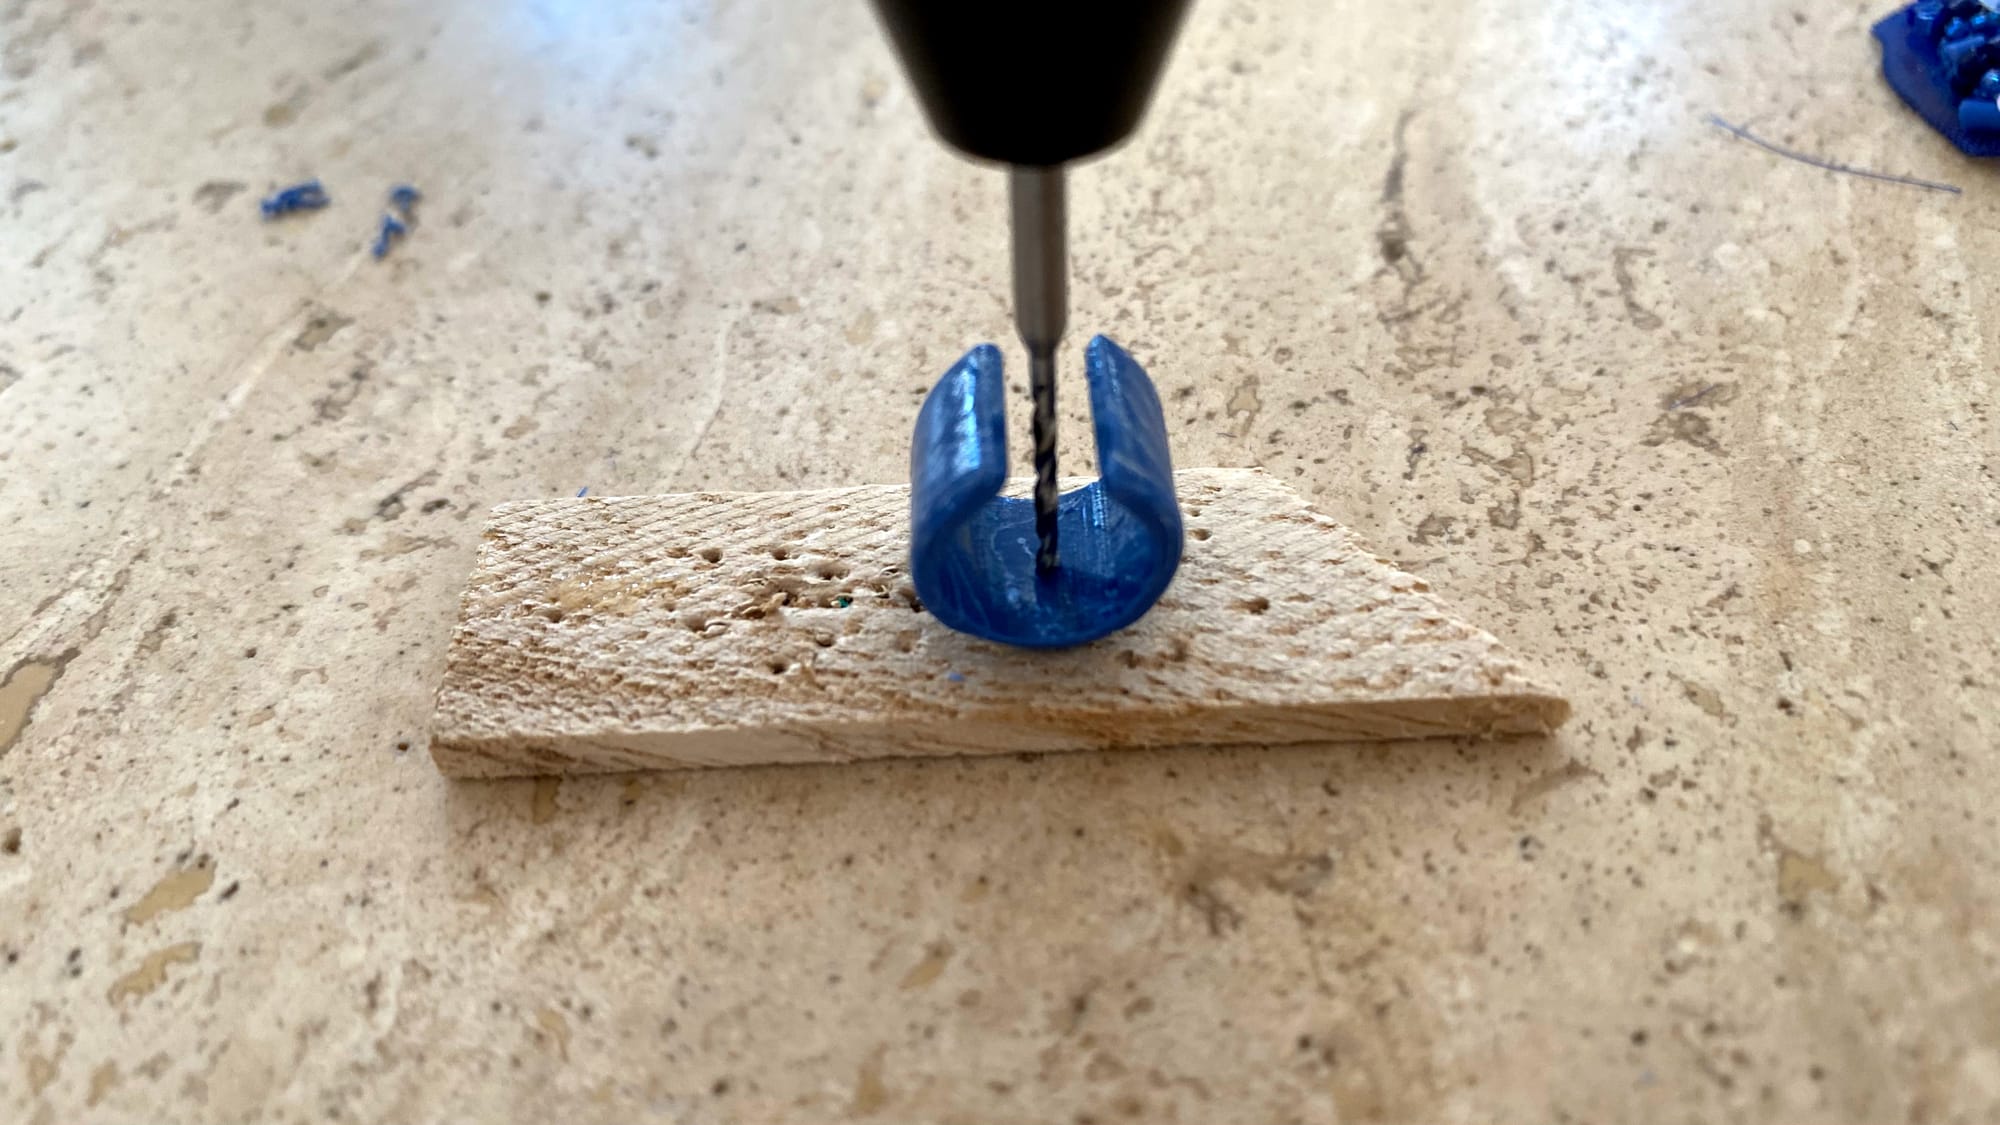
After I made a hole in the center of the clay element, I also made two other holes at the edges ofthe clay element
Step 8. After I made three holes in my polymer clay element, I inserted a small ball-head pin into it and made a ring on top of the clay element with the help of round pliers.
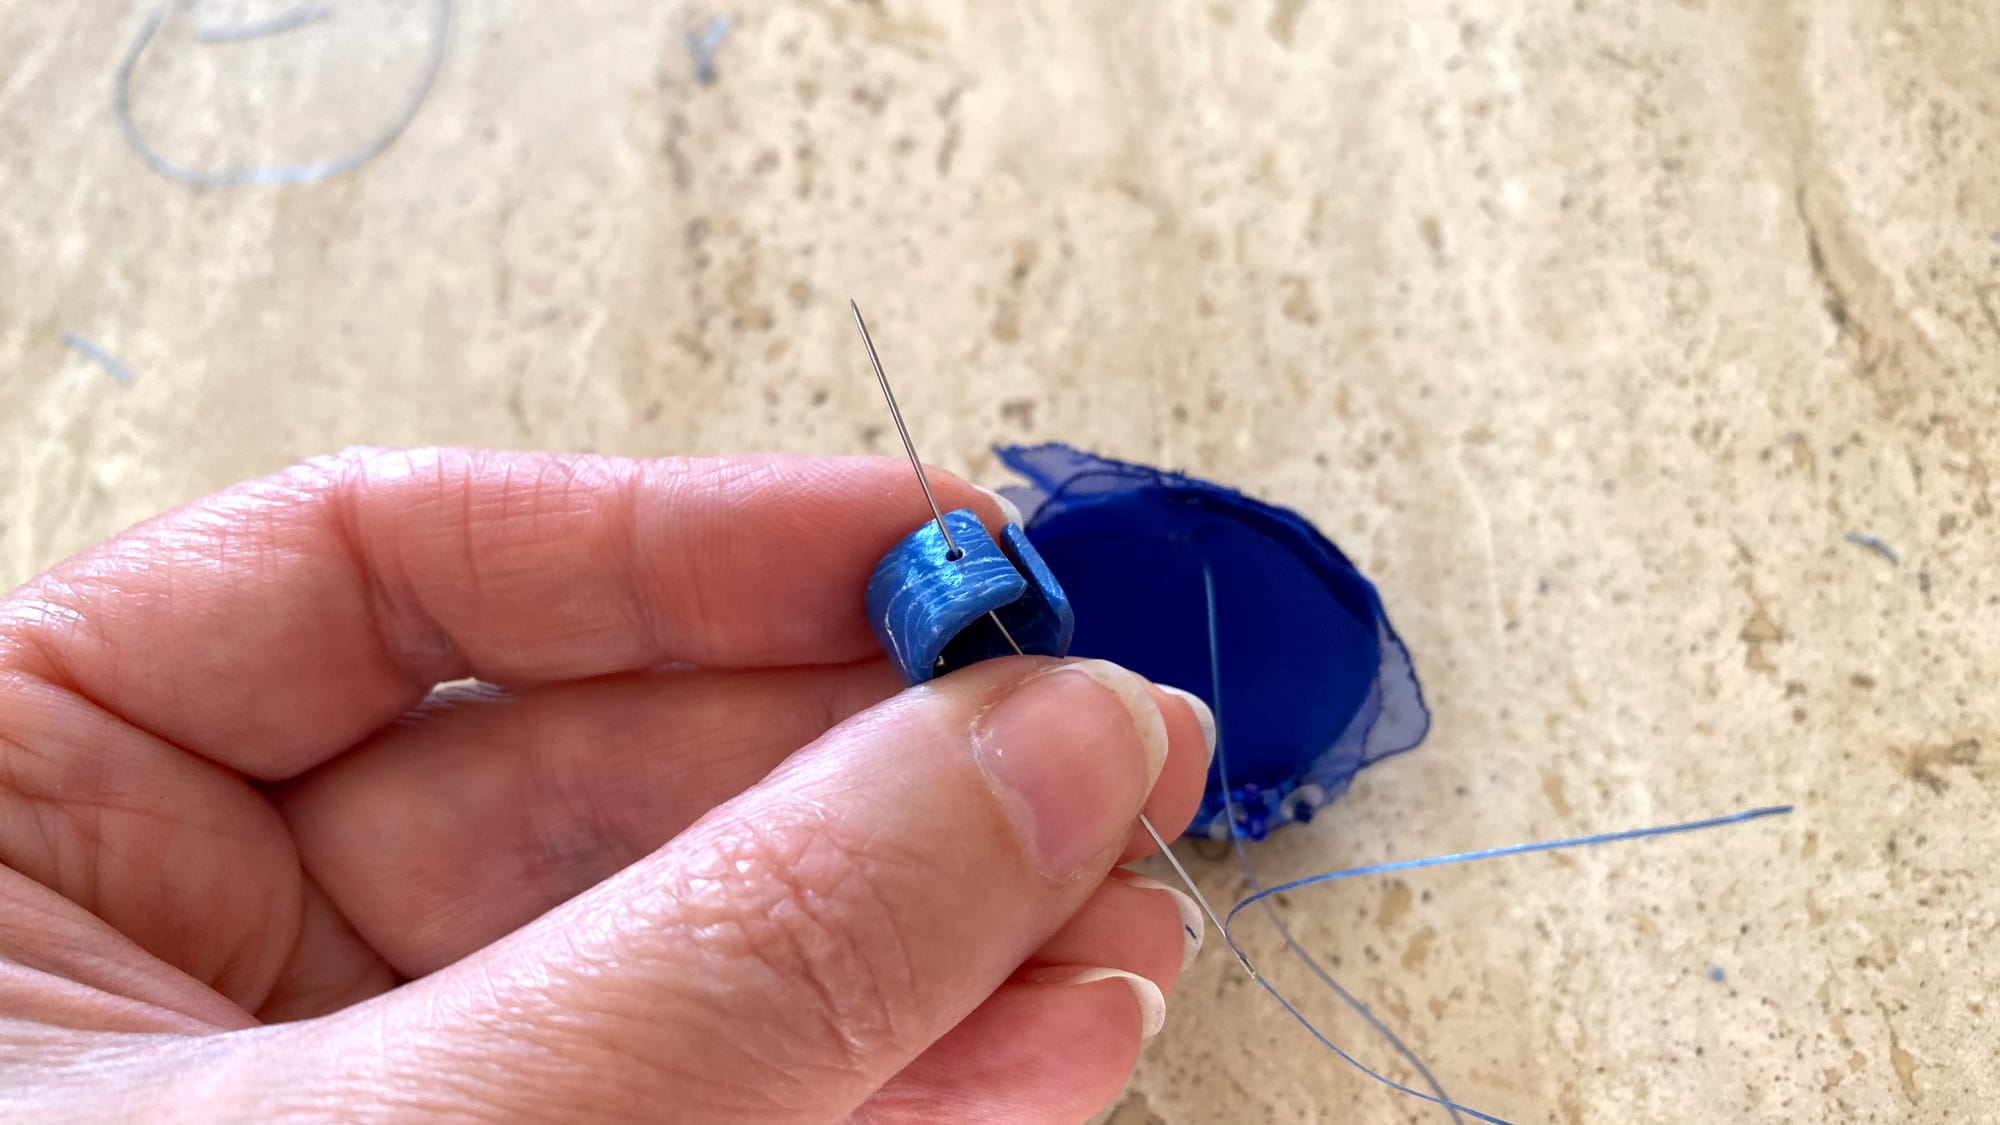
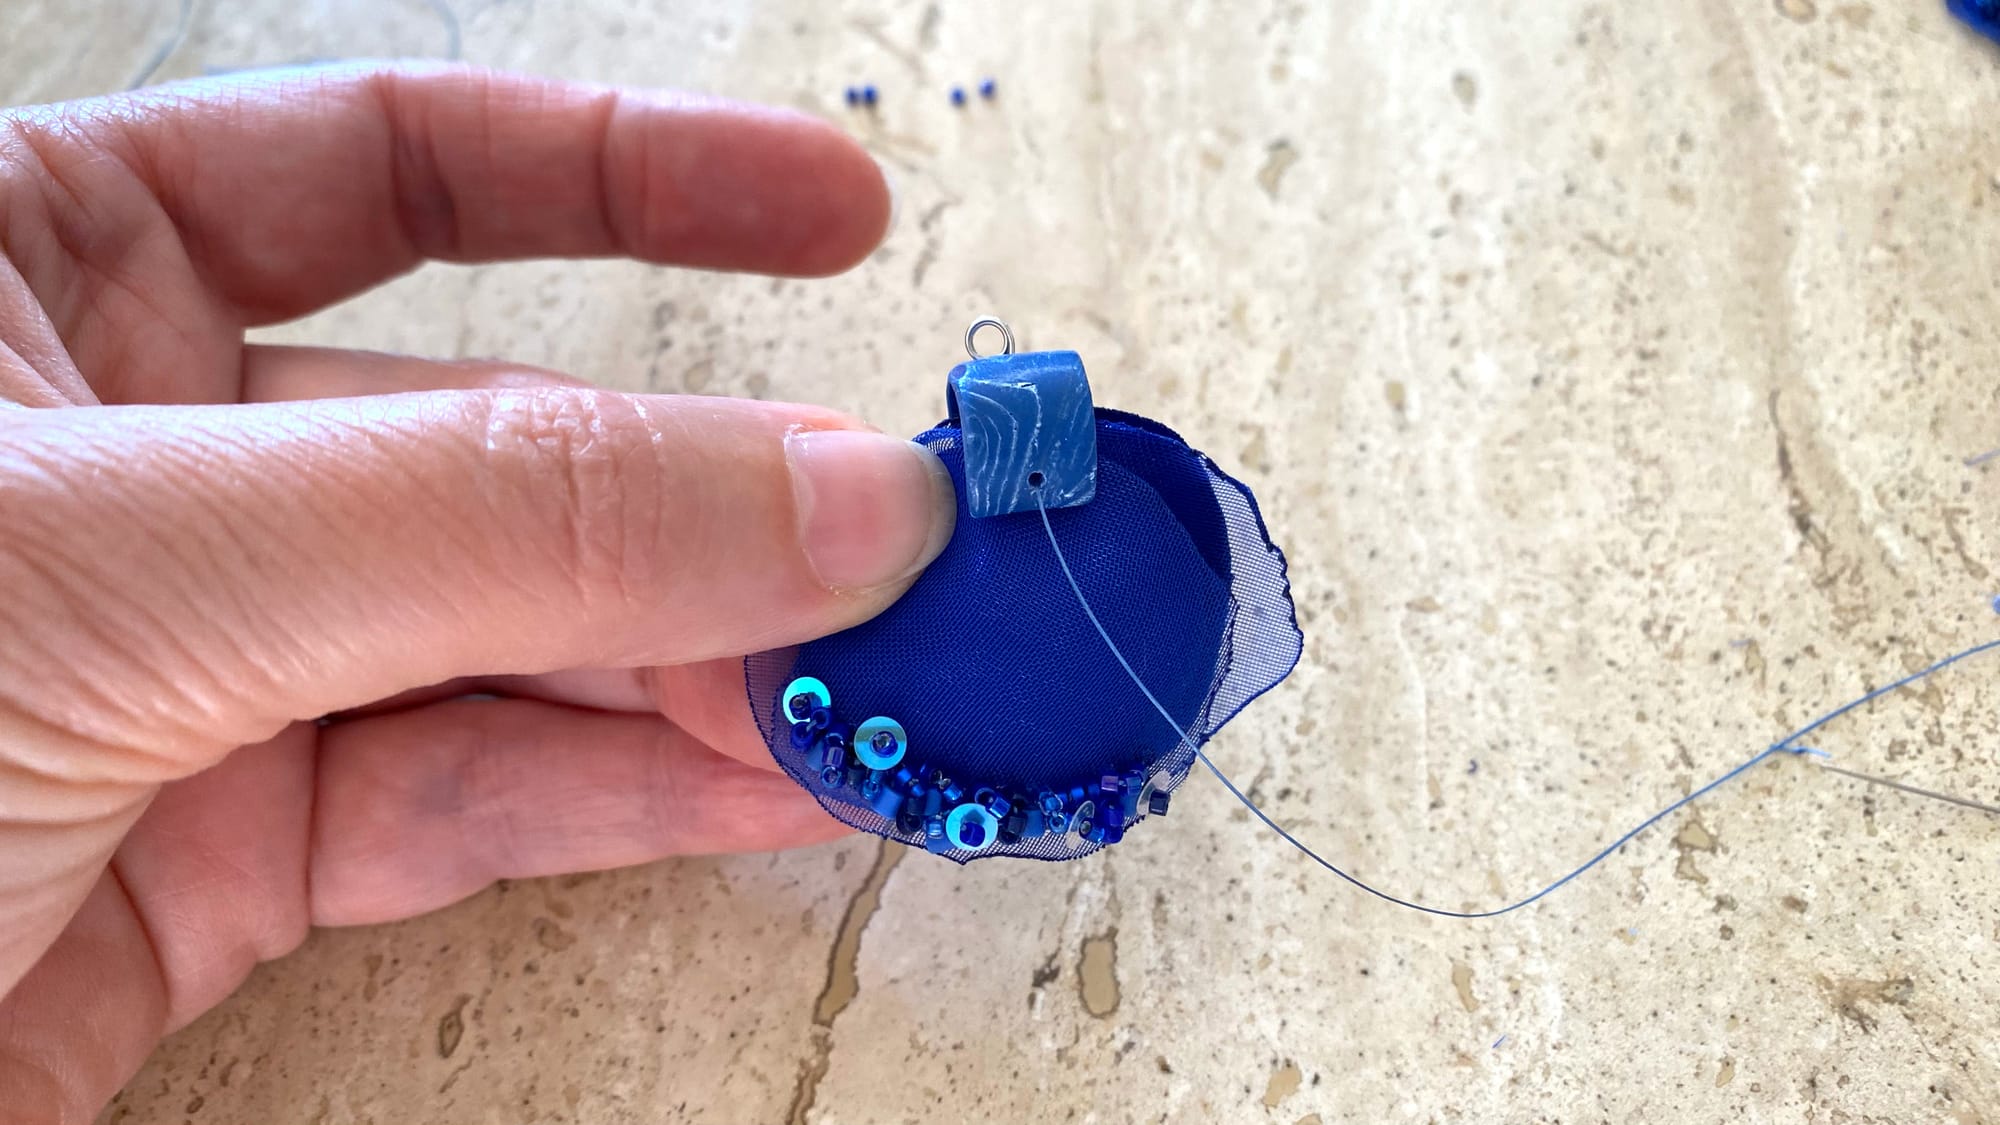
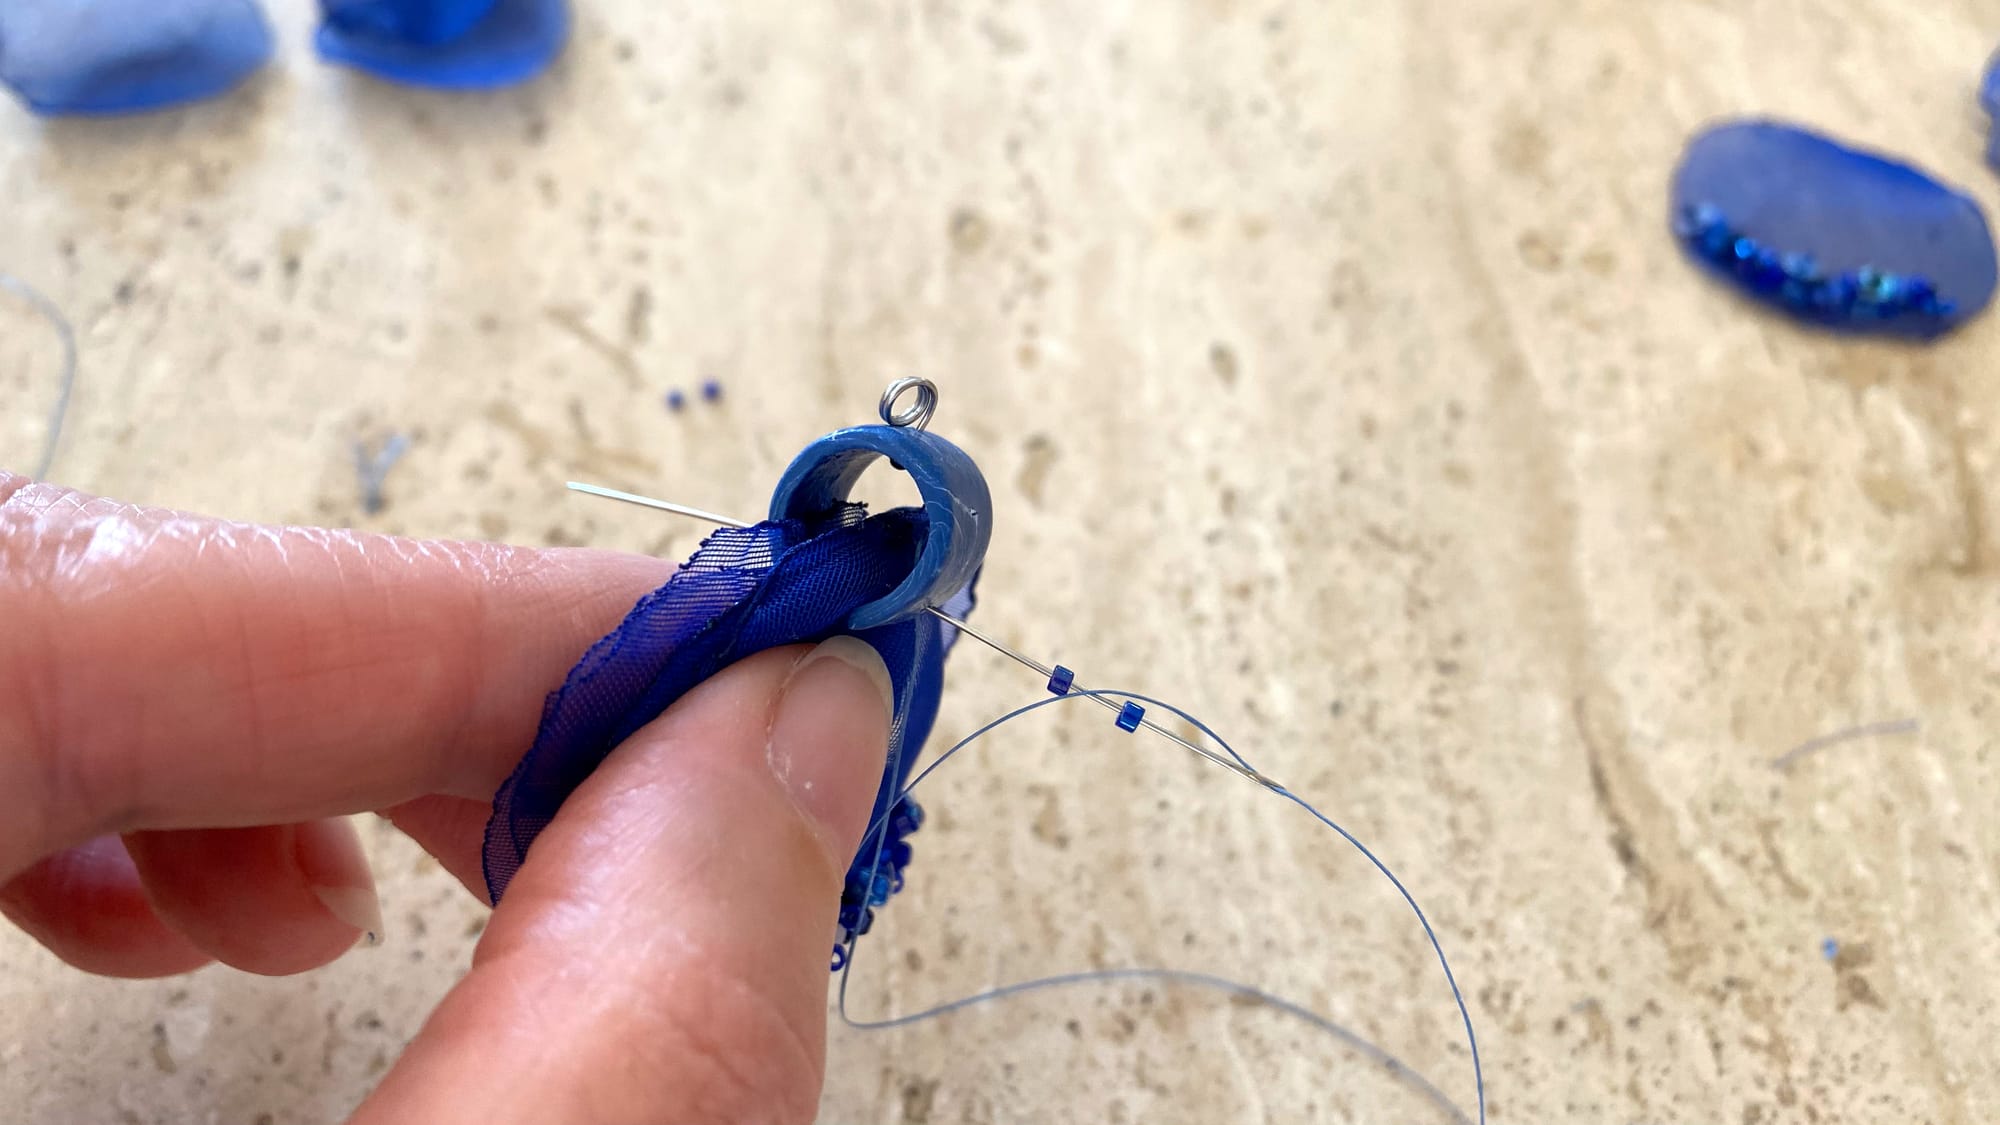
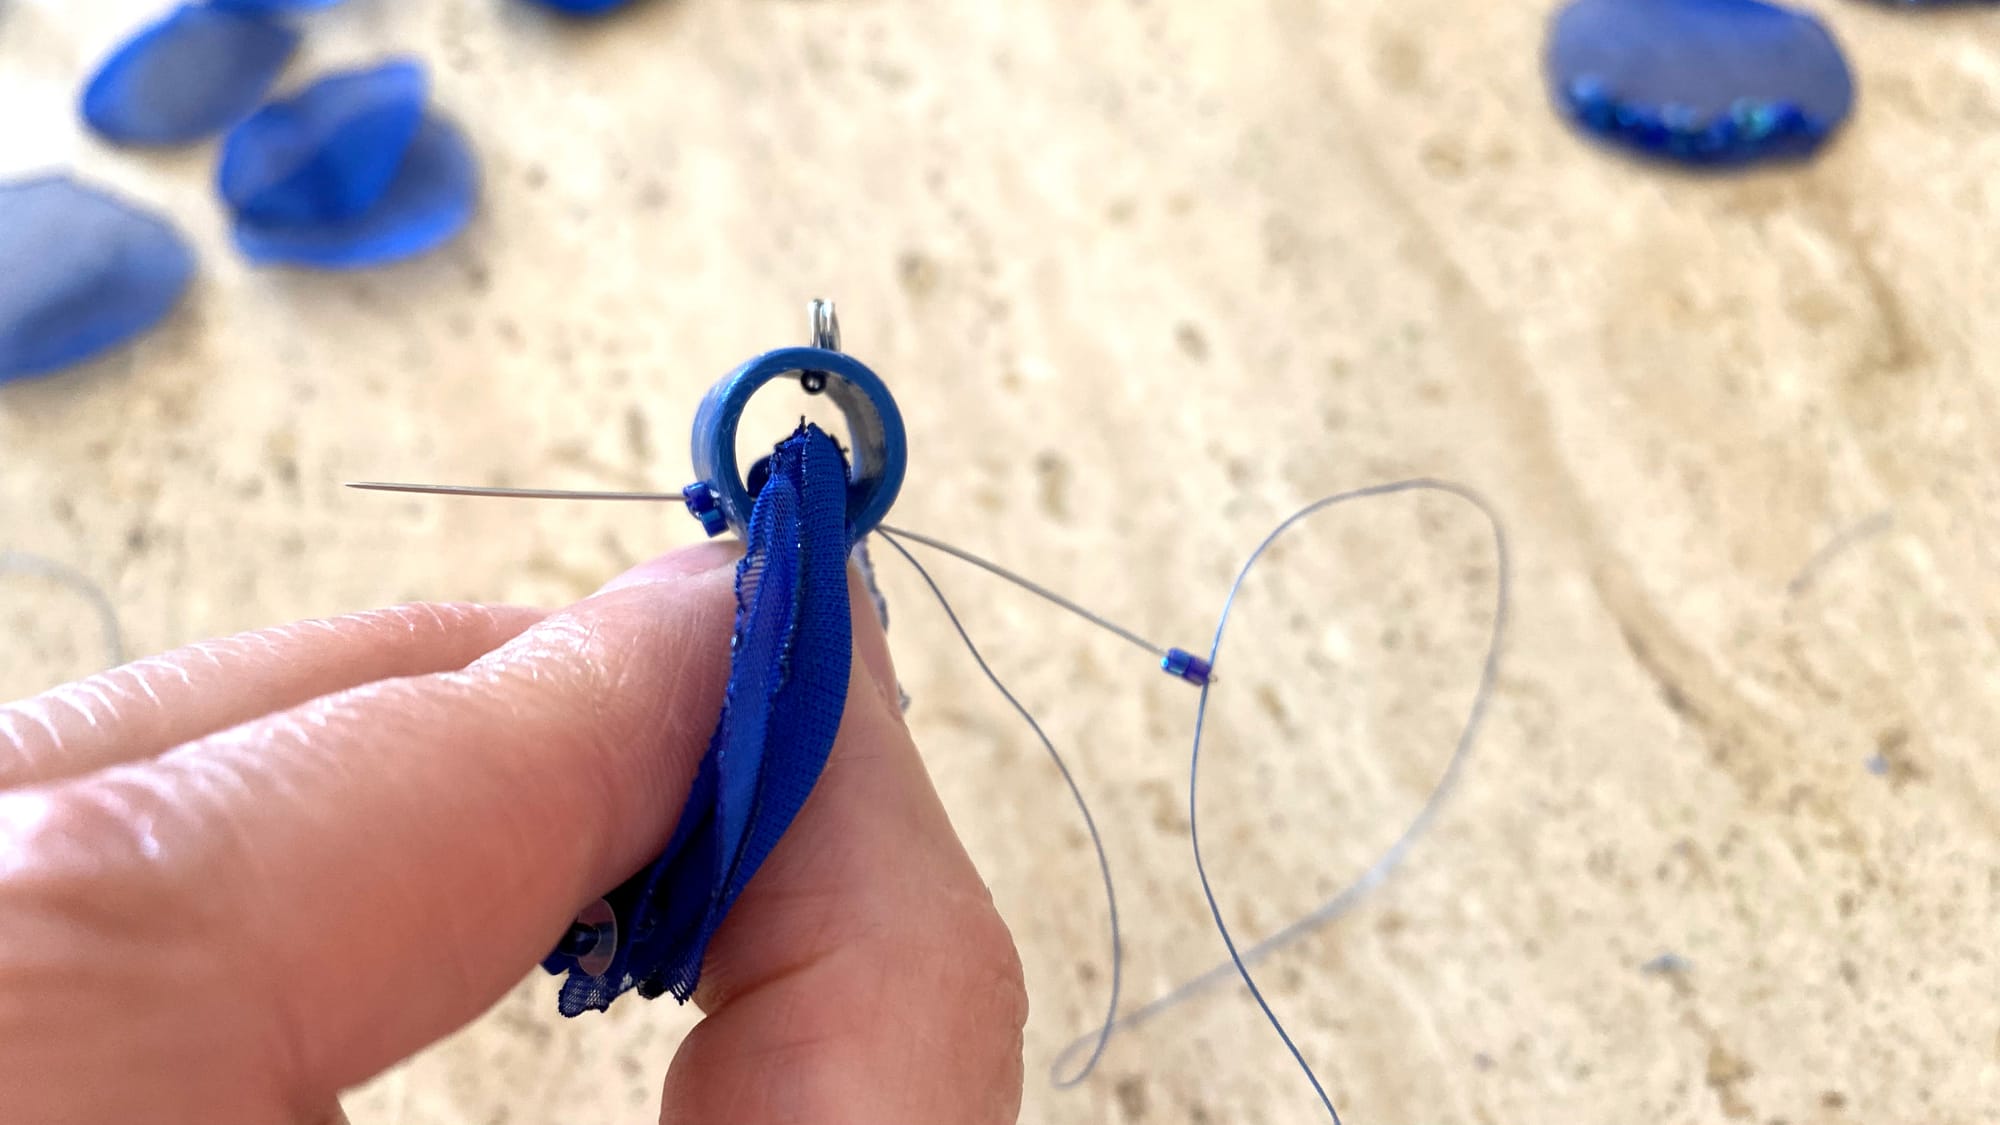
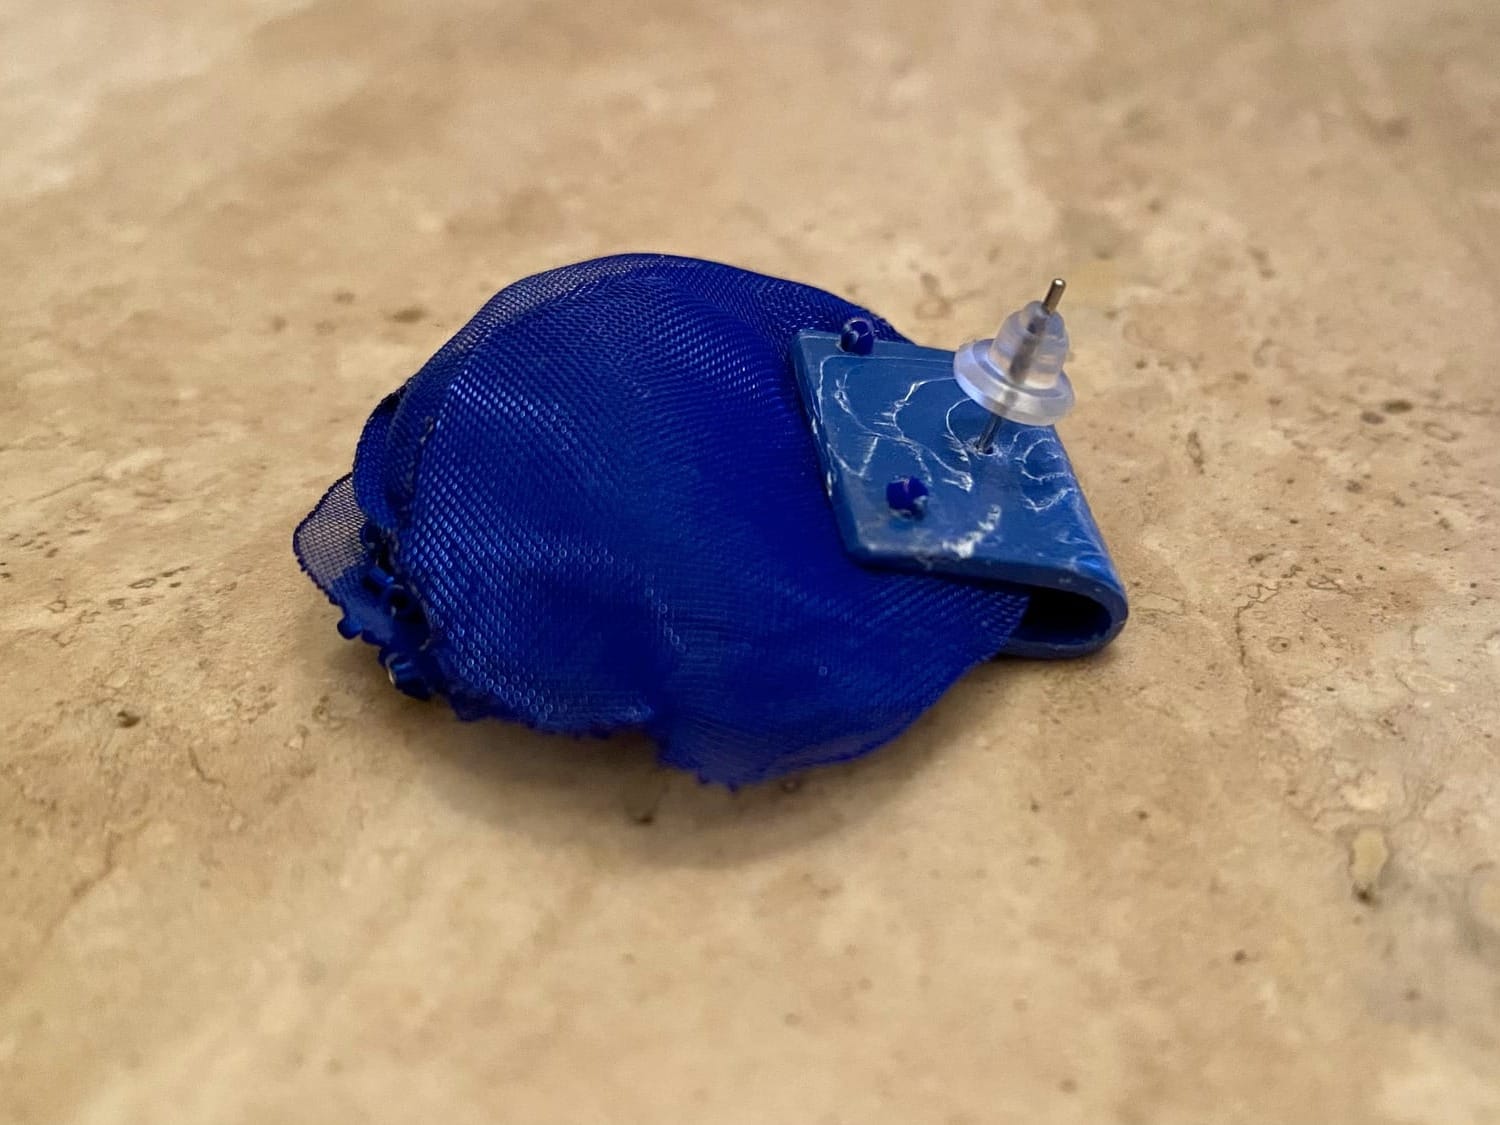
Step 9. Now my polymer clay elements are ready and I can connecting the fabric flower to the polymer clay element. I used the holes at the edges of the clay shape and needled through them several times. At the front side of the beaded element, I put two small Miyuki Delica beads to fix the thread.

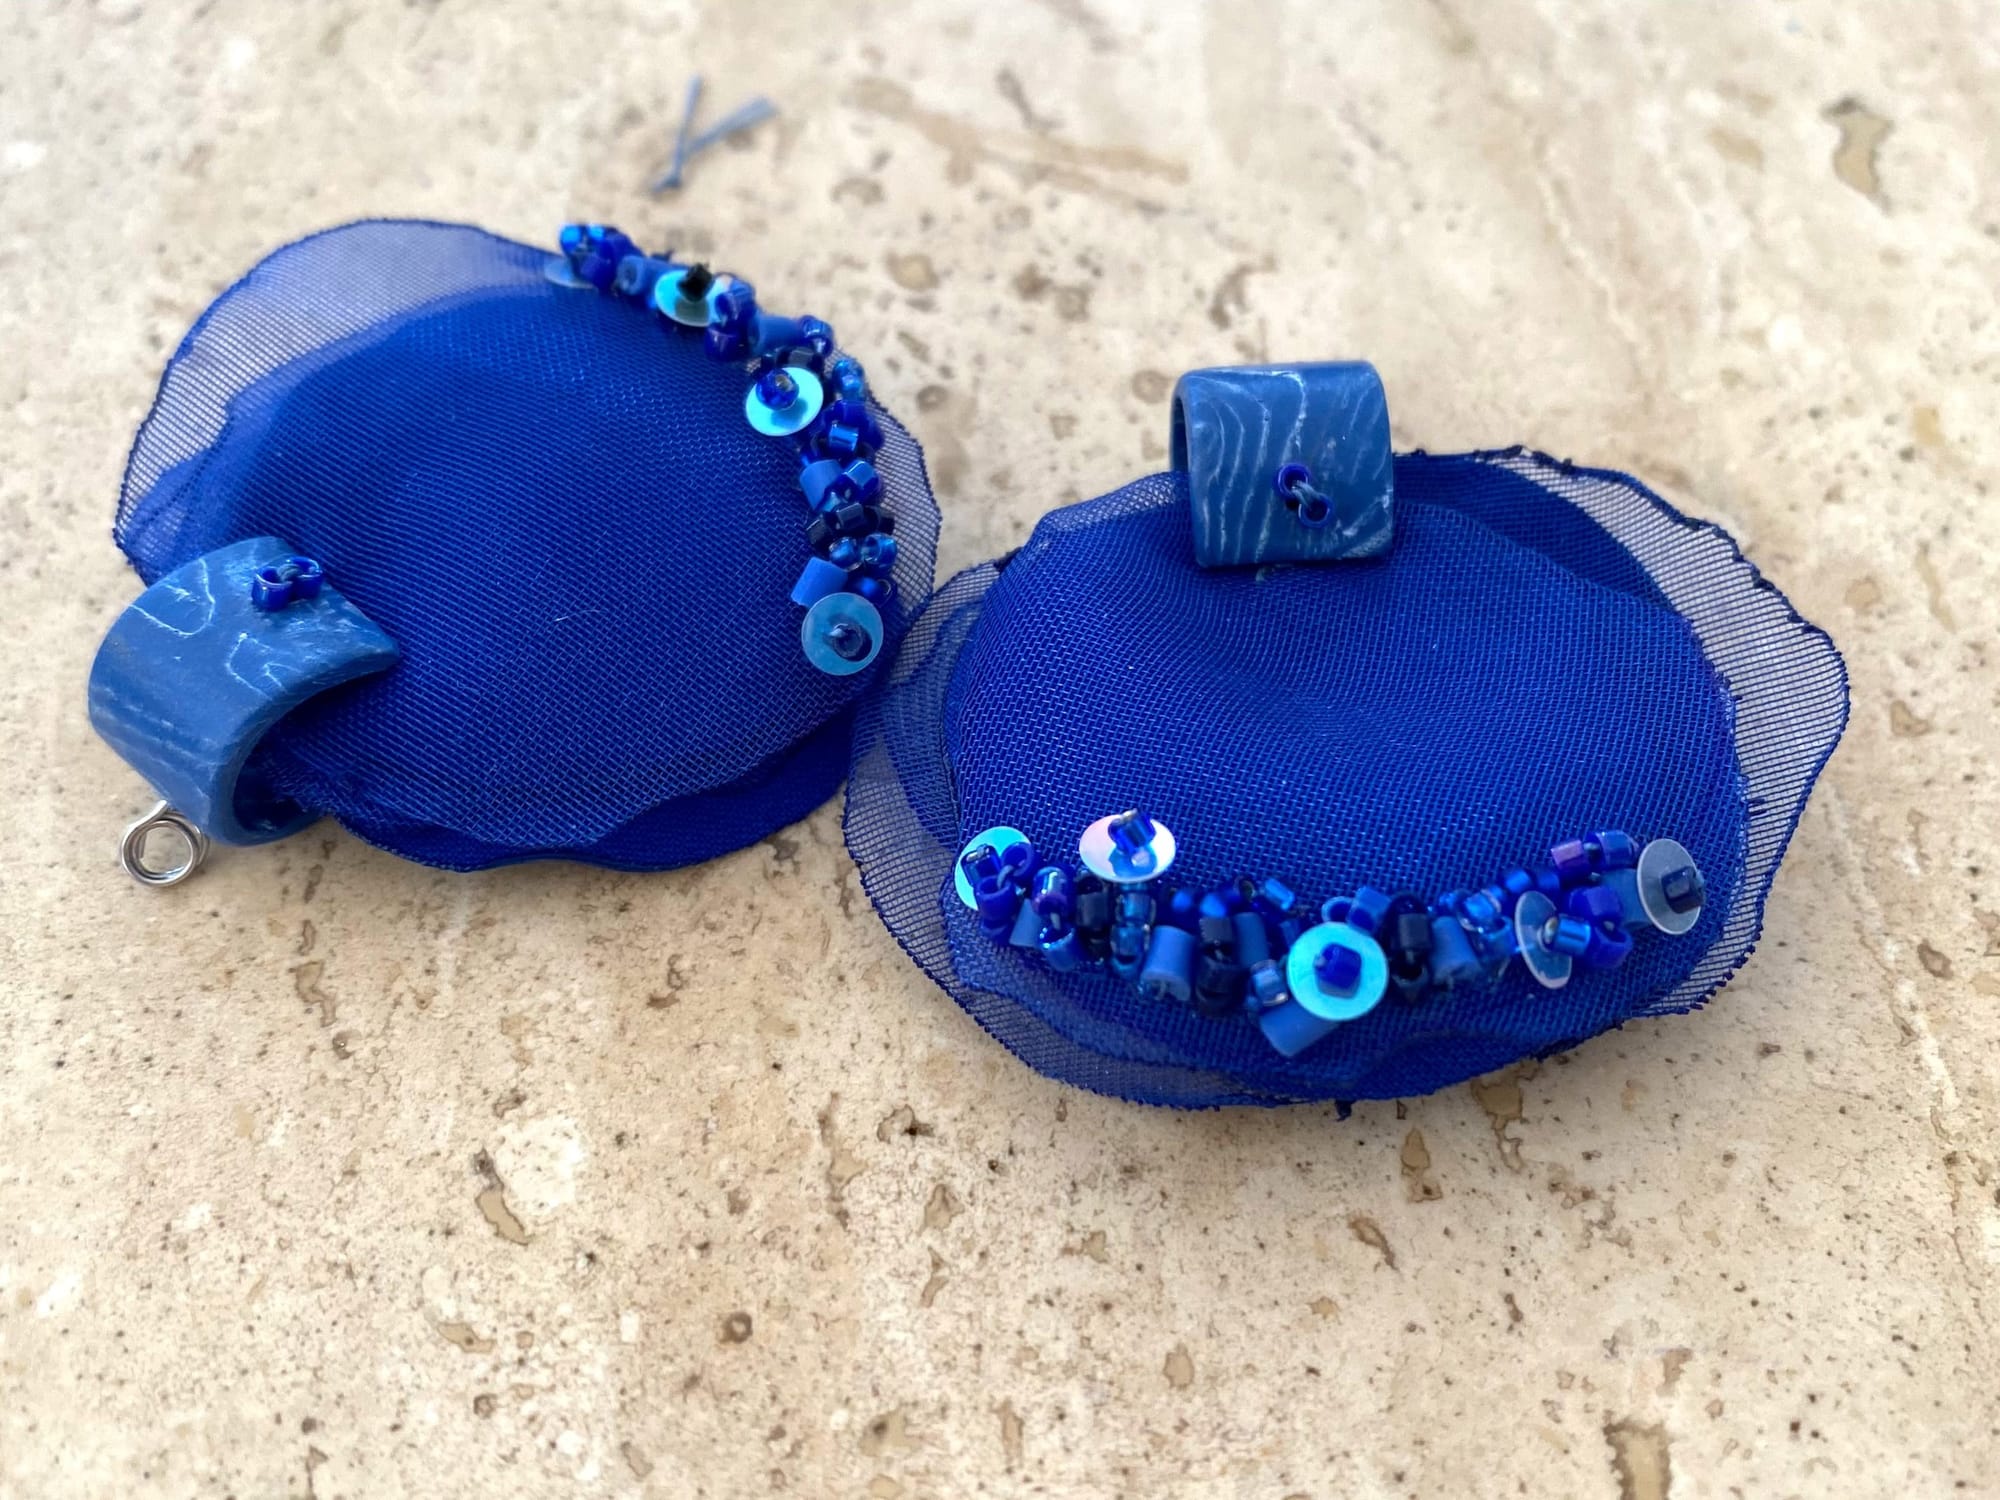
I then repeated steps 6-9 to assemble the second earring. Here is the result:
Step 10. Now all I have left to do is to insert the earring hook in the ring made from a ball-headed pin and my earrings are ready!

As you saw at the beginning, I had several different shapes made from blue polymer clay and I created a couple of other designs using those elements. The second pair is connected in the same way: with three holes, a ball-headed pin, and an earring hook.
The third element made from polymer clay was wider than previous two, and to better connect fabric part I made four holes at the edges and inserted a stud earring fitting instead of using a hook.
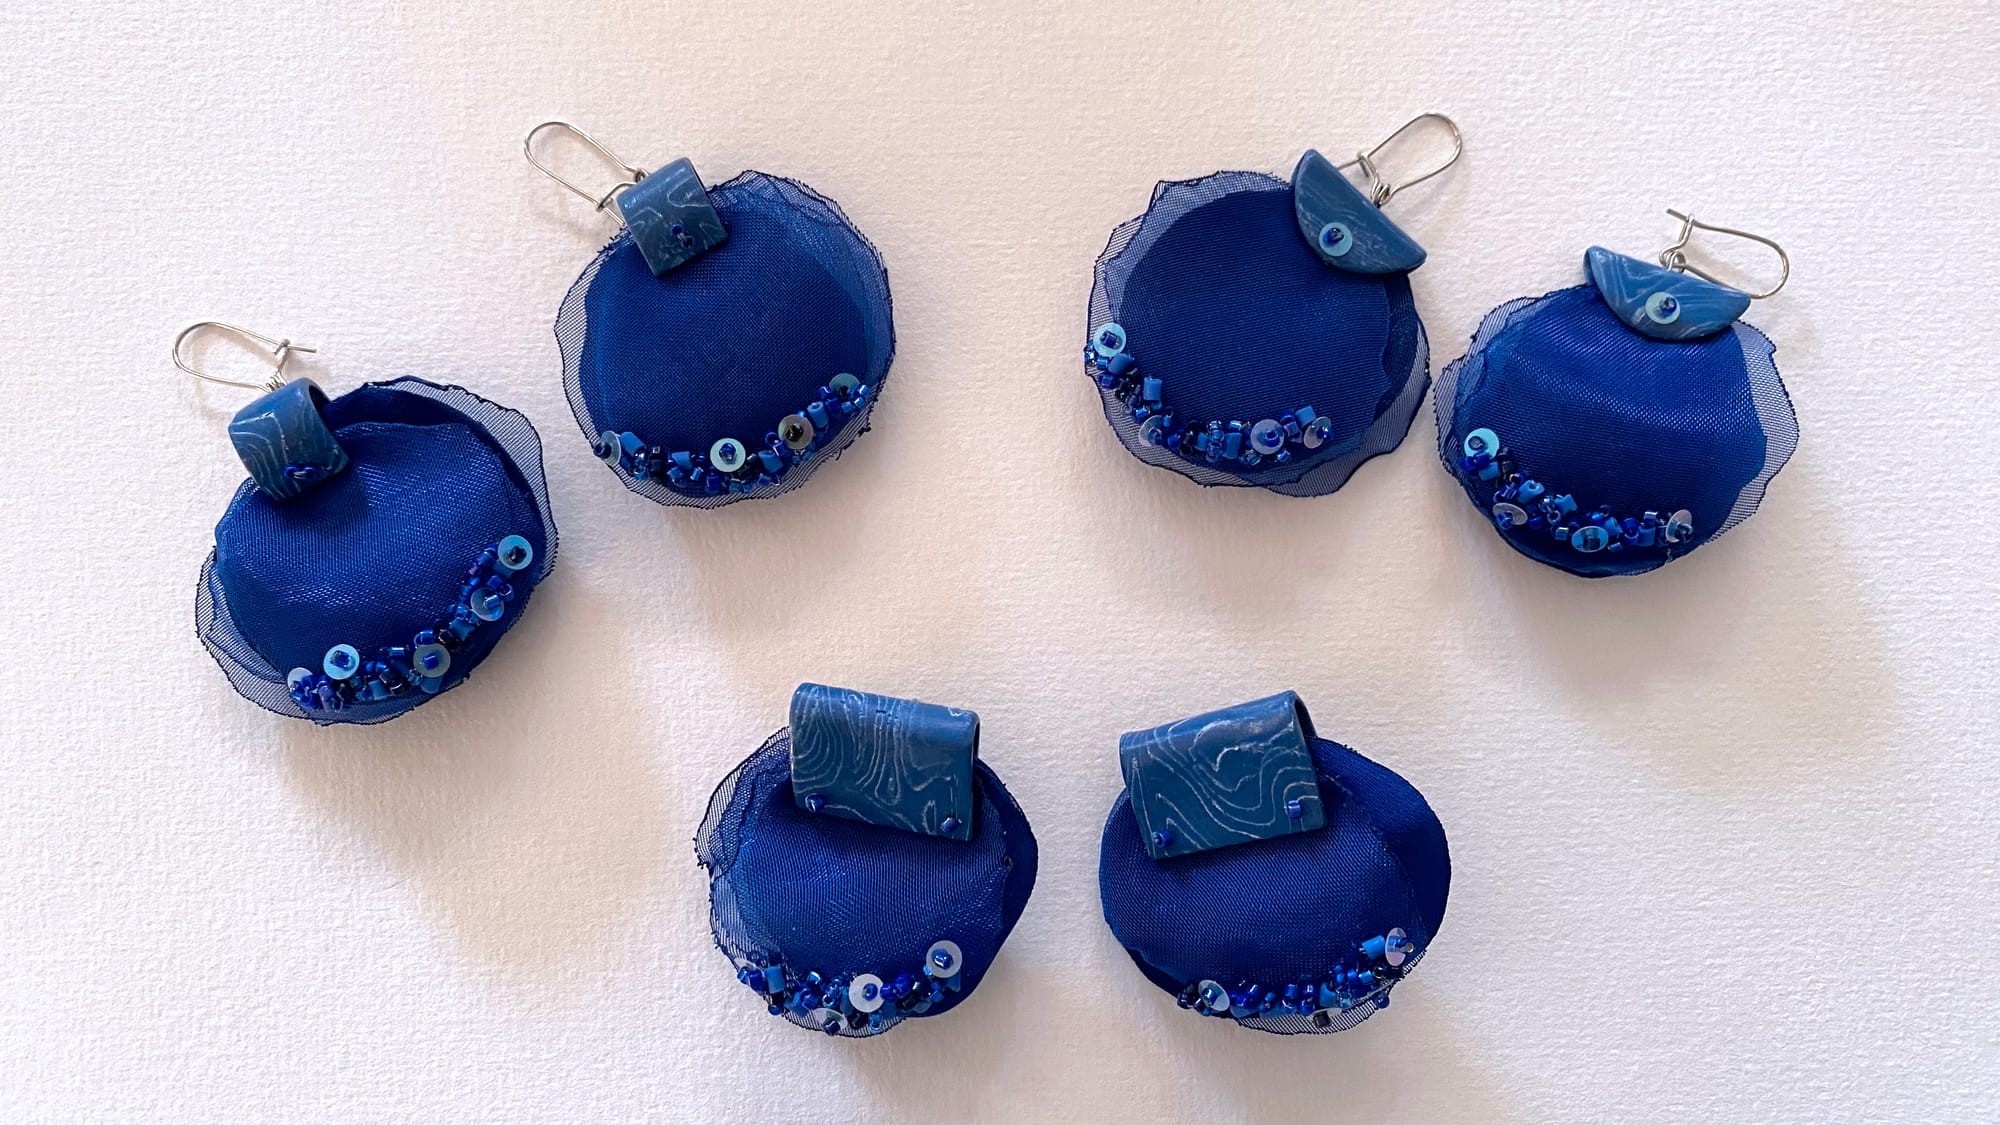
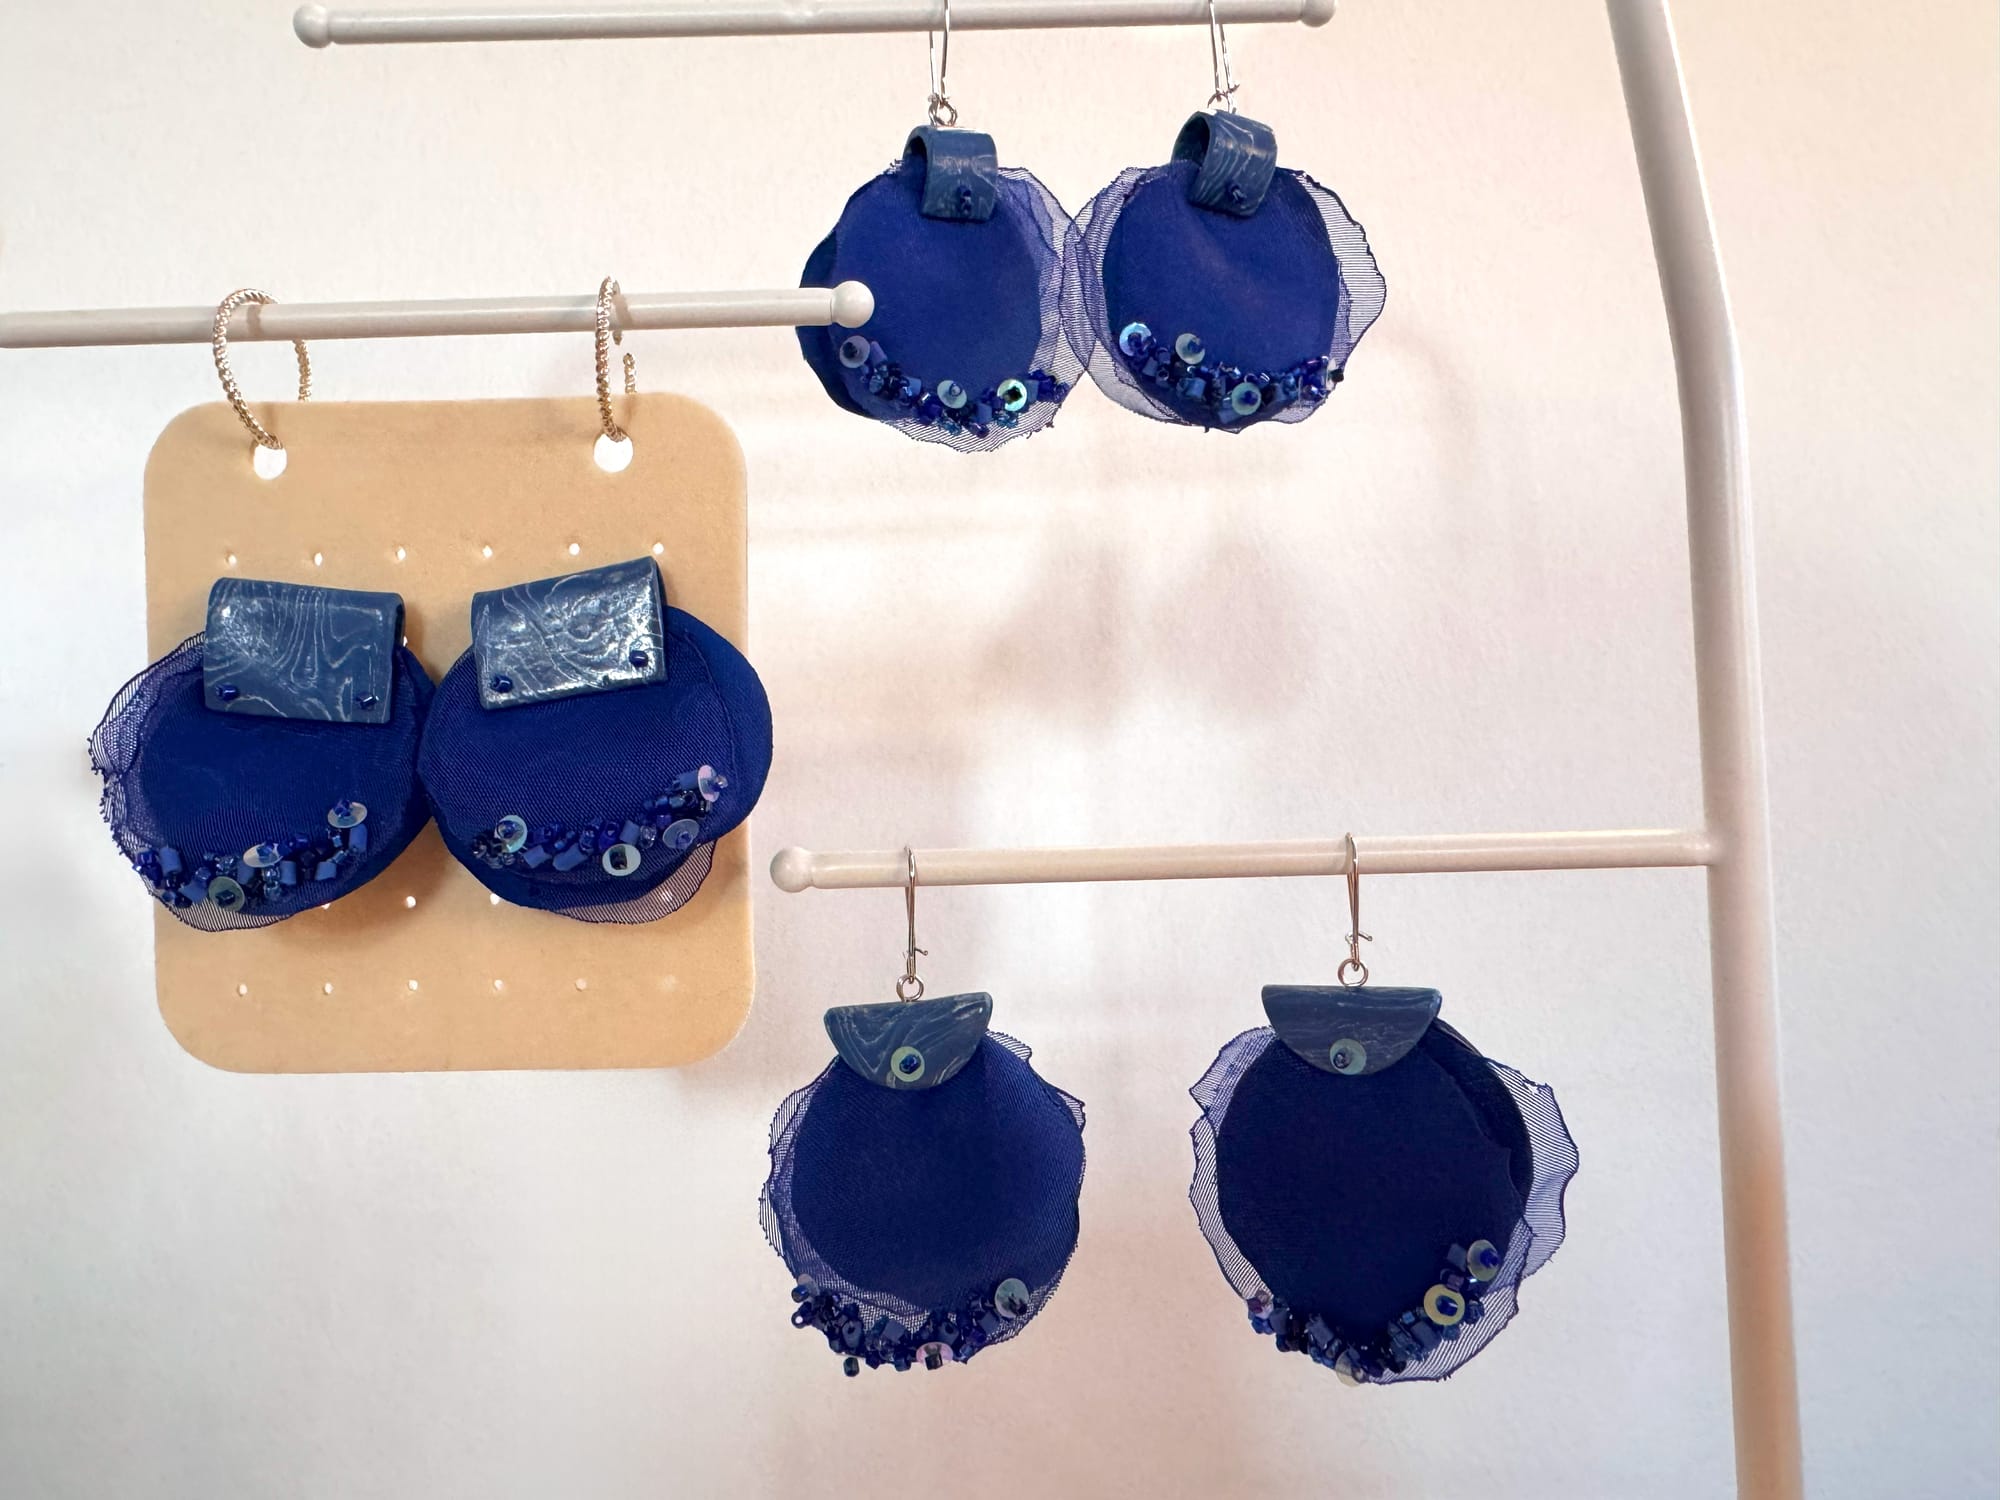
Here are all the three pairs of earring I crafted on that day:
We hope you like this experiential crafting project. As always - your imagination will guide you. You can make earrings in the way I made them: in one color and accents in similar hues. You can make the same earrings in a combination of contrasting combinations: using different colors of organza, or different colors of beads. Both organza and polymer clay are very lightweight materials, which, despite their medium size, makes these earrings light and flowing.
Please leave us your comments if you have any additional questions. Also please let us know if you like this design and if you want us to share with you other designs made from a combination of fabric and beads. Check out our YouTube channel for other tutorials and please subscribe to this blog and be the first to get other crafting ideas from us.
Thank you for reading and Happy Crafting!